
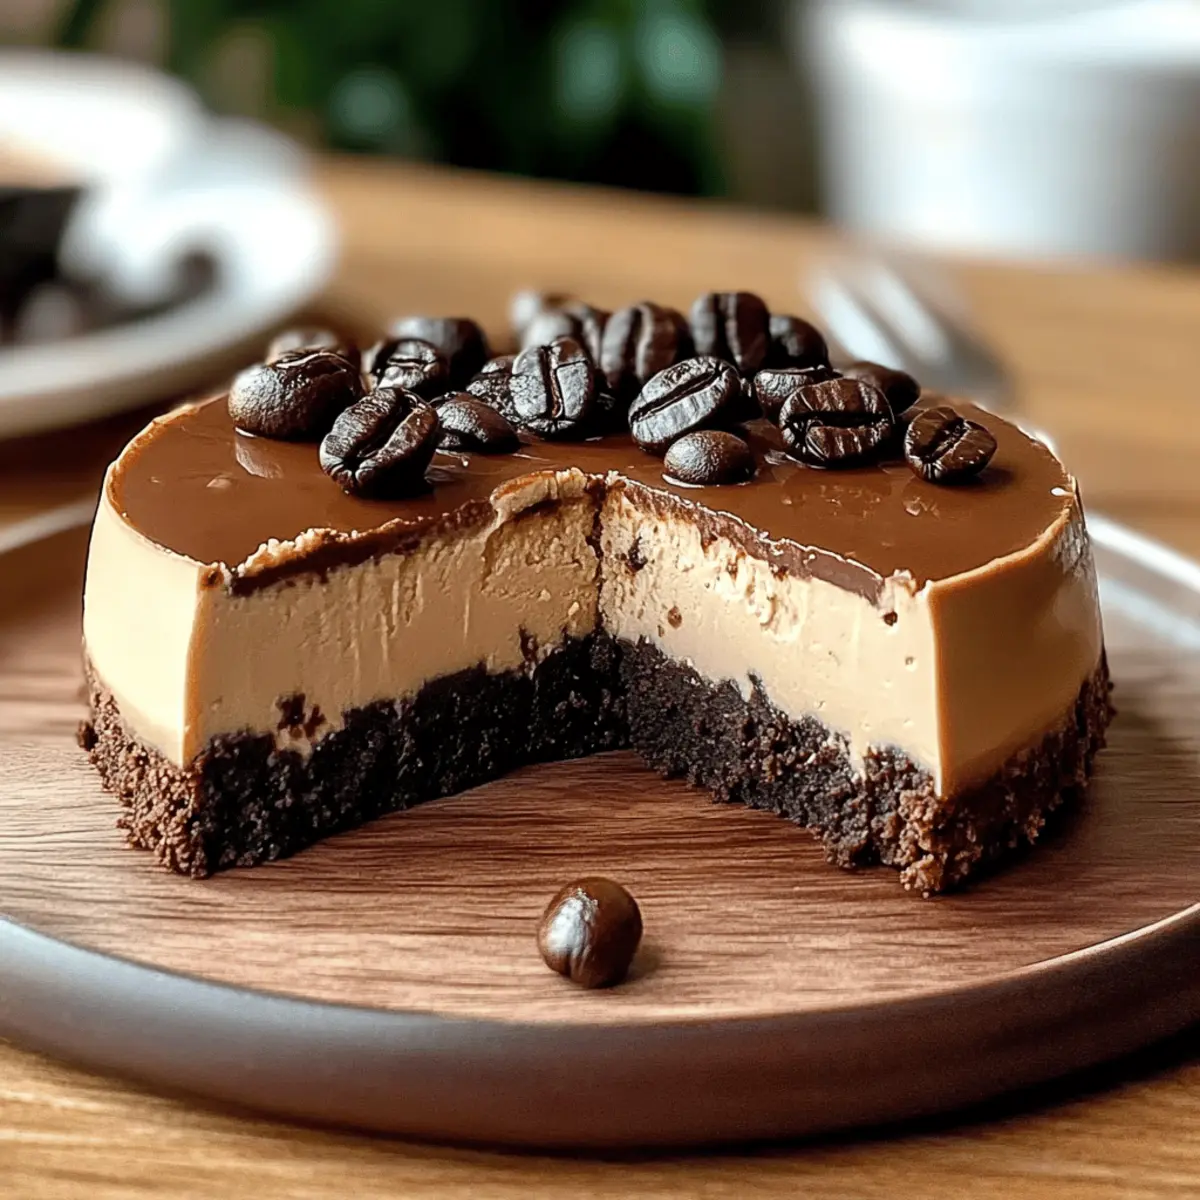
In a cozy corner of my kitchen, the rich aroma of freshly brewed coffee melds with the warmth of melting chocolate, filling the air with an inviting scent that promises indulgence. That’s when I decided to whip up my favorite indulgent masterpiece: Coffee Brownie Cheesecake. This delightful dessert combines a dense, fudgy brownie base with a creamy, coffee-infused cheesecake layer that’s simply irresistible. It’s quick to prepare and an absolute crowd-pleaser, perfect for gatherings or a sophisticated evening treat. Whether you’re a coffee connoisseur or a chocolate lover, this dessert effortlessly elevates any occasion. Ready to savor a slice of heaven? Let’s get baking!
Why is Coffee Brownie Cheesecake so irresistible?
Decadent Flavor: This dessert combines the deep richness of chocolate with the boldness of coffee, creating a flavor explosion that will have everyone coming back for seconds.
Simple Preparation: With straightforward steps, even novice bakers can have success in the kitchen, making it perfect for anyone tired of fast food.
Versatile Indulgence: Switch up the layers with fruit for added freshness or try individual servings in muffin tins for fun and easy sharing!
Crowd-Pleasing Delight: Whether at a party or a cozy family gathering, this Coffee Brownie Cheesecake is sure to impress all your guests.
Elegant Presentation: Adorn with whipped cream, chocolate shavings, or even whole coffee beans for a café-style finish, elevating your dessert game like a pro!
For more dessert inspiration, try the mouthwatering Gooey Coffee Caramel or the delightful Cheesecake Stuffed Strawberries that will charm your friends and family!
Coffee Brownie Cheesecake Ingredients
For the Brownie Base
- Unsalted Butter – This provides a rich flavor and fudgy texture that’s essential for those dreamy brownies.
- Granulated Sugar – Sweetens the brownies and contributes to that decadent texture you’re craving.
- Brown Sugar – Adds moisture and a hint of caramel flavor for deeper richness.
- Eggs – Bind the ingredients together and elevate the overall richness of your Coffee Brownie Cheesecake.
- Vanilla Extract – Enhances the overall flavors in both the brownie and cheesecake layers.
- All-Purpose Flour – Gives structure to the brownies while stabilizing the cheesecake on top.
- Unsweetened Cocoa Powder – Delivers a deep chocolate flavor that perfectly complements the coffee.
- Salt – Balances sweetness and enhances the luscious flavors throughout.
For the Cheesecake Layer
- Cream Cheese – The star ingredient for a smooth, luscious cheesecake that takes this dessert to the next level.
- Brewed Coffee – Infuses that rich coffee flavor; for a bolder taste, use cooled espresso instead!
- Semi-Sweet Chocolate Chips – Adds extra chocolatey goodness in the brownie layer for an irresistible treat.
Optional Toppings
- Whipped Cream – A light topping that adds texture and a touch of elegance.
- Chocolate Shavings – Perfect for an elegant finish that pleases the eye as much as the palate.
- Coffee Beans – Adds a gourmet touch for presentation, making your Coffee Brownie Cheesecake look like a café specialty!
Step‑by‑Step Instructions for Coffee Brownie Cheesecake
Step 1: Prepare the Brownie Base
Preheat your oven to 350°F (175°C). Grease a 9-inch springform pan and line the bottom with parchment paper for easy removal. In a medium bowl, melt unsalted butter, then stir in granulated and brown sugars until well combined. Once cooled slightly, mix in eggs and vanilla extract until silky. In a separate bowl, combine all-purpose flour, cocoa powder, and salt, then gradually fold into the wet mixture along with chocolate chips. Bake for 25-30 minutes until a toothpick inserted reveals moist crumbs. Allow to cool completely.
Step 2: Make the Coffee Cheesecake Layer
Lower the oven temperature to 325°F (160°C). In a large mixing bowl, beat softened cream cheese until smooth and creamy. Gradually add granulated sugar, mixing until fluffy. Incorporate eggs and vanilla extract, followed by cooled brewed coffee and flour, ensuring a smooth batter. Pour this luscious cheesecake mixture over the cooled brownie base, spreading it evenly. Bake for 50-60 minutes; the edges should firm up, leaving the center with a hint of jiggle, indicating it’s ready.
Step 3: Cool and Chill the Cheesecake
Once baking time is complete, turn off the oven and leave the door ajar. Allow the Coffee Brownie Cheesecake to cool in the oven for an hour, which helps prevent cracks. Afterward, transfer it to the refrigerator and chill for at least 4 hours or overnight if you can resist! The chilling process allows the flavors to meld beautifully, enhancing the richness of the cheesecake.
Step 4: Serve and Garnish
When ready to serve, run a knife around the edges of the springform pan before gently releasing the sides. For a stunning presentation of your Coffee Brownie Cheesecake, slice with a warm knife, create clean cuts, and optionally garnish with whipped cream, chocolate shavings, or coffee beans. Enjoy your rich, decadent dessert with friends or family for a delightful treat!
What to Serve with Coffee Brownie Cheesecake
Elevate your dessert experience with delightful pairings that enhance your Coffee Brownie Cheesecake and create a memorable meal.
-
Velvety Ice Cream: A scoop of vanilla or coffee ice cream adds a rich, creamy contrast that melts beautifully with each bite. Perfect for cooling down the decadent chocolate experience!
-
Fresh Berries: Juicy raspberries or strawberries provide a refreshing tartness that cuts through the richness. Their vibrant color also adds a stunning visual touch to your dessert plate.
-
Decadent Whipped Cream: Add a dollop of fresh whipped cream for a light, airy texture that complements the dense cheesecake. For an extra flair, infuse it with a touch of vanilla or coffee flavor.
-
Rich Espresso: Serve a shot of espresso on the side to intensify the coffee notes in the cheesecake. The warm, strong flavor enhances the dessert experience for coffee lovers.
-
Chocolate Drizzle: Drizzle warm melted chocolate over the top for an indulgent touch that amplifies the dessert’s chocolate charm. It’s a simple addition that elevates the presentation.
-
Creamy Liqueur: A glass of Irish cream liqueur pairs beautifully, offering creamy, sweet notes that harmonize with the coffee flavors. It’s a delightful way to round off an adult gathering!
-
Caramel Sauce: A drizzle of salted caramel sauce provides an irresistible sweet-salty contrast, enhancing the richness of your Coffee Brownie Cheesecake.
-
Toasted Nuts: Sprinkle chopped toasted walnuts or hazelnuts on top for a crunchy texture that adds depth and an earthy flavor that aligns perfectly with the dessert’s richness.
-
Dark Chocolate Shavings: Garnish with chocolate shavings for an elegant finish that not only looks stunning but adds a little extra chocolate indulgence.
-
Fruit-Infused Tea: Serve a cup of fruit-infused herbal tea on the side to cleanse the palate between bites. Its lightness offers a delightful contrast to the rich, creamy cheesecake.
How to Store and Freeze Coffee Brownie Cheesecake
Fridge: Refrigerate leftovers in an airtight container for up to 5 days to keep your Coffee Brownie Cheesecake fresh and delicious.
Freezer: Slice and freeze individually wrapped pieces for up to 3 months. When you’re ready to indulge again, thaw in the refrigerator overnight for the best texture.
Reheating: To enjoy the cheesecake warm, gently reheat individual slices in the microwave for 15-20 seconds, just until slightly warm, enhancing the flavors without compromising the texture.
Room Temperature: Allow the cheesecake to sit at room temperature for about 15-30 minutes before serving. This brings out its rich, decadent flavors and makes for a smoother texture.
Expert Tips for Coffee Brownie Cheesecake
-
Prevent Overmixing: Mix the brownie and cheesecake batters just until combined to avoid density and cracking. Less is more when creating your Coffee Brownie Cheesecake!
-
Cooling Time is Key: Always allow the brownie base to cool completely before adding the cheesecake layer. Gradually cooling the cheesecake in the oven helps prevent unsightly cracks.
-
Room Temperature Ingredients: Ensure cream cheese and eggs are at room temperature before mixing; this contributes to a smooth, creamy cheesecake batter.
-
Keep the Oven Door Closed: Avoid opening the oven door during baking to maintain a consistent temperature, which is essential for a perfectly set cheesecake.
-
Use a Water Bath: For an ultra-smooth texture, consider baking the Coffee Brownie Cheesecake in a water bath. Wrap the pan tightly in foil and place it in a larger baking dish filled with water before baking.
Coffee Brownie Cheesecake Variations
Feel free to let your creativity flow and customize this delightful dessert to suit your taste buds!
-
Espresso Boost: Swap brewed coffee for espresso or flavored coffee to enhance the richness of the cheesecake layer, giving it a serious caffeine kick.
-
Fruit Layering: Layer fresh fruit preserves, like raspberry or cherry, between the brownie and cheesecake for a refreshing burst of flavor. This adds a delightful tartness that complements the sweetness beautifully.
-
Gluten-Free: Substitute all-purpose flour with a gluten-free flour blend for a gluten-sensitive option without sacrificing taste or texture. Now everyone can enjoy this indulgent treat!
-
Dairy-Free: Use dairy-free cream cheese and a plant-based butter substitute in the brownie base to create a dairy-free version of this luscious dessert. It’s amazing how tasty alternatives can be!
-
Mini Cheesecakes: For an engaging individual dessert, pour the batter into muffin tins, creating mini Coffee Brownie Cheesecakes. They’re perfect for parties or easy portion control.
-
Nutty Surprise: Fold in chopped nuts like walnuts or pecans into the brownie batter for an added crunch and depth of flavor. The nutty texture makes each bite even more satisfying!
-
Chocolate Swirls: Add richness by swirling melted chocolate into the cheesecake layer before baking, presenting a beautiful marbled effect that enhances both appearance and flavor.
For more decadent dessert ideas, consider trying the scrumptious Brownie Mix Cookies for a quick treat or indulge in Cheesecake Stuffed Strawberries for a delightful fruity twist!
Make Ahead Options
These Coffee Brownie Cheesecakes are perfect for meal prep enthusiasts! You can prepare the brownie base and the cheesecake layer up to 24 hours in advance, ensuring that you save time on busy baking days. Simply bake and cool the brownie layer completely, then wrap it tightly in plastic wrap and refrigerate. You can also mix the cheesecake batter ahead of time and store it in the refrigerator, just be sure to let it sit at room temperature for about 30 minutes before pouring it over the brownie base. When you’re ready to finish, bake the assembled cheesecake and allow it to cool as directed. This way, you’ll have a beautifully layered dessert just as delicious, with minimal effort on the day of serving!
Coffee Brownie Cheesecake Recipe FAQs
How do I choose the right coffee for this recipe?
Absolutely! For a robust flavor, I recommend using a high-quality brewed coffee or cooled espresso. The bolder the coffee, the more pronounced the flavor will be in your Coffee Brownie Cheesecake. Avoid instant coffee granules, as they don’t provide the same richness.
How long can I store leftover Coffee Brownie Cheesecake?
You can refrigerate leftovers in an airtight container for up to 5 days. This helps maintain the creamy texture and flavors of the cheesecake. Just remember to keep it well-covered to prevent it from absorbing any unwanted odors from the fridge!
Can I freeze Coffee Brownie Cheesecake?
Very! To freeze, slice your cheesecake into individual portions and wrap each piece tightly in plastic wrap. Place them in a freezer-safe container or bag, and you can keep them for up to 3 months. When you’re ready to enjoy a slice, simply thaw it in the refrigerator overnight for the best quality.
What should I do if my cheesecake cracks during baking?
No worries! If you notice cracks, it may be due to overmixing or sudden temperature changes. To prevent this, always mix your batter just until combined and bake with the oven door closed to maintain an even temperature. If cracks still form, don’t fret—it will still taste amazing! You can cover them with whipped cream or chocolate shavings for a beautiful presentation.
Can I make this recipe gluten-free?
Definitely! To create a gluten-free Coffee Brownie Cheesecake, simply substitute all-purpose flour with a gluten-free blend that measures cup-for-cup. This alteration allows everyone to indulge in this rich delight while accommodating dietary needs. Always check that your chocolate and other ingredients are labeled gluten-free as well.
How should I serve Coffee Brownie Cheesecake?
I often recommend slicing with a warm knife for clean cuts—this really elevates the presentation! You can garnish with whipped cream, chocolate shavings, or coffee beans to give it that café-style finish. Serve with a hot cup of coffee or espresso to enhance its flavors.
Feel free to enjoy a slice of this delicious treat anytime; it’s always a crowd-pleaser!
Decadent Coffee Brownie Cheesecake You'll Crave Daily
Ingredients
Equipment
Method
- Preheat your oven to 350°F (175°C). Grease a 9-inch springform pan and line the bottom with parchment paper.
- In a medium bowl, melt unsalted butter, then stir in granulated and brown sugars until well combined.
- Once cooled slightly, mix in eggs and vanilla extract until silky.
- In a separate bowl, combine all-purpose flour, cocoa powder, and salt, then gradually fold into the wet mixture along with chocolate chips.
- Bake for 25-30 minutes until a toothpick inserted reveals moist crumbs. Allow to cool completely.
- Lower the oven temperature to 325°F (160°C). In a large mixing bowl, beat softened cream cheese until smooth and creamy.
- Gradually add granulated sugar, mixing until fluffy. Incorporate eggs and vanilla extract, followed by cooled brewed coffee and flour.
- Pour this cheesecake mixture over the cooled brownie base, spreading it evenly.
- Bake for 50-60 minutes; the edges should firm up, leaving the center with a hint of jiggle.
- Once baking time is complete, turn off the oven and leave the door ajar for one hour.
- Afterward, transfer it to the refrigerator and chill for at least 4 hours or overnight.
- When ready to serve, run a knife around the edges of the springform pan before gently releasing the sides.
- Slice with a warm knife, create clean cuts, and optionally garnish with whipped cream, chocolate shavings, or coffee beans.