
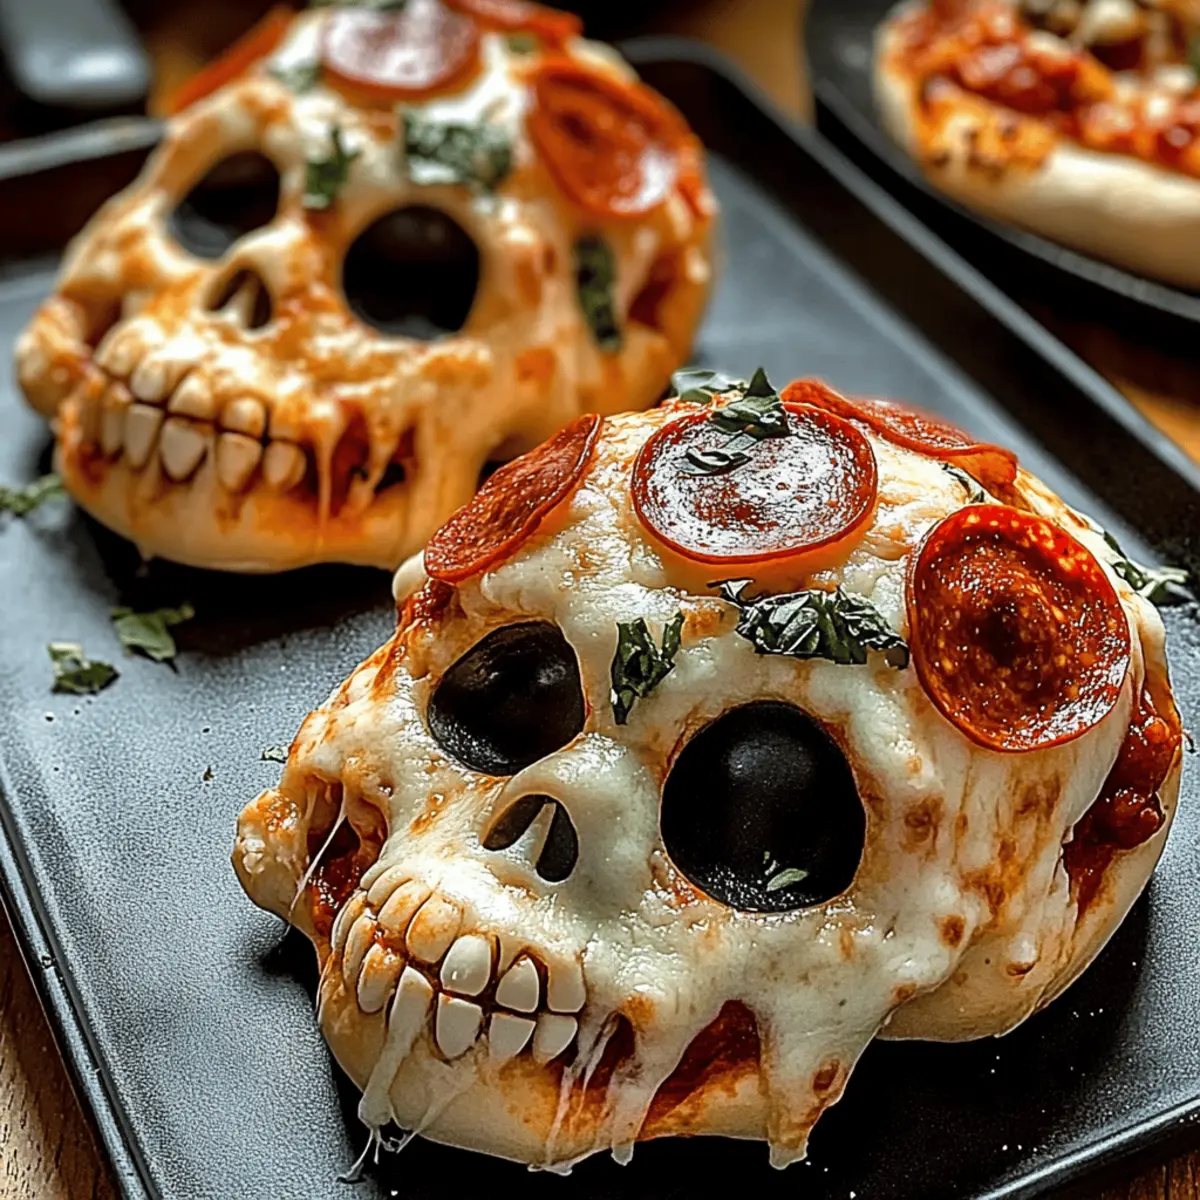
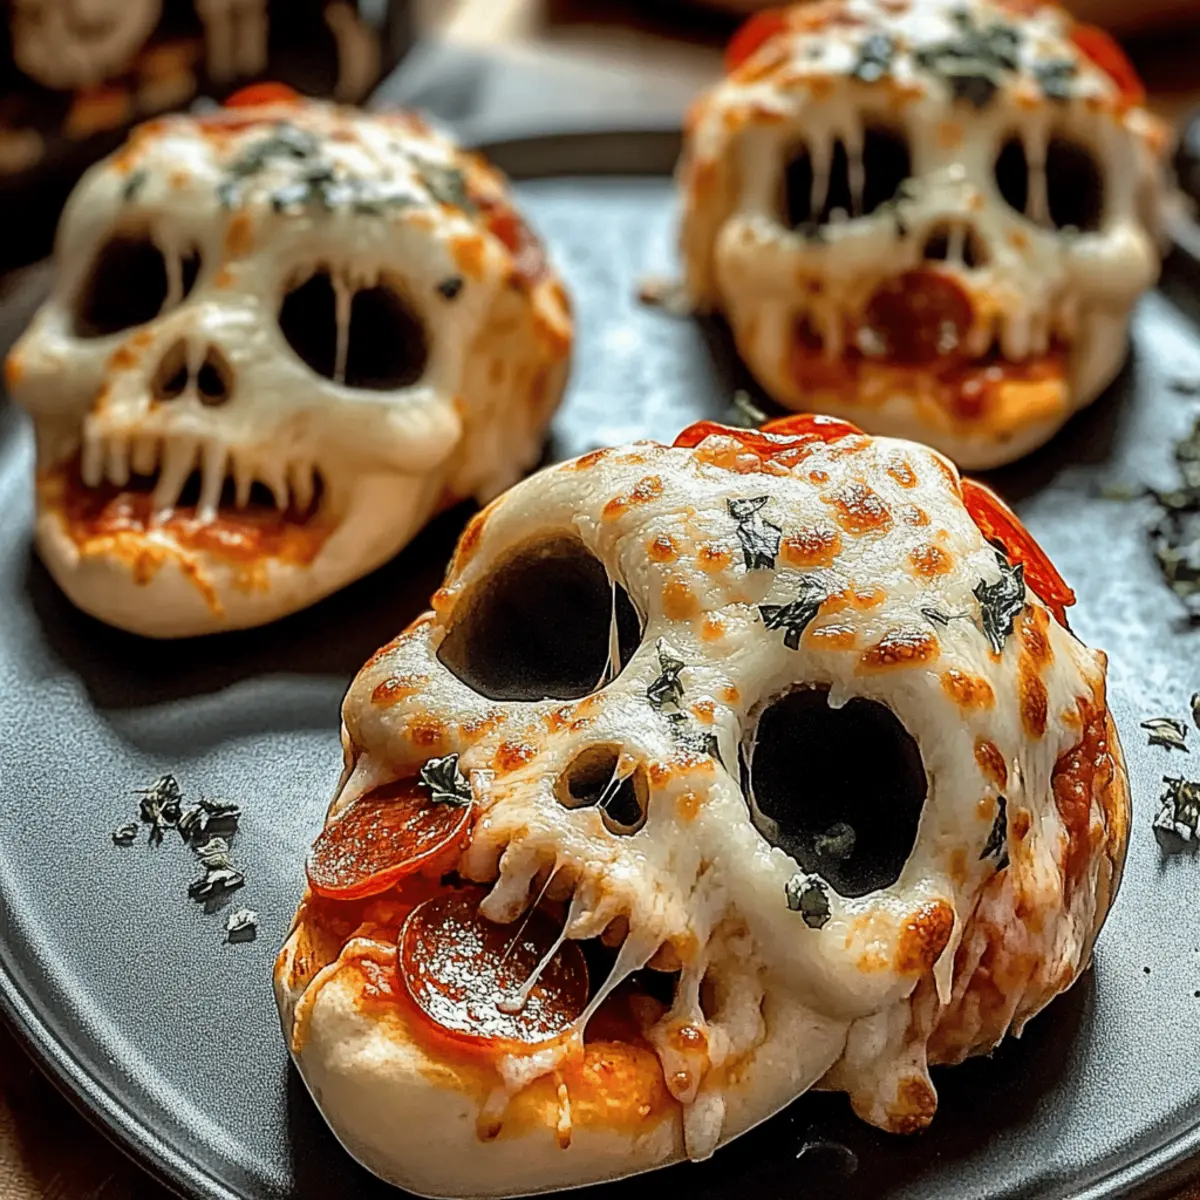
The aroma of warm, cheesy goodness wafts through the air as I pull my freshly baked Cheesy Halloween Pizza Skulls from the oven. These spooky delights not only bring a fun twist to traditional pizza, but they also cater to everyone’s taste buds with customizable fillings. Whether you’re hosting a Halloween bash, enjoying a cozy family dinner, or diving into a spooky movie night, these little skull-shaped treats are a hit! With quick prep and an easy assembly process, even novice cooks can whip up a batch that will impress. Plus, they’re vegetarian-friendly, making it simple to accommodate your guests. So, are you ready to turn your kitchen into a haunted culinary lab?
Why Will You Love Pizza Skulls?
Spooky Creativity: These Cheesy Halloween Pizza Skulls invite you to unleash your imagination in the kitchen. Customize fillings with your favorites, from oozy mozzarella to colorful veggies, making them a fun activity for kids and adults alike—perfect for Halloween parties!
Quick and Easy: Prepare these delightful skulls in no time! Even novice cooks can create a festive treat that looks impressive with minimal effort. Plus, if you’re in the mood for something cheesy, check out our Cheesy Garlic Potato for more savory options!
Crowd-Pleaser: Appealing to everyone, these spooky snacks will have your guests raving. Serve them alongside marinara for dipping, and watch them vanish faster than ghostly spirits!
Versatile Toppings: With the choice of toppings, everyone can enjoy their favorite flavors! These tantalizing treats can suit any palette, even accommodating vegetarian diets—ideal for holiday gatherings!
Perfect for Any Occasion: While they shine at Halloween, you’ll find yourself making these magical morsels year-round for family dinners or movie nights. Get ready to add a little charm to your kitchen!
Cheesy Halloween Pizza Skulls Ingredients
• Get ready to create your own spooky delights with these essential ingredients!
For the Skulls
- Pizza Dough – This forms the spooky skull-shaped casing; feel free to use store-bought for a quick option.
- Mozzarella Cheese – This gooey favorite provides a melty texture; cheddar is a great substitute if you prefer.
- Parmesan Cheese – Offers a sharp kick of flavor; nutritional yeast works well for a vegan alternative.
For the Filling
- Pizza Sauce – This adds moisture and tang; choose any sauce you love, homemade or from the store!
- Desired Toppings – Customize with your favorites like pepperoni or veggies; for a vegetarian-friendly twist, simply omit the meat.
For the Prep
- Cooking Spray – A quick spray will prevent the dough from sticking in the baking tin, ensuring easy removal.
Get ready to embark on a culinary adventure with these Cheesy Halloween Pizza Skulls!
Step‑by‑Step Instructions for Cheesy Halloween Pizza Skulls
Step 1: Preheat the Oven
Begin your spooky culinary adventure by preheating your oven to 400°F (204°C). This step is essential to ensure that your Cheesy Halloween Pizza Skulls bake evenly and develop a beautifully golden color. While the oven heats, get your baking gear ready to create these fun treats!
Step 2: Prepare the Baking Tin
Lightly spray a mini skull baking tin with cooking spray, ensuring each cavity is well greased to prevent sticking. This will allow your spooky skulls to pop out easily once they’re baked. Take a moment to admire your equipment – these adorable molds are going to shape your Halloween masterpiece!
Step 3: Roll Out the Dough
On a floured surface, roll out your pizza dough to approximately 1/4 inch thick. Using a sharp knife or pizza cutter, slice the dough into six rectangles. This will provide the base for your Cheesy Halloween Pizza Skulls, giving them that perfect shape and texture when baked.
Step 4: Assemble the Skulls
Gently press each rectangle of dough into a skull cavity, making sure to mold it precisely to capture the spooky shape. Next, spoon a bit of pizza sauce into each filled cavity, followed by a generous amount of mozzarella and Parmesan cheese, and your chosen toppings. These layers will create a deliciously gooey and flavorful filling.
Step 5: Seal the Dough
Take a small dollop of pizza sauce and place it on top of the fillings to keep everything moist. Next, fold the excess dough over the top and pinch it shut to seal the skulls tightly. This step is crucial for locking in all the cheesy goodness within your Cheesy Halloween Pizza Skulls as they bake.
Step 6: Chill Before Baking
Once all your skulls are filled and sealed, place the baking tin in the refrigerator while the oven finishes preheating. Chilling the filled trays for about 10-15 minutes helps the dough firm up, making it easier for the skulls to retain their shape while baking.
Step 7: Bake to Golden Perfection
After preheating, transfer your skull-filled baking tin to the oven and bake for 16-20 minutes. Keep an eye on them until they turn a lovely golden-brown color. This visual cue will indicate that your Cheesy Halloween Pizza Skulls are done and ready to be taken out for the next exciting step.
Step 8: Unmold and Serve
Allow the Cheesy Halloween Pizza Skulls to cool for about 5 minutes after removing them from the oven. Once slightly cooled, carefully unmold each skull and serve them on a festive platter. Pair your spooky treats with a side of marinara sauce for dipping, and get ready to delight your guests with this whimsical Halloween snack!
How to Store and Freeze Cheesy Halloween Pizza Skulls
-
Fridge: Store leftover Cheesy Halloween Pizza Skulls in an airtight container for up to 3 days. This keeps them fresh while maintaining their delightful cheesy flavor.
-
Freezer: For longer storage, freeze the skulls in a single layer on a baking sheet, then transfer to a freezer-safe bag for up to 2 months. This prevents them from sticking together.
-
Reheating: Reheat your spooky snacks in the oven at 350°F (175°C) for 10-15 minutes, or pop them in the microwave on medium power for about 1-2 minutes until heated through.
-
Make Ahead: Prepare the skulls and fill them ahead of time; refrigerate until you’re ready to bake. This is a great trick for last-minute entertaining!
Expert Tips for Cheesy Halloween Pizza Skulls
-
Grease Well: To ensure easy removal of the Cheesy Halloween Pizza Skulls, make sure to adequately grease your baking tin to avoid sticking.
-
Watch Your Bake Time: Keep a close eye on your skulls as they bake—ovens can vary! Look for a golden-brown hue to know they’re perfectly done.
-
Chill for Best Results: If you’re preparing the filling ahead of time, refrigerate the filled baking tin for about 10-15 minutes before baking. This helps maintain their spooky shape.
-
Customize Wisely: While it’s fun to experiment with toppings, make sure not to overfill. A little goes a long way, and sealing them tightly will keep the cheesy goodness inside!
-
Use Quality Cheese: The key to achieving that delicious gooey texture is using high-quality mozzarella. Avoid pre-shredded cheese, as it doesn’t melt as well.
-
Serve Fresh: For the best experience, serve these adorable skulls warm right out of the oven. They taste best when the cheese is gooey and the dough is crunchy!
Make Ahead Options
These Cheesy Halloween Pizza Skulls are perfect for busy weeknights or Halloween parties! You can prepare the filled skulls up to 24 hours in advance—simply follow the assembly steps and refrigerate them until you’re ready to bake. To maintain quality, make sure they are tightly covered in the fridge to prevent drying out. When you’re ready to serve, just preheat your oven and pop the skulls in for 16-20 minutes until golden brown. This way, you’ll have delicious, festive treats with minimal effort and maximum flavor! With these make-ahead options, you’re set for a spook-tacular gathering without the last-minute scramble.
Cheesy Halloween Pizza Skulls Variations
Feel free to unleash your culinary creativity and customize these Cheesy Halloween Pizza Skulls to suit your taste!
-
Dairy-Free: Swap mozzarella for a vegan cheese alternative, keeping it creamy without the dairy.
-
Flavorful Sauces: Try using pesto or barbecue sauce instead of traditional pizza sauce for a delightful twist. The unexpected flavors can elevate your skulls to new heights!
-
Veggie-Packed: Load up on assorted vegetables like mushrooms, bell peppers, or spinach for a nutritious boost; worry not, these veggie additions still keep the spooky fun alive!
-
Meaty Options: Add cooked sausage, diced chicken, or pepperoni for those craving heartier flavors. It keeps the skulls excited and tasty for the meat lovers in your family.
-
Spicy Kick: Sprinkle in some crushed red pepper or jalapeños if you want a spicy surprise; your guests will thank you for the added zing!
-
Herbaceous Notes: Fresh herbs like basil or oregano sprinkled on top can add an aromatic layer that complements the cheesy goodness. It’s the ticket to a restaurant-quality treat!
-
Cheesy Variations: Try mixing different cheeses, like cheddar or gouda, for a unique melted texture; it’s a small change that makes a big impact.
-
Alternative Shapes: If you don’t have skull molds, use muffin tins or make mini rounds. Creativity knows no bounds, as seen in our popular Cheesy Beef Enchilada or Potato Casserole Cheesy variations, giving you festive fun anytime!
Embrace the festive spirit, and happy cooking!
What to Serve with Cheesy Halloween Pizza Skulls?
The Halloween fun doesn’t stop with these cheesy treats; complement them with delightful sides and drinks that enhance the spooky spirit!
-
Crispy Garlic Bread: The buttery crunch of garlic bread pairs beautifully with the gooey pizza skulls, providing a satisfying texture contrast.
-
Mixed Green Salad: A fresh salad with tangy vinaigrette adds a light, crisp element, balancing the rich flavors of the cheesy skulls.
-
Spooky Fruit Skewers: Thread seasonal fruits like mandarin oranges and grapes on sticks for a fun dessert that echoes the festive theme.
-
Pumpkin Soup: This creamy, spiced pumpkin soup creates a cozy atmosphere and enhances the Halloween spirit, making it a perfect pairing.
-
Marinara Dipping Sauce: Serve extra marinara on the side for dipping, amplifying the tomato-rich flavors that already shine within the skulls.
-
Hot Apple Cider: This warm, spiced beverage is a fall favorite that adds comforting warmth and a sweet sip to your Halloween feast.
-
Chocolate Monster Cupcakes: Delight guests with themed desserts that contain eerie decorations, offering a sweet finale to the spooky meal ahead.
-
Bloody Marys: For adult gatherings, these flavorful cocktails can add a humorous twist to the meal, matching the Halloween vibe while tantalizing the palate!
Embrace the spirit of Halloween with these perfect pairings that ensure a feast full of flavors and fun!
Cheesy Halloween Pizza Skulls Recipe FAQs
What should I look for when selecting pizza dough?
Absolutely! When choosing pizza dough, you’ll want to look for a soft, pliable texture. If you’re making it from scratch, use fresh ingredients and let it rise until it doubles in size. If you go the store-bought route, check for any visible signs of damage or expiration dates; it should be fresh and ready to roll!
How should I store leftover Cheesy Halloween Pizza Skulls?
For storing leftovers, keep your Cheesy Halloween Pizza Skulls in an airtight container in the refrigerator for up to 3 days. This ensures they maintain their cheesy goodness. If you want to enjoy them later, simply follow the reheat instructions below!
Can I freeze Cheesy Halloween Pizza Skulls?
Yes, you can! To freeze your Cheesy Halloween Pizza Skulls, first, place them in a single layer on a baking sheet until they’re solid. After they freeze, transfer them to a freezer-safe bag or container. They can last up to 2 months! When you’re ready to enjoy, don’t forget to preheat your oven and bake them directly from frozen!
What if my pizza skulls are difficult to unmold?
No worries! If your skulls are sticking, it’s probably due to insufficient greasing of the baking tin. Always ensure every cavity is well-coated with cooking spray. If they still give you trouble, gently run a butter knife around the edges to help loosen them before unmolding.
Are Cheesy Halloween Pizza Skulls suitable for vegetarians?
Absolutely! These delightful skulls can easily be made vegetarian-friendly by omitting meat fillings. You can custom fill them with an assortment of vegetables like mushrooms, peppers, or spinach, making them a perfect treat for everyone at your gathering!
Cheesy Halloween Pizza Skulls: Spooky Fun for Everyone
Ingredients
Equipment
Method
- Preheat your oven to 400°F (204°C) to ensure even baking.
- Lightly spray a mini skull baking tin with cooking spray.
- Roll out your pizza dough to about 1/4 inch thick and slice into rectangles.
- Press each rectangle into a skull cavity, then spoon in pizza sauce, mozzarella, parmesan, and your chosen toppings.
- Seal the skulls by placing sauce on top and folding the excess dough over.
- Chill the filled baking tin in the refrigerator for about 10-15 minutes.
- Bake in the preheated oven for 16-20 minutes until golden brown.
- Let cool for about 5 minutes before unmolding and serving with marinara sauce.