
Introduction to Red Velvet Cake
Red Velvet Cake has a way of bringing people together, doesn’t it? I remember the first time I tasted this vibrant dessert at a family gathering. The rich, velvety texture and the tangy cream cheese frosting were simply unforgettable. This recipe is perfect for impressing your loved ones or treating yourself after a long day. It’s not just a cake; it’s a celebration on a plate! Whether you’re a seasoned baker or just starting out, this Red Velvet Cake is a quick solution that will have everyone asking for seconds. Let’s dive into this delicious adventure!
Why You’ll Love This Red Velvet Cake
This Red Velvet Cake is a delightful blend of flavors and textures that will make your taste buds dance. It’s incredibly easy to whip up, making it perfect for both special occasions and casual get-togethers. The moist layers paired with creamy frosting create a dessert that’s not just tasty but visually stunning. Plus, it’s a crowd-pleaser, ensuring you’ll be the star of any gathering. Who wouldn’t love that?
Ingredients for Red Velvet Cake
Gathering the right ingredients is the first step to creating a show-stopping Red Velvet Cake. Here’s what you’ll need:
- All-purpose flour: The backbone of your cake, providing structure and texture.
- Granulated sugar: Sweetens the cake and helps create that moist crumb.
- Baking soda: This leavening agent gives the cake its lift, making it light and fluffy.
- Salt: Enhances the flavors and balances the sweetness.
- Cocoa powder: Just a hint adds depth to the flavor without overpowering the signature red hue.
- Vegetable oil: Keeps the cake moist and tender; you can also use canola oil if preferred.
- Buttermilk: Adds a tangy flavor and helps create a soft texture. If you don’t have buttermilk, mix milk with a splash of vinegar as a substitute.
- Large eggs: Essential for binding the ingredients and adding richness.
- Red food coloring: The star of the show! It gives the cake its iconic color. Feel free to adjust the amount for a deeper or lighter shade.
- Vanilla extract: A classic flavor enhancer that rounds out the cake’s taste.
- White vinegar: Reacts with the baking soda to create a fluffy texture and adds a subtle tang.
For the frosting:
- Cream cheese: The creamy base of the frosting, providing that signature tangy flavor.
- Unsalted butter: Adds richness and helps achieve a smooth consistency.
- Powdered sugar: Sweetens the frosting and gives it that perfect spreadable texture.
- Vanilla extract: Just like in the cake, it enhances the overall flavor.
- Milk (optional): Use to thin the frosting if it’s too thick for your liking.
Exact measurements for these ingredients can be found at the bottom of the article, ready for printing. Happy baking!
How to Make Red Velvet Cake
Now that you have your ingredients ready, let’s get baking! Follow these simple steps to create a stunning Red Velvet Cake that will wow your friends and family.
Step 1: Preheat and Prepare
Start by preheating your oven to 350°F (175°C). This ensures your cake bakes evenly. While the oven heats up, grease and flour two 9-inch round cake pans. This will help the cakes release easily once they’re baked.
Step 2: Mix Dry Ingredients
In a large mixing bowl, whisk together the all-purpose flour, granulated sugar, baking soda, salt, and cocoa powder. Make sure everything is well combined. This step is crucial for a uniform texture in your cake.
Step 3: Combine Wet Ingredients
In another bowl, mix the vegetable oil, buttermilk, eggs, red food coloring, vanilla extract, and white vinegar until smooth. The vibrant red color will start to shine through, making you even more excited to bake!
Step 4: Combine Mixtures
Gradually add the wet ingredients to the dry ingredients. Mix until just combined. Be careful not to overmix; a few lumps are perfectly fine. This will keep your cake light and fluffy.
Step 5: Bake the Cakes
Divide the batter evenly between the prepared cake pans. Bake for 25-30 minutes, or until a toothpick inserted into the center comes out clean. The aroma wafting through your kitchen will be irresistible!
Step 6: Cool the Cakes
Once baked, allow the cakes to cool in the pans for about 10 minutes. Then, turn them out onto wire racks to cool completely. Patience is key here; frosting a warm cake can lead to a melty mess!
Step 7: Make the Cream Cheese Frosting
While the cakes cool, prepare the cream cheese frosting. In a large bowl, beat the softened cream cheese and unsalted butter together until smooth and creamy. Gradually add the powdered sugar and vanilla extract, mixing until well combined. If the frosting is too thick, add milk a tablespoon at a time until you reach your desired consistency.
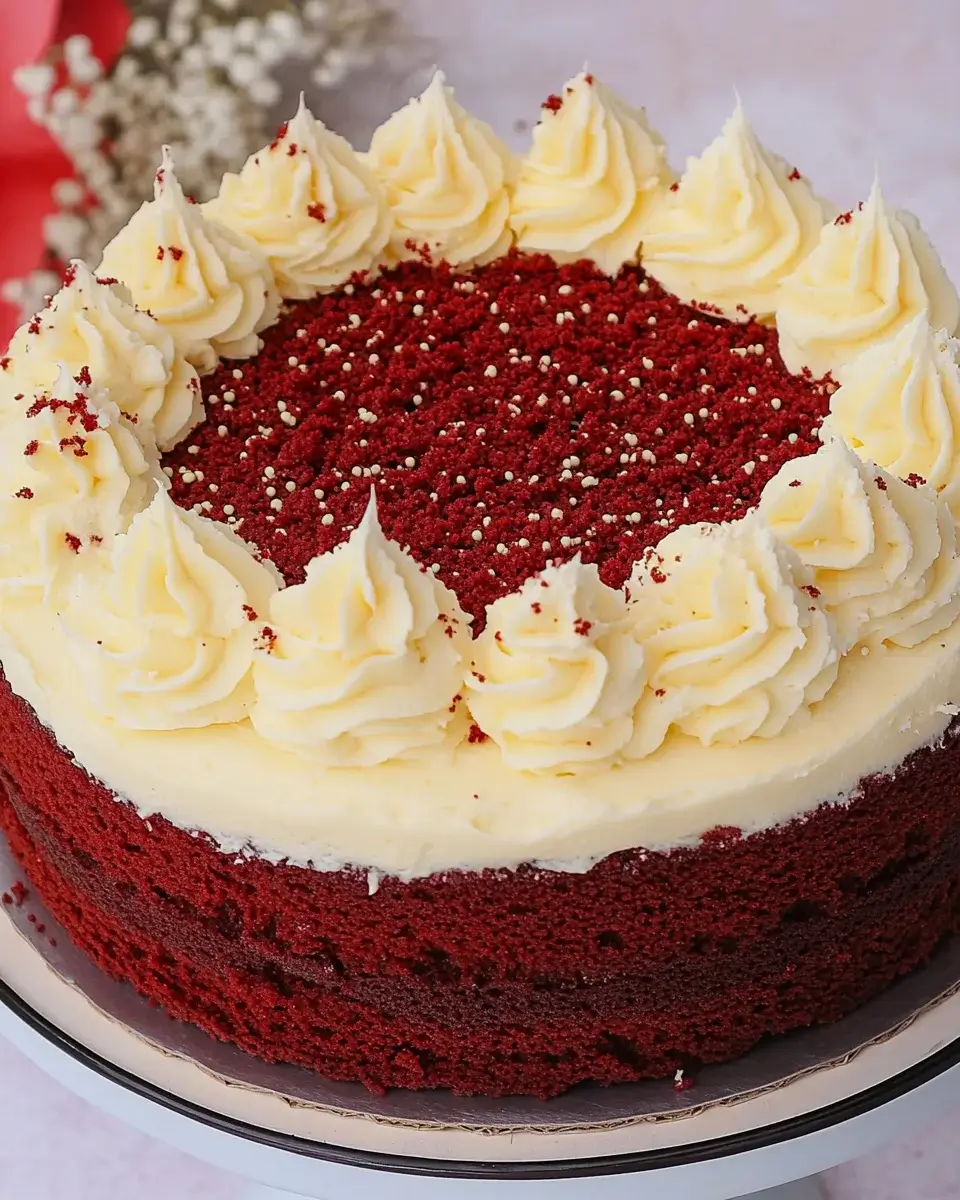
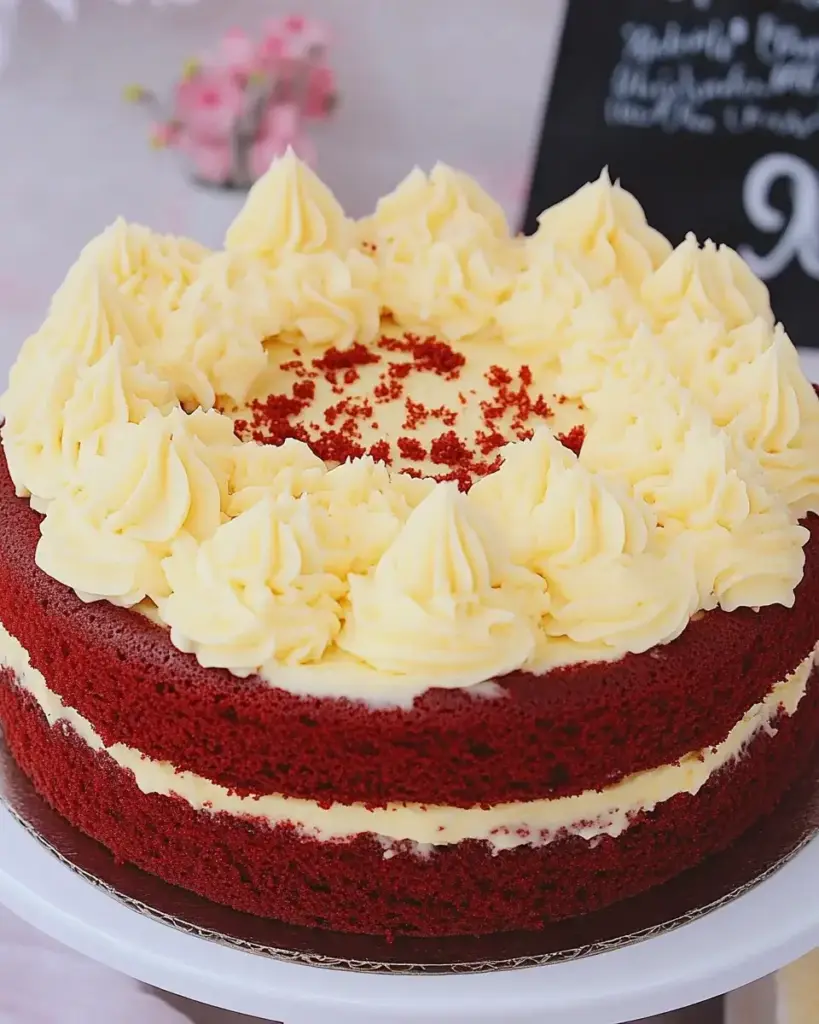
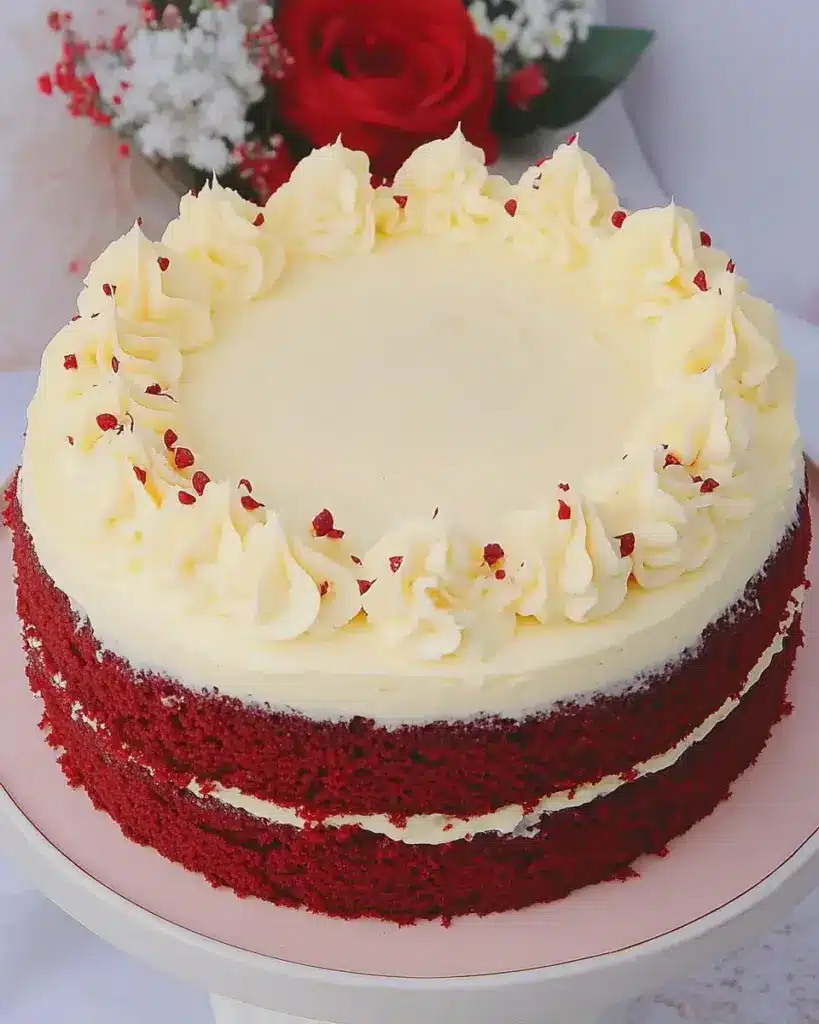
Step 8: Assemble the Cake
Once the cakes are completely cool, place one layer on a serving plate. Spread a generous layer of cream cheese frosting on top. Place the second cake layer on top and frost the top and sides of the cake with the remaining frosting. Now, step back and admire your masterpiece! Serve immediately or refrigerate for up to three days.
Tips for Success
- Use room temperature ingredients for better mixing and a smoother batter.
- Don’t skip the vinegar; it enhances the cake’s texture and flavor.
- For a more vibrant color, use gel food coloring instead of liquid.
- Let the cakes cool completely before frosting to avoid melting.
- Store leftovers in an airtight container to keep them fresh and moist.
Equipment Needed
- Mixing bowls: A set of various sizes is ideal; you can use any large bowl if needed.
- Whisk: A hand whisk works great, but an electric mixer speeds things up.
- Measuring cups and spoons: Essential for accuracy; you can use a kitchen scale as an alternative.
- 9-inch round cake pans: If you don’t have these, any similar-sized pans will do.
- Cooling racks: These help cakes cool evenly; a plate can work in a pinch.
Variations
- Chocolate Red Velvet: Add an extra tablespoon of cocoa powder for a richer chocolate flavor.
- Nutty Twist: Fold in chopped walnuts or pecans into the batter for added crunch and flavor.
- Gluten-Free Option: Substitute all-purpose flour with a gluten-free blend to accommodate dietary needs.
- Vegan Version: Replace eggs with flaxseed meal and use plant-based butter and milk for a vegan-friendly cake.
- Layered Delight: Create a multi-layered cake by adding more cake layers and frosting in between for a stunning presentation.
Serving Suggestions
- Pair your Red Velvet Cake with a scoop of vanilla ice cream for a delightful contrast.
- Serve alongside a cup of freshly brewed coffee or a rich hot chocolate.
- For an elegant touch, garnish with fresh berries or mint leaves.
- Consider a drizzle of chocolate sauce for added indulgence.
FAQs about Red Velvet Cake
As you embark on your Red Velvet Cake journey, you might have a few questions. Here are some common queries that can help you along the way:
What makes Red Velvet Cake different from regular chocolate cake?
Red Velvet Cake has a unique flavor profile thanks to the combination of cocoa powder and buttermilk, which gives it a subtle tang. The vibrant red color, often enhanced by food coloring, sets it apart visually as well.
Can I make Red Velvet Cake ahead of time?
Absolutely! You can bake the cake layers a day in advance. Just wrap them tightly in plastic wrap and store them in the fridge. Frosting can also be made ahead and stored in the refrigerator until you’re ready to assemble.
How do I store leftover Red Velvet Cake?
To keep your cake fresh, store it in an airtight container at room temperature for up to three days. If you need to keep it longer, refrigerate it. Just remember to let it come to room temperature before serving for the best flavor and texture.
Can I use a different frosting for my Red Velvet Cake?
While cream cheese frosting is traditional, you can experiment with other frostings like buttercream or whipped cream. Just keep in mind that the tangy flavor of cream cheese complements the cake beautifully!
Is Red Velvet Cake suitable for special diets?
Yes! You can easily adapt this recipe for gluten-free or vegan diets. Just follow the variations mentioned earlier, and you’ll have a delicious cake that everyone can enjoy.
Final Thoughts
Baking this Red Velvet Cake is more than just following a recipe; it’s about creating memories and sharing joy. The vibrant color and rich flavor make it a centerpiece for any occasion, from birthdays to casual get-togethers. Each slice is a reminder of the love and effort you put into it. Plus, the smiles on your loved ones’ faces as they take that first bite? Priceless. So, roll up your sleeves, embrace the process, and let this cake be a delicious chapter in your culinary story. Trust me, it’s a journey worth taking!
Red Velvet Cake: Try This Irresistible Recipe Today!
Ingredients
Method
- Preheat your oven to 350°F (175°C). Grease and flour two 9-inch round cake pans.
- In a large mixing bowl, whisk together the flour, sugar, baking soda, salt, and cocoa powder until well combined.
- In another bowl, mix the vegetable oil, buttermilk, eggs, red food coloring, vanilla extract, and vinegar until smooth.
- Gradually add the wet ingredients to the dry ingredients, mixing until just combined. Do not overmix.
- Divide the batter evenly between the prepared cake pans. Bake for 25-30 minutes, or until a toothpick inserted into the center comes out clean.
- Allow the cakes to cool in the pans for 10 minutes, then turn them out onto wire racks to cool completely.
- While the cakes are cooling, prepare the cream cheese frosting. In a large bowl, beat the softened cream cheese and butter together until smooth and creamy.
- Gradually add the powdered sugar and vanilla extract, mixing until well combined. If the frosting is too thick, add milk a tablespoon at a time until desired consistency is reached.
- Once the cakes are completely cool, place one layer on a serving plate and spread a layer of cream cheese frosting on top. Place the second cake layer on top and frost the top and sides of the cake with the remaining frosting.
- Serve immediately or refrigerate for up to 3 days.
Nutrition
Notes
- For a richer flavor, try adding a teaspoon of almond extract to the frosting.
- You can also decorate the cake with fresh berries or chocolate shavings for an elegant touch.
- If you prefer a lighter version, substitute half of the cream cheese with Greek yogurt in the frosting.