
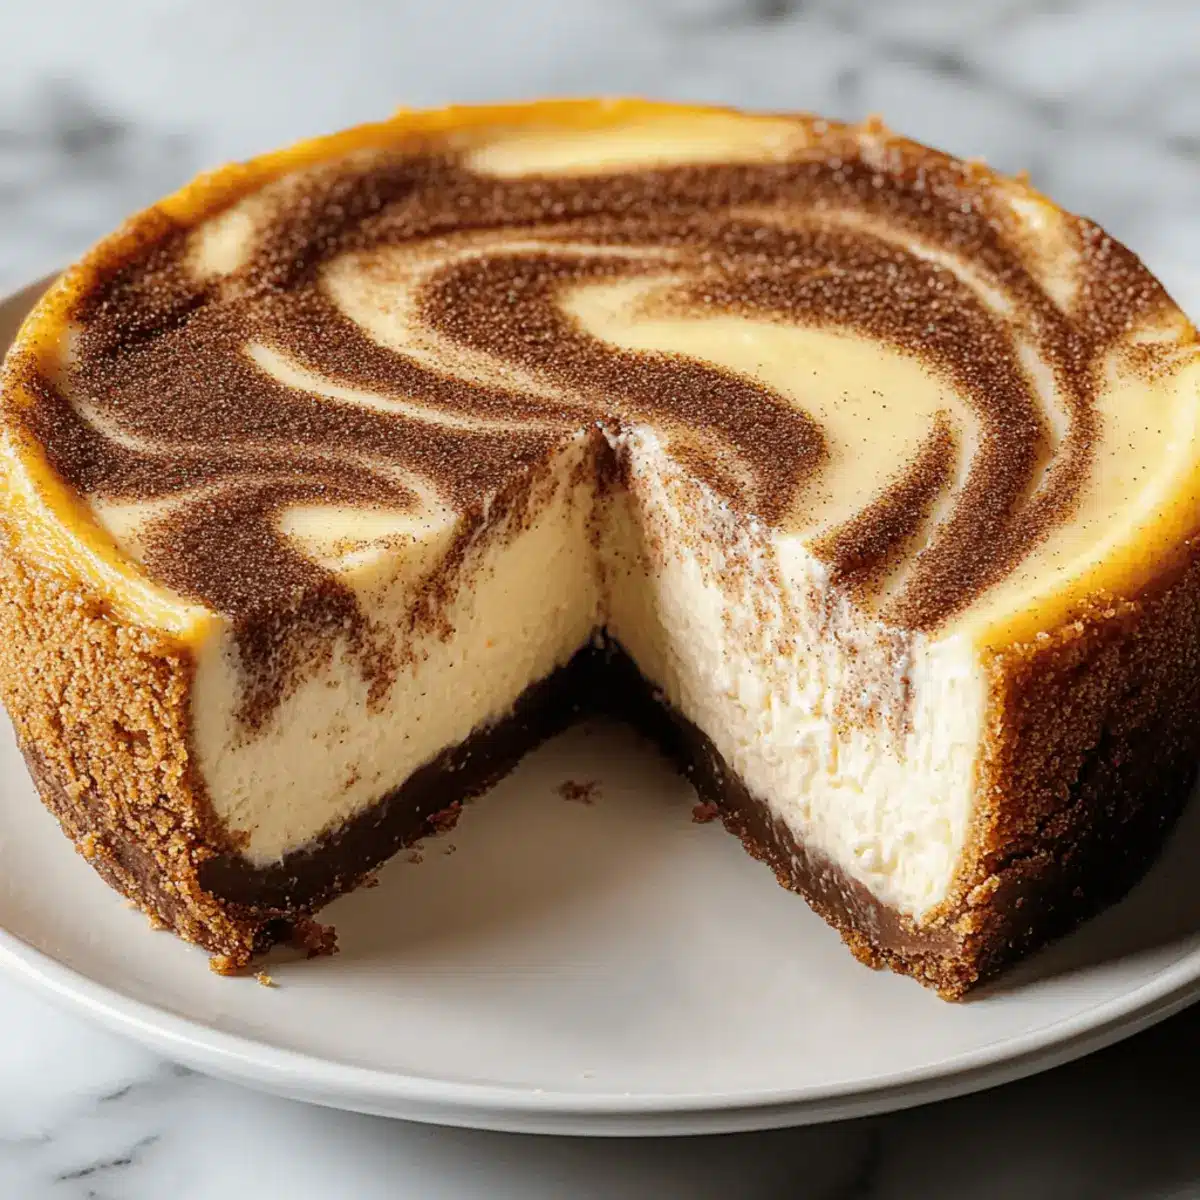
As I pulled out the cinnamon-sugar cookies from the oven, the aroma transported me to cozy fall afternoons spent with loved ones. Today, I’m excited to blend that nostalgic flavor into something truly special—my Snickerdoodle Cheesecake. This dessert masterfully combines the creamy texture of classic cheesecake with the spiced warmth of snickerdoodle cookies, making it a show-stopper for any gathering. Best of all, it’s a breeze to make, fully approachable for bakers of all skill levels! Whether you’re impressing friends at a holiday feast or savoring a slice with your favorite cup of coffee, this cheesecake promises to be a comforting delight. Curious about how to create this indulgence? Let’s dive into the recipe!

Why is Snickerdoodle Cheesecake Irresistible?
Decadent Flavor: This cheesecake perfectly marries the rich creaminess of cheesecake with the warm, spiced notes of snickerdoodle cookies, delivering a flavor that is both nostalgic and indulgent.
Simple Steps: With straightforward steps, even novice bakers can master this dessert, ensuring everyone can enjoy a slice of heaven.
Crowd Pleaser: Perfect for fall gatherings or holiday celebrations, this dessert will surely impress your guests and keep them coming back for more.
Versatile Treat: Serve it chilled, topped with whipped cream or a drizzle of caramel, to elevate your dessert experience. If you love a fruity twist, consider checking out these Cheesecake Stuffed Strawberries too for some extra variety!
Make Ahead Friendly: You can prepare this cheesecake a day in advance, making it a great option for stress-free holiday entertaining.
With these irresistible qualities, it’s clear that Snickerdoodle Cheesecake is a must-try for anyone who enjoys homemade treats!
Snickerdoodle Cheesecake Ingredients
For the Crust
• Graham Cracker Crumbs or Crushed Snickerdoodle Cookies – Serves as the base, providing a sweet and crumbly foundation; use gluten-free cookie crumbs for a gluten-free option.
• Melted Butter – Binds the crust ingredients together while adding richness.
• Granulated Sugar – Sweetens both the crust and filling, enhancing overall flavors.
• Ground Cinnamon – Essential for delivering that signature snickerdoodle flavor; high-quality Ceylon cinnamon adds a rich depth.
• Salt – Balances sweetness in both the crust and the filling.
For the Filling
• Cream Cheese – The star ingredient, delivering a rich, creamy texture that makes cheesecake so indulgent; make sure it’s softened for easy mixing.
• Eggs – Provides structure and stability to the cheesecake; using large eggs at room temperature helps with emulsification.
• Sour Cream – Adds creaminess and a slight tang for flavor depth; Greek yogurt can be used as a substitute.
• Vanilla Extract – Enhances the flavor complexity of the cheesecake filling.
• All-Purpose Flour – Gives structure to the filling; substitute with cornstarch or a gluten-free blend for a gluten-free version.
• Nutmeg – Introduces aromatic warmth that complements the cinnamon beautifully.
For the Swirl
• Brown Sugar – Adds deeper sweetness and moisture to the cinnamon swirl.
• Additional Ground Cinnamon (for Swirl) – Reinforces the beloved snickerdoodle flavor profile in the swirl.
• Melted Butter (for Swirl) – Helps to combine the cinnamon and sugar mixture for better distribution in the cheesecake.
With these carefully selected ingredients, you’ll be on your way to creating a Snickerdoodle Cheesecake that will not just satisfy your sweet tooth but also evoke memories of cozy times spent with loved ones. Happy baking!
Step‑by‑Step Instructions for Snickerdoodle Cheesecake
Step 1: Prepare the Pan
Preheat your oven to 325°F (163°C) and get ready to transform your ingredients into a delightful Snickerdoodle Cheesecake. Start by wrapping a 9-inch springform pan with aluminum foil, ensuring it’s secure to prevent water from seeping in during baking. This will create a beautiful, smooth cheesecake with no cracks!
Step 2: Make the Crust
In a mixing bowl, combine graham cracker crumbs, melted butter, granulated sugar, ground cinnamon, and salt. Mix until the ingredients are well combined and crumbly. Press the mixture firmly into the bottom of your prepared springform pan, creating an even layer. Bake the crust for 10 minutes, allowing it to set and achieve a light golden color before moving on.
Step 3: Prepare Cheesecake Filling
In a large mixing bowl, beat the softened cream cheese until it’s smooth and creamy. Gradually add granulated sugar while continuing to mix, followed by the eggs one at a time, ensuring each one is fully incorporated. Blend in sour cream, vanilla extract, all-purpose flour, ground cinnamon, and nutmeg until just combined, creating a rich filling for your Snickerdoodle Cheesecake.
Step 4: Layer Ingredients
Once the crust has cooled, carefully pour half of the cheesecake batter over it and spread evenly. In a separate bowl, whisk together the brown sugar, additional cinnamon, and melted butter for the cinnamon swirl. Spoon this mixture over the batter, then pour the remaining cheesecake batter on top. Use a knife to create gentle swirls, distributing the cinnamon mixture throughout the filling.
Step 5: Bake
Place your wrapped springform pan inside a larger roasting pan. Carefully pour hot water into the roasting pan until it reaches about halfway up the sides of the springform pan, creating a water bath. Bake your Snickerdoodle Cheesecake for 65 minutes, or until the center is slightly jiggly but set, signaling it’s ready to cool down.
Step 6: Cool
Once baked, turn off the oven and crack the door open, allowing the cheesecake to cool slowly for one hour inside the oven. This gentle cooling process helps minimize cracks and maintain a creamy texture. After the hour is up, transfer the cheesecake to the refrigerator, where it should chill for at least 4 hours before serving, ensuring it’s perfectly set and delightful.
How to Store and Freeze Snickerdoodle Cheesecake
Fridge: Store your Snickerdoodle Cheesecake in an airtight container in the refrigerator for up to 7 days, keeping it fresh and delicious.
Freezer: If you’d like to enjoy the cheesecake later, wrap it tightly in plastic wrap and then in aluminum foil. Freeze for up to 3 months, ensuring optimal flavor and texture.
Thawing: To thaw, transfer the cheesecake to the fridge for a day before serving, allowing it to regain its creamy consistency naturally without compromising its taste.
Reheating: Serve chilled or at room temperature. If you’d like to warm a slice slightly, do so in the microwave for about 10-15 seconds—just enough to take the chill off!
Expert Tips for Snickerdoodle Cheesecake
• Ingredient Quality: Opt for high-quality ingredients, particularly Ceylon cinnamon, to elevate the flavor of your Snickerdoodle Cheesecake.
• Room Temperature: Ensure your cream cheese and eggs are at room temperature for smoother batter mixing, which prevents lumps and ensures even texture.
• Water Bath: Always use a water bath during baking to avoid cracks in your cheesecake. Check for leaks in your wrapped pan before adding water.
• Swirl Carefully: When creating the cinnamon swirl, use a gentle hand with a knife to avoid over-mixing and losing those lovely swirls.
• Chill Time: Patience is key! Allowing your cheesecake to cool gradually in the oven and then chilling thoroughly in the fridge ensures that it sets perfectly and slices beautifully.
What to Serve with Decadent Snickerdoodle Cheesecake
Pairing this luscious cheesecake with complementary sides can elevate your dessert experience to new heights. Here’s how to create a delightful spread.
-
Whipped Cream: A light dollop adds a creamy, airy texture that balances the richness of the cheesecake. It allows the warm cinnamon flavors to shine through.
-
Fresh Berries: Juicy strawberries or raspberries offer a refreshing tartness, perfectly contrasting the sweetness of the cheesecake and enhancing each bite’s flavor.
-
Caramel Sauce: A drizzle of rich caramel adds a decadent touch, enhancing the warm, spiced flavors while providing a delightful sticky sweetness that guests will love.
-
Coffee or Espresso: Serving a cup of freshly brewed coffee alongside the cheesecake creates a cozy atmosphere. The bitterness of the coffee enhances the dessert’s sweetness beautifully.
-
Chai Tea: Infused with spices, chai tea mirrors the snickerdoodle spices, making it a comforting option that resonates with the flavors of the cheesecake.
-
Chocolate Ganache: A silky chocolate layer can be spread or drizzled over the cheesecake to create a luxurious chocolate-cinnamon fusion that indulges any chocolate lover’s cravings.
-
Candied Nuts: Crunchy candied pecans or walnuts sprinkle extra texture and a sweet crunch, which beautifully contrasts with the creamy filling, bringing a delightful additional layer to each bite.
Incorporating these pairings will enhance your Snickerdoodle Cheesecake experience, making every gathering a sweet success!
Snickerdoodle Cheesecake Variations
Explore delightful ways to customize your Snickerdoodle Cheesecake and make it uniquely yours!
- Gluten-Free: Substitute the crust ingredients with gluten-free cookie crumbs and use cornstarch instead of flour for the filling.
- Nutty Twist: Add chopped pecans or walnuts to the crust for a crunchy texture that enhances the flavor with nutty notes. The added crunch complements the smooth cheesecake beautifully.
- Chocolate Lovers: Fold in chocolate chips into the cheesecake filling for a rich, indulgent twist. The chocolate pairs wonderfully with the cinnamon flavors, creating a delectable contrast.
- Spicy Kick: For a little heat, add a pinch of cayenne pepper or ginger to the filling. This unexpected spice can elevate the dessert and surprise your taste buds!
- Fruit Infusion: Swirl in a layer of fruit preserves, like raspberry or cherry, for a fruity contrast. The tartness of the fruit cuts through the richness of the cheesecake, balancing the flavors harmoniously.
- Caramel Drizzle: Top your cheesecake with a homemade or store-bought caramel sauce for an extra layer of indulgence. This sweet drizzle adds a luscious finish that takes every bite to the next level.
- Mini Cheesecakes: Bake individual portions in a muffin tin for bite-sized treats perfect for gatherings. Not only are they adorable, but they’re also easy to serve and share! If you’re looking for a fun twist, try these Cheesecake Stuffed Strawberries alongside for a refreshing contrast!
- Vegan Version: Use nut-based cream cheese and flax eggs as substitutes to create a plant-based version of this delicious treat. With a little creativity, you can enjoy the same delightful flavors while accommodating different diets.
With these variations, you can make your Snickerdoodle Cheesecake a true reflection of your tastes, perfect for any occasion!
Make Ahead Options
These Snickerdoodle Cheesecake pieces are a lifesaver for busy home cooks! You can prepare the crust and filling up to 24 hours in advance. Simply make the crust and allow it to cool completely before refrigerating it. Next, prepare the cheesecake filling (minus the baking step) and store it in an airtight container in the fridge. When you’re ready to bake, simply layer the filling over the crust and create your cinnamon swirl as directed. This method not only saves you time on the big day but also ensures the cheesecake is just as delicious when served, maintaining optimal flavor and texture. Enjoy stress-free entertaining with your Snickerdoodle Cheesecake!
Snickerdoodle Cheesecake Recipe FAQs
How do I choose the right cream cheese for my cheesecake?
Absolutely! Always opt for full-fat cream cheese for the best results, as it offers a rich and creamy texture. Ensure the cream cheese is softened to room temperature before mixing; this helps incorporate air for a fluffier filling and prevents lumps from forming.
What’s the best way to store Snickerdoodle Cheesecake?
You can store your Snickerdoodle Cheesecake in an airtight container in the refrigerator for up to 7 days, which helps maintain its freshness and flavor. If you’re looking to keep it longer, wrap it tightly in plastic wrap and aluminum foil and freeze it for up to 3 months. Just remember to thaw it in the fridge a day before serving for the best texture!
How can I avoid cracks in my cheesecake?
Very! To avoid cracks, it’s crucial to bake your Snickerdoodle Cheesecake using a water bath, which provides gentle, even heat. Additionally, don’t rush the cooling process; allow it to cool gradually in the oven with the door slightly ajar for about an hour. This step helps the cheesecake to set evenly and minimizes the risk of cracks.
Can I make substitutions for dietary restrictions?
Of course! If you need a gluten-free version, substitute graham cracker crumbs with gluten-free cookie crumbs or crushed gluten-free crackers for the crust. Additionally, you can replace sour cream with Greek yogurt for a bit of extra protein. Just be sure to allow any substitute ingredients to match in taste and consistency as much as possible.
How do I create the perfect cinnamon swirl?
Creating the cinnamon swirl is part of the fun! In a small bowl, mix together brown sugar, ground cinnamon, and melted butter. After pouring half of your cheesecake batter into the crust, use a spoon to drop dollops of the cinnamon mixture evenly over it. Then, pour the remaining batter on top. To make swirls, gently run a knife through the layers in a zigzag pattern, being careful not to overmix and fully combine the batters.
Can I use non-dairy alternatives for this recipe?
Absolutely! If you’re looking for non-dairy substitutes, use blocks of dairy-free cream cheese and nut-based sour cream alternatives. You can also try egg substitutes like flaxseed meal or applesauce, although the texture may vary slightly. Make sure to check the directions on the packages for proper measurements to keep your Snickerdoodle Cheesecake luscious and delicious!
Irresistible Snickerdoodle Cheesecake that Everyone Will Love
Ingredients
Equipment
Method
- Preheat your oven to 325°F (163°C) and wrap a 9-inch springform pan with aluminum foil.
- In a mixing bowl, combine graham cracker crumbs, melted butter, granulated sugar, ground cinnamon, and salt. Mix and press into the bottom of the pan. Bake for 10 minutes.
- Beat softened cream cheese until smooth, gradually add granulated sugar and eggs one at a time, blend in sour cream, vanilla, flour, cinnamon, and nutmeg.
- Pour half of the cheesecake batter over the crust, create a cinnamon swirl with brown sugar, additional cinnamon, and melted butter, then top with remaining cheesecake batter.
- Bake in a water bath for 65 minutes, until the center is slightly jiggly but set.
- Turn off the oven, crack the door open, and cool the cheesecake for 1 hour. Chill in the refrigerator for at least 4 hours before serving.