
As I stood in my kitchen, the scent of warm cocoa began to wrap around me like a cozy winter blanket. This Chocolate Peppermint Bread merges all the festive flavors we love, delivering a mouthwatering experience with each slice. Perfect for busy bakers, this quick bread offers an effortless way to impress family and friends during the holiday season. Plus, it’s a delightful alternative to traditional cookies, allowing you to share a unique treat that warms hearts and homes alike. With the crunch of crushed candy canes on top, it’s sure to become a new holiday favorite. Are you ready to create this seasonal masterpiece? Let’s dive in!
Why is Chocolate Peppermint Bread a must-try?
Irresistible Flavor: The fusion of rich chocolate and refreshing peppermint creates a taste that captures the essence of the season, making every bite a delightful holiday experience.
Quick and Easy: With simple ingredients and straightforward steps, this bread can be whipped up in no time—ideal for busy bakers and last-minute gatherings.
Perfect for Gifting: This festive treat makes a thoughtful homemade gift, beautifully presented with a sprinkle of crushed candy canes.
Endless Variations: Get creative! Transform this recipe into decadent muffins or try adding nuts for extra crunch.
Crowd-Pleaser: Whether served at holiday parties or enjoyed as a cozy breakfast, this Chocolate Peppermint Bread will be a hit with everyone—a delightful alternative to Chocolate Chip Kodiak muffins!
Chocolate Peppermint Bread Ingredients
For the Bread
- Butter – Provides moisture and richness; substitute with plant-based butter for a dairy-free option.
- White Sugar – Adds sweetness and texture; brown sugar can enhance flavor for a deeper taste.
- Brown Sugar – Contributes to moisture and a slight caramel flavor; use equally in place of white sugar if needed.
- Eggs – Binds ingredients together and provides structure; flax eggs can work for a vegan alternative.
- Peppermint Extract – Imparts the signature mint flavor; don’t exceed the recommended amount to prevent overpowering.
- All-Purpose Flour – Gives structure to the bread; a 1:1 gluten-free flour blend can be used for a gluten-free option.
- Cocoa Powder – Adds rich chocolate flavor; ensure you use unsweetened for best results.
- Baking Powder – Helps the bread rise; make sure it’s fresh for optimal leavening.
- Baking Soda – Works in tandem with baking powder for a light texture.
- Espresso Powder – Enhances chocolate flavor without adding coffee taste; can be omitted if preferred.
- Milk – Adds moisture; almond or oat milk can be a great dairy-free substitute.
- Dark Chocolate Chips – Provides bursts of melted chocolate throughout; feel free to swap with white or milk chocolate chips based on taste.
- Salt – Balances flavors and enhances sweetness.
For the Frosting
- Powdered Sugar – Used for frosting; substitute with coconut powdered sugar for a non-refined option.
- Milk (for frosting) – Adds creaminess; non-dairy milk can be used if necessary.
- Greek Yogurt – Adds moisture and a tangy contrast; replace with sour cream or omit if undesired.
For the Topping
- Crushed Candy Canes – Provides a crunchy topping and visual appeal; can also be replaced with chocolate sprinkles for a delicious variation.
Step‑by‑Step Instructions for Chocolate Peppermint Bread
Step 1: Preheat the Oven
Start by preheating your oven to 350°F (177°C). As the oven warms up, gather your mixing bowl and measuring cups, ensuring everything is ready for the delightful Chocolate Peppermint Bread you’re about to create. This temperature is perfect for achieving a beautifully baked loaf with a tender crust.
Step 2: Cream the Butter and Sugars
In a large mixing bowl, combine softened butter with both white and brown sugar. Using an electric mixer, beat them together on medium speed until the mixture is light and fluffy—about 3-5 minutes. This critical step creates a rich base for your bread, imparting moisture and sweetness that enhances the overall flavor.
Step 3: Mix Dry Ingredients
Next, add the baking powder, baking soda, espresso powder, cocoa powder, and salt to the butter mixture. Stir these dry ingredients together using a wooden spoon or spatula until everything is well combined. You should see a deep, chocolatey hue, setting the perfect tone for your festive Chocolate Peppermint Bread.
Step 4: Incorporate Wet Ingredients
Crack the eggs into the bowl and pour in the peppermint extract, mixing everything together until fully blended. This will introduce the signature minty flavor that beautifully complements the rich chocolate. Ensure the mixture is smooth, which will help deliver an enjoyable texture to your bread.
Step 5: Combine Flour and Milk
Now, it’s time to alternately add the flour and milk to the batter. Start with a third of the flour, mixing gently until just combined. Follow it with half the milk, then repeat until all flour and milk are incorporated, taking care not to over-mix. This step will help create the moist and fluffy texture you desire in your Chocolate Peppermint Bread.
Step 6: Fold in Chocolate Chips
Using a rubber spatula, gently fold in the dark chocolate chips, ensuring they’re evenly distributed throughout the batter. These delicious pockets of melted chocolate will enhance every bite of your bread. This is a perfect way to add even more indulgent flavors as you prepare for the final baking.
Step 7: Prepare the Loaf Pan
Carefully pour the batter into a parchment-lined or greased loaf pan, smoothing the top with your spatula. Be sure to fill the pan about three-quarters full to allow space for the bread to rise. At this moment, the batter should look rich and inviting, setting the stage for a delightful bake ahead.
Step 8: Bake the Bread
Place the loaf pan in the preheated oven and bake for 50-60 minutes. Check for doneness by inserting a toothpick into the center; it should come out clean or with a few moist crumbs attached. The top of your Chocolate Peppermint Bread should be firm to the touch and slightly cracked, signaling it’s ready to come out.
Step 9: Prepare the Frosting
While your bread bakes, make the frosting by combining powdered sugar, milk, peppermint extract, and Greek yogurt in a mixing bowl. Beat until the mixture is smooth and creamy. This frosting adds a luscious finish to your Chocolate Peppermint Bread, elevating it to a festive treat that’s hard to resist.
Step 10: Frost and Garnish
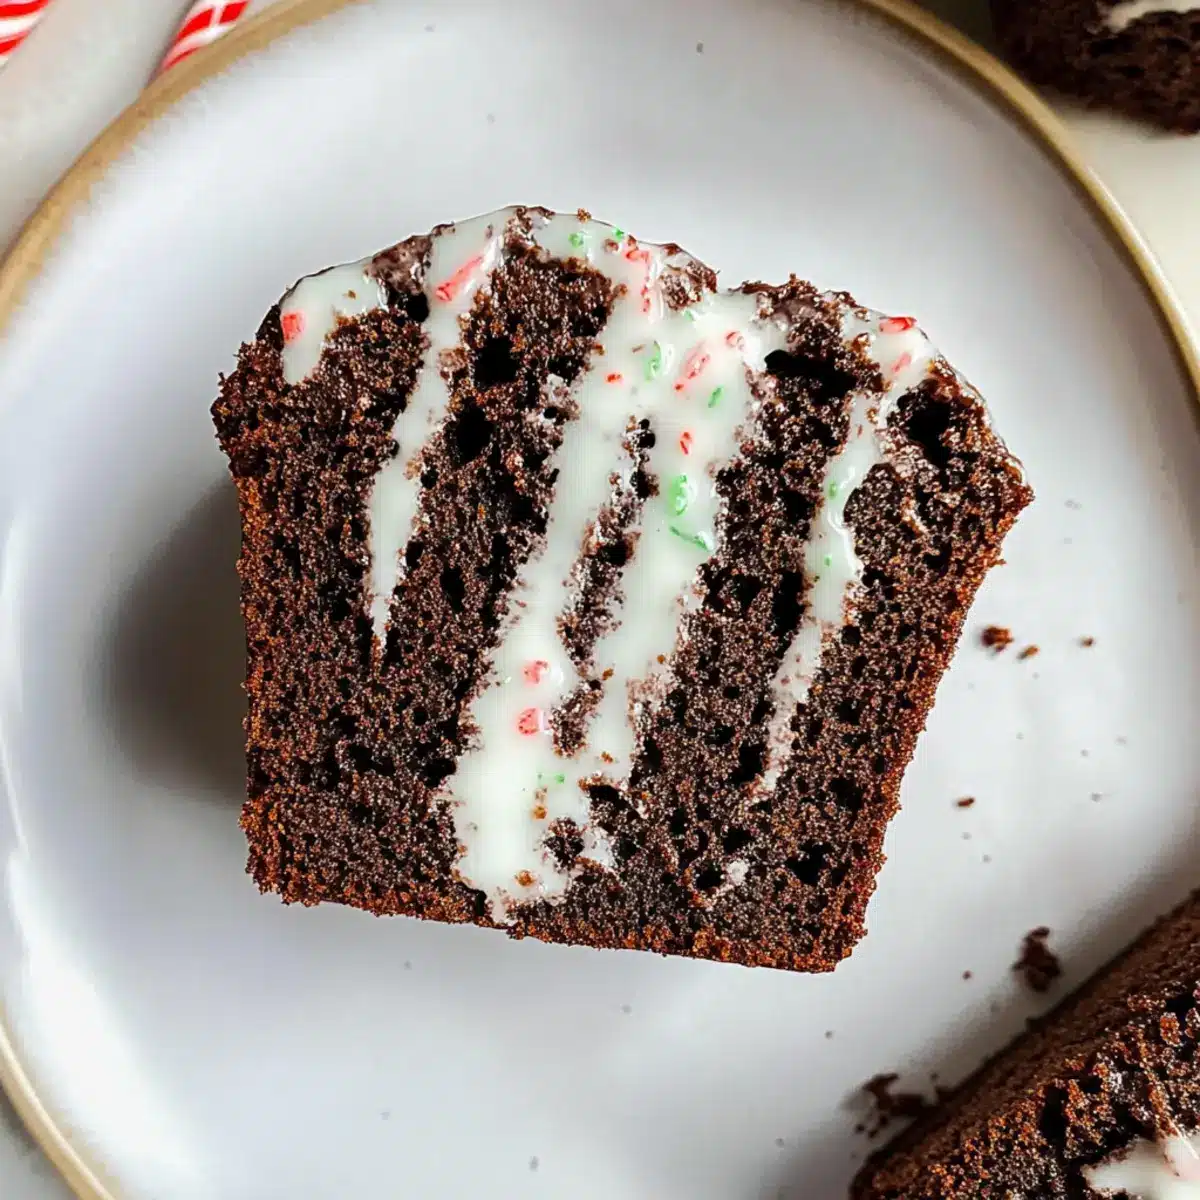
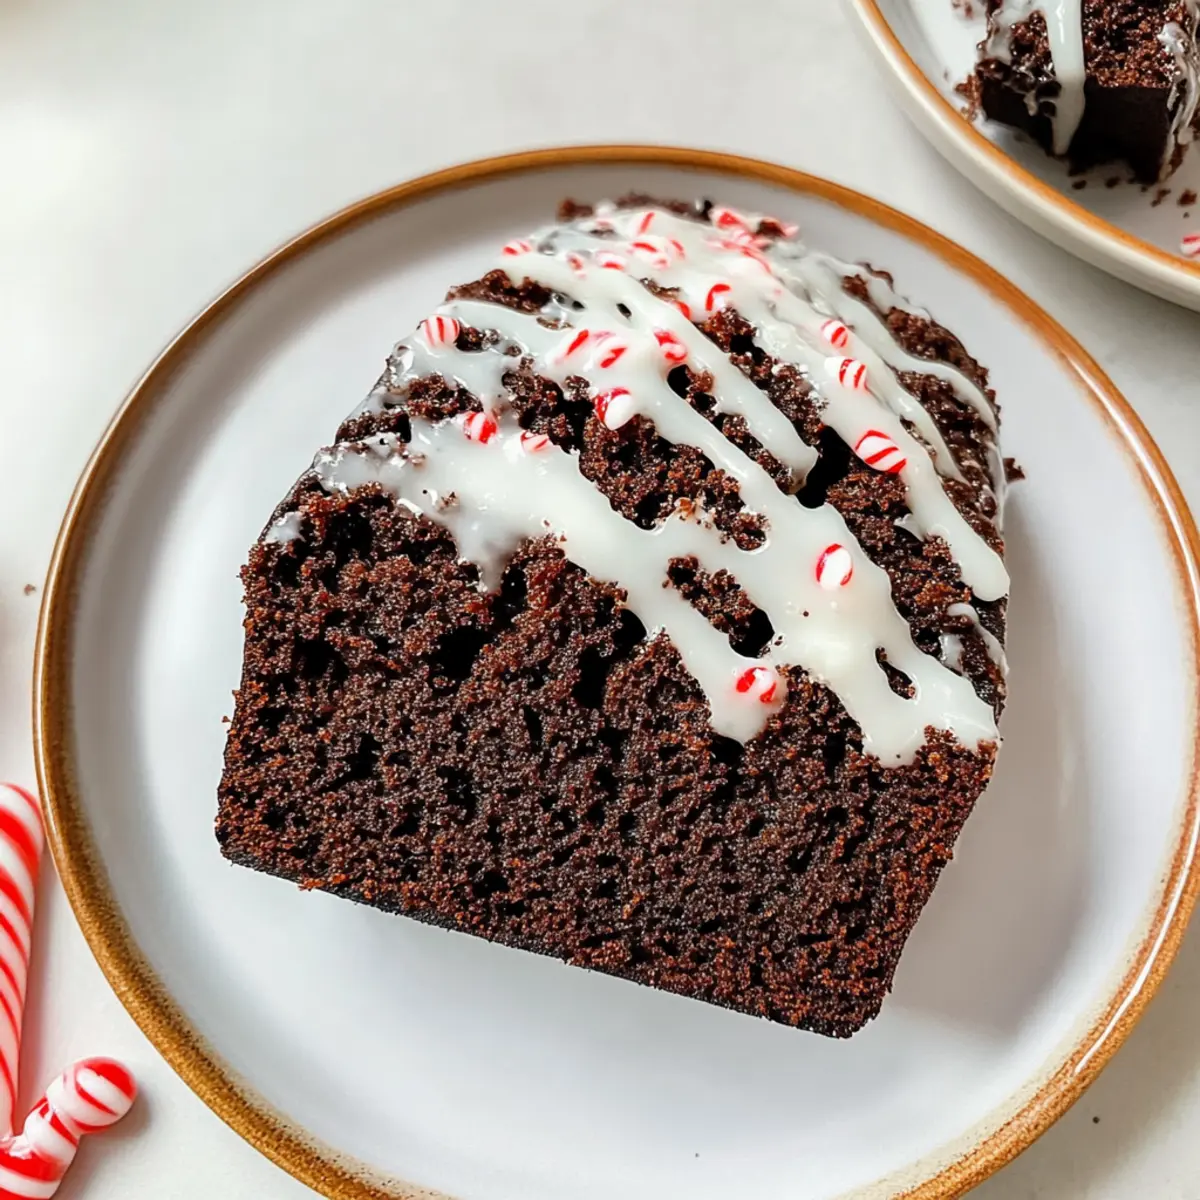
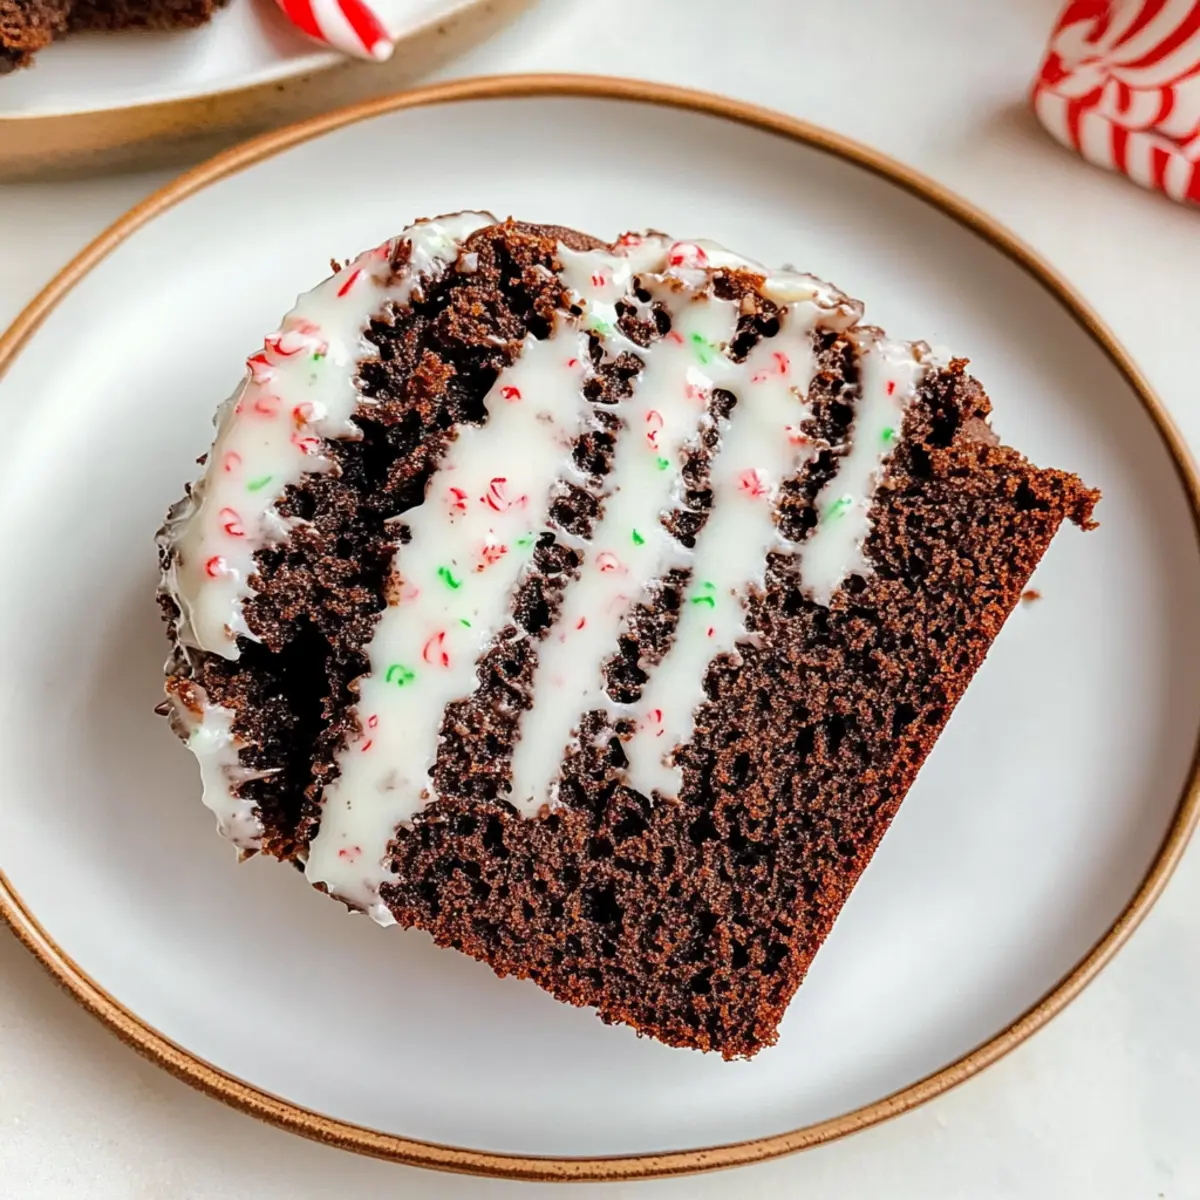
Once the bread has cooled completely, generously frost the top with your prepared mixture. To finish, sprinkle crushed candy cane pieces over the frosting for a delightful crunch and festive flair. The vibrant colors and textures will enhance the visual appeal of your Chocolate Peppermint Bread, making it perfect for serving.
Step 11: Slice and Serve
Finally, slice your Chocolate Peppermint Bread into thick, delicious pieces. Serve it warm or at room temperature, and watch as the flavors and festive presentation delight everyone who tries it. This irresistible treat is perfect for sharing during the holiday season or enjoying with your loved ones!
Expert Tips for Chocolate Peppermint Bread
-
Right Temperature: Ensure the ingredients are at room temperature before mixing to promote better incorporation and a fluffier texture.
-
Don’t Overmix: When combining the wet and dry ingredients, mix just until incorporated to avoid a dense loaf; this helps maintain the fluffy nature of your Chocolate Peppermint Bread.
-
Use Fresh Ingredients: Check your baking powder and baking soda for freshness; stale leavening agents can cause the bread to not rise properly.
-
Cool Before Frosting: Allow your bread to cool completely before adding frosting; this prevents it from melting and ensures a beautiful finish.
-
Candy Cane Crunch: For a beautiful presentation, crush the candy canes coarsely before sprinkling them on top; larger pieces add a delightful crunch and visual appeal.
Make Ahead Options
Prepare your Chocolate Peppermint Bread in advance for hassle-free holiday baking! You can mix the dry ingredients (flour, cocoa powder, baking powder, and baking soda) up to 3 days ahead and store them in an airtight container to keep them fresh. Additionally, the frosting can be made and refrigerated up to 24 hours in advance, ensuring it’s ready to go when you need it. When you’re set to bake, simply mix the wet ingredients with the dry, fold in the chocolate chips, and bake as directed. This way, you’ll enjoy a deliciously moist bread that’s just as festive and delightful, saving you time during busy preparations!
How to Store and Freeze Chocolate Peppermint Bread
Room Temperature: Keep the Chocolate Peppermint Bread covered at room temperature for up to 3 days. This allows it to remain moist and flavorful.
Fridge: If you prefer a chilled treat, refrigerate the bread for up to a week. Wrap it tightly to prevent drying out and absorbing odors from other foods.
Freezer: For longer storage, freeze the bread for up to 3 months. Wrap it in plastic wrap and then foil to protect against freezer burn.
Reheating: To enjoy it warm, slice and reheat in the microwave for about 10-15 seconds or in an oven set at 350°F (177°C) for a few minutes until warmed through.
What to Serve with Chocolate Peppermint Bread?
Indulging in a slice of Chocolate Peppermint Bread is like wrapping yourself in a warm holiday embrace. To elevate your experience, consider these delightful pairings that complement the festive flavors of this quick bread.
-
Fresh Berries: Their juicy, tart flavor contrasts beautifully with the sweetness of the bread, adding a refreshing touch to each bite.
-
Whipped Cream: A dollop of lightly sweetened whipped cream enhances the creamy texture, making for a delightful and festive dessert.
-
Homemade Hot Chocolate: This cozy beverage mirrors the chocolatey goodness of the bread while the warm drink brings comfort to your cool evenings.
-
Peppermint Tea: Sip on a warm cup of peppermint tea to highlight the minty notes of the bread, creating a harmonious culinary experience.
-
Vanilla Ice Cream: The creamy, smooth ice cream melts against the warm bread, creating a luscious dessert that’s both decadent and satisfying.
For an extra touch, consider a festive platter featuring the bread alongside these delights, inviting friends and family to gather and enjoy an extraordinary holiday moment together. Each pairing will enhance your Chocolate Peppermint Bread experience while bringing joy and warmth to your table.
Chocolate Peppermint Bread Variations
Feel inspired to make this recipe your own with delightful twists and substitutions that infuse new life into your Chocolate Peppermint Bread!
-
Muffins: Transform the batter into luxurious muffins by pouring it into muffin tins and baking them for 20-25 minutes instead of using a loaf pan. This way, everyone can enjoy a personal treat!
-
Dairy-Free Delight: Swap out butter and milk for plant-based alternatives like coconut oil and almond milk. This option keeps the festive spirit while catering to dietary preferences!
-
Nutty Crunch: Mix in ½ cup of chopped walnuts or pecans to add a delightful crunch and earthy flavor. The nuts elevate the texture and enhance the holiday vibe.
-
Reduced Sugar: If you’re looking to lighten it up, reduce the sugars by one-third without sacrificing the deliciousness. The natural sweetness from the chocolate will shine.
-
Spice It Up: Add a teaspoon of cinnamon or nutmeg to the dry ingredients. This brings warmth and spice, perfect for holiday gatherings and cozy atmospheres.
-
Chocolate Chip Swap: Instead of dark chocolate chips, use white or milk chocolate chips for a different flavor profile. Each variation offers a unique twist that’s sure to please every palate.
-
Candy Cane Transformation: Replace crushed candy canes on top with chocolate sprinkles for a chocolate lover’s twist. This alteration adds fun and flair while still staying festive.
-
Egg-Free Option: For a vegan alternative, use flax eggs (1 tablespoon of flaxseed meal mixed with 2.5 tablespoons of water = 1 egg). This keeps the bread moist while adhering to plant-based guidelines.
With these variations, your Chocolate Peppermint Bread is bound to become even more irresistible! Don’t forget to consider trying some of them when pairing with other festive treats, like delightful Chocolate Chip Kodiak muffins!
Chocolate Peppermint Bread Recipe FAQs
How do I select ripe ingredients for my Chocolate Peppermint Bread?
Absolutely! For best results, choose eggs that are at room temperature, as they incorporate better into the batter. The butter should be softened but not melted, creating a light and fluffy mixture when creamed with sugars. When it comes to peppermint extract, use high-quality pure extract to enhance the flavor without being overpowering.
What are the best storage methods and duration for Chocolate Peppermint Bread?
Keep your Chocolate Peppermint Bread covered at room temperature for up to 3 days for optimal softness and flavor. Alternatively, you can refrigerate it for up to a week—make sure to wrap it tightly to maintain moisture and prevent it from absorbing other odors. For longer storage, it freezes beautifully for up to 3 months!
How do I freeze my Chocolate Peppermint Bread?
The more the merrier when it comes to enjoying your Chocolate Peppermint Bread! To freeze, first wrap the completely cooled loaf tightly in plastic wrap. Follow this with a layer of aluminum foil to prevent freezer burn. You can also slice the bread before freezing for convenience. When you’re ready to enjoy, simply thaw it in the fridge overnight or on the counter for a few hours.
What should I do if my Chocolate Peppermint Bread turns out dense?
Very! A dense loaf can occur if the batter is overmixed or if the leavening agents aren’t fresh. Make sure to mix until just combined when adding wet and dry ingredients. If possible, always check the expiration dates on your baking powder and baking soda to ensure they’re active. A toothpick test is crucial—your bread should come out clean but not overbaked.
Can my pets eat Chocolate Peppermint Bread?
I recommend it! However, chocolate is toxic to dogs and cats, so it’s essential to keep this delightful treat away from your furry friends. Also, peppermint extract can be harmful to pets in large amounts. If you want to share a baked good with your pets, consider making a special dog-friendly treat instead.
Can I adjust the recipe for allergies?
Absolutely! This recipe is quite adaptable. For a dairy-free version, use plant-based butter, almond milk, or oat milk. To make it vegan, swap the eggs for flax eggs (1 tablespoon of ground flaxseed mixed with 3 tablespoons of water, letting it sit for 5 minutes). For gluten-free options, a 1:1 gluten-free flour blend works wonderfully. Always ensure that all the ingredients used are suitable for your dietary needs.

Irresistible Chocolate Peppermint Bread – Your New Holiday Favorite
Ingredients
Equipment
Method
- Preheat your oven to 350°F (177°C). Gather your mixing bowl and measuring cups.
- In a large mixing bowl, combine softened butter with both white and brown sugar. Beat them until light and fluffy—about 3-5 minutes.
- Add the baking powder, baking soda, espresso powder, cocoa powder, and salt to the butter mixture. Stir until well combined.
- Crack the eggs and pour in the peppermint extract, mixing until fully blended.
- Alternately add the flour and milk to the batter, mixing gently until just combined.
- Fold in the dark chocolate chips until evenly distributed throughout the batter.
- Pour the batter into a parchment-lined or greased loaf pan, filling it about three-quarters full.
- Bake for 50-60 minutes. Check for doneness by inserting a toothpick; it should come out clean.
- While the bread bakes, make the frosting by combining powdered sugar, milk, peppermint extract, and Greek yogurt. Beat until smooth.
- Once cooled, frost the top of the bread with the prepared mixture and sprinkle crushed candy cane pieces over the frosting.
- Slice your Chocolate Peppermint Bread into thick pieces and serve it warm or at room temperature.