
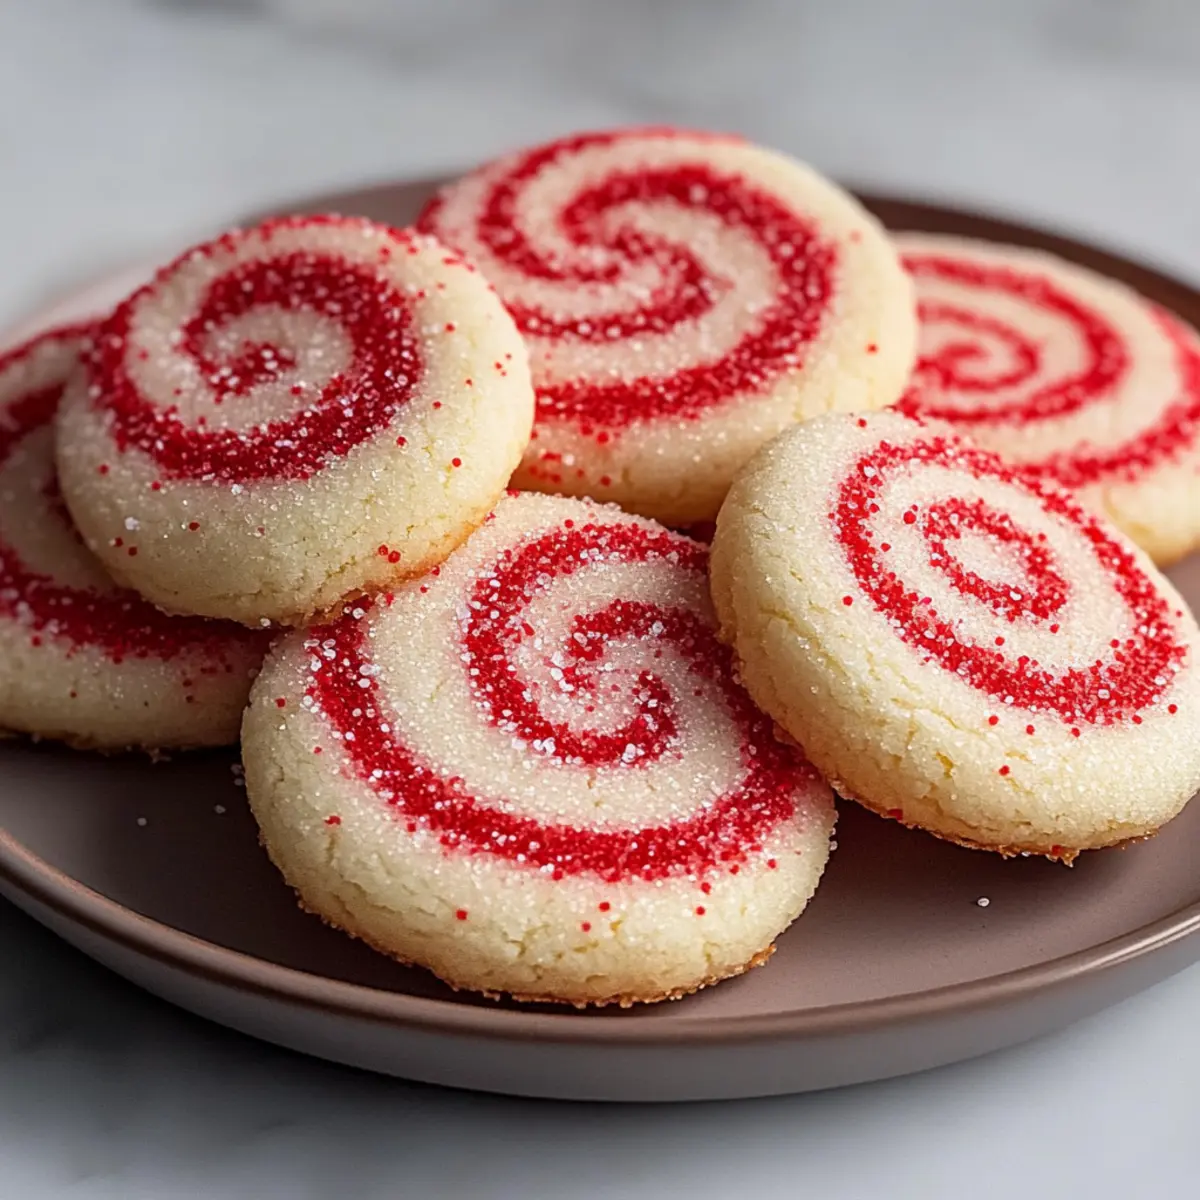
As I stood in my kitchen, the aroma of buttery sweetness mingling with crisp peppermint filled the air, instantly evoking memories of joyous holiday gatherings. These Peppermint Swirl Cookies are a delightful addition to any festive occasion, featuring a stunning red and white swirl that brings a visual feast to your dessert table. Not only are they easy to whip up, but the tender texture and refreshing peppermint flavor make them an instant crowd-pleaser. Whether you’re baking for a cozy night at home or crafting the perfect homemade gift, these cookies will surely join your list of favorite holiday traditions. Curious about how to create this festive treat? Let’s dive into the recipe!
Why Make Peppermint Swirl Cookies?
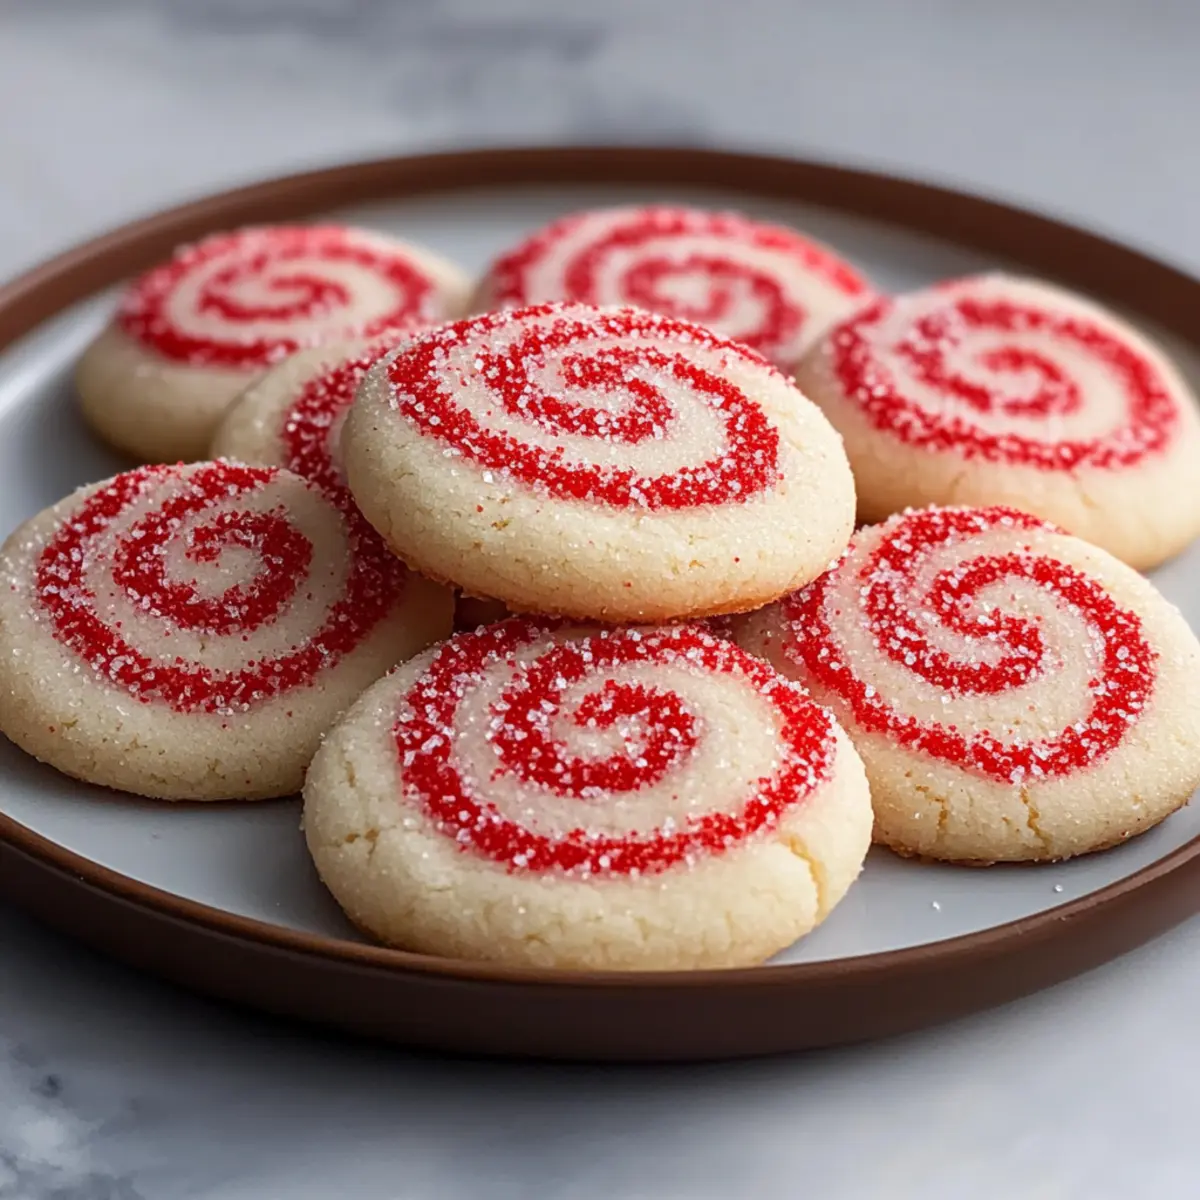
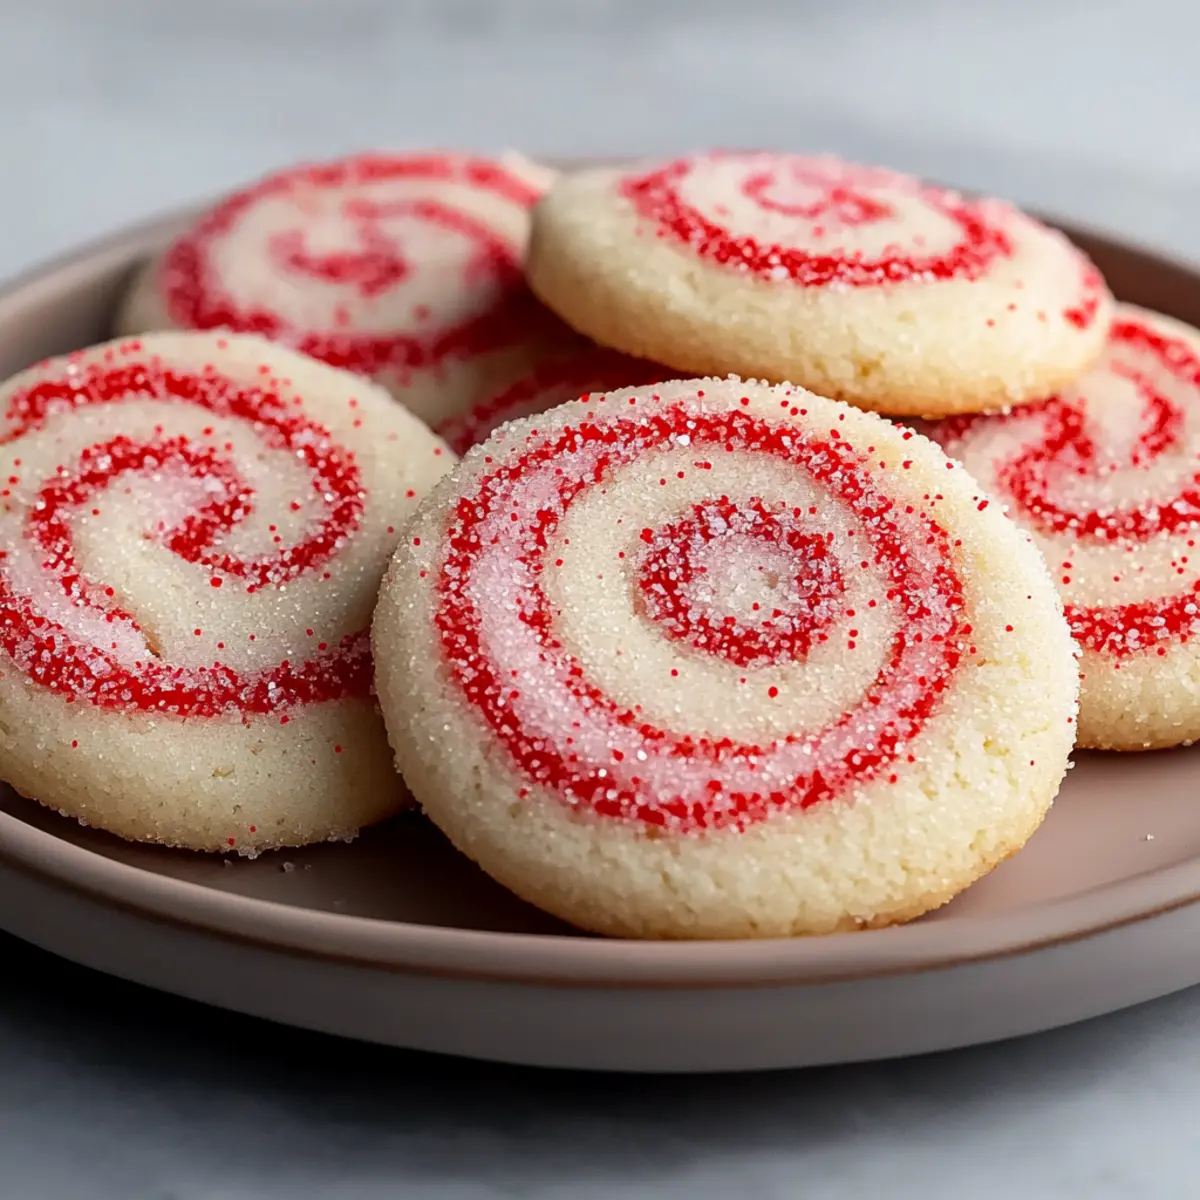
Visual Appeal: The stunning red and white swirl of these cookies makes them a standout addition to any holiday dessert table, creating a festive atmosphere.
Easy to Prepare: With straightforward steps and common ingredients, you can whip up a batch without fuss, allowing more time for holiday cheer.
Delightful Flavor: The perfect fusion of buttery sweetness and refreshing peppermint creates a mouthwatering experience that will have everyone asking for seconds.
Versatile Treat: Whether you’re enjoying them with a cup of hot cocoa or gifting them in a charming tin, these cookies fit perfectly into any holiday scenario!
Make-Ahead Friendly: Prep the dough up to three days in advance, making it super convenient for busy holiday schedules; just slice and bake when you’re ready!
Peppermint Swirl Cookies Ingredients
For the Cookie Dough
• All-purpose flour – Provides structure to the cookies; for a gluten-free option, substitute with a 1:1 gluten-free flour blend.
• Baking powder – Helps the cookies rise and achieve a tender texture.
• Salt – Enhances flavor and balances the sweetness in the cookies.
• Unsalted butter – Adds richness and moisture; make sure it’s softened for effortless creaming.
• Granulated sugar – Sweetens the cookies and contributes to their lovely texture.
• Large egg – Binds the ingredients together, helping to create the perfect cookie consistency.
• Vanilla extract – Adds depth and richness of flavor to the dough.
• Peppermint extract – Provides the signature minty flavor that makes these Peppermint Swirl Cookies irresistible.
For the Swirl
• Red gel food coloring – Helps achieve that vibrant red color for a striking swirl effect.
• Coarse sugar or crushed peppermint candies – Adds a festive touch and additional sweetness when coating the cookie edges.
Step‑by‑Step Instructions for Peppermint Swirl Cookies
Step 1: Combine Dry Ingredients
In a medium bowl, whisk together 2 cups of all-purpose flour, 1 teaspoon of baking powder, and a pinch of salt until well combined. This step ensures that the leavening agent is evenly distributed throughout the flour, contributing to the tender texture of the Peppermint Swirl Cookies. Set the bowl aside while you prepare the wet ingredients.
Step 2: Cream Butter and Sugar
In a large mixing bowl, beat ¾ cup of softened unsalted butter and 1 cup of granulated sugar together with an electric mixer on medium speed until the mixture is light and fluffy, about 2-4 minutes. The color should turn pale yellow as you cream; this process introduces air for a wonderfully soft cookie texture.
Step 3: Add Egg and Extracts
Add one large egg, 1 teaspoon of vanilla extract, and ½ teaspoon of peppermint extract to the butter mixture. Mix on low speed until just combined, ensuring not to over-mix. The extracts bring out the delicious peppermint flavor that is essential to your Peppermint Swirl Cookies while enriching the overall taste with a touch of warmth from the vanilla.
Step 4: Incorporate Dry Ingredients
Gradually add the flour mixture to the wet ingredients, mixing on low speed until just combined. Be careful not to overmix, as this can lead to tougher cookies. You should see no dry flour, and the dough should take on a cohesive appearance, ready for shaping and swirling.
Step 5: Divide and Color Dough
Carefully divide the dough in half; leave one portion plain and color the other with a few drops of red gel food coloring. Use your hands to knead the color evenly into the dough until fully incorporated, achieving a bright, festive hue that will create a stunning contrast in your Peppermint Swirl Cookies.
Step 6: Chill Dough
Flatten each half of the dough into discs, wrap them tightly in plastic wrap, and refrigerate for at least 1 hour. Chilling the dough is crucial for maintaining its shape while rolling and slicing, as well as enhancing the flavors as they meld together during this resting period.
Step 7: Roll Out Doughs
Once chilled, roll out each disc on a floured surface into rectangles measuring about 12×10 inches and ¼ inch thick. This gives you a perfect canvas for layering the two colors. Keep an eye on the thickness, as thinner dough may roll unevenly and affect the swirls.
Step 8: Layer and Roll
Carefully invert the plain dough onto the red dough, aligning the edges. Press down gently to adhere them together, and then tightly roll the layered dough from one end to the other into a log shape. This is where the beautiful swirl pattern begins to form, setting the stage for your Peppermint Swirl Cookies.
Step 9: Refine Log and Chill Again
Using your hands, shape the log into a uniform cylinder, ensuring it is tightly rolled. Wrap the log in plastic wrap and refrigerate for an additional 2 hours or overnight. This step is essential for the dough to hold its shape during baking, creating perfectly thick cookies with lovely swirls.
Step 10: Preheat Oven and Slice Cookies
Preheat your oven to 375°F (190°C). Once the oven is ready, slice the chilled log into rounds about ¼ inch thick with a sharp knife, ensuring that each slice showcases the beautiful swirls. Place the cookie slices on a parchment-lined baking sheet, leaving space between them for spreading.
Step 11: Bake Cookies
Bake the Peppermint Swirl Cookies in the preheated oven for 8-11 minutes, or until the edges are lightly golden. Keep a close eye on them toward the end; the cookies will continue to firm up slightly after they come out of the oven, ensuring they remain soft and tender.
Step 12: Cool Cookies
Allow the cookies to cool on the baking sheet for about 5 minutes before gently transferring them to a wire rack to cool completely. This cooling period allows the cookies to set, making them easier to handle while preserving their delicate texture and flavorful peppermint swirl.
Step 13: Decorate (Optional)
If desired, roll the edges of the cooled cookies in coarse sugar or crushed peppermint candies for an extra festive touch. This final step adds a delightful crunch and additional sweetness, making your Peppermint Swirl Cookies even more irresistible just in time for the holidays!
What to Serve with Peppermint Swirl Cookies
Indulge in a delightful combination of flavors and textures while enhancing your festive experience with these enchanting cookies.
- Hot Cocoa: A rich cup of hot cocoa complements the cool peppermint perfectly, creating a comforting balance of flavors on a cozy evening.
- Vanilla Ice Cream: The creamy sweetness of vanilla ice cream contrasts beautifully with the cookies, adding a refreshing touch on each bite.
- Spiced Chai: Warm, spiced chai with notes of cinnamon and ginger pairs splendidly, elevating the holiday spirit with each sip.
- Christmas Fruit Platter: Vibrant, colorful fruits like strawberries and citrus offer a refreshing contrast, cleansing the palate and complementing the cookie’s sweetness.
- Milk: A classic choice, a glass of cold milk enhances the buttery texture of the cookies while balancing their minty flavor profile.
- Gingerbread Men: For a nostalgic treat, serve with gingerbread men; the warm spices provide a festive harmony with the peppermint.
- Sugary Cocktail: A holiday-inspired cocktail, such as a peppermint martini, makes for a fun adults-only treat that echoes the cookie’s theme in a spirited way.
- Cheese Board: Incorporating assorted cheeses adds a savory touch that creatively contrasts the cookies’ sweetness, offering an unusual but delightful pairing.
- Coffee: A warm, aromatic coffee can bring out the cookies’ buttery notes, making for a cozy, inviting afternoon treat.
- Chocolate Truffles: Rich chocolate truffles provide a decadent, indulgent option alongside these cookies, satisfying any sweet tooth with added depth in each bite.
Expert Tips for Peppermint Swirl Cookies
-
Butter Matters: Ensure your butter is softly pliable, not melted. This step is crucial for achieving the perfect creamed texture in your Peppermint Swirl Cookies.
-
Chill for Success: Don’t skip chilling the dough! Properly chilling helps maintain the shape during baking and ensures those beautiful swirls hold up.
-
Even Slices: Use a sharp knife to slice the rolled log into even rounds. This helps maintain the swirl pattern and ensures uniform cooking for perfectly baked cookies.
-
Space It Out: Leave enough space between cookies on the baking sheet to avoid merging while they bake. Give them room to spread and achieve that ideal shape.
-
Visual Appeal: For an extra festive touch, consider rolling the edges of the cookies in crushed peppermint candies right after baking! This enhances sweetness and adds a lovely crunch.
Peppermint Swirl Cookies Variations
Feel free to get creative with these amazing cookies and make them your own with delightful twists and swaps!
-
Almond Extract: Replace peppermint extract with almond extract for a warm, nutty flavor that’s equally festive. It adds a cozy touch that invites everyone to savor each bite.
-
Festive Colors: Swap red food coloring for green to celebrate a “Grinch” theme. This variation is especially fun for themed gatherings and adds a whimsical touch to your dessert spread.
-
Chocolate Drizzle: Drizzle melted chocolate over the cooled cookies for an indulgent touch. The rich chocolate perfectly complements the refreshing peppermint, creating a dreamy flavor pairing.
-
Cream Cheese Filling: Create sandwich cookies by adding a layer of sweet cream cheese frosting or ganache in between two cookies. This twist brings a delightful creaminess that takes the cookies to the next level.
-
Cocoa Powder Twist: Mix in a couple of tablespoons of cocoa powder to part of the dough for a chocolate peppermint hybrid. This added depth of flavor creates a warm, holiday cocoa experience in every bite.
-
Nutty Crunch: Fold in chopped nuts like pecans or walnuts for a charming texture and added flavor. The crunchiness creates a beautiful contrast with the soft, buttery cookie.
-
Spicy Kick: Add a pinch of cayenne pepper or cinnamon to the dough to introduce a hint of warmth and spice. This subtle heat can elevate the overall festive feel of your holiday treat.
-
Crushed Candy Coating: Before baking, roll the edges of the cookies in crushed peppermint candies or festive sprinkles for an eye-catching finish. It adds extra sweetness and makes each cookie sparkle!
These variations allow you to explore different flavors and textures while keeping the core essence of Peppermint Swirl Cookies alive. And if you’re curious about quick treats, don’t forget to check out our easy-to-make Brownie Mix Cookies for another happy baking experience!
Make Ahead Options
These Peppermint Swirl Cookies are perfect for meal prep, allowing you to enjoy festive baking without the last-minute stress! You can prepare the cookie dough up to 3 days in advance. Simply follow the recipe’s steps through chilling the formed log, then wrap it tightly in plastic wrap and refrigerate. When you’re ready to bake, slice the chilled log into rounds and proceed with the baking instructions. Chilling the dough ahead ensures the cookies hold their beautiful shape and remain just as delicious when baked. This way, you’ll have fresh, festive treats at your fingertips, ready for any holiday gathering!
How to Store and Freeze Peppermint Swirl Cookies
Room Temperature: Store cookies in an airtight container at room temperature for up to one week to keep them soft and fresh.
Fridge: If you prefer a firmer texture, you can store the cookies in the fridge for up to 10 days; just ensure they’re well-wrapped.
Freezer: For longer storage, freeze the cookies in a single layer for up to three months. Once frozen, place them in an airtight container, separating layers with parchment paper to prevent sticking.
Reheating: To enjoy the cookies warm, place them on a baking sheet and reheat in a 350°F (175°C) oven for about 5-7 minutes. This will refresh their delightful texture and enhance their peppermint flavor!

Peppermint Swirl Cookies Recipe FAQs
How do I select the right peppermint extract?
Absolutely! When choosing peppermint extract, opt for a high-quality pure extract for the most authentic flavor. I often look for brands that don’t include artificial colors or flavors. If you want a milder peppermint taste, you could use less extract or even a bit of vanilla to balance the flavor.
What’s the best way to store Peppermint Swirl Cookies?
To keep your Peppermint Swirl Cookies soft and fresh, store them in an airtight container at room temperature for up to one week. If you prefer a firmer texture, consider refrigerating them for up to 10 days. Just make sure they are well-wrapped to avoid drying out.
Can I freeze Peppermint Swirl Cookies?
Certainly! To freeze, first, place the cookies in a single layer on a baking sheet and freeze them until solid. Then transfer the cookies to an airtight container, layering them with parchment paper to prevent sticking. These cookies can be frozen for up to three months, allowing you to enjoy a festive treat whenever you want!
How can I troubleshoot if my cookies spread too much?
Very! If your Peppermint Swirl Cookies spread excessively during baking, it could be due to the dough being too warm. Ensure to chill the dough properly—1 hour for the discs and an additional 2 hours once rolled into a log. Also, using softened butter instead of melted can help maintain their shape. Lastly, make sure you’ve evenly measured your flour; an accurate amount helps prevent spreading.
Are there any allergen considerations for this recipe?
Definitely! If baking for individuals with allergies, be aware that this recipe contains gluten from the all-purpose flour and can be modified for gluten-free needs with a suitable flour blend. Additionally, I recommend checking peppermint extract and food coloring labels for any allergens. Always customize the recipe based on personal dietary restrictions to ensure safety for everyone enjoying your cookies!
Irresistible Peppermint Swirl Cookies for Holiday Cheer
Ingredients
Equipment
Method
- In a medium bowl, whisk together flour, baking powder, and salt until well combined. Set aside.
- In a large mixing bowl, beat softened butter and granulated sugar together until light and fluffy.
- Add egg, vanilla extract, and peppermint extract, then mix until just combined.
- Gradually add the flour mixture to the wet ingredients, mixing until just combined.
- Divide the dough in half; leave one portion plain, color the other with red gel food coloring.
- Chill each half of the dough for at least 1 hour.
- Roll out each disc into rectangles about 12x10 inches and 1/4 inch thick.
- Invert the plain dough onto the red dough and roll tightly into a log shape.
- Shape the log into a uniform cylinder and chill again for 2 hours or overnight.
- Preheat the oven to 375°F (190°C). Slice the log into 1/4 inch thick rounds.
- Bake for 8-11 minutes until edges are lightly golden. Cool on a wire rack.
- Optionally, roll cooled cookies in coarse sugar or crushed peppermint candies.