
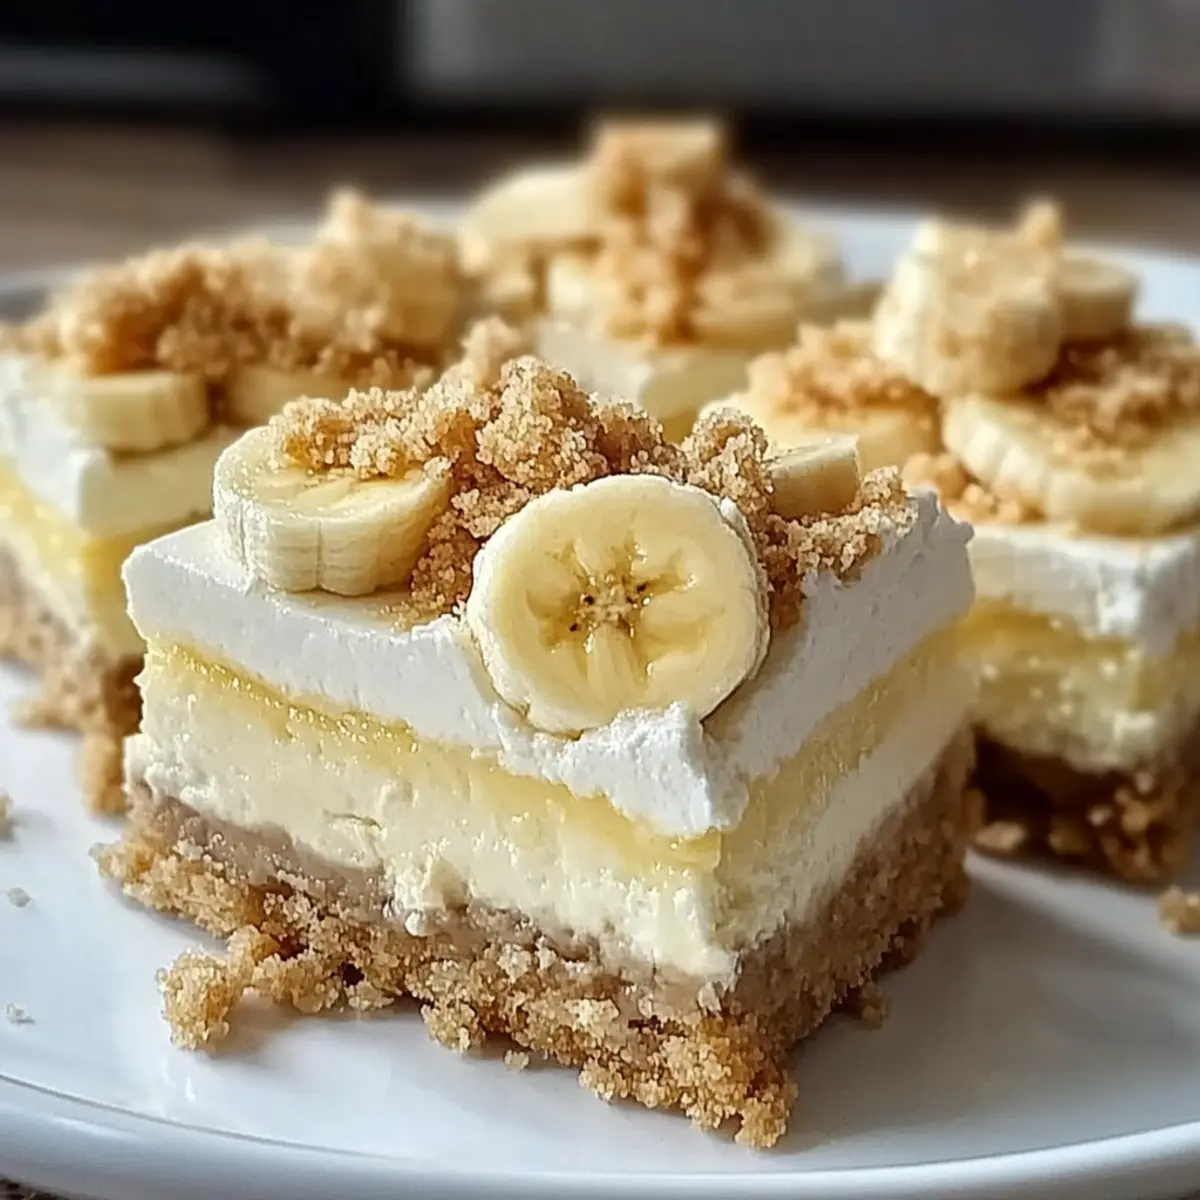
As I opened the fridge, a ripe bunch of bananas caught my eye, instantly transporting me back to childhood kitchen escapades filled with laughter and sweet treats. Today, I’m merging those cherished memories with a modern twist by making Banana Pudding Cheesecake Squares. This easy dessert combines the classic flavors of banana pudding with the creamy richness of cheesecake, all nestled in a crunchy vanilla wafer crust. What I love most about this recipe is that it’s perfect for gatherings and simple enough for even the newest bakers to tackle without fuss. Plus, it packs nostalgia into every bite! Ready to whip up this delightful treat that’s sure to impress? Let’s dive in!
Why are these squares so unforgettable?
Comforting, nostalgic flavors: These Banana Pudding Cheesecake Squares combine two beloved desserts into one, evoking sweet memories from childhood.
Easy to Make: With no-bake elements and straightforward steps, even novice bakers will shine in the kitchen.
Perfect for Sharing: Ideal for potlucks and family gatherings, this treat is sure to impress both friends and family alike.
Customizable Options: Make it your own by trying chocolate cookies for the crust or adding fresh banana slices for extra flavor, just like in our popular Cheesecake Stuffed Strawberries.
Crowd-Pleasing Delight: Each square is a creamy, rich indulgence that will leave everyone craving more!
Banana Pudding Cheesecake Squares Ingredients
• From the comforting crust to the creamy filling, let’s gather everything you need to bring this nostalgic dessert to life!
For the Crust
- Vanilla Wafer Cookies – Provides a sweet and crunchy crust; try substituting with graham crackers for a different flavor profile.
- Unsalted Butter – Binds the crust together; coconut oil is a great dairy-free alternative.
For the Cheesecake Filling
- Cream Cheese – Adds creamy texture and richness; soften it well for easy mixing.
- Granulated Sugar – Sweetens the cream cheese mixture; consider using a sugar substitute if desired.
- Large Eggs – Provides structure and stability to the cheesecake; ensure they are at room temperature for optimal blending.
For the Banana Layer
- Medium Ripe Bananas – Adds natural sweetness and flavor; using overripe bananas elevates the taste.
- Instant Banana Pudding Mix – Enhances the banana flavor and thickens the pudding layer; can be swapped for vanilla pudding mix for a milder banana intensity.
- Cold Milk – Combines with the pudding mix for a creamy layer; nut milk works wonderfully for a dairy-free option.
For the Topping
- Whipped Topping – Adds a light, fluffy finish; homemade whipped cream is a fresh alternative for a delicious touch.
Step‑by‑Step Instructions for Banana Pudding Cheesecake Squares
Step 1: Preheat the Oven
Begin by preheating your oven to 325°F (163°C). While it warms up, prepare a 9×9-inch baking dish by lining the bottom and sides with parchment paper, leaving some overhang for easy removal later. This step is essential for ensuring your Banana Pudding Cheesecake Squares cook evenly and release smoothly.
Step 2: Make the Crust
In a mixing bowl, combine crushed vanilla wafer cookies with melted unsalted butter, mixing until well combined. Press this mixture firmly into the bottom of your lined baking dish, creating an even layer. Aim for a tight crust that holds together well; this will be the foundation of your delicious cheesecake squares.
Step 3: Prepare Cream Cheese Mixture
Using a hand mixer, beat softened cream cheese with granulated sugar in a large bowl until the mixture is creamy and smooth. Add the large eggs one at a time, mixing thoroughly after each addition until fully incorporated. This creamy mixture will form the rich filling of your Banana Pudding Cheesecake Squares.
Step 4: Mix in Bananas
Gently fold in the mashed medium ripe bananas until they are fully blended into the cream cheese mixture. Once combined, spread the mixture evenly over the crust you’ve already prepared. This delightful layer will bring the comforting banana flavor to your cheesecake squares.
Step 5: Prepare Pudding Layer
In a separate bowl, whisk the instant banana pudding mix with cold milk for about 2 minutes, allowing it to thicken. Once it reaches a pudding-like consistency, carefully pour this layer over the cheesecake filling, spreading it evenly to create a smooth surface. This layer brings an extra burst of banana flavor to your dessert.
Step 6: Bake
Place the assembled dish in the preheated oven and bake for approximately 40 minutes. The center should be set, but a slight jiggle is okay; it will firm up as it cools. Keep an eye on it towards the end, as the aroma will fill your kitchen, signaling that your Banana Pudding Cheesecake Squares are almost ready.
Step 7: Cool and Refrigerate
Once baking is complete, remove the dish from the oven and allow it to cool completely at room temperature. After cooling, transfer the squares to the refrigerator and chill for at least 2 hours, or overnight if possible. This refrigeration helps set the layers and deepen the flavors, ensuring a delightful treat.
Step 8: Serve
When ready to serve, top your chilled Banana Pudding Cheesecake Squares with whipped topping. Use a sharp knife to slice them into squares, exposing the beautiful layers inside. These squares are perfect for sharing with family and friends, bringing nostalgia and joy to every gathering.
How to Store and Freeze Banana Pudding Cheesecake Squares
Fridge: Store leftover squares in an airtight container in the fridge for up to 3 days. This helps maintain their creamy texture and fresh flavors.
Freezer: If you want to keep them longer, wrap the squares tightly in plastic wrap and then in aluminum foil. They can be frozen for up to 2 months.
Thawing: To enjoy frozen Banana Pudding Cheesecake Squares, simply thaw them overnight in the fridge before serving. This will ensure they regain their deliciously creamy consistency.
Reheating: For serving, you don’t need to reheat; these squares are best enjoyed chilled directly from the fridge, topped with whipped cream for a light finish.
Expert Tips for Banana Pudding Cheesecake Squares
• Soften Cream Cheese: Make sure your cream cheese is fully softened before mixing to prevent lumps in your batter, ensuring a smooth filling.
• Proper Layering: When preparing the layers, allow each to set properly before adding the next. This will enhance texture in your Banana Pudding Cheesecake Squares.
• Don’t Rush Cooling: Allow the squares to cool completely before refrigerating. This step is crucial for achieving a firm, sliceable dessert that’s packed with flavor.
• Avoid Overmixing: When incorporating eggs and bananas, mix just until combined. Overmixing can lead to a denser texture, which you’ll want to avoid for these light squares.
• Chill Overnight: For the best flavor, refrigerate the squares overnight. This allows the flavors to meld together, making every bite enjoyably delightful.
Banana Pudding Cheesecake Squares Variations
Feel free to sprinkle your personal touch on these delightful squares, transforming them into your family’s new favorite treat!
-
Chocolate Twist: Substitute vanilla wafer cookies with chocolate cookies for a rich, chocolaty flavor. The chocolate pairs beautifully with the banana, creating a decadent experience that’s hard to resist.
-
Extra Banana Love: Add a layer of sliced bananas on top of the cheesecake before pouring the pudding mix. This creates a visually appealing and flavor-packed bonus layer, reminiscent of your mom’s banana cream pie.
-
Flavorful Pudding Mix: Try using different flavored pudding mixes, such as butterscotch or coconut, for varied taste experiences. Each flavor brings its own charm, making this dessert feel fresh time after time.
-
Nutty Crunch: Top the finished squares with chopped nuts like pecans or walnuts for some added texture and flavor. The crunchy bits create a delightful contrast to the creamy layers beneath, enhancing the overall enjoyment.
-
Dairy-Free: For a dairy-free version, swap cream cheese for vegan cream cheese, and use coconut cream instead of whipped topping. You’ll still enjoy the same great taste, making it friendly for everyone at your table.
-
Spiced Up: Add a pinch of cinnamon or nutmeg into the cream cheese mixture for a warm, cozy twist. These warm spices invoke memories of family gatherings and can elevate the banana flavor beautifully.
-
Fun Variations: Incorporate some crushed cookies or candies into the pudding layer. Imagine the surprise of crunching on a cookie or piece of candy while enjoying your cheesecake squares!
-
Refreshing Topper: Instead of whipped topping, consider serving with a drizzle of caramel or chocolate sauce for an indulgent finish. Pairing with our Cheesecake Stuffed Strawberries makes for a vibrant dessert platter everyone will love.
Customization is the heart of home cooking, so don’t hesitate to experiment and find your own favorite combinations!
Make Ahead Options
These Banana Pudding Cheesecake Squares are perfect for busy home cooks looking to save time! You can prepare the crust and cream cheese filling up to 24 hours in advance—just store them separately in the refrigerator. To maintain quality, keep the crust in an airtight container to prevent it from becoming soggy. You can also mix the pudding layer and keep it chilled for about 3 days. When you’re ready to serve, simply layer the cream cheese mixture over the crust, add the pudding layer, and refrigerate for at least 2 hours (or overnight for best results). This way, you’ll enjoy a delicious dessert without any last-minute hassle!
What to Serve with Banana Pudding Cheesecake Squares
Transport your dessert experience to another level with perfect pairings that delight the palate and evoke nostalgia.
- Creamy Vanilla Ice Cream: A scoop of ice cream adds a cool, creamy contrast that beautifully complements the richness of the cheesecake squares.
- Fresh Berries: Bright, tart raspberries or strawberries provide a refreshing pop of color and flavor, cutting through the sweetness.
- Homemade Whipped Cream: Light and fluffy, it enhances the dessert’s creamy texture and adds an inviting touch that’s hard to resist.
- Mint Leaves: A few fresh mint leaves can elevate your serving, adding a pop of freshness that complements the banana flavor.
- Caramel Sauce: Drizzle warm caramel for a luscious addition that brings a sweet finish to the creamy cheesecake layers.
- Chocolate Syrup: For chocolate lovers, a drizzle of chocolate syrup provides an indulgent contrast, perfect for those who crave a richer dessert.
- Coffee or Espresso: The earthy notes of coffee or a shot of espresso pair wonderfully, balancing the sweetness and enhancing the overall flavor profile.
- Lemonade or Citrus Spritzers: A refreshing beverage with citrus brightness can cleanse the palate and elevate your dessert experience.
- Coconut Macaroons: For a contrasting texture, serve with chewy coconut macaroons to layer flavors and create a delightful bite.
- Brownie Bites: Offering a fudgy counterpart, brownie bites add another beloved nostalgic flavor to your dessert spread, making it a true feast!
Banana Pudding Cheesecake Squares Recipe FAQs
How do I choose ripe bananas for this recipe?
Absolutely! For the best flavor, use medium ripe bananas with a few brown spots. The sweeter and more flavorful they are, the better your Cheesecake Squares will taste. Overripe bananas offer a richer banana flavor, making them ideal for this recipe.
What is the best way to store leftovers?
Store any leftover Banana Pudding Cheesecake Squares in an airtight container in the fridge for up to 3 days. This will keep them fresh and maintain their delightful creamy texture. If you’re not planning to eat them soon, consider freezing them!
Can I freeze Banana Pudding Cheesecake Squares?
Yes! To freeze, wrap the squares tightly in plastic wrap, then secure them with aluminum foil to prevent freezer burn. They can be stored in the freezer for up to 2 months. When you’re ready to enjoy them, simply thaw them overnight in the fridge for best results.
What should I do if my cheesecake cracks during baking?
Very! If you notice cracks in your dessert’s surface, don’t worry at all. This is common and tends to happen as the cheesecake cools. Since the squares are best served in pieces, any imperfections won’t matter – just slice them up, and they’ll still be delicious.
Are these cheesecake squares suitable for people with dairy allergies?
Great question! You can make these Banana Pudding Cheesecake Squares dairy-free by substituting cream cheese with a dairy-free cream cheese alternative and using coconut oil instead of butter. For the whipped topping, consider using a coconut whipped topping to keep it dairy-free and delicious!
Can I use a different pudding mix?
Absolutely! While the recipe calls for instant banana pudding mix to enhance the banana flavor, feel free to use vanilla or even butterscotch pudding mix for a fun twist. Just keep in mind that this will alter the overall banana flavor profile in your Cheesecake Squares.
Banana Pudding Cheesecake Squares That Bring Back Sweet Memories
Ingredients
Equipment
Method
- Preheat your oven to 325°F (163°C) and prepare a 9×9-inch baking dish by lining it with parchment paper.
- Combine crushed vanilla wafer cookies with melted unsalted butter in a mixing bowl, then press into the bottom of the baking dish to form a crust.
- Beat softened cream cheese with granulated sugar until creamy, then mix in large eggs one at a time.
- Fold in mashed ripe bananas into the cream cheese mixture, then spread this evenly over the crust.
- Whisk instant banana pudding mix with cold milk until it thickens, then pour this over the cheesecake filling.
- Bake in the preheated oven for about 40 minutes until set.
- Allow the dish to cool completely at room temperature, then refrigerate for at least 2 hours or overnight.
- Top with whipped topping, slice, and serve chilled.