
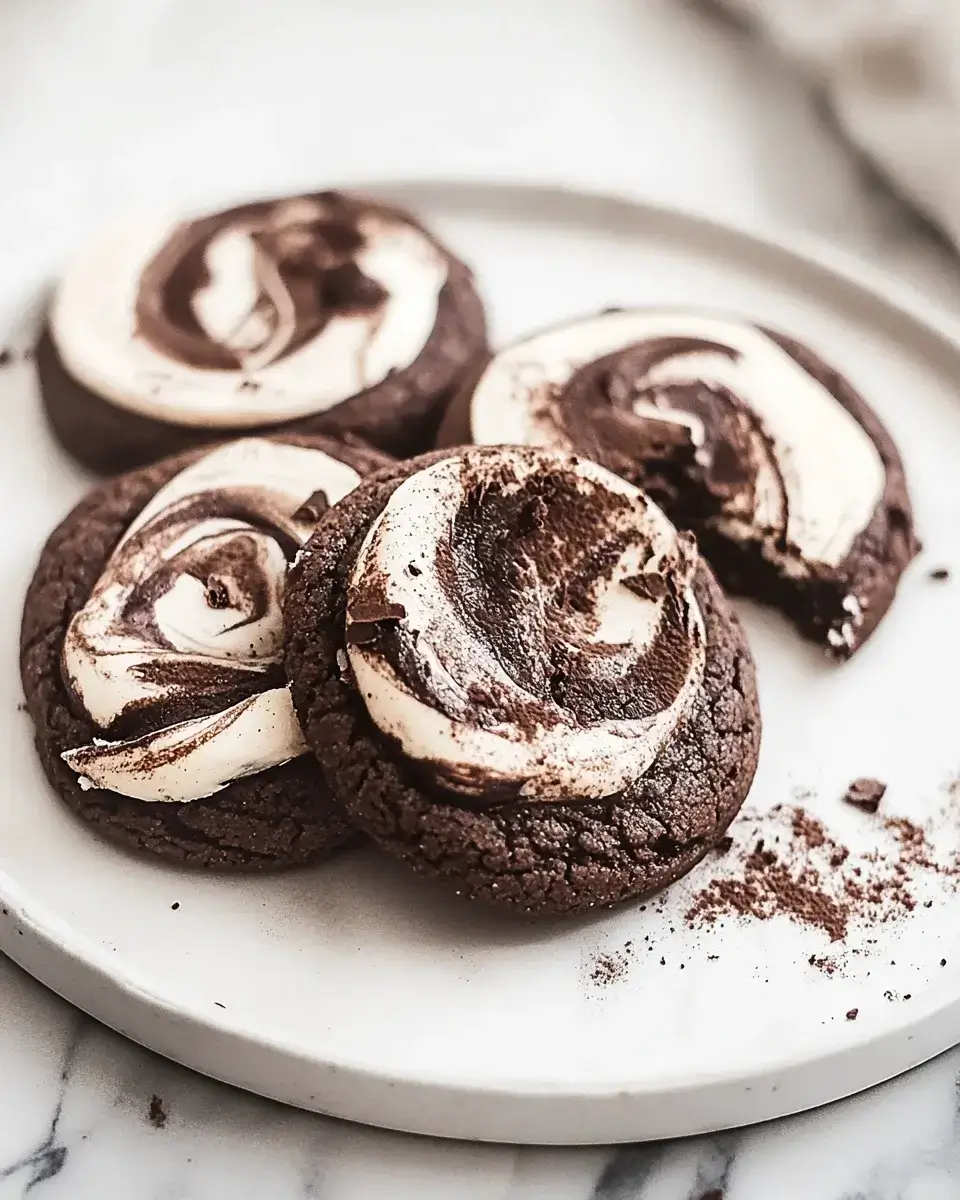
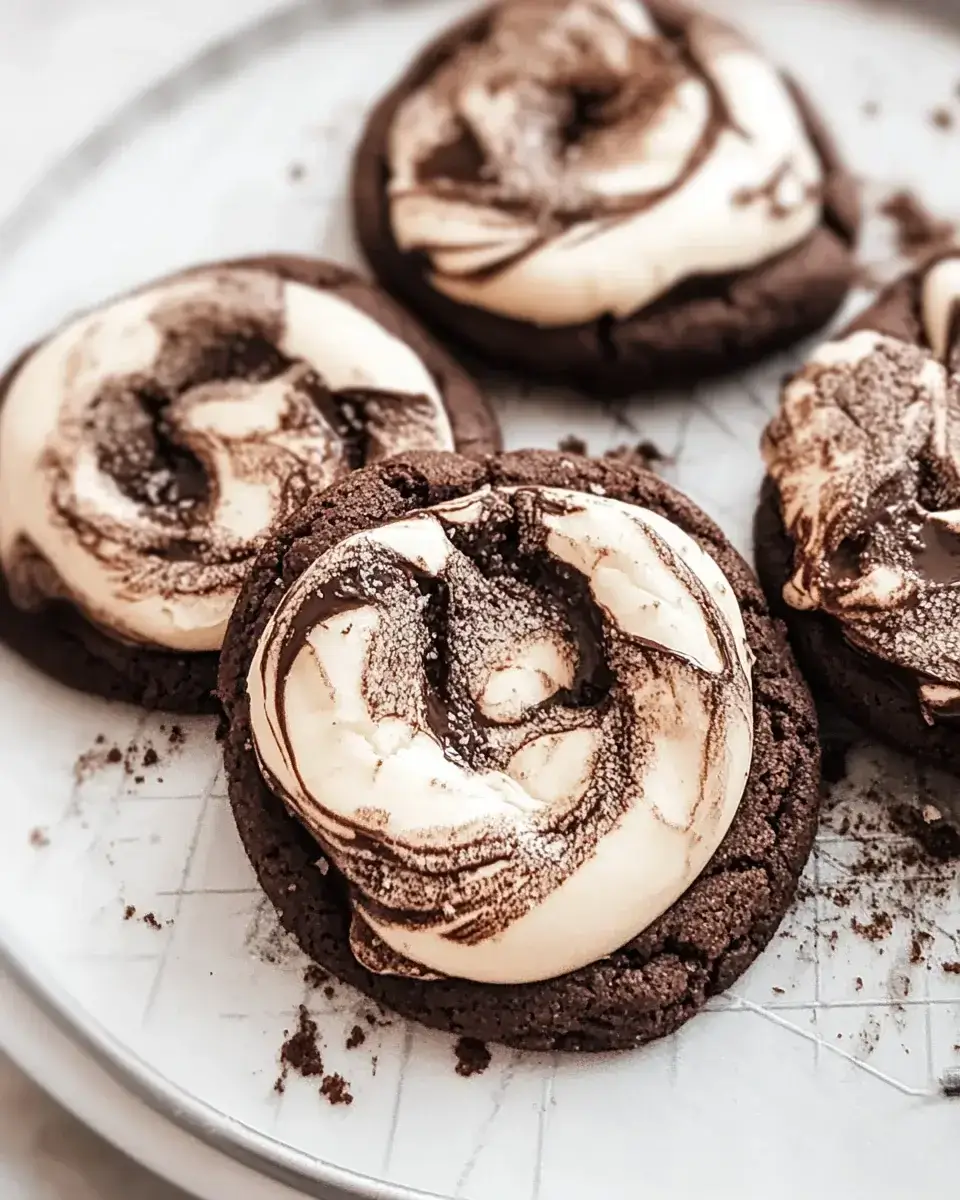
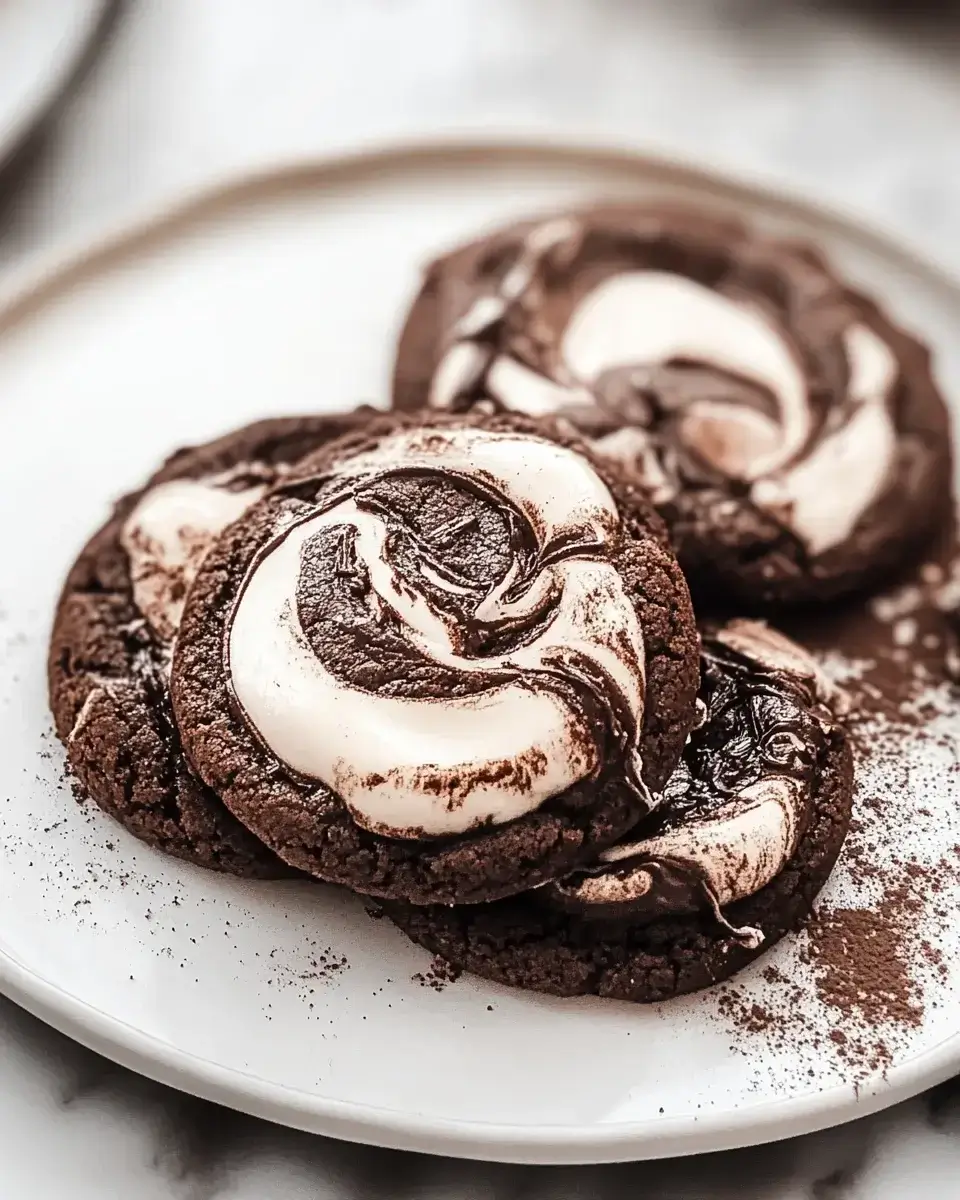
Introduction to Chocolate Marshmallow Swirl Cookies
There’s something magical about the combination of chocolate and marshmallow that takes me back to my childhood.
Those lazy afternoons spent in the kitchen, experimenting with sweet treats, always ended with sticky fingers and big smiles.
Now, as a passionate home cook, I want to share that joy with you through these Chocolate Marshmallow Swirl Cookies.
Perfect for a quick dessert after a long day or a delightful surprise for your loved ones, these cookies are a decadent treat that will impress anyone.
Let’s dive into this delicious adventure together!
Why You’ll Love This Chocolate Marshmallow Swirl Cookies
These Chocolate Marshmallow Swirl Cookies are not just a dessert; they’re a celebration of flavor and simplicity.
With a rich chocolate base and a creamy filling, they’re sure to satisfy any sweet tooth.
The best part? They come together quickly, making them perfect for busy weeknights or last-minute gatherings.
You’ll love how easy they are to make, and the smiles they bring will be worth every bite!
Ingredients for Chocolate Marshmallow Swirl Cookies
When it comes to baking, the right ingredients can make all the difference.
For these Chocolate Marshmallow Swirl Cookies, you’ll need a mix of pantry staples and a few special items to create that rich, decadent flavor.
Here’s what you’ll need:
- All-purpose flour: The backbone of your cookies, providing structure and texture.
- Baking powder and baking soda: These leavening agents help your cookies rise and become fluffy.
- Salt: A pinch enhances the sweetness and balances flavors.
- Unsweetened cocoa powder: This is where the chocolate magic begins, giving your cookies that deep, rich flavor.
- Granulated sugar and brown sugar: A combination of these sugars adds sweetness and moisture, creating a chewy texture.
- Unsalted butter: Softened butter is key for a creamy batter and rich taste.
- Eggs: They bind everything together and add moisture.
- Vanilla extract: A splash of vanilla elevates the flavor profile, making it irresistible.
- Buttermilk: This adds tanginess and keeps the cookies moist.
- Boiling water: It helps to bloom the cocoa powder, intensifying the chocolate flavor.
- Heavy cream: Essential for the creamy filling, it adds richness and smoothness.
- Cream cheese: This gives the filling a delightful tang and creamy texture.
- Powdered sugar: Used in both the filling and frosting, it sweetens without adding graininess.
- Optional ingredients: For a mocha twist, consider adding instant coffee granules to the boiling water. Chocolate chips can also be a fun addition for extra chocolatey goodness.
Exact measurements for these ingredients can be found at the bottom of the article, ready for you to print and take to the kitchen!
How to Make Chocolate Marshmallow Swirl Cookies
Step 1: Preheat and Prepare
Preheat your oven to 350°F (175°C).
While it warms up, line a muffin tin with cupcake liners.
This step is crucial for easy removal later.
Make sure the liners are snug in the tin to hold the batter perfectly.
The anticipation of those cookies baking will have your kitchen smelling divine!
Step 2: Mix Dry Ingredients
In a medium bowl, whisk together the all-purpose flour, baking powder, baking soda, salt, and cocoa powder.
This blend is the foundation of your cookies, ensuring they rise beautifully.
Whisking helps to aerate the mixture, making it light and fluffy.
Take a moment to enjoy the rich aroma of cocoa as you mix.
It’s a small but delightful part of the process!
Step 3: Cream Butter and Sugars
In a large bowl, beat together the granulated sugar, brown sugar, and softened butter until the mixture is light and fluffy.
This step is where the magic begins!
The sugars will dissolve into the butter, creating a creamy texture.
Use an electric mixer for best results, but a good old-fashioned whisk works too.
Just be prepared for a workout!
Step 4: Add Eggs and Vanilla
Now, incorporate the eggs one at a time, mixing well after each addition.
This ensures they blend smoothly into the batter.
Next, stir in the vanilla extract for that irresistible flavor boost.
The combination of eggs and vanilla will create a rich, velvety base for your cookies.
Trust me, you’ll want to savor this moment!
Step 5: Combine Dry and Wet Ingredients
Gradually mix in the dry ingredients with the buttermilk, alternating between the two.
Start and end with the dry ingredients for the best texture.
This method keeps the batter from becoming too thick or lumpy.
Mix until just combined; overmixing can lead to tough cookies.
Keep it gentle, and your cookies will be soft and chewy!
Step 6: Add Boiling Water
Stir in the boiling water until the batter is smooth and well combined.
This step is key for enhancing the chocolate flavor.
The heat helps to bloom the cocoa powder, making it richer.
Don’t worry if the batter seems thin; it’s supposed to be that way!
This will lead to a moist and decadent cookie.
Step 7: Bake the Cookies
Fill each cupcake liner about two-thirds full with the batter.
This allows room for the cookies to rise without overflowing.
Bake in your preheated oven for 18-20 minutes.
Keep an eye on them; a toothpick inserted into the center should come out clean.
The smell wafting through your kitchen will be pure bliss!
Step 8: Prepare the Creamy Filling
While the cookies cool, beat the heavy cream in a medium bowl until stiff peaks form.
In another bowl, beat the cream cheese until smooth.
Gradually add the powdered sugar and cocoa powder, mixing until combined.
Gently fold the whipped cream into the cream cheese mixture.
This creamy filling is what makes these cookies truly special!
Step 9: Fill the Cookies
Once the cookies are completely cooled, use a small knife or cupcake corer to remove a portion from the center of each cookie.
This creates a perfect cavity for the filling.
Fill each cavity generously with the creamy chocolate filling.
Don’t be shy; the more, the merrier!
This is where the magic happens, and your cookies come to life.
Step 10: Make the Frosting
To make the frosting, beat the softened butter in a bowl until creamy.
Gradually add the powdered sugar and cocoa powder, mixing until smooth.
Then, add the milk and vanilla extract, beating until the frosting is light and fluffy.
This frosting is rich and decadent, perfect for topping your cookies.
You’ll want to taste it straight from the bowl!
Step 11: Frost the Cookies
Finally, frost the filled cookies with the chocolate frosting, creating a beautiful swirl on top.
Use a piping bag for a professional touch, or simply spread it on with a knife.
The swirls add a delightful visual appeal.
Each cookie will look as good as it tastes!
Get ready to impress your friends and family with these stunning treats!
Tips for Success
- Make sure your butter is softened for easy creaming with sugars.
- Don’t skip the boiling water; it enhances the chocolate flavor.
- Use a cookie scoop for even batter distribution in the liners.
- Let the cookies cool completely before filling to prevent melting.
- For a fun twist, try adding a pinch of sea salt on top of the frosting.
Equipment Needed
- Muffin tin: Essential for baking your cookies; a cupcake pan works too.
- Mixing bowls: Use a variety of sizes; glass or metal bowls are great.
- Electric mixer: A hand mixer speeds up the process, but a whisk will do.
- Measuring cups and spoons: Accurate measurements are key for baking success.
- Spatula: Perfect for folding and scraping down the sides of bowls.
Variations
- Nutty Delight: Add chopped nuts like walnuts or pecans to the batter for a crunchy texture.
- Mint Chocolate: Incorporate a few drops of peppermint extract into the batter for a refreshing twist.
- Gluten-Free Option: Substitute all-purpose flour with a gluten-free blend to accommodate dietary needs.
- Vegan Version: Use plant-based butter, flax eggs, and non-dairy milk for a delicious vegan treat.
- Spicy Kick: Add a pinch of cayenne pepper or cinnamon to the batter for a surprising flavor boost.
Serving Suggestions
- Pair with Coffee: A rich cup of coffee complements the chocolate flavors beautifully.
- Serve with Ice Cream: A scoop of vanilla or mint chocolate chip ice cream adds a delightful contrast.
- Presentation: Arrange cookies on a decorative platter and drizzle with chocolate sauce for an elegant touch.
- Garnish: Top with chocolate shavings or a sprinkle of sea salt for added flair.
FAQs about Chocolate Marshmallow Swirl Cookies
Can I make these cookies ahead of time?
Absolutely! You can bake the cookies and store them in an airtight container for up to three days. Just fill and frost them on the day you plan to serve for the best texture and flavor.
What can I substitute for buttermilk?
If you don’t have buttermilk on hand, you can easily make a substitute. Just mix one cup of milk with one tablespoon of vinegar or lemon juice. Let it sit for about five minutes, and you’re good to go!
How do I store leftover cookies?
Store any leftover Chocolate Marshmallow Swirl Cookies in an airtight container at room temperature. They’ll stay fresh for a few days, but trust me, they won’t last long!
Can I freeze these cookies?
Yes! You can freeze the baked cookies without frosting for up to three months. Just make sure to wrap them tightly in plastic wrap and place them in a freezer-safe bag. Thaw them at room temperature before filling and frosting.
What’s the best way to serve these cookies?
These cookies are delightful on their own, but for an extra treat, serve them warm with a scoop of ice cream or alongside a hot cup of coffee. The combination is simply heavenly!
Final Thoughts
Baking these Chocolate Marshmallow Swirl Cookies is more than just a recipe; it’s an experience filled with joy and nostalgia.
Each step, from mixing the batter to swirling on the frosting, brings back memories of laughter and creativity in the kitchen.
The moment you take that first bite, the rich chocolate and creamy filling will transport you to a place of pure bliss.
Whether you’re sharing them with family or enjoying them solo, these cookies are sure to bring smiles and satisfaction.
So, roll up your sleeves and let the magic unfold—your taste buds will thank you!
Chocolate Marshmallow Swirl Cookies: A Decadent Delight!
Ingredients
Method
- Preheat your oven to 350°F (175°C) and line a muffin tin with cupcake liners.
- In a medium bowl, whisk together the flour, baking powder, baking soda, salt, and cocoa powder.
- In a large bowl, beat together the granulated sugar, brown sugar, and softened butter until light and fluffy.
- Add the eggs one at a time, mixing well after each addition, then stir in the vanilla extract.
- Gradually mix in the dry ingredients, alternating with the buttermilk, starting and ending with the dry ingredients.
- Stir in the boiling water until the batter is smooth.
- Fill each cupcake liner about two-thirds full with the batter.
- Bake for 18-20 minutes or until a toothpick inserted into the center comes out clean.
- Allow the cupcakes to cool in the pan for 5 minutes before transferring them to a wire rack to cool completely.
- For the creamy chocolate filling, beat the heavy cream in a medium bowl until stiff peaks form.
- In another bowl, beat the cream cheese until smooth, then gradually add the powdered sugar and cocoa powder.
- Mix in the vanilla extract and gently fold the whipped cream into the cream cheese mixture until well combined.
- Once the cupcakes are completely cooled, use a small knife or cupcake corer to remove a small portion from the center of each cupcake.
- Fill each cavity with the creamy chocolate filling.
- To make the frosting, beat the softened butter in a bowl until creamy.
- Gradually add the powdered sugar and cocoa powder, mixing until smooth.
- Add the milk and vanilla extract, beating until the frosting is light and fluffy.
- Frost the filled cupcakes with the chocolate frosting, swirling it on top for a decorative finish.
Nutrition
Notes
- For a mocha flavor, add 1 tablespoon of instant coffee granules to the boiling water before mixing it into the batter.
- Try adding chocolate chips to the batter for an extra chocolatey treat.