
As I rummaged through my pantry the other day, I stumbled upon a jar of creamy peanut butter, and a wave of nostalgia hit me. Remembering the delight of biting into a homemade Nutter Butter, I decided it was time to recreate that magic right in my kitchen! These Homemade Peanut Butter Nutter Butters are not only a simpler, more flavorful alternative to their store-bought counterparts, but they also promise a fun cooking experience with the whole family. Plus, they’re perfect for any occasion—whether you’re snuggling up with a movie or packaging them as a thoughtful gift. Trust me, making these cookies will ignite that joy of baking we all cherish! Are you ready to fill your home with the warm aroma of fresh-baked cookies?

Why are Homemade Nutter Butters irresistible?
Deliciously Nostalgic: These Homemade Nutter Butters bring back memories of childhood treats, offering a taste of joy with every bite.
Effortless to Make: This easy recipe requires minimal effort, perfect for novice bakers or those short on time.
Decadently Creamy Filling: The rich peanut butter filling is what sets these cookies apart, delivering a delightful creaminess that fills your senses.
Versatile Enjoyment: Whether served at a picnic, party, or movie night, these cookies steal the show and impress everyone.
Customize Your Flavor: Feel free to get creative—add chocolate chips or even dip them in chocolate for an indulgent twist! Try pairing them with a glass of cold milk for the ultimate experience.
Homemade Nutter Butters Ingredients
For the Cookies
• All-purpose flour – Provides structure. Can substitute with gluten-free flour.
• Baking soda – Helps cookies rise. Ensure it’s fresh for optimal results.
• Kosher salt – Enhances flavor. Can substitute with regular salt but reduce quantity.
• Unsalted butter (softened) – Adds richness and moisture to cookies.
• Light brown sugar – Adds sweetness and moisture, yielding a chewy texture. Can replace with granulated sugar for a different taste.
• Creamy peanut butter – The main flavor and fat source for both the cookies and the filling. Chunky peanut butter can be used for added texture.
• Large egg – Binds the ingredients. Can use a flax egg for a vegan option.
• Pure vanilla extract – Adds depth of flavor. Ensure it’s pure for the best taste.
• Sugar (for rolling) – Coats the cookies for added sweetness and a crunchy texture.
For the Peanut Butter Filling
• Unsalted butter (softened) – Adds creaminess to the filling.
• Creamy peanut butter – Main flavor in the filling. Can use natural peanut butter for a healthier option.
• Powdered sugar – Sweetens and thickens the filling.
• Milk – Adjusts consistency of the filling. Non-dairy milk works as a substitute.
• Vanilla extract – Enhances flavor profile of the filling.
Are you ready for some delightful homemade Nutter Butters? Let’s gather these ingredients and bake up some nostalgia!
Step‑by‑Step Instructions for Homemade Nutter Butters
Step 1: Preheat the Oven
Begin by preheating your oven to 350°F (175°C). Line a baking sheet with parchment paper while you prepare your cookie dough. This step ensures that your Homemade Nutter Butters will bake evenly and prevent sticking, allowing for easy transfer later.
Step 2: Mix the Dry Ingredients
In a medium bowl, whisk together 1 ½ cups of all-purpose flour, 1 teaspoon of baking soda, and ½ teaspoon of kosher salt until well combined. This creates a uniform dry mixture that will help your cookies rise and have the right texture, ensuring your Nutter Butters have a perfect balance across each bite.
Step 3: Cream the Wet Ingredients
In a large mixing bowl, combine ½ cup of softened unsalted butter, ¾ cup of light brown sugar, and ¾ cup of creamy peanut butter. Using an electric mixer, beat these ingredients on medium speed until the mixture is fluffy and light, about 2-3 minutes. The creamy base introduces a delicious richness that is essential for your Homemade Nutter Butters.
Step 4: Combine Wet and Dry Mixtures
Add one large egg and 1 teaspoon of pure vanilla extract to your creamed mixture, mixing until well combined. Gradually incorporate the dry ingredients, mixing just until the dough forms and is fully combined. Be careful not to overmix, as this could result in tough cookies instead of the soft texture you desire.
Step 5: Shape the Cookies
Scoop about 1.5 tablespoons of dough and roll it into a small ball, then shape it into a log approximately 2 inches long. Roll each log in sugar for a sweet crunch. Place them on the prepared baking sheet, ensuring enough space between the logs to allow for spreading as they bake, forming your iconic Homemade Nutter Butters.
Step 6: Bake the Cookies
Bake the cookies in the preheated oven for 10-12 minutes, or until the edges are lightly browned. You want them to be slightly firm but soft in the center, which guarantees that delightful chewiness upon cooling. Once baked, remove them from the oven and allow them to rest on the baking sheet for a few minutes.
Step 7: Cool the Cookies
Transfer the cookies to a wire rack to cool completely, which will take about 10-15 minutes. This step is crucial, as the cookies will firm up a bit more as they cool, ensuring the ultimate texture for your Homemade Nutter Butters.
Step 8: Prepare the Peanut Butter Filling
In a medium bowl, beat together ½ cup of softened unsalted butter, ¾ cup of creamy peanut butter, and 2 cups of powdered sugar until the mixture is light and fluffy. Add 2 tablespoons of milk for the perfect consistency, adjusting as needed, and mix in 1 teaspoon of vanilla extract to amplify the flavor of your filling.
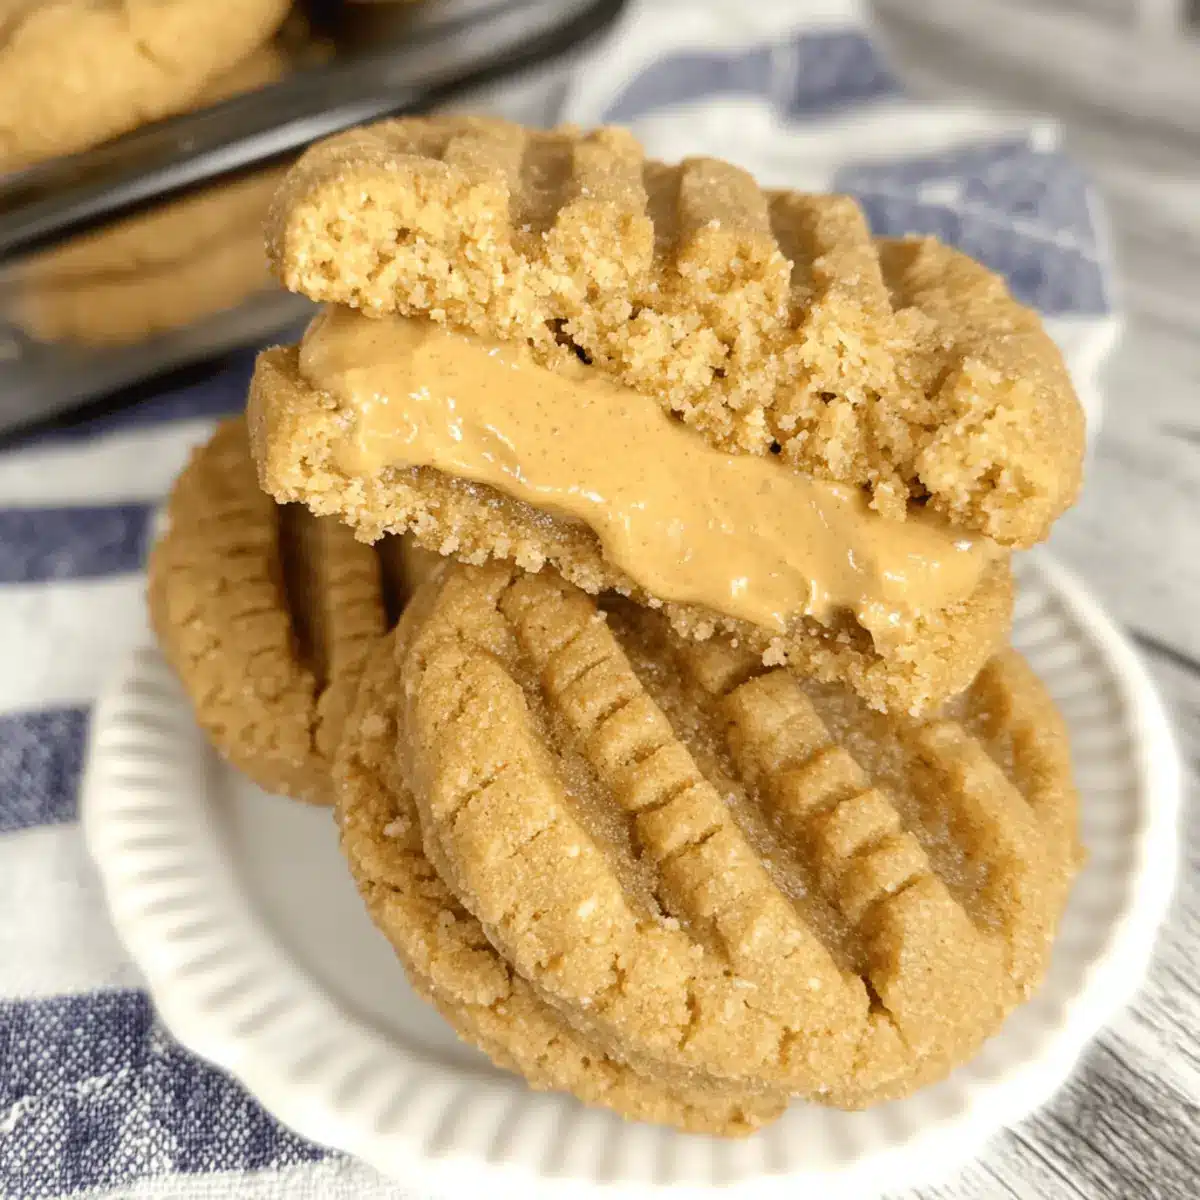
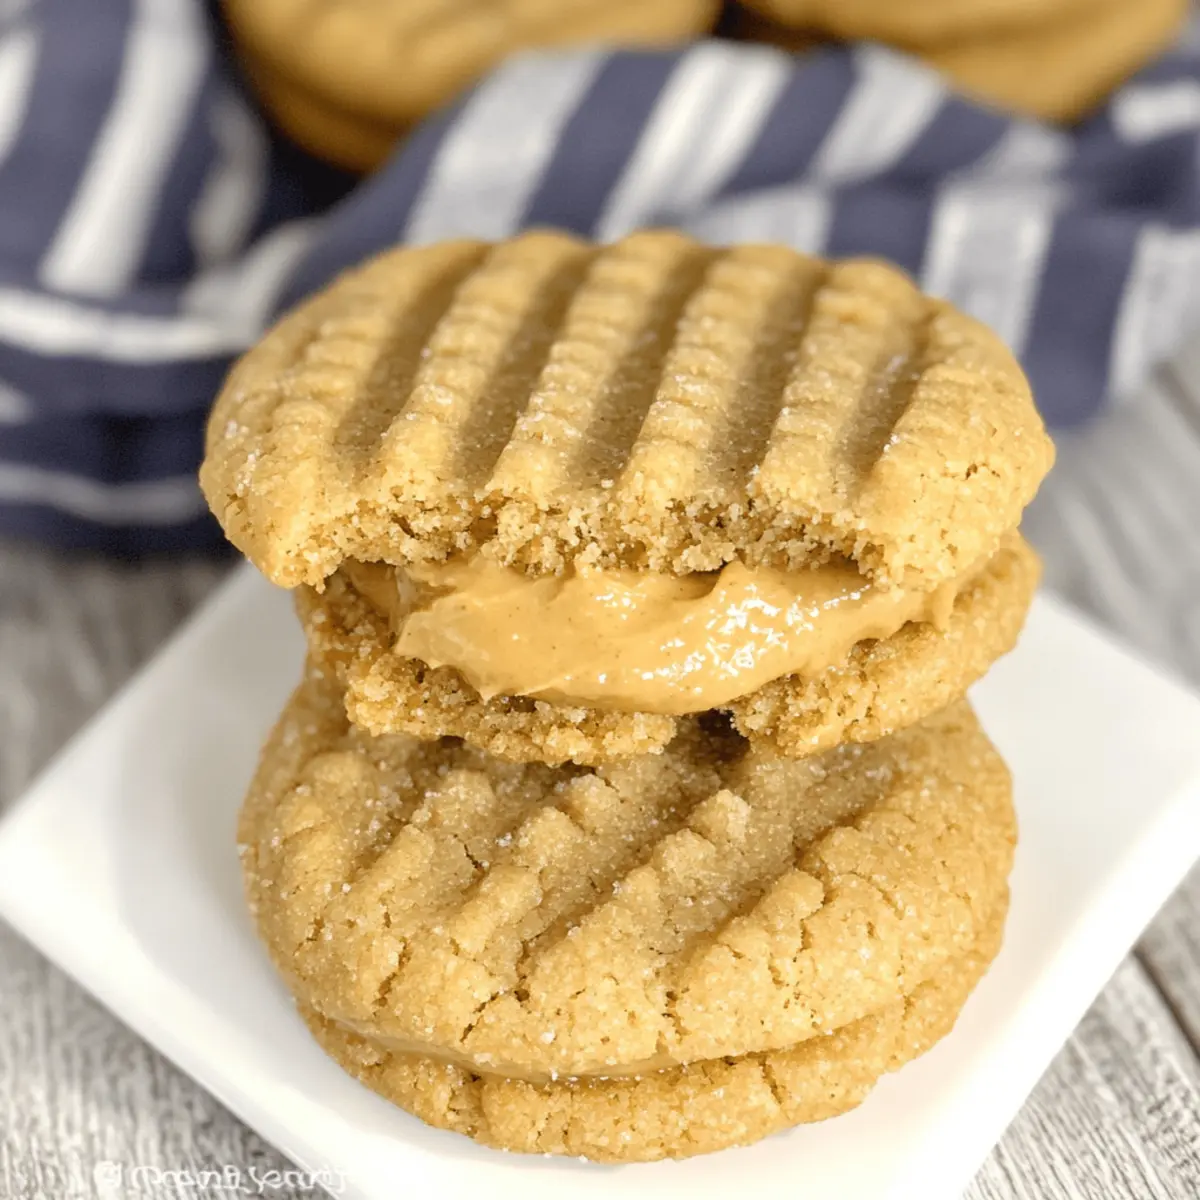
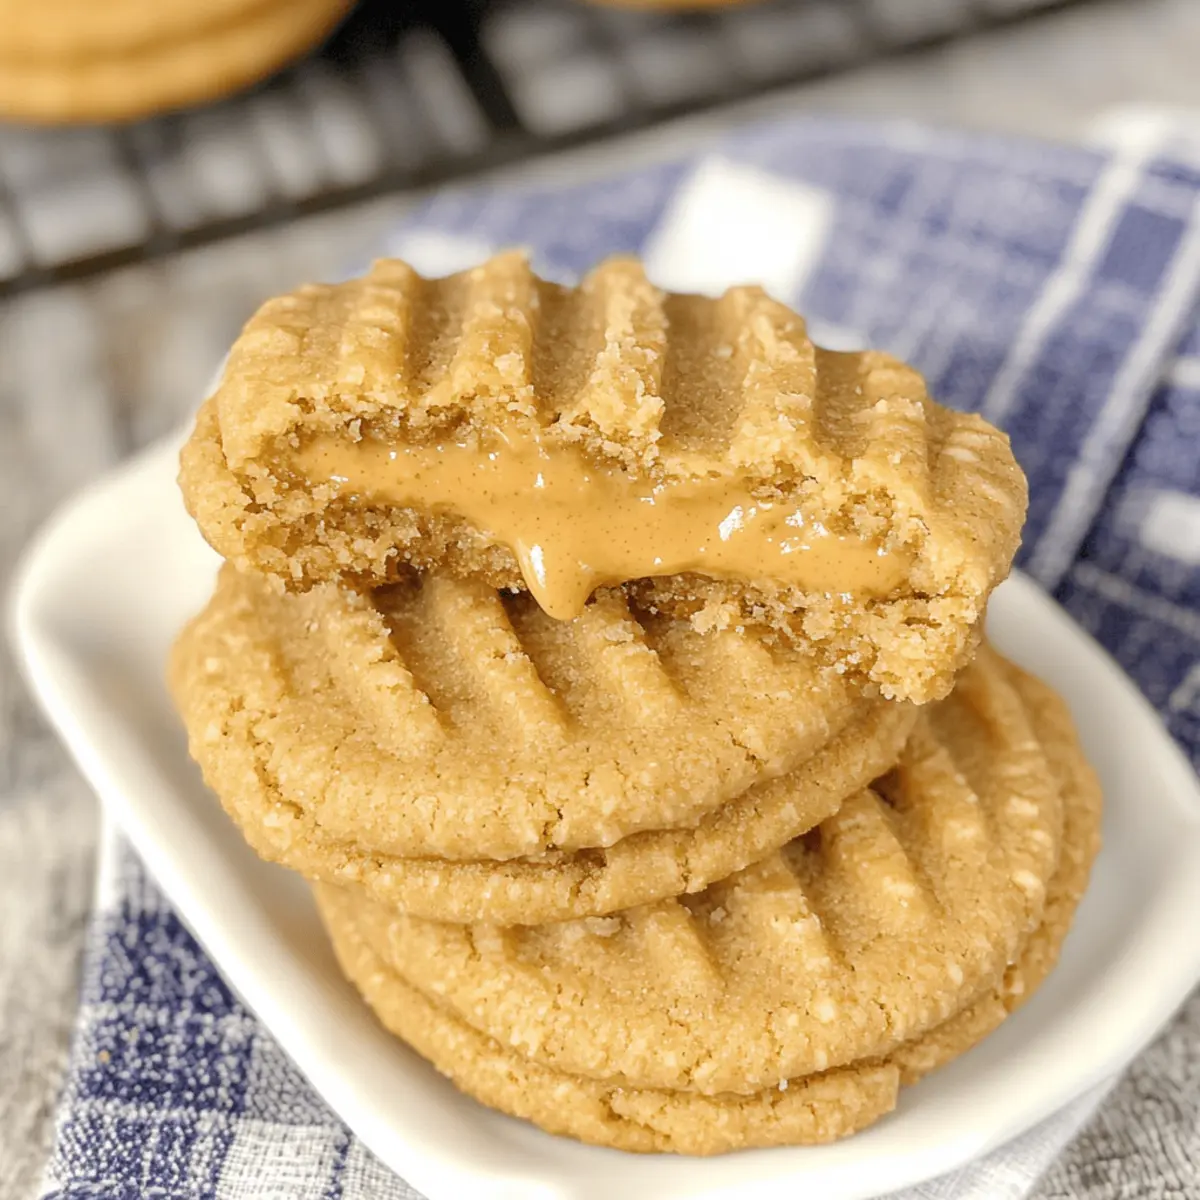
Step 9: Assemble the Cookies
Once the cookies have cooled, spoon a generous amount of the peanut butter filling onto the flat side of half the cookies. Press another cookie on top, flat side down, to make a delightful sandwich. Repeat this process until all cookies are filled, creating your irresistible Homemade Nutter Butters, ready to delight everyone!
What to Serve with Homemade Peanut Butter Nutter Butters
There’s nothing quite like the joy of pairing sweet treats with comforting accompaniments for an unforgettable experience.
- Glass of Milk: The classic combination! Cold milk perfectly balances the rich flavors of the cookies, enhancing every delightful bite.
- Vanilla Ice Cream: Scoops of creamy vanilla ice cream take this treat to new heights, creating a delightful contrast of temperature and texture. A dreamy dessert awaits!
- Fresh Berries: Juicy strawberries or raspberries add a fresh burst that cuts through the sweetness, making for a refreshing flavor combination.
- Coffee or Tea: Brewed coffee or herbal tea can enhance the indulgent peanut butter flavor, providing a warm and cozy moment with every dunk.
- Chocolate Dipping Sauce: For the chocolate lovers, a side of warm chocolate sauce invites indulgence; dip your Nutter Butters for a decadent twist!
- Peanut Butter Banana Smoothie: Smooth peanut butter combined with ripe bananas creates a blissful, creamy smoothie that complements these cookies beautifully.
- Caramel Drizzle: A light drizzle of caramel over your cookies adds a rich sweetness that pairs perfectly with the chewy texture of each bite.
- Candied Pecans: These sweet, crunchy elements provide texture and a lovely nutty flavor, making a delightful contrast to the soft cookies.
- Dessert Board: Arrange an assortment of treats, including your Nutter Butters, for a beautiful dessert board that invites sharing and joy at any gathering!
Expert Tips for Homemade Nutter Butters
-
Butter Temperature: Ensure that your butter is softened but not melted. Properly softened butter creates a lighter, fluffier texture in your cookies.
-
Mix with Care: Avoid over-mixing the dough after adding the dry ingredients. This will help maintain the soft and chewy texture of your Homemade Nutter Butters.
-
Cool Before Filling: Let your cookies cool completely before adding the peanut butter filling. This prevents the filling from melting and helps the cookies hold their shape.
-
Sugar Coating: Roll your cookie logs in sugar before baking for an extra crunch. It adds a delightful sweetness that complements the peanut butter flavor nicely.
-
Experiment with Add-Ins: Feel free to add chocolate chips or nuts to the dough for added flavor and texture, customizing your Homemade Nutter Butters to your taste!
Homemade Nutter Butters Variations
Feel free to unleash your creativity with these delicious cookie twists that will make your Homemade Nutter Butters even more special!
- Gluten-Free: Substitute all-purpose flour with gluten-free flour to make this recipe celiac-friendly without sacrificing taste and texture.
- Nutty Crunch: Switch to chunky peanut butter for both the cookies and filling, creating a delightful texture that complements the creamy taste perfectly.
- Chocolate Lovers: Add ½ cup of chocolate chips to the cookie dough for a luscious flavor burst—who can resist a chocolate-peanut butter combo?
- Creamy Indulgence: Dip the finished cookies in melted chocolate for a luxurious treat. This extra layer of richness will surely captivate every sweet tooth!
- Maple Twist: Replace the vanilla extract with maple syrup for a unique flavor profile that adds a warm hint of sweetness to your cookies.
- Vegan-Friendly: Opt for a flax egg instead of a large egg and use non-dairy butter and milk to create a vegan version everyone can enjoy.
- Zesty Surprise: Incorporate the zest of one orange into the cookie dough for an exciting citrus twist that brightens every bite.
- Spicy Kick: Add a pinch of cayenne pepper to the cookie dough for a surprising hint of heat to balance the sweetness—it’s a unique flavor adventure!
If you adore savory with a hint of sweetness, try our Homemade Butter Chicken for a delicious meal that pairs perfectly with these cookies. The world of flavors is yours to explore!
Make Ahead Options
These Homemade Nutter Butters are perfect for busy cooks looking to save time during the week! You can prepare the cookie dough up to 24 hours in advance by mixing all the ingredients and storing the dough in an airtight container in the refrigerator. Alternatively, the cookies can be fully baked and kept in an airtight container at room temperature for up to 3 days. To maintain their soft texture, always cool the cookies completely before storing. When you’re ready to enjoy, simply fill them with the peanut butter filling and your nostalgic treat will taste just as delicious as if they were freshly baked!
How to Store and Freeze Homemade Nutter Butters
Room Temperature: Store homemade Nutter Butters in an airtight container at room temperature for up to 3-4 days to keep them fresh and chewy.
Fridge: If you prefer a firmer texture, you can refrigerate the cookies in an airtight container for up to 1 week. Bring them to room temperature before serving for the best flavor.
Freezer: For longer storage, freeze the filled cookies in an airtight container or freezer bag for up to 3 months. Layer parchment paper between cookies to prevent sticking.
Reheating: To enjoy a warm treat, reheat the frozen cookies in the microwave for about 10-15 seconds. They will taste just like fresh-baked homemade Nutter Butters!
Homemade Peanut Butter Nutter Butters Recipe FAQs
How do I choose ripe ingredients for Homemade Nutter Butters?
Absolutely! For the best results, use creamy peanut butter that is smooth and well-mixed. If you’re opting for natural peanut butter, ensure there are no excess oils on the top layer. Choose butter that is fully softened to room temperature, about 65°F (18°C), which helps achieve the right cookie texture.
What is the best way to store Homemade Nutter Butters?
Store your delicious Homemade Nutter Butters in an airtight container at room temperature for up to 3-4 days for optimal freshness and flavor. If you have leftovers, refrigerating them will keep them good for up to 1 week, but let them come to room temperature before enjoying.
Can I freeze Homemade Nutter Butters?
Absolutely! To freeze your Homemade Nutter Butters, simply place them in an airtight container or freezer bag, making sure to layer parchment paper between each cookie to prevent sticking. They can be stored in the freezer for up to 3 months. When you’re ready to enjoy them, reheat in the microwave for about 10-15 seconds for that fresh-baked taste!
What if my cookies spread too much while baking?
Very often, this happens if the butter is too soft or the dough is overmixed. Make sure your butter is just softened, not melted. For a thicker cookie, chill the dough for 30 minutes before shaping and baking, as this will help them keep their shape better.
Can my pets eat Homemade Nutter Butters?
It’s best to keep these homemade treats away from pets. The ingredients like peanut butter and sugar can be harmful in significant amounts to animals. If you want to give your furry friends a treat, consider making homemade, pet-safe peanut butter cookies that do not contain sugar or harmful ingredients.
Are these cookies suitable for people with allergies?
The traditional recipe contains peanuts, gluten, and dairy, so it’s not suitable for those with allergies to these ingredients. However, you can easily modify the recipe to be allergy-friendly by using gluten-free flour, nondairy butter, and a nut-free spread like sunflower seed butter for a delicious alternative!
Irresistible Homemade Nutter Butters for Your Sweet Tooth
Ingredients
Equipment
Method
- Preheat your oven to 350°F (175°C) and line a baking sheet with parchment paper.
- In a medium bowl, whisk together 1.5 cups of flour, 1 teaspoon of baking soda, and 0.5 teaspoon of kosher salt until well combined.
- In a large mixing bowl, combine 0.5 cups of softened unsalted butter, 0.75 cups of light brown sugar, and 0.75 cups of creamy peanut butter. Beat until fluffy, about 2-3 minutes.
- Add one large egg and 1 teaspoon of pure vanilla extract, mixing well. Gradually incorporate the dry ingredients until the dough forms.
- Scoop about 1.5 tablespoons of dough, shape into logs approximately 2 inches long, and roll in sugar. Place on the baking sheet.
- Bake for 10-12 minutes until edges are lightly browned. Allow cookies to rest on the baking sheet for a few minutes.
- Transfer cookies to a wire rack to cool completely for about 10-15 minutes.
- In a medium bowl, beat together 0.5 cups of softened unsalted butter, 0.75 cups of creamy peanut butter, and 2 cups of powdered sugar until light and fluffy. Add 2 tablespoons of milk and 1 teaspoon of vanilla extract.
- Once cooled, spoon filling onto flat side of half the cookies and press another cookie on top, flat side down. Repeat for all cookies.