

Introduction to Cheesecake Phyllo Cups
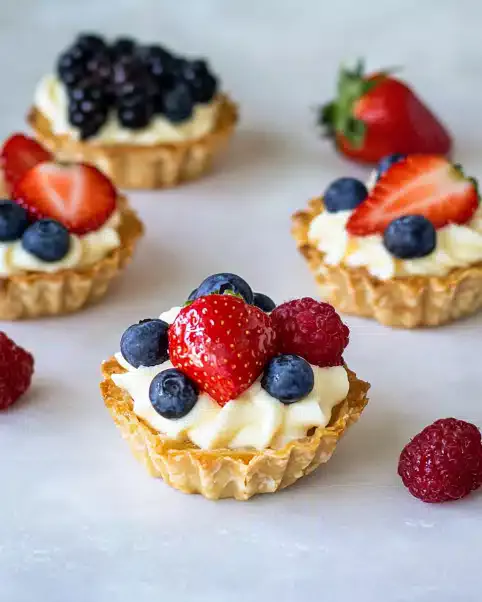
There’s something magical about desserts that bring a smile to your face, and these Cheesecake Phyllo Cups do just that. They’re not just a treat; they’re a delightful experience wrapped in crispy layers of phyllo dough. Whether you’re looking to impress guests or simply satisfy a sweet craving after a long day, this recipe is your go-to solution. With minimal effort and maximum flavor, these little cups are perfect for any occasion. Trust me, once you take that first bite, you’ll understand why they’re a favorite in my kitchen!
Why You’ll Love This Cheesecake Phyllo Cups
These Cheesecake Phyllo Cups are a game-changer in the dessert world. They’re incredibly easy to whip up, making them perfect for busy weeknights or last-minute gatherings. The crispy phyllo dough adds a delightful crunch, while the creamy cheesecake filling is pure bliss. Plus, they’re versatile! You can customize them with your favorite toppings, ensuring everyone leaves the table happy. Trust me, these little delights will quickly become a staple in your dessert repertoire!
Ingredients for Cheesecake Phyllo Cups
Gathering the right ingredients is the first step to creating these delightful Cheesecake Phyllo Cups. Here’s what you’ll need:
- Phyllo dough: The star of the show! This flaky pastry creates the perfect crunchy base for your cheesecake filling.
- Unsalted butter: Melted and brushed on the phyllo layers, it adds richness and helps achieve that golden color.
- Cream cheese: Softened to perfection, it forms the creamy heart of the cheesecake filling.
- Powdered sugar: This sweetener blends seamlessly into the filling, giving it that smooth, sweet taste.
- Vanilla extract: A splash of this adds depth and warmth to the flavor profile.
- Sour cream: It brings a tangy richness that balances the sweetness of the filling.
- Fresh berries: Choose strawberries, blueberries, or raspberries for a burst of color and flavor on top.
- Mint leaves: Optional, but they make for a lovely garnish that adds a refreshing touch.
For those looking to mix things up, consider adding chocolate chips or a fruit compote instead of berries. You can find the exact quantities for each ingredient at the bottom of the article, ready for printing!
How to Make Cheesecake Phyllo Cups
Creating these Cheesecake Phyllo Cups is a straightforward process that anyone can master. Follow these simple steps, and you’ll be on your way to dessert bliss!
Step 1: Preheat the Oven
Start by preheating your oven to 350°F (175°C). This step is crucial because it ensures even baking. A hot oven helps the phyllo cups become perfectly crispy and golden. Trust me, you don’t want to skip this part!
Step 2: Prepare the Phyllo Dough
Phyllo dough can be a bit temperamental, so handle it with care. Unroll the dough and cover it with a damp cloth to keep it from drying out. This will prevent it from becoming brittle and breaking apart when you layer it. Remember, moisture is your friend here!
Step 3: Layer the Phyllo
Now comes the fun part! Take one sheet of phyllo dough, brush it with melted butter, and layer another sheet on top. Repeat this process until you have about five layers. This layering creates that delightful texture we all love in phyllo cups. The more layers, the crunchier the result!
Step 4: Form the Cups
Once your layers are ready, it’s time to cut them. Use a sharp knife to slice the layered phyllo into squares, roughly 4×4 inches. Gently press each square into a muffin tin, forming little cups. Don’t worry if they don’t look perfect; they’ll still taste amazing!
Step 5: Bake the Cups
Place the muffin tin in your preheated oven and bake for 10-12 minutes. Keep an eye on them! You want the phyllo cups to turn a beautiful golden brown. This is the moment when your kitchen will start to smell heavenly!
Step 6: Make the Cheesecake Filling
While the cups are baking, let’s whip up the cheesecake filling. In a mixing bowl, beat the softened cream cheese until it’s smooth. Gradually add the powdered sugar and vanilla extract, mixing until well combined. Finally, fold in the sour cream for that creamy texture. It should be velvety and delicious!
Step 7: Assemble the Cups
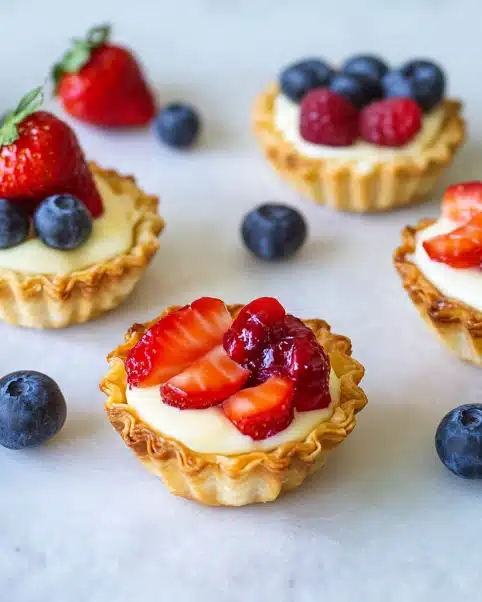
Once the phyllo cups have cooled, it’s time to fill them. Spoon the cheesecake filling into each cup generously. Top with fresh berries for a pop of color and flavor. If you like, add mint leaves for a refreshing touch. Just remember, letting the cups cool first is key to keeping them crispy!
Tips for Success
- Keep phyllo dough covered with a damp cloth while working to prevent drying.
- Use a pastry brush for even butter application on the phyllo layers.
- Don’t overfill the cups; a little cheesecake filling goes a long way!
- Experiment with different toppings like chocolate chips or caramel drizzle.
- Let the cups cool completely before filling to maintain their crispiness.
Equipment Needed
- Muffin tin: Essential for shaping the phyllo cups. A mini muffin tin works great for bite-sized treats.
- Pastry brush: Perfect for applying melted butter. A clean paintbrush can work in a pinch!
- Mixing bowls: Use these for combining your cheesecake filling. Any size will do.
- Sharp knife: Needed for cutting the phyllo dough into squares.
Variations
- Chocolate Cheesecake Cups: Add 2 tablespoons of cocoa powder to the cheesecake filling for a rich chocolate flavor.
- Fruit Compote Topping: Swap fresh berries for a homemade fruit compote, like blueberry or raspberry, for a sweet twist.
- Nutty Crunch: Sprinkle chopped nuts, like pecans or almonds, on top of the filling for added texture and flavor.
- Gluten-Free Option: Use gluten-free phyllo dough to make these cups suitable for gluten-sensitive friends.
- Vegan Version: Substitute cream cheese with a vegan cream cheese alternative and use coconut cream for a dairy-free filling.
Serving Suggestions
- Pair with a scoop of vanilla ice cream for a delightful contrast in temperature.
- Serve alongside a cup of freshly brewed coffee or tea to balance the sweetness.
- Present on a colorful platter, garnished with extra berries and mint leaves for a stunning display.
FAQs about Cheesecake Phyllo Cups
Got questions about these delightful Cheesecake Phyllo Cups? You’re not alone! Here are some common queries that might help you out:
Can I make the phyllo cups ahead of time?
Absolutely! You can prepare the phyllo cups in advance and store them in an airtight container. Just fill them with the cheesecake mixture right before serving to keep them crispy.
What can I use instead of cream cheese?
If you’re looking for alternatives, try using mascarpone cheese or a dairy-free cream cheese for a similar texture. Both options work well in the filling!
How do I store leftover Cheesecake Phyllo Cups?
Store any leftovers in the fridge in an airtight container. They’re best enjoyed within a couple of days, but the phyllo may lose some crispiness over time.
Can I freeze these Cheesecake Phyllo Cups?
Yes, you can freeze the baked phyllo cups without the filling. Just thaw and fill them with the cheesecake mixture when you’re ready to enjoy!
What other toppings can I use?
The sky’s the limit! Try caramel sauce, chocolate ganache, or even a sprinkle of crushed cookies for a fun twist on these Cheesecake Phyllo Cups.
Final Thoughts
Creating these Cheesecake Phyllo Cups is more than just baking; it’s about sharing joy and deliciousness with those you love. Each bite offers a delightful crunch paired with creamy cheesecake, making them a hit at any gathering. Whether it’s a casual weeknight or a festive celebration, these little cups bring smiles and satisfaction. Plus, the versatility allows you to get creative with flavors and toppings. So, roll up your sleeves, gather your ingredients, and let the magic happen in your kitchen. Trust me, once you serve these, they’ll become a cherished favorite in your home!
Cheesecake Phyllo Cups: Easy Delightful Desserts!
Ingredients
Method
- Preheat the oven to 350°F (175°C).
- Unroll the phyllo dough and cover it with a damp cloth to prevent it from drying out.
- Take one sheet of phyllo dough, brush it with melted butter, and layer another sheet on top. Repeat this process until you have 5 layers.
- Cut the layered phyllo into squares (about 4×4 inches) and gently press each square into a muffin tin, forming cups.
- Repeat with the remaining phyllo dough until all cups are formed.
- Bake the phyllo cups in the preheated oven for 10-12 minutes or until golden brown. Remove from the oven and let cool.
- In a mixing bowl, beat the softened cream cheese until smooth. Add the powdered sugar and vanilla extract, mixing until well combined.
- Fold in the sour cream until the mixture is creamy and smooth.
- Spoon the cheesecake filling into each cooled phyllo cup.
- Top each cup with fresh berries and garnish with mint leaves if desired.
Nutrition
Notes
- For a chocolate twist, add 2 tablespoons of cocoa powder to the cheesecake filling.
- You can substitute the berries with chocolate chips or a fruit compote for a different flavor profile.