
Introduction to Baked Salmon Sushi Bowl
When I think of comfort food, the Baked Salmon Sushi Bowl always comes to mind. It’s a delightful blend of flavors and textures that feels both indulgent and healthy.
This dish is perfect for those busy weeknights when you want something quick yet impressive.
With just a few simple ingredients, you can whip up a meal that not only satisfies your hunger but also nourishes your body.
Whether you’re cooking for yourself or impressing friends, this sushi bowl is a fantastic choice that brings a taste of Japan right to your kitchen.
Why You’ll Love This Baked Salmon Sushi Bowl
This Baked Salmon Sushi Bowl is a game-changer for anyone looking to enjoy a delicious meal without spending hours in the kitchen.
It’s quick to prepare, taking just about 50 minutes from start to finish.
The combination of fresh ingredients and savory flavors makes it a crowd-pleaser.
Plus, it’s versatile enough to cater to different tastes, ensuring everyone at the table leaves satisfied.
Ingredients for Baked Salmon Sushi Bowl
Creating a Baked Salmon Sushi Bowl is all about using fresh, quality ingredients that come together beautifully. Here’s what you’ll need:
- Sushi rice: This short-grain rice is sticky and perfect for holding together in your bowl.
- Water: Essential for cooking the rice to the right texture.
- Salmon fillet: The star of the show! Choose a fresh, high-quality fillet for the best flavor.
- Soy sauce: Adds a savory umami kick to the salmon, enhancing its natural flavors.
- Honey: A touch of sweetness balances the saltiness of the soy sauce.
- Sesame oil: This oil brings a nutty aroma and richness to the dish.
- Garlic powder: A sprinkle of this adds depth and warmth to the marinade.
- Ginger powder: Offers a zesty bite that complements the salmon perfectly.
- Avocado: Creamy and rich, it adds a luxurious texture to your bowl.
- Cucumber: Fresh and crunchy, it provides a refreshing contrast to the warm rice and salmon.
- Shredded carrots: These add a pop of color and a slight sweetness.
- Green onions: Chopped for a mild onion flavor and a bit of crunch.
- Sesame seeds: These tiny seeds add a delightful crunch and nutty flavor.
- Nori: Cut into strips, these seaweed sheets bring a taste of the ocean.
- Pickled ginger: Optional, but it’s a classic sushi accompaniment that cleanses the palate.
- Wasabi: For those who like a spicy kick, this is a must-have on the side.
You can find all the exact quantities for these ingredients at the bottom of the article, ready for printing. Feel free to mix and match based on your preferences!
How to Make Baked Salmon Sushi Bowl
Creating a Baked Salmon Sushi Bowl is a straightforward process that anyone can master.
Let’s break it down step by step, ensuring you have all the tips you need for a delicious outcome.
Step 1: Preheat and Prepare
Start by preheating your oven to 375°F.
While it warms up, line a baking sheet with parchment paper.
This will prevent the salmon from sticking and make cleanup a breeze.
Step 2: Cook the Sushi Rice
Rinse the sushi rice under cold water until the water runs clear.
This step is crucial; it removes excess starch, ensuring your rice is fluffy and not gummy.
In a medium pot, combine the rinsed rice with water.
Bring it to a boil, then reduce the heat to low, cover, and let it simmer for 18-20 minutes.
Once the rice is tender and the water is absorbed, remove it from heat and let it sit covered for 10 minutes.
This resting period allows the rice to finish cooking and become perfectly sticky.
Step 3: Prepare the Salmon
While the rice is cooking, it’s time to prepare the salmon.
Place the salmon fillet on your prepared baking sheet.
In a small bowl, mix together the soy sauce, honey, sesame oil, garlic powder, and ginger powder.
Brush this flavorful marinade generously over the salmon.
This will infuse the fish with a savory sweetness that’s simply irresistible.
Step 4: Bake the Salmon
Now, pop the salmon into the preheated oven.
Bake it for 15-20 minutes, or until it flakes easily with a fork.
To check for doneness, gently press the salmon with a fork; if it separates easily, it’s ready.
Keep an eye on it to avoid overcooking, as dry salmon is a no-go.
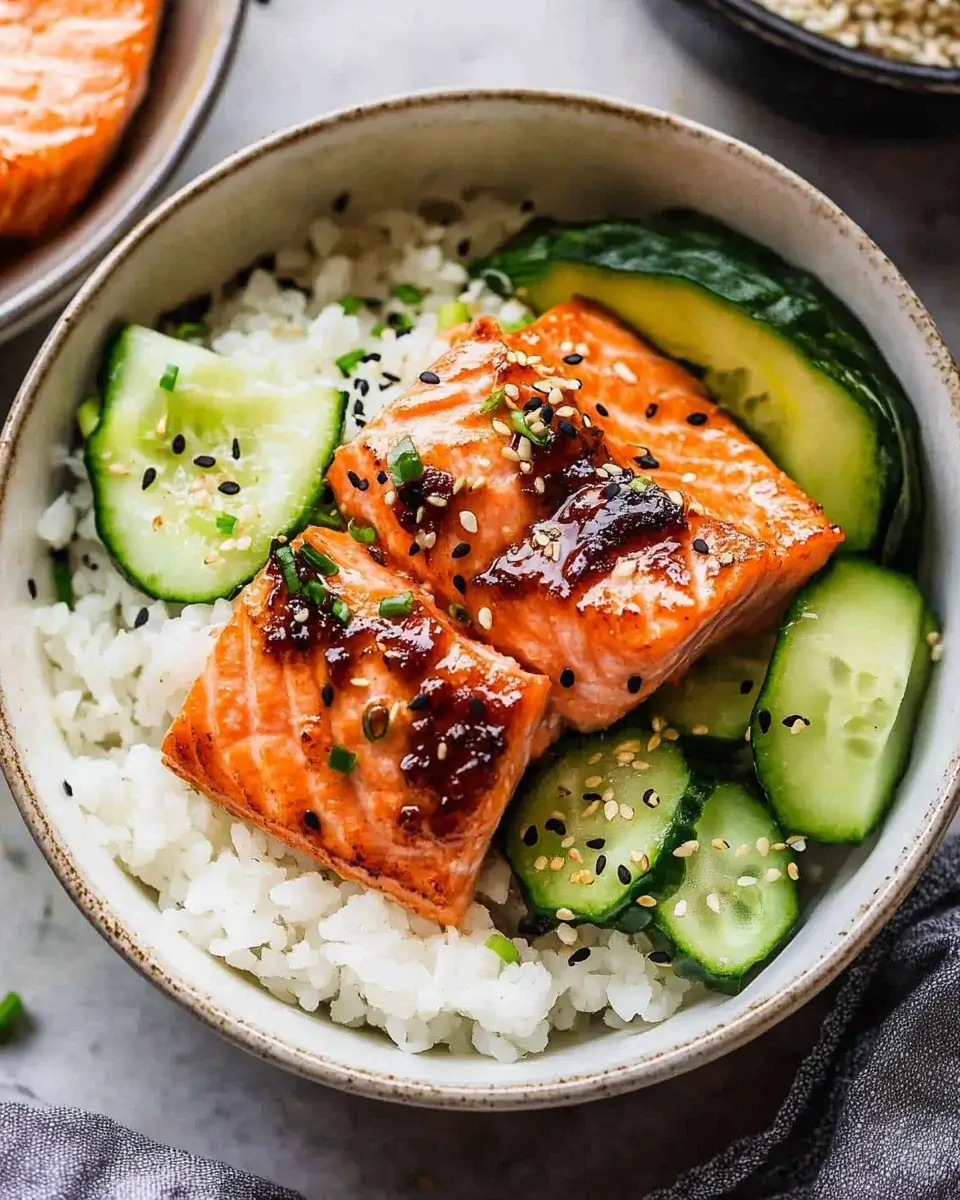
Step 5: Assemble the Bowl
Once the rice and salmon are ready, it’s time to assemble your bowl.
Fluff the cooked sushi rice with a fork and divide it among serving bowls.
Top each bowl with flaked salmon, avocado slices, cucumber, shredded carrots, and green onions.
For the finishing touch, sprinkle sesame seeds and nori strips on top.
Serve with pickled ginger and wasabi on the side for an authentic sushi experience.
Tips for Success
- Always rinse sushi rice thoroughly to achieve that perfect fluffy texture.
- Use a high-quality salmon fillet for the best flavor and texture.
- Don’t skip the resting time for the rice; it makes a big difference!
- Feel free to customize toppings based on your preferences or what you have on hand.
- For extra flavor, consider marinating the salmon for a few hours before baking.
Equipment Needed
- Baking sheet: A standard sheet works, but a rimmed one can catch any drips.
- Parchment paper: Use this for easy cleanup; aluminum foil is a good alternative.
- <strong<Medium pot: Essential for cooking sushi rice; a rice cooker can also do the job.
- Fork: For fluffing the rice; a wooden spoon can work too.
- Small bowl: Perfect for mixing the marinade; any mixing bowl will suffice.
Variations
- Protein Swap: Substitute salmon with cooked shrimp, tofu, or even grilled chicken for a different protein option.
- Vegetarian Delight: Skip the fish entirely and load up on extra veggies like bell peppers, radishes, or edamame.
- Spicy Twist: Add a drizzle of sriracha or spicy mayo on top for a kick of heat.
- Quinoa Base: For a gluten-free alternative, use quinoa instead of sushi rice for a nutty flavor.
- Seasonal Veggies: Incorporate seasonal vegetables like asparagus or snap peas for a fresh touch.
Serving Suggestions
- Side Salad: Pair your sushi bowl with a light cucumber and seaweed salad for a refreshing crunch.
- Drink Pairing: Enjoy with a chilled sake or a crisp Japanese beer to complement the flavors.
- Presentation: Serve in colorful bowls and garnish with extra sesame seeds for a vibrant look.
FAQs about Baked Salmon Sushi Bowl
Can I use brown rice instead of sushi rice?
Absolutely! Brown rice is a healthier option, but it will require a longer cooking time. Just be sure to adjust the water ratio accordingly for the best results.
How can I store leftovers?
Store any leftover Baked Salmon Sushi Bowl in an airtight container in the fridge for up to 2 days. Just keep the toppings separate to maintain freshness.
Is this recipe gluten-free?
Yes, this Baked Salmon Sushi Bowl is gluten-free as long as you use gluten-free soy sauce. Always check labels to be sure!
Can I make this dish ahead of time?
You can prepare the rice and salmon in advance. Just assemble the bowl right before serving to keep everything fresh and vibrant.
What can I substitute for salmon?
If salmon isn’t your thing, try using cooked shrimp, tofu, or even grilled chicken. Each option brings its own unique flavor to the bowl!
Final Thoughts
Cooking the Baked Salmon Sushi Bowl is more than just preparing a meal; it’s an experience that brings joy to your kitchen.
The vibrant colors and fresh ingredients create a feast for the eyes, while the delightful flavors dance on your palate.
Whether you’re enjoying it solo or sharing with loved ones, this dish fosters connection and satisfaction.
It’s a reminder that healthy eating can be both simple and delicious.
So, roll up your sleeves, embrace the process, and savor every bite of this delightful sushi bowl. You’ll find it’s a recipe worth repeating!
Baked Salmon Sushi Bowl: Easy Recipe for a Delightful Meal!
Ingredients
Method
- Preheat the oven to 375°F. Line a baking sheet with parchment paper.
- Rinse the sushi rice under cold water until the water runs clear. In a medium pot, combine the rinsed rice and water. Bring to a boil, then reduce heat to low, cover, and simmer for 18-20 minutes until the rice is tender and water is absorbed. Remove from heat and let it sit covered for 10 minutes.
- While the rice is cooking, prepare the salmon. Place the salmon fillet on the prepared baking sheet. In a small bowl, mix together the soy sauce, honey, sesame oil, garlic powder, and ginger powder. Brush the mixture over the salmon.
- Bake the salmon in the preheated oven for 15-20 minutes, or until it flakes easily with a fork. Remove from the oven and let it cool slightly before flaking it into bite-sized pieces.
- In a large bowl, fluff the cooked sushi rice with a fork. Divide the rice among serving bowls.
- Top each bowl of rice with flaked salmon, avocado slices, cucumber, shredded carrots, and green onions.
- Sprinkle sesame seeds and nori strips on top of each bowl. Serve with pickled ginger and wasabi on the side, if desired.
Nutrition
Notes
- For a spicier kick, add a drizzle of sriracha over the top before serving.
- You can also substitute the salmon with cooked shrimp or tofu for a different protein option.