

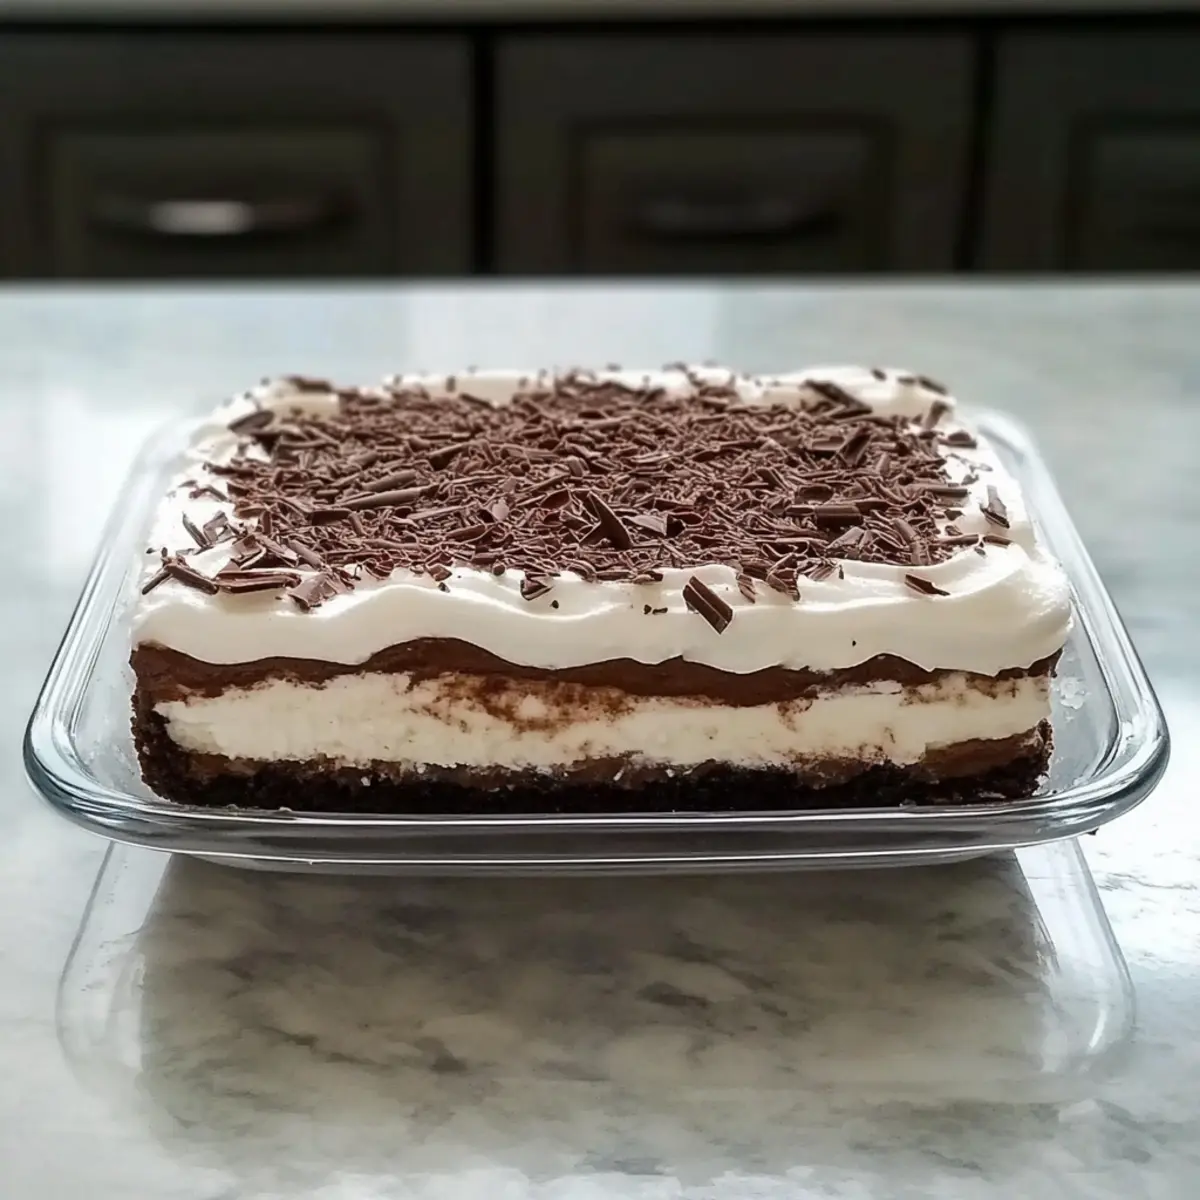
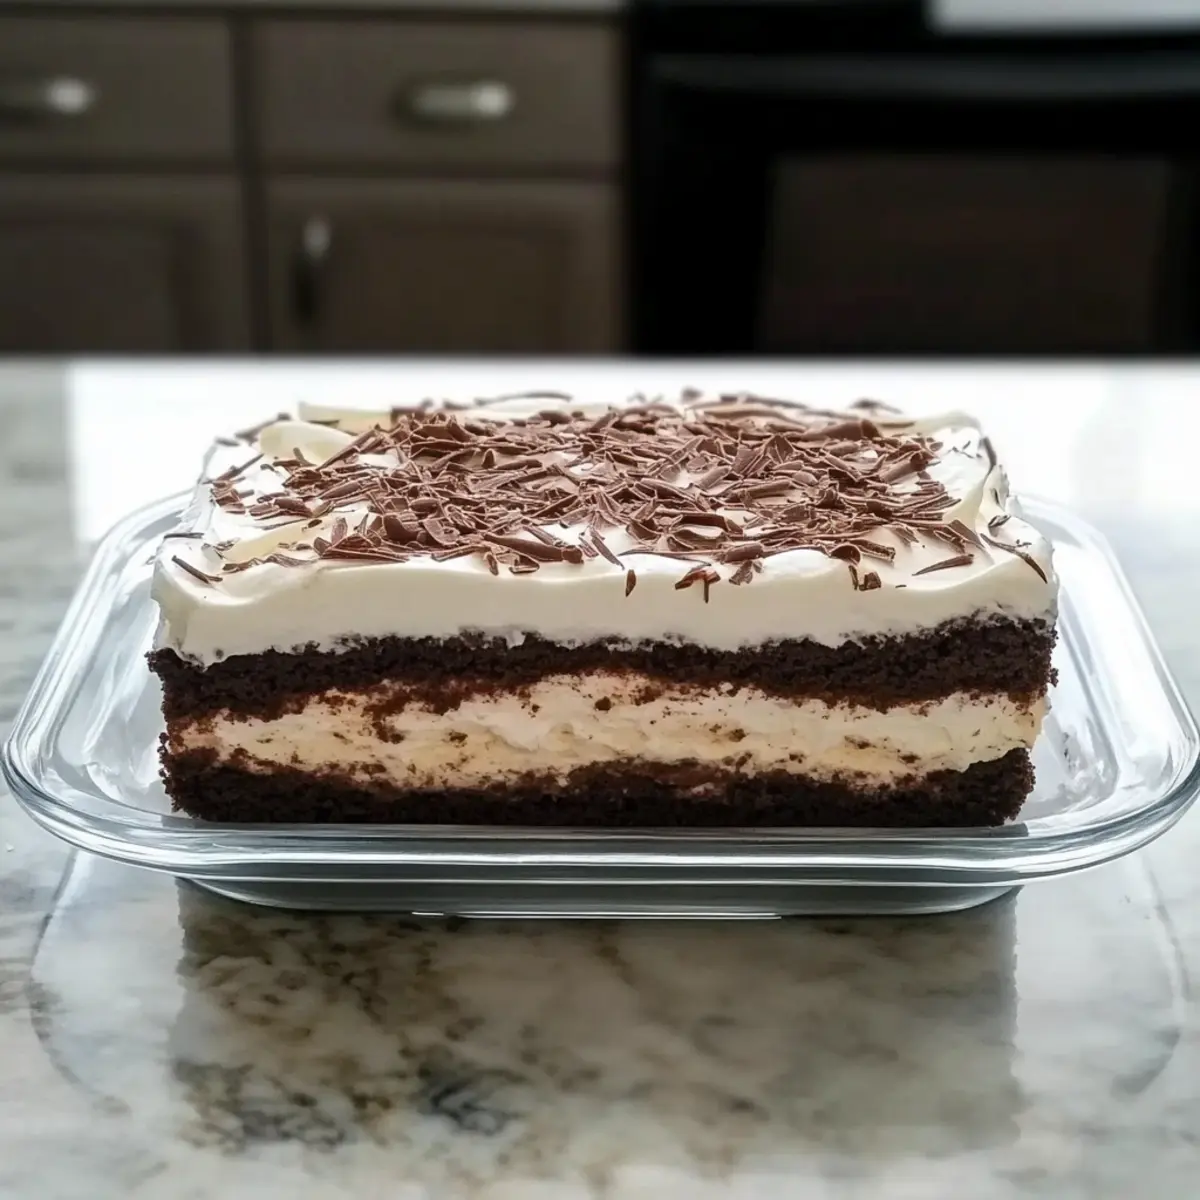
As I opened my refrigerator, a delightful surprise awaited—an Easy Brownie Refrigerator Cake that was layered like a treasure! The chewy brownie base, creamy cream cheese filling, and silky pudding come together in a celebration of texture and flavor. This layered dessert not only dazzles the taste buds but also offers the perk of being a make-ahead treat, perfect for potlucks or dinner parties. With minimal effort, I had a crowd-pleaser ready to shine on any occasion. Plus, the longer it sits, the better it becomes as the flavors meld together beautifully. Are you ready to indulge in this fabulous dessert that’s both rich and refreshing? Let’s dive into the recipe!
Why is Brownie Refrigerator Cake a Must-Try?
Effortless Preparation: The beauty of this cake lies in its simplicity; just a few seamless steps transform basic ingredients into a stunning dessert.
Layered Delight: Experience the rich and creamy layers that create a visual feast and a flavor explosion with every slice.
Make-Ahead Perfection: Time-saving and convenient, this dessert can be prepared in advance, allowing the flavors to deepen and develop for the ultimate indulgence.
Crowd-Pleasing Treat: Whether for a potluck or family gathering, this delightful dessert is sure to impress your guests and leave them asking for seconds!
Variations Galore: Feel free to experiment! Add crushed Oreos for a fun twist or swirl in peanut butter for that irresistible flavor combination.
Dive into your dessert with this Brownie Refrigerator Cake and discover just how easy it is to impress everyone at your next gathering!
Brownie Refrigerator Cake Ingredients
For the Brownie Base
• Brownie Mix – This forms the chewy foundation of your cake and is easy to work with; opt for a homemade version for a personal touch.
• Extra-Large Egg – Adds structure and moisture, helping achieve that cake-like texture in your brownie.
For the Creamy Layer
• Cream Cheese (8 oz, softened) – Creates a rich and tangy filling; using light cream cheese can cut calories, though it may alter the texture slightly.
• Powdered Sugar (1 cup) – Sweetens and smoothens the cream cheese layer, making every bite a delight.
For the Pudding Layers
• Instant Chocolate Pudding Mix (3 oz) – Provides a rich, luscious layer; the chocolate flavor is essential for that satisfying taste.
• Instant Vanilla Pudding Mix (3 oz) – Adds balance to the dessert without overpowering it; can be replaced with more chocolate pudding for a richer experience.
• Cold Milk (3 ½ cups) – Essential for thickening the pudding; always use cold milk to ensure proper setting.
For the Topping
• Cool Whip Frozen Whipped Topping (2 x 8 oz containers, thawed) – Offers a light and fluffy finish; homemade whipped cream can be used but requires additional stabilization.
• Hershey Candy Bar or Chocolate Syrup – Adds a finishing touch for delightful presentation; it’s the perfect way to elevate your Brownie Refrigerator Cake!
Create this stunning layered dessert that promises to satisfy your sweet cravings with its combination of flavors and textures.
Step‑by‑Step Instructions for Brownie Refrigerator Cake
Step 1: Preheat the Oven
Begin by preheating your oven to 350°F (175°C). Prepare a 9×13-inch baking pan by greasing it or lining it with parchment paper for easy removal. In a mixing bowl, combine your brownie mix with the extra-large egg according to the package instructions, stirring until the batter is smooth and well-blended.
Step 2: Bake the Brownies
Pour the brownie batter into the prepared pan, spreading it evenly with a spatula. Bake in the preheated oven for 20–25 minutes, or until a toothpick inserted into the center comes out with a few moist crumbs. Once baked, remove the pan from the oven and let the brownies cool completely on a wire rack.
Step 3: Prepare the Cream Cheese Layer
In a large mixing bowl, use an electric mixer to beat the softened cream cheese and powdered sugar together on medium speed. Continue beating until the mixture is completely smooth and creamy, about 2-3 minutes. Gently fold in half of the thawed Cool Whip until fully incorporated, then spread the cream cheese layer evenly over the cooled brownie base.
Step 4: Make the Pudding Layers
In a separate bowl, combine the instant chocolate and vanilla pudding mixes. Gradually whisk in the cold milk for about 2 minutes, or until the mixture thickens and is lump-free. Once thickened, pour the pudding mixture over the cream cheese layer, ensuring it’s evenly distributed for a beautiful Brownie Refrigerator Cake.
Step 5: Add the Topping
Spread the remaining Cool Whip over the pudding layer, smoothing it out carefully to create a light, fluffy top. Ensure that it covers the pudding completely to keep it moist and prevent any air exposure. This adds a delightful finish to the Brownie Refrigerator Cake that everyone will enjoy.
Step 6: Chill in the Refrigerator
Cover the assembled dessert with plastic wrap or a lid to prevent odors from seeping in. Refrigerate the cake for at least 4 hours, but overnight chilling is preferable to allow the flavors to meld beautifully. The longer it sits, the better the layers will be defined and taste!
Step 7: Garnish Before Serving
Before serving, add a decorative touch by garnishing with chocolate shavings or a drizzle of chocolate syrup on top of the Cool Whip. This not only enhances the visual appeal of your Brownie Refrigerator Cake but also adds an extra layer of chocolate delight.
Step 8: Cut and Serve
When ready to serve, use a sharp knife dipped in hot water for clean cuts making sure to slice through each layer neatly. Serve chilled, and watch as your guests are captivated by the beautiful presentation and rich flavors of this layered dessert!

Make Ahead Options
These Easy Brownie Refrigerator Cakes are perfect for meal prep, saving you precious time on busy weeknights! You can prepare the brownie layer up to 3 days in advance—just bake, cool completely, and store it tightly wrapped at room temperature. To take it further, the cream cheese layer and pudding layers can also be prepped ahead and stored in the refrigerator for up to 24 hours. When ready to serve, simply assemble the layers, add the remaining Cool Whip, and chill it for at least 4 hours (or overnight, if preferred). This gives the cake time to meld flavors beautifully, ensuring it’s just as delicious as if made fresh!
Brownie Refrigerator Cake Variations
Feel free to get creative with this delightful dessert and make it your own! Each twist adds a new layer of flavor and fun.
-
Cookies & Cream: Stir in crushed Oreos to the cream cheese layer for a delightful cookies-and-cream experience. The familiar taste will surely bring smiles to everyone’s faces.
-
Peanut Butter Swirl: Add a generous swirl of creamy peanut butter into the pudding mixture for an indulgent twist reminiscent of a peanut butter cup. It’s a deliciously rich combination that pleases both chocolate and peanut butter lovers.
-
Nutty Crunch: Toss in some chopped walnuts or pecans into the brownie batter for added crunch and texture. This lovely nutty flavor complements the chocolate beautifully, creating a satisfying bite.
-
Mint Chocolate: Mix in a few drops of peppermint extract to the pudding layer for a refreshing minty flavor. It evokes the spirit of indulgence, transforming your dessert into a mint chocolate treat everyone will love!
-
Chocolate Lover’s Delight: Swap out the vanilla pudding for extra chocolate pudding mix to double the chocolatey goodness. It’s a dream come true for any chocolate lover!
-
Caramel Drizzle: Finish off with a drizzle of caramel sauce on top of the Cool Whip for an extra layer of sweetness and gooeyness. This little touch will elevate your dessert to new heights of decadence.
-
Fruity Surprise: Top your Brownie Refrigerator Cake with fresh berries, like strawberries or raspberries, before serving. They add a pop of color and a tart balance to the rich layers.
If you’re tempted to explore beyond this Brownie Refrigerator Cake, you might also enjoy our scrumptious Lemon Velvet Cake or the incredible Biscoff Cake Gooey. The possibilities for delicious indulgence are endless!
Storage Tips for Brownie Refrigerator Cake
-
Fridge: Keep your Brownie Refrigerator Cake covered in the refrigerator, where it will stay fresh for up to 4–5 days. This allows the flavors to deepen and the layers to set beautifully.
-
Freezer: For longer storage, you can freeze the cake for up to 3 months. Ensure it’s wrapped tightly in plastic wrap and aluminum foil to prevent freezer burn.
-
Thawing: To enjoy your frozen dessert, simply transfer it to the fridge and let it thaw overnight before serving. This ensures the layers remain intact and delicious.
-
Reheating: There’s no need to reheat this dessert; it’s best enjoyed chilled straight from the refrigerator, preserving its refreshing texture and rich flavors.
Expert Tips for Brownie Refrigerator Cake
- Chill for Flavor: Let your Brownie Refrigerator Cake chill overnight for the best taste. This allows the layers to set beautifully and flavors to meld.
- Cool Completely: Make sure the brownie layer is completely cooled before adding the cream cheese mixture to avoid unwanted mixing of layers.
- Cutting Technique: To achieve clean and neat slices, use a hot knife dipped in water. This prevents tearing the layers apart.
- Add Espresso Powder: For a deeper chocolate flavor, mix in 1 teaspoon of instant espresso powder in both the brownie and pudding layers.
- Storage Tips: Keep the cake covered in the refrigerator to maintain its freshness for up to 5 days or freeze for up to 3 months—just thaw overnight before serving!
What to Serve with Easy Brownie Refrigerator Cake
Serving up a decadent layered dessert opens the door to delightful pairings that elevate your meal.
- Fresh Berries: Their brightness and acidity cut through the richness of the cake, providing a refreshing contrast that balances each bite beautifully.
- Vanilla Ice Cream: A scoop alongside your cake adds a creamy, dreamy element that enhances the chocolate flavors and makes for a truly indulgent experience.
- Caramel Sauce: Drizzle it over the top for added sweetness and a luxurious touch; the gooey texture harmonizes splendidly with the creamy layers.
- Nutty Topping: Chopped nuts sprinkled on top add crunch, bringing in a delightful textural contrast to the smoothness of the cake.
- Chocolate Milkshake: The cool, creamy contrast of a chocolate milkshake pairs wonderfully, turning dessert into a nostalgic treat that’s pure bliss.
- Coffee: A warm cup of coffee complements the sweet layers and balances the richness. Its bitter notes enhance the chocolate flavors for an incredible pairing.
- Whipped Cream: Serve it on the side for extra fluffiness; this light element complements the dense brownie while adding a touch of sweetness.
- Mint Leaves: A few sprigs as garnish give a fresh aroma and flavor burst, brightening the overall dessert experience with its herbal notes.
- Chocolate-Covered Strawberries: These sweet, juicy bites resonate perfectly with the chocolate layers of the refrigerator cake, uniting flavors that everyone loves.
- Chocolate Shavings: Sprinkle finely grated chocolate on top of your served slice for a beautiful and rich finish, adding to the visuals as well as flavor depth.

Easy Brownie Refrigerator Cake Recipe FAQs
What type of brownie mix should I use?
You can use any brand of brownie mix for this Easy Brownie Refrigerator Cake, but I often recommend a fudge or classic chocolate mix for that rich, moist base. If you’re feeling adventurous, a homemade brownie recipe can also add a personal touch.
How should I store the Brownie Refrigerator Cake?
Store your Brownie Refrigerator Cake covered in the refrigerator, where it will remain fresh for up to 4-5 days. This chilling process helps the flavors meld beautifully, enhancing the overall taste.
Can I freeze the Brownie Refrigerator Cake?
Absolutely! You can freeze the cake for up to 3 months. Just ensure it’s wrapped tightly in plastic wrap and aluminum foil to prevent freezer burn. When you’re ready to enjoy it, thaw it overnight in the refrigerator for safe and easy serving.
What if my brownie layer didn’t bake properly?
If your brownie layer is undercooked, it may not support the weight of the layers on top. In that case, I suggest returning the brownies to the oven for an additional 5-10 minutes, checking for doneness with a toothpick. If it’s overbaked, just ensure it isn’t too dry before adding the cream cheese layer.
Is this dessert safe for individuals with gluten allergies?
If you’re catering to gluten-free diets, choose a gluten-free brownie mix to ensure everyone can enjoy this delightful dessert without worries! Always double-check ingredient labels on pudding mixes and whipped toppings too, as these can sometimes contain gluten.
Can I use anything other than Cool Whip for the topping?
Certainly! While Cool Whip adds a light, fluffy texture, you could make your own whipped cream by beating heavy cream with sugar until soft peaks form. Just be sure to stabilize it if you plan to keep it in the fridge for a while, using a little cornstarch or pudding mix.
Delicious Brownie Refrigerator Cake for Effortless Indulgence
Ingredients
Equipment
Method
- Preheat the oven to 350°F (175°C). Prepare a baking pan by greasing it or lining with parchment.
- Combine brownie mix with extra-large egg in a mixing bowl and stir until smooth.
- Pour the brownie batter into the prepared pan and bake for 20–25 minutes. Let cool completely.
- Beat cream cheese and powdered sugar together until smooth. Fold in half of the Cool Whip.
- Spread the cream cheese layer evenly over the cooled brownie base.
- Combine instant pudding mixes and whisk in cold milk until thick. Pour over the cream cheese layer.
- Spread remaining Cool Whip over the pudding layer, smoothing it out carefully.
- Cover and refrigerate for at least 4 hours, preferably overnight, to allow flavors to meld.
- Garnish with chocolate shavings or syrup before serving.
- Cut using a hot knife dipped in water and serve chilled.