

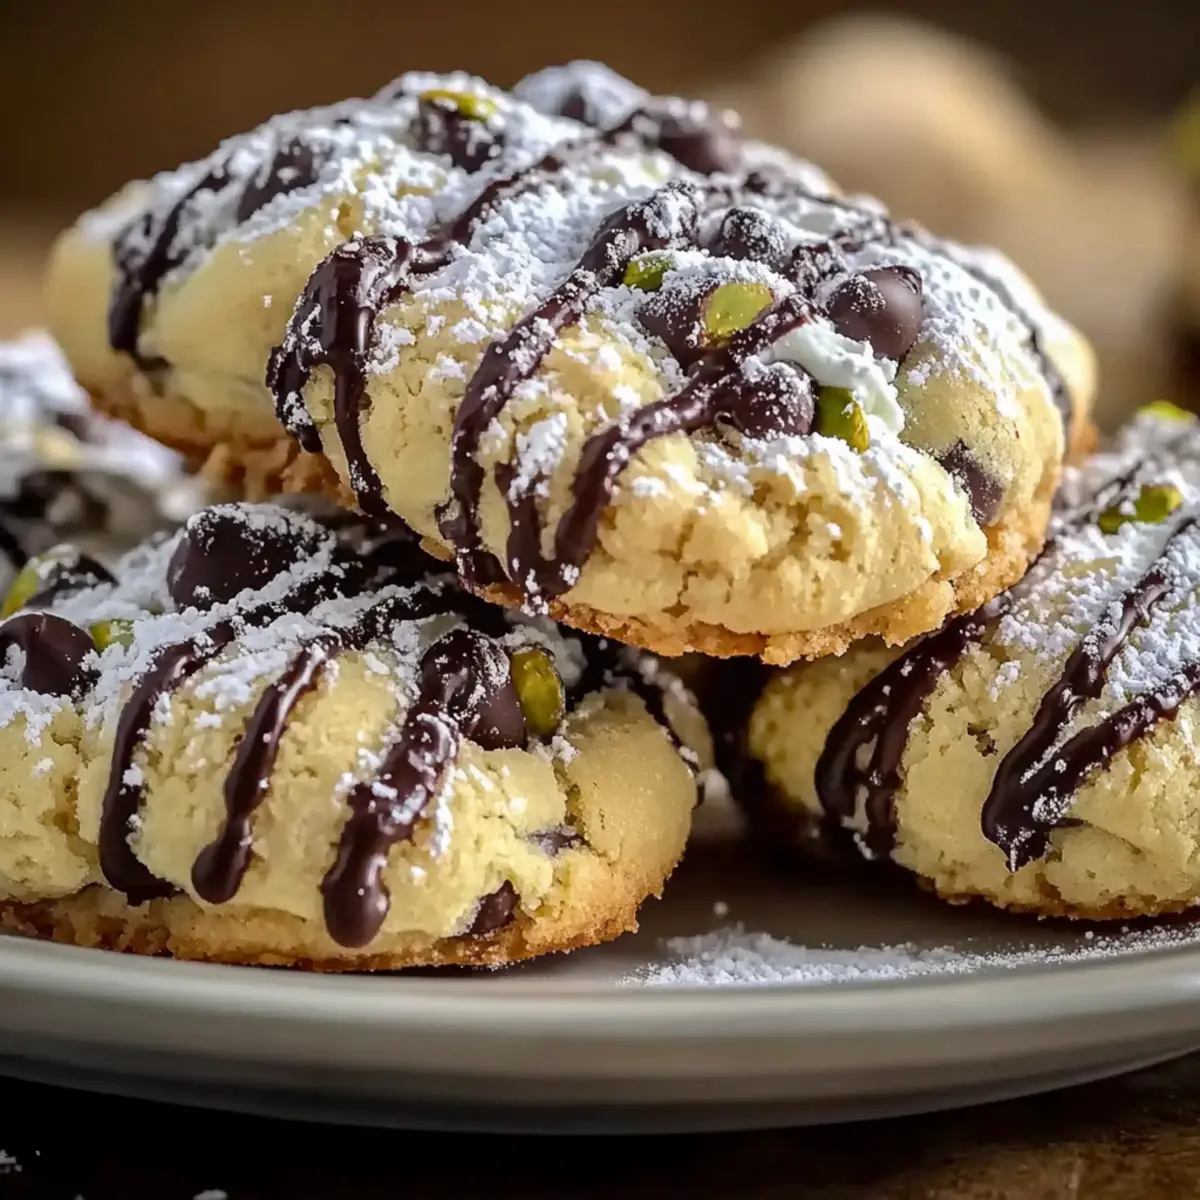
As I lifted a golden Cannoli Cookie from the cooling rack, a wave of nostalgia washed over me; the delightful aroma of vanilla and lemon zest reminded me of Sunday family gatherings in my grandmother’s kitchen. These delectable Italian-inspired treats perfectly blend a crisp exterior with a creamy filling made luxurious by rich ricotta cheese. Not only are these Cannoli Cookies a crowd-pleaser, but they also make baking a stress-free joy, thanks to their simple prep. They’re the kind of sweet indulgence that invites you to share stories and laughter over coffee or dessert wine. So, are you ready to fill your home with the warm, inviting scent of these delightful cookies? Let’s dive into the magic of homemade Cannoli Cookies!

Why are Cannoli Cookies so special?
Unique Texture: The combination of a crispy outer layer and a creamy ricotta filling creates a delightful contrast in every bite.
Savor All the Flavors: Infused with zesty lemon and rich vanilla, each cookie bursts with a range of tantalizing tastes that evoke traditional Italian flavors.
Easy to Make: With straightforward steps, you don’t need to be a professional baker to impress your family and friends—just try these easy Cannoli Cookies.
Perfect for Sharing: These cookies are ideal for gatherings, sparking joy and warmth among loved ones as you share stories and laughter over coffee.
Versatile Fillings: Mix things up by experimenting with different fillings like cream cheese or even dried fruit for a twist on the classic.
Cannoli Cookies Ingredients
For the Dough
• All-Purpose Flour – Provides structure to the cookies; make sure to sift for a lighter texture.
• Granulated Sugar – Adds essential sweetness to balance flavors; no substitutions recommended for best taste.
• Ricotta Cheese – Adds moisture and richness; use ¼ cup (60 g) in the dough for that unique cannoli texture.
• Large Egg – Binds the ingredients together, ensuring the ideal cookie texture.
• Vanilla Extract – Enhances flavor and infuses a sweet aroma into the dough.
• Lemon Zest – Infuses a refreshing citrus note, brightening up the cookies delightfully.
For the Filling
• Ricotta Cheese – A second ¼ cup (60 g) keeps the filling creamy; ensure it’s at room temperature for smooth blending.
• Mini Chocolate Chips – Provide delightful bursts of sweetness; feel free to substitute with dark chocolate chips for a richer flavor.
• Chopped Pistachios – Adds a crunchy texture and unique flavor; can be easily replaced with walnuts or almonds if desired.
For Dusting
• Powdered Sugar – Adds a sweet finishing touch and enhances presentation; dust generously before serving.
Step‑by‑Step Instructions for Cannoli Cookies
Step 1: Preheat the Oven
Begin by preheating your oven to 350°F (175°C). This initial step ensures your Cannoli Cookies will achieve that perfect golden-brown hue during baking. While it heats, gather your baking sheets and line them with parchment paper to prevent sticking, making cleanup a breeze later.
Step 2: Combine Dry Ingredients
In a large mixing bowl, whisk together the all-purpose flour and granulated sugar. Ensure both ingredients are well combined for an even distribution of sweetness and structure. A fine sieve can help you achieve a lighter texture by sifting the flour. Set this mixture aside while you prepare the wet ingredients.
Step 3: Mix the Wet Ingredients
In a separate bowl, blend the ricotta cheese (¼ cup for dough), large egg, vanilla extract, and freshly grated lemon zest. Whisk until the mixture is smooth and creamy, ensuring there are no lumps of ricotta. This step is crucial for creating the rich flavor profile of your Cannoli Cookies.
Step 4: Form the Dough
Gradually incorporate the dry flour mixture into the wet ingredients, stirring gently to form a soft dough. Avoid overmixing, as this can make your cookies tough. The dough should come together easily but still be slightly sticky. Once combined, cover the bowl with plastic wrap and let it rest at room temperature for 30 minutes.
Step 5: Roll Out the Dough
After resting, lightly flour your clean countertop and roll out the dough to about ¼ inch thick. Use a rolling pin to achieve an even thickness, which will ensure uniform baking. Cut the dough into rectangles measuring approximately 2×3 inches, and place them on your prepared baking sheets, leaving space between each cookie.
Step 6: Prepare the Filling
In another bowl, mix the ricotta cheese (¼ cup for filling), mini chocolate chips, and chopped pistachios. Stir until fully combined for a creamy filling that boasts delightful bursts of flavor. This rich mixture is the essence of your Cannoli Cookies, bringing a wonderful contrast to the crispy exterior.
Step 7: Assemble the Cookies
Take one rectangle of dough and place a spoonful of the ricotta filling on one side. Firmly fold the dough over like a turnover and press the edges together to seal securely. Repeat this with the remaining rectangles, ensuring that none of the filling escapes during baking.
Step 8: Bake to Perfection
Place your filled Cannoli Cookies in the preheated oven and bake for 15-18 minutes. Keep an eye on them; they should turn a lovely golden brown. A sure sign they’re ready is a slightly firm appearance around the edges while remaining soft in the center.
Step 9: Cool and Dust
Once baked, remove the cookies from the oven and allow them to cool on the baking sheets for a few minutes. Then, transfer them to a wire rack to cool completely. Once cooled, dust the Cannoli Cookies generously with powdered sugar, adding a delightful sweetness and enhancing their presentation before serving.

Make Ahead Options
These Cannoli Cookies are perfect for busy home cooks who love to meal prep! You can prepare the dough and refrigerate it for up to 24 hours before baking; this will actually enhance the flavors while making it easier to roll out later. Additionally, the ricotta filling can be made ahead of time and stored in an airtight container in the refrigerator for up to 3 days. Just remember to let the filling sit at room temperature for about 10 minutes before assembling the cookies. When you’re ready to bake, simply roll out the chilled dough, fill it, and pop them in the oven for a fresh-from-the-oven treat that’s just as delicious as if made the same day!
Cannoli Cookies Variations & Substitutions
Customize your Cannoli Cookies to suit your taste buds and make them even more delightful!
- Gluten-Free: Substitute all-purpose flour with a 1-to-1 gluten-free flour blend for a safe alternative that doesn’t skimp on taste.
- Dairy-Free: Use almond or coconut ricotta to create a dairy-free cookie that still offers a creamy filling. These swaps can deliver fantastic flavor without compromising texture!
- Nut-Free: Omit pistachios and swap with sunflower seeds; they provide a similar crunch without any allergens.
- Flavor Boost: Add a splash of almond extract for an extra layer of flavor, creating an aromatic twist that echoes traditional Italian desserts.
- Healthier Sweetness: Replace mini chocolate chips with dark chocolate chips for a richer taste, or better yet, use chopped dried fruit like apricots for a fruity punch.
- More Texture: Incorporate finely chopped nuts, like walnuts or hazelnuts, into the dough for added crunch and flavor in every bite.
- Spicy Twist: Mix in a pinch of cinnamon or nutmeg to the filling for a warm, spicy note that pairs beautifully with the sweetness of the cookies.
- Zesty Variation: Substitute lemon zest with orange zest for a citrusy flavor shift that brightens the overall cookie experience.
Take a moment to explore these variations, and don’t hesitate to branch out and create your own! Each twist adds a personal touch to these beloved Cannoli Cookies, making them just a bit more special. For more creative ideas, you might enjoy trying these easy Cannoli Cookies that embrace the joys of homemade treats!
What to Serve with Cannoli Cookies
Indulge in a delightful feast that complements the sweet, creamy goodness of these Italian Cannoli Cookies.
-
Fresh Fruit Salad: A vibrant mix of seasonal fruits adds refreshing brightness and counterbalances the cookies’ richness.
-
Italian Espresso: The bold, aromatic flavors of espresso enhance the sweetness, creating a perfect afternoon treat.
-
Chocolate Gelato: Creamy, chocolate gelato offers a heavenly pairing, with its rich texture echoing the cookies’ filling.
-
Whipped Cream: Light and airy, a dollop of whipped cream elevates the dessert experience while adding a creamy element.
-
Pistachio Ice Cream: The nutty flavor plays beautifully with the pistachios in the cookies, creating a harmonious dessert duo.
-
Dessert Wine: A glass of sweet dessert wine like Vin Santo enriches the sweet notes, making every bite more special.
-
Baklava: The flaky layers and honey sweetness of baklava provide an interesting textural contrast and delightful flavor.
-
Caramel Sauce: Drizzling warm caramel over the cookies adds a unique sweetness that pairs beautifully with the chocolate filling.
-
Cappuccino: The smooth, frothy texture of cappuccino perfectly complements the crispness of the cookies, enhancing the afternoon coffee experience.
Expert Tips for Cannoli Cookies
-
Smooth Ricotta: Ensure the ricotta is well-blended to avoid a grainy texture in both the dough and filling for your Cannoli Cookies.
-
Avoid Overmixing: Gently incorporate dry ingredients into the wet mixture to keep the dough tender; overmixing can lead to tough cookies.
-
Watch the Bake Time: Keep a close eye on the cookies as they bake; they should be golden brown but not too dark, preventing any bitterness.
-
Prevent Sticking: Use parchment paper on your baking sheets to avoid any sticky situations during baking and make cleanup easier.
-
Cooling is Key: Let the cookies cool completely on a wire rack for the best texture and flavor before dusting with powdered sugar.
How to Store and Freeze Cannoli Cookies
Room Temperature: Store Cannoli Cookies in an airtight container at room temperature for up to 3 days to maintain their deliciousness and avoid becoming soggy.
Fridge: If you prefer, you can keep the cookies in the fridge for 4-5 days; just ensure they’re well-wrapped to prevent drying out.
Freezer: For long-term storage, wrap the cookies tightly in plastic wrap and then in aluminum foil, freezing them for up to 1 month. Thaw before serving and dust with powdered sugar to refresh their look.
Reheating: To enjoy warm Cannoli Cookies, pop them in a microwave for about 10-15 seconds or place them in a preheated oven at 350°F (175°C) for a few minutes.
Cannoli Cookies Recipe FAQs
What kind of ricotta cheese should I use?
Absolutely! For optimal results, use whole milk ricotta cheese that is smooth and creamy. Avoid using low-fat or part-skim ricotta as they can lead to a grainy texture in both the dough and filling, which is not ideal for these Cannoli Cookies. Always make sure it’s at room temperature for better blending.
How should I store leftover Cannoli Cookies?
The more the merrier! Store your Cannoli Cookies in an airtight container at room temperature for up to 3 days. If you want to extend their life, you can keep them in the refrigerator for up to 5 days, just make sure they are well-wrapped to prevent drying out.
Can I freeze Cannoli Cookies?
Certainly! To freeze, wrap each cookie tightly in plastic wrap, then cover them with aluminum foil to prevent freezer burn. They can be frozen for up to 1 month. When you’re ready to enjoy them, thaw at room temperature and dust with powdered sugar to refresh their appearance.
What if my cookie dough is too sticky?
Very good question! If your dough is sticky, don’t worry! Lightly dust your work surface with flour before rolling it out. You can also sprinkle a little flour on your hands and the dough as needed while shaping it. Just be careful not to overdo it; too much flour can change the texture of your Cannoli Cookies!
Are Cannoli Cookies suitable for people with nut allergies?
Absolutely! If you’re making these for someone with nut allergies, you can simply omit the chopped pistachios and substitute them with another crunchy option like sunflower seeds. Make sure to also check any other ingredients for potential allergens to ensure everyone’s safety.
Can I use different fillings in Cannoli Cookies?
Definitely! Experimenting with various fillings can be a delightful experience. For a lighter option, consider using sweetened cream cheese or flavored mascarpone. You can also try adding chopped dried fruits or even a dash of espresso powder to the filling for a unique twist on traditional flavors. Enjoy the creativity!

Crispy Cannoli Cookies with Creamy Sweet Filling Delight
Ingredients
Equipment
Method
- Preheat the oven to 350°F (175°C) and line baking sheets with parchment paper.
- In a large bowl, whisk together the all-purpose flour and granulated sugar.
- In another bowl, blend the ricotta cheese for dough, egg, vanilla extract, and lemon zest until smooth.
- Gradually incorporate the dry ingredients into the wet, stirring gently to form a soft dough.
- Roll out the dough to about ¼ inch thick and cut into rectangles.
- Mix the second portion of ricotta cheese, mini chocolate chips, and chopped pistachios for the filling.
- Place a spoonful of filling on one side of a dough rectangle and fold to seal.
- Bake for 15-18 minutes until golden brown and firm at the edges.
- Cool on wire racks and dust with powdered sugar before serving.