
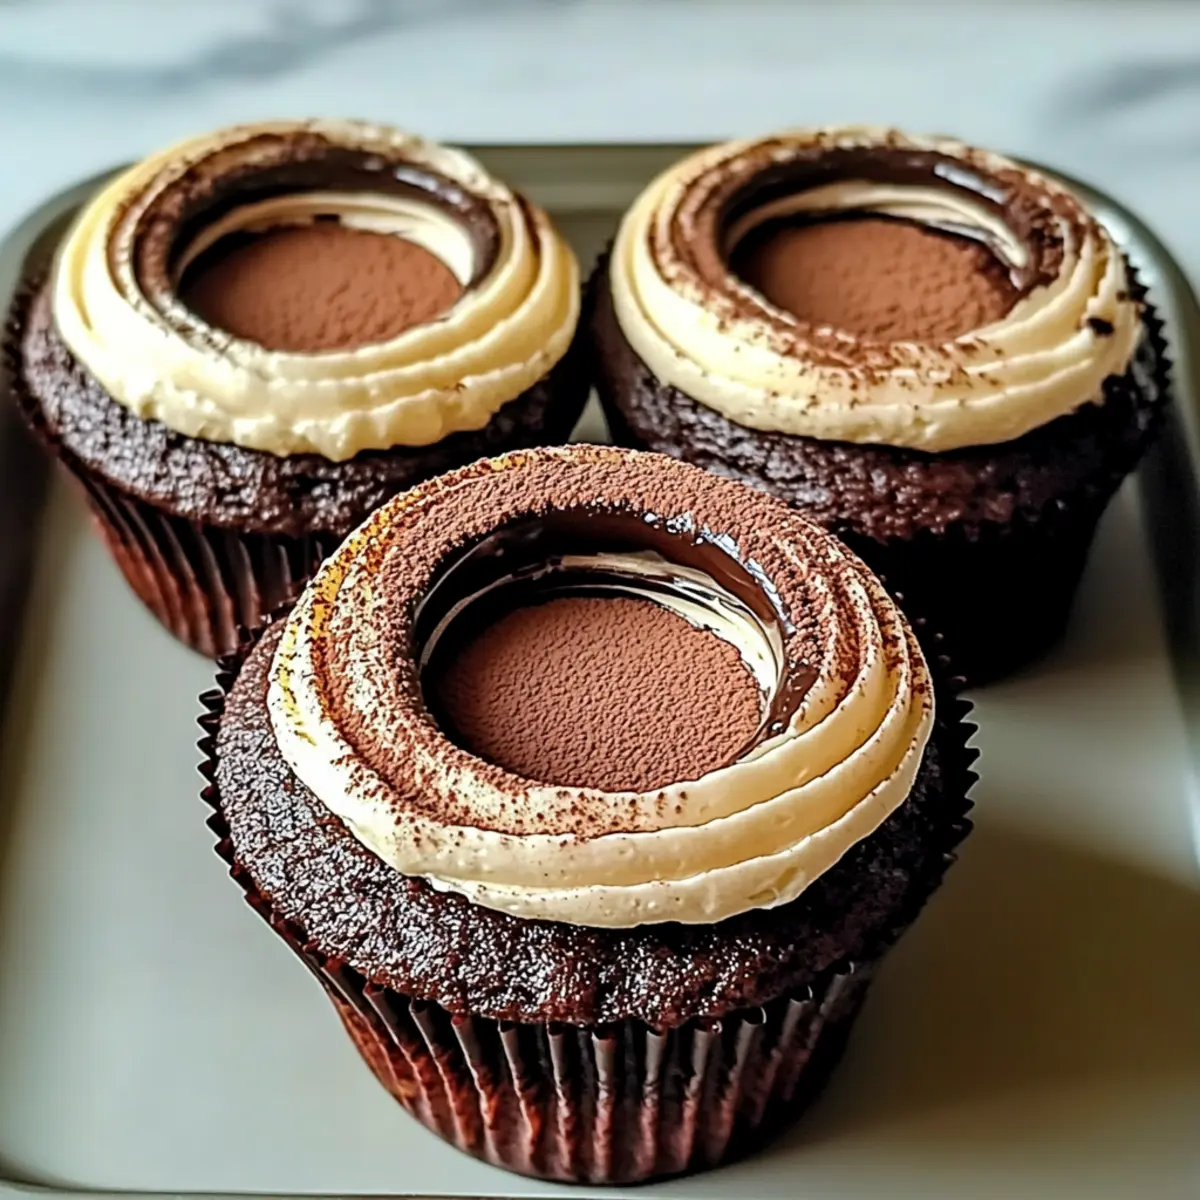
As I took the first bite of a freshly baked Chocolate Tiramisu Cupcake, the world around me faded—now that’s a sweet escape! These cupcakes beautifully marry the rich, indulgent flavors of traditional tiramisu with the playful charm of a cupcake. Not only are they a delightful gluten-free alternative for dessert lovers seeking a quick fix, but they also cater to various dietary preferences, making them a unanimous crowd-pleaser. Whether you’re hosting a gathering or just treating yourself after a long day, these little delights transform any moment into an opportunity for joy. Are you ready to bring a bit of café elegance into your kitchen? Let’s dive into the recipe!
Why Choose Chocolate Tiramisu Cupcakes?
Irresistible Flavor Fusion: These cupcakes beautifully combine rich chocolate and coffee, creating a decadent treat that tantalizes your taste buds.
Gluten-Free Delight: Enjoy guilt-free indulgence with our gluten-free options, ensuring everyone can savor this delightful dessert.
Quick and Easy: With straightforward instructions, you can whip up these cupcakes in no time, making them perfect for busy days.
Perfect for Any Occasion: Whether it’s a dinner party or a cozy night in, these cupcakes are sure to impress your guests and tickle your cravings.
Versatile Variations: Feel free to play around with flavors or fillings, just like with our Patriotic Cupcakes Festive recipe, and cater them to your unique taste!
Transform your dessert experience and elevate every bite with the luxurious taste of Chocolate Tiramisu Cupcakes!
Chocolate Tiramisu Cupcake Ingredients
For the Batter
• All-Purpose Flour – Provides structure; substitute with a gluten-free all-purpose blend for a gluten-free version.
• Cocoa Powder – Adds rich chocolate flavor; dark cocoa is recommended for a deeper taste.
• Baking Powder – Acts as a leavening agent for fluffy cupcakes; ensure it’s fresh for best results.
• Granulated Sugar – Sweetens the batter; coconut sugar can be a great alternative for a healthier option.
• Eggs – Used for moisture and stability; flax eggs work well as a plant-based substitute.
• Milk – Contributes to the moistness; almond milk is perfect for dairy-free variations.
• Vegetable Oil – Keeps the cupcakes from drying out; melted butter is an excellent alternative.
• Espresso – Infuses the coffee essence reminiscent of classic tiramisu; instant coffee can also be used if preferred.
• Mascarpone Cheese – Creates a rich, creamy filling; you can substitute ricotta for a lighter texture.
• Cocoa Powder (for Dusting) – Enhances the visual appeal and adds flavor to the final presentation.
Indulge in these Chocolate Tiramisu Cupcakes and experience a delightful balance of flavors that transport you to dessert heaven!
Step‑by‑Step Instructions for Chocolate Tiramisu Cupcakes
Step 1: Preheat the Oven
Begin by preheating your oven to 350°F (175°C) while you prepare your muffin tin. Line each cup with cupcake liners to ensure easy removal after baking. The inviting heat will create the perfect environment for your Chocolate Tiramisu Cupcakes to rise beautifully.
Step 2: Mix Dry Ingredients
In a large mixing bowl, whisk together the all-purpose flour, cocoa powder, baking powder, and granulated sugar until well combined. Look for a uniform dry mixture without any lumps; this will ensure that your cupcakes rise evenly and maintain a delightful chocolate flavor throughout.
Step 3: Combine Wet Ingredients
In a separate bowl, mix together the eggs, milk, and vegetable oil until the mixture is smooth and homogeneous. A creamy consistency indicates that your wet ingredients are ready to be incorporated into the dry mix, setting the stage for the rich flavors of the Chocolate Tiramisu Cupcakes.
Step 4: Blend Ingredients Together
Pour the wet mixture into the bowl containing the dry ingredients, stirring gently until just combined. Be careful not to overmix; a few small lumps are perfectly fine. This careful blending will create the moist base needed for each decadent cupcake.
Step 5: Fill the Cupcake Liners
Spoon the batter into the lined muffin tin, filling each cupcake liner about two-thirds full. This allows enough room for them to rise while baking, resulting in fluffy Chocolate Tiramisu Cupcakes that are both impressive and indulgent.
Step 6: Bake the Cupcakes
Place the muffin tin in the preheated oven and bake the cupcakes for 18-20 minutes. Keep an eye on them, and they’re done when a toothpick inserted into the center comes out clean. The delightful aroma of chocolate and coffee will fill your kitchen during this time!
Step 7: Cool the Cupcakes
Once baked, remove the muffin tin from the oven and allow it to cool in the pan for about 5 minutes. Then, transfer the cupcakes to a wire rack to cool completely. This step is crucial as it prepares them for the creamy filling, enhancing the flavors of your Chocolate Tiramisu Cupcakes.
Step 8: Prepare the Mascarpone Filling
While the cupcakes cool, whip together the mascarpone cheese and espresso in a medium bowl until it becomes fluffy and well-combined. This heavenly filling infuses each bite with the rich coffee essence reminiscent of a classic tiramisu, ensuring a delightful surprise inside your cupcakes.
Step 9: Fill the Cupcakes
Once the cupcakes are completely cool, carefully remove the top of each cupcake and scoop out a small portion of the center. Fill the hollowed area with the espresso mascarpone filling, generously adding a delightful treat in the middle of each Chocolate Tiramisu Cupcake.
Step 10: Dust and Serve
Finally, dust the filled cupcakes with cocoa powder for an elegant finish. This enhances both the presentation and flavor. Serve your Chocolate Tiramisu Cupcakes proudly, and watch as they become the star of any gathering or a comforting end to your day!

Chocolate Tiramisu Cupcakes Variations
Feel free to let your creativity shine while making these heavenly cupcakes, giving them a personal touch that delights every palate!
-
Dairy-Free: Replace mascarpone with coconut cream and use almond milk to keep it lactose-free, while still enjoying creamy goodness.
For an extra layer of flavor, consider incorporating a splash of vanilla extract into the filling for richness. -
Gluten-Free Bliss: Swap all-purpose flour for a 1:1 gluten-free blend, ensuring everyone can dive into this delicious treat without worry.
It’s an easy swap that maintains the cupcakes’ moist and fluffy texture while accommodating dietary needs. -
Chocolate Overload: Use dark chocolate cocoa powder and add mini chocolate chips into the batter for an intensified chocolate experience.
This twist creates a delightful surprise as each bite erupts with even more chocolaty goodness! -
Heat Things Up: Add a pinch of cayenne pepper or a sprinkle of chili powder to the batter for a spicy kick that beautifully contrasts the sweetness.
It’s a fun, unexpected twist that brings warmth with each decadent bite. -
Flavor Infusions: Experiment with flavored liqueurs like hazelnut or orange-flavored spirits in the espresso filling for a unique twist on traditional tiramisu.
Even a touch of orange zest can elevate flavors beautifully, making them stand out at your next gathering. -
Berry Goodness: Incorporate fresh raspberries or strawberries into the filling for a burst of fruity freshness alongside the rich chocolate.
Pairing berries with chocolate creates a mouth-watering combination that also makes for a stunning presentation. -
Nutty Addition: Mix in finely chopped nuts, such as walnuts or hazelnuts, into the batter for added texture and flavor.
The crunch of nuts complements the soft cupcake, creating a delightful contrast in each bite. -
Serve with a Twist: Pair your Chocolate Tiramisu Cupcakes with a scoop of rich vanilla ice cream or a drizzle of espresso for an indulgent moment.
This simple addition transforms your dessert into an extraordinary experience, charming every guest at the table.
For even more delightful options, don’t forget to check out our delicious Chocolate Chip Kodiak recipe!
How to Store and Freeze Chocolate Tiramisu Cupcakes
Room Temperature: Keep cupcakes at room temperature for up to 1 day in an airtight container to maintain their flavor and texture.
Fridge: Store Chocolate Tiramisu Cupcakes in the refrigerator for up to 3 days, ensuring they’re placed in an airtight container to prevent drying out.
Freezer: Freeze individually wrapped cupcakes for up to 2 months. Thaw in the refrigerator before filling and serving for the best taste and texture.
Reheating: If desired, warm your cupcakes briefly in the microwave for about 10-15 seconds to enjoy a fresh-baked experience!
Make Ahead Options
These Chocolate Tiramisu Cupcakes are perfect for meal prep enthusiasts looking to save time during busy days! You can bake the cupcakes up to 24 hours in advance and store them in an airtight container at room temperature for optimal freshness. The espresso mascarpone filling can also be prepared ahead of time; simply refrigerate it for up to 3 days. To maintain their delicious quality, be sure to allow the cupcakes to cool completely before filling them to lock in their moistness. When ready to serve, just scoop out the centers, fill them with the rich mascarpone mixture, and dust with cocoa powder for the final, irresistible touch!
What to Serve with Chocolate Tiramisu Cupcakes?
Picture a delightful gathering filled with laughter and warmth, where the promise of rich, chocolatey treats fills the air with sweet anticipation.
-
Rich Vanilla Ice Cream: Creamy ice cream perfectly balances the cupcakes’ rich flavors, creating a blissful contrast that’s simply irresistible.
-
Fresh Berries: The tartness of strawberries or raspberries enhances the sweetness of the cupcakes, adding a refreshing burst of flavor and color.
-
Whipped Cream: Light and airy, a dollop of freshly whipped cream adds a beautiful, indulgent touch that complements the espresso mascarpone filling perfectly.
-
Warm Espresso: For the coffee lover, a shot of warm espresso alongside the cupcakes deepens the tiramisu experience, echoing the flavors in every sip.
-
Chocolate Ganache Drizzle: Elevate the treat with a silky chocolate ganache drizzle, adding an extra layer of decadence that will leave your guests enchanted.
-
Chilled Almond Milk: For a dairy-free option, chilled almond milk serves as a soothing complement to the richness of the cupcakes, making them feel lighter.
Indulge in these pairings and transform every moment into a sweet escape!
Expert Tips for Chocolate Tiramisu Cupcakes
- Mix Gently: Avoid overmixing your batter; this helps to maintain a soft texture in your Chocolate Tiramisu Cupcakes. A few lumps are just fine!
- Cool Completely: Allow your cupcakes to cool completely before filling them to ensure the mascarpone stays fluffy and doesn’t melt.
- Perfect Fillings: Make sure to fill the cupcake centers generously with the espresso mascarpone to get that delicious tiramisu experience in every bite.
- Decorate Thoughtfully: Dust with cocoa powder just before serving for the best visual presentation and flavor enhancement.
- Storage Tips: Store leftovers in an airtight container in the fridge for up to three days. They’re even more delightful chilled!
Chocolate Tiramisu Cupcakes Recipe FAQs
What type of flour should I use for gluten-free Chocolate Tiramisu Cupcakes?
Absolutely! To make gluten-free Chocolate Tiramisu Cupcakes, I recommend using a gluten-free all-purpose flour blend. Many brands are available that mimic the texture of traditional flour, ensuring your cupcakes are just as delightful and fluffy.
How should I store my Chocolate Tiramisu Cupcakes?
For optimal freshness, store your Chocolate Tiramisu Cupcakes in an airtight container. At room temperature, they last for up to 1 day. If you choose to refrigerate them, they can keep for about 3 days. Just make sure the container is airtight to keep them moist and tempting!
Can I freeze the Chocolate Tiramisu Cupcakes?
Certainly! To freeze your cupcakes, wrap each one individually in plastic wrap or aluminum foil, then place them in a freezer-safe bag or container. They can be frozen for up to 2 months. When ready to enjoy, thaw them in the refrigerator overnight before filling and dusting with cocoa powder.
What should I do if my cupcakes are too dense?
If you find your Chocolate Tiramisu Cupcakes are too dense, this could be from overmixing the batter. Be gentle when combining wet and dry ingredients—it’s perfectly fine to have some lumps. Additionally, ensure your baking powder is fresh, as expired leavening agents can lead to denser results.
Are Chocolate Tiramisu Cupcakes safe for pets or allergies?
Great question! Chocolate is toxic to dogs and cats, so please keep these cupcakes out of their reach. If you’re catering to someone with allergies, be mindful of the eggs and dairy content in the recipe. You can use flax eggs for a plant-based option and dairy-free alternatives like almond milk and coconut cream cheese for the filling.
How can I make Chocolate Tiramisu Cupcakes dairy-free?
To make these cupcakes dairy-free, simply substitute cow’s milk with almond milk or oat milk, and instead of mascarpone cheese, use a plant-based cream cheese alternative. Ensure any added flavors or additional ingredients are also dairy-free for a delicious yet inclusive dessert!
Decadent Chocolate Tiramisu Cupcakes for a Sweet Escape
Ingredients
Equipment
Method
- Preheat your oven to 350°F (175°C) and prepare your muffin tin with cupcake liners.
- In a large mixing bowl, whisk together the flour, cocoa powder, baking powder, and sugar until well combined.
- In a separate bowl, mix together the eggs, milk, and vegetable oil until smooth.
- Pour the wet mixture into the dry ingredients, stirring gently until just combined.
- Spoon the batter into the lined muffin tin, filling each cupcake liner about two-thirds full.
- Bake the cupcakes for 18-20 minutes until a toothpick comes out clean.
- Allow them to cool in the pan for about 5 minutes, then transfer to a wire rack to cool completely.
- Whip together mascarpone cheese and espresso until fluffy.
- Once cool, scoop out a small portion from the center of each cupcake and fill with the espresso mascarpone filling.
- Dust the filled cupcakes with cocoa powder before serving.