
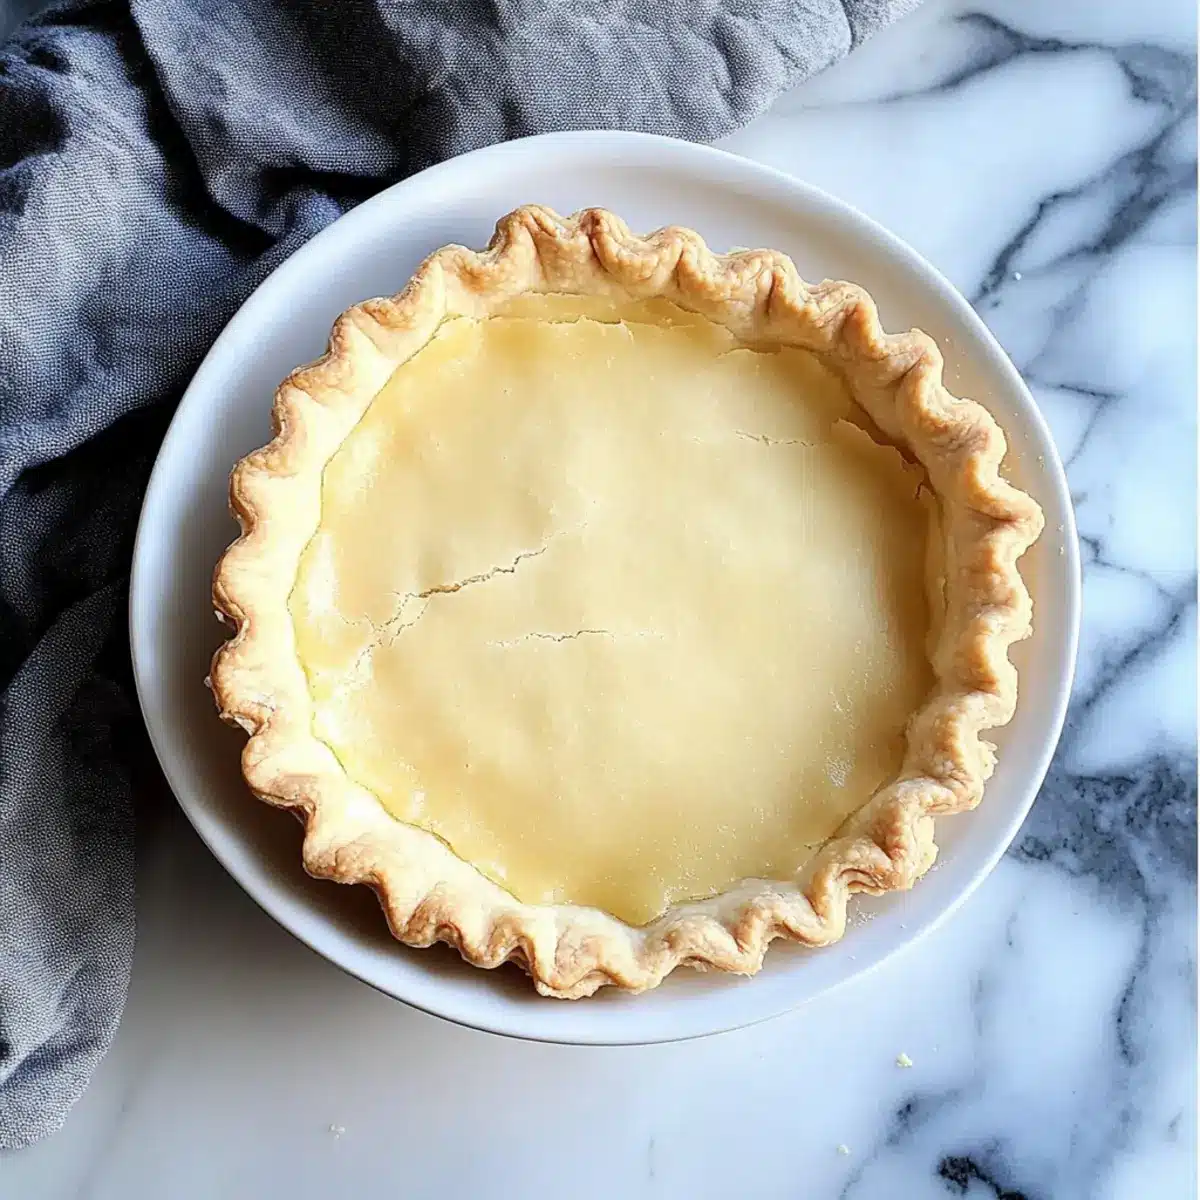
As I stood in my kitchen, the aroma of freshly baked pies danced around me, bringing back memories of family gatherings and warm conversations. If you’ve ever wanted that same comforting experience without the gluten, then my Gluten-Free Pie Crust is just what you need. This flaky, buttery crust is so effortlessly versatile it can cradle your favorite fillings—be it a decadent chocolate tart or a savory quiche. Best of all, it’s incredibly easy to whip up, making it a reliable option for those last-minute baking adventures or holiday feasts. So why settle for store-bought when you can create something truly special at home? What delightful filling will you choose to try with this crust?
Why Is This Gluten-Free Pie Crust Amazing?
Simplicity at Its Best: The steps are straightforward, requiring minimal kitchen expertise to achieve flaky perfection.
Rich, Buttery Flavor: Made with cold butter, this crust boasts a delightfully rich taste that enhances any filling.
Incredible Versatility: Sweet or savory, this pie crust fits your every culinary craving—use it for everything from fruit tarts to quiches!
Time-Saving: Quick to prepare and chill, it’s a lifesaver for last-minute baking needs.
Crowd-Pleasing Appeal: Even non-gluten-free friends will admire the taste and texture—it’s a hit at any gathering!
Elevate your baking with this easy gluten-free pie crust that invites creativity in the kitchen. Whether it’s a classic apple pie or a vibrant vegetable quiche, this crust is sure to impress.
Gluten-Free Pie Crust Ingredients
For the Dough
- Gluten-Free Flour Blend – This is the main structure; Bob’s Red Mill Gluten-Free 1:1 works wonders!
- Cold Unsalted Butter – Provides flakiness; feel free to use vegan butter for a dairy-free version.
- Egg – Adds moisture and structure; substitute with a flax egg for a vegan option.
- Chilled Water – Keeps the dough cold, crucial for flaky results; ice water is ideal!
- Apple Cider Vinegar – Activates the gluten-free flour for better texture and rise.
- Xanthan Gum – Helps bind the ingredients; omit if using a blend that already includes it.
- Baking Powder – Promotes leavening for a light, airy crust.
- Sugar – Enhances sweetness and helps with browning; adjust based on your filling.
- Salt – Balances flavors and elevates the overall taste.
Optional Additions
- Herbs or Spices – Consider incorporating some for savory applications, like rosemary or cinnamon for sweet.
This easy gluten-free pie crust pairs perfectly with both sweet and savory fillings, making it a delightful addition to your recipe collection!
Step‑by‑Step Instructions for Gluten-Free Pie Crust
Step 1: Mix Wet Ingredients
In a small bowl, whisk together one egg, 3-4 tablespoons of chilled water, and 1 tablespoon of apple cider vinegar until well combined. This mixture adds moisture and helps activate the ingredients. Aim for a smooth consistency, as this will ensure your gluten-free pie crust holds together beautifully. Set aside while you prepare the dry ingredients.
Step 2: Combine Dry Ingredients
In a larger mixing bowl, combine 2 cups of gluten-free flour blend, 2 tablespoons of sugar, 1 teaspoon of xanthan gum, 1 teaspoon of baking powder, and ½ teaspoon of salt. Stir thoroughly until blended, ensuring there are no lumps. This dry mixture forms the foundation of your gluten-free pie crust.
Step 3: Cut in Butter
Add ½ cup of chilled unsalted butter (cut into cubes) to your flour mixture. Using a pastry cutter or your fingertips, work the butter into the flour until the mixture resembles coarse crumbs, resembling the size of peas. This step is crucial for achieving that flaky texture. Keep the mixture cool to ensure the crust remains buttery.
Step 4: Combine Mixtures
Pour the wet ingredients into the dry mixture and quickly stir until a dough forms. If the dough appears too dry or crumbly, add more chilled water, one tablespoon at a time, until you achieve a cohesive consistency. Aim for a dough that’s slightly tacky but manageable, perfect for your gluten-free pie crust.
Step 5: Chill Dough
Shape the dough into a disk, wrap it tightly in plastic wrap, and refrigerate for at least 30 minutes to 1 hour. Chilling helps the butter firm up, ensuring your gluten-free pie crust remains flaky during baking. For the best results, you can chill it overnight if time allows.
Step 6: Roll Out Dough
On a sheet of parchment paper lightly dusted with gluten-free flour, roll the dough into a 13-inch round, about ¼ inch thick. Don’t worry about imperfections; you can easily patch any tears with extra dough. Ensure the edges are even as you roll, which is essential for a well-crafted crust.
Step 7: Transfer to Pie Dish
Carefully lift the rolled dough and transfer it to a 9-inch pie dish. Press it gently into the dish, crimping the edges as desired for a rustic look. If the dough is too sticky to handle, place it back in the refrigerator for a few minutes to firm up before transferring.
Step 8: Bake
Use your gluten-free pie crust as directed in your pie recipe. Typically, pre-bake at 350°F for around 10 minutes, or until the edges are lightly golden. Keep an eye on it to prevent over-browning; a perfect crust enhances any sweet or savory filling you choose to fill it with.
Expert Tips for Gluten-Free Pie Crust
-
Chill Everything: Ensure your butter, egg, and water are all very cold to maximize flakiness in your gluten-free pie crust.
-
Quick Handling: Avoid overworking the dough; the warmth from your hands can melt the butter, resulting in a less flaky texture.
-
Avoiding Dryness: If the dough is crumbly, gradually add chilled water, one tablespoon at a time, until it holds together well.
-
Patch Imperfections: Don’t stress about an imperfect roll-out. Use extra dough to patch up any tears or cracks in the crust.
-
Blind Baking Tips: If your recipe calls for blind baking, place parchment paper on the crust and fill with pie weights to prevent puffing during baking.
-
Customize Flavor: Feel free to mix in your favorite herbs or spices to elevate the taste of your gluten-free pie crust for both sweet and savory masterpieces.
What to Serve with Gluten-Free Pie Crust
Building a delightful meal around this versatile gluten-free crust opens up a world of possibilities for flavorful combinations that will make your taste buds dance.
- Savory Quiche: A rich quiche filled with sautéed vegetables and cheese offers a heartwarming contrast to the flaky crust. Each slice is perfect for brunch or dinner.
- Fresh Garden Salad: Crisp greens with a light vinaigrette brighten the plate while balancing the pie’s richness. A refreshing crunch adds contrast to the tender texture.
- Fruit Tart: Bursting with vibrant seasonal fruits and a light glaze, this sweet top makes for an irresistibly beautiful dessert that compliments the buttery crust.
- Hearty Stews: Pairing with a robust beef or vegetable stew allows the pie crust to shine as a perfect vessel. The comfort of a warm filling within a flaky crust is unbeatable!
- Creamy Mashed Potatoes: These silky potatoes provide a comforting, creamy contrast that enhances savory pies, making every bite a delight.
- Sparkling Lemonade: A refreshing, zesty drink adds a fun twist when serving sweet pies, awakening your palate between bites with its fizzy brightness.
- Chocolate Ganache Tart: Indulge in smooth, rich chocolate coupled with the crust’s buttery flakes—this dessert is a chocolate lover’s dream come true!
- Crispy Roasted Vegetables: The caramelized edges and tender interiors of seasonal vegetables offer an earthy, satisfying note that complements savory fillings beautifully.
- Pumpkin Soup: A velvety bowl of pumpkin soup serves as a warm starter, perfectly leading into any main course pie. Its slight sweetness and spice elevate your meal even further.
Make Ahead Options
Preparing your Gluten-Free Pie Crust ahead of time is a game-changer for busy home cooks! You can make the dough up to 24 hours in advance. Simply follow the initial steps to combine your ingredients, then wrap the shaped dough disk tightly in plastic wrap and refrigerate it. Alternatively, to keep it fresh for up to 3 days, place the wrapped dough in an airtight container. When you’re ready to bake, just roll it out and transfer to your pie dish—no need to change a thing! This strategy not only saves time but ensures your crust is just as flaky and buttery when you’re ready to fill it.
How to Store and Freeze Gluten-Free Pie Crust
Fridge: Store any unused gluten-free pie crust dough wrapped tightly in plastic wrap for up to 2 days. This chilling will maintain its flakiness and ensure it’s ready for your next baking adventure.
Freezer: For longer storage, freeze the wrapped dough for up to 3 months. When ready to use, thaw it in the refrigerator overnight before rolling out to prevent crumbling.
Baked Crust: If you have a pre-baked gluten-free pie crust that you’d like to save, keep it in an airtight container in the fridge for up to 5 days. Use it as needed without compromising taste or texture.
Reheating: To reheat a baked crust, warm it in a 350°F oven for about 5-10 minutes until it’s warmed through and ready to host your favorite filling.
Gluten-Free Pie Crust Variations
Feel free to put your own personal twist on this delightful crust and make it truly yours!
- Dairy-Free: Substitute cold unsalted butter with vegan butter for a creamy, non-dairy option without losing flavor. Your crust will remain just as flaky and delicious!
- Sweetener Swap: Instead of sugar, try using maple syrup or honey for a more complex sweetness. Just watch the moisture content; you may need a tad less water!
- Herbed Delight: Stir in chopped fresh herbs like rosemary or thyme for a savory crust perfect for quiches or pot pies. The aroma while baking will have your friends and family clamoring for a slice!
- Nutty Twist: Replace a portion of the gluten-free flour with almond flour for a nutty flavor and richer texture. Just remember to balance it with a bit of extra binding agent, like xanthan gum, to keep everything in check.
- Cocoa Infusion: For a sweet dessert pie, incorporate unsweetened cocoa powder into the dough for a chocolatey crust. It pairs beautifully with cherry or chocolate fillings for an indulgent treat.
- Spicy Kick: Add spices like cinnamon or nutmeg to your sweet pies or a pinch of cayenne pepper for savory pies. This small addition can transform your basic recipe into something extraordinary!
- Nut-Free Option: For a nut-free crust, use a combination of gluten-free flour and a little ground sunflower seeds for flavor and binding. It’s a great option for those with nut allergies!
- Floral Infusion: Consider adding edible flowers like lavender or chamomile to your crust for a delightful twist, especially if the pie filling is on the lighter, fruitier side.
Let your imagination run wild as you bring your favorite flavors into this simple gluten-free pie crust. Each variation opens a door to new creative endeavors in your baking journey!
Gluten-Free Pie Crust Recipe FAQs
How do I choose the best gluten-free flour blend?
Choosing the right gluten-free flour blend is crucial for an amazing pie crust. I recommend brands like Bob’s Red Mill Gluten-Free 1:1 or Cup-4-Cup, as they contain necessary starches and binders. These blends provide enough structure, ensuring your crust remains flaky and tender. Feel free to experiment with different brands based on your taste preferences!
How should I store leftover gluten-free pie crust dough?
To keep your leftover gluten-free pie crust dough fresh, wrap it tightly in plastic wrap and store it in the refrigerator for up to 2 days. This maintains its flakiness. If you’re looking to store it for longer, you can freeze the wrapped dough for up to 3 months. Just remember to thaw it in the fridge overnight before rolling it out!
Can I freeze a baked gluten-free pie crust?
Absolutely! A baked gluten-free pie crust can be frozen to enjoy later. Just let it cool completely, then wrap it tightly in plastic wrap and place it in an airtight container. It can be frozen for up to 3 months. When you’re ready to use it, simply thaw it in the fridge overnight and reheat it in a 350°F oven for about 5-10 minutes before filling.
What should I do if my gluten-free pie crust is too crumbly?
If your gluten-free pie crust feels too crumbly, don’t worry—it’s an easy fix! Gradually add chilled water one tablespoon at a time while gently mixing the dough until it comes together. Make sure not to overhandle the dough, as this can lead to a tougher texture. Aim for a slightly tacky but manageable dough that will hold its shape beautifully when baked.
Are there any dietary considerations for pets or allergies?
This gluten-free pie crust is free from gluten, making it suitable for individuals with gluten sensitivity or celiac disease. However, be cautious when using optional ingredients like sugar or herbs, as some pets may not handle them well. If sharing snippets of your delicious pie with your furry friends, it’s best to stick with plain components like unseasoned cooked fruits or veggies.
Deliciously Flaky Gluten-Free Pie Crust for Every Occasion
Ingredients
Equipment
Method
- In a small bowl, whisk together the egg, chilled water, and apple cider vinegar until well combined.
- In a larger bowl, combine the gluten-free flour blend, sugar, xanthan gum, baking powder, and salt, stirring thoroughly.
- Add the cubed cold butter to the flour mixture and work it in until it resembles coarse crumbs.
- Pour the wet mixture into the dry ingredients and stir until a dough forms, adding more chilled water as needed.
- Shape the dough into a disk, wrap in plastic wrap, and refrigerate for at least 30 minutes.
- Roll the chilled dough on parchment paper into a 13-inch round, about ¼ inch thick.
- Transfer the rolled dough to a 9-inch pie dish and press it in, crimping the edges as desired.
- Pre-bake the crust at 350°F for about 10 minutes or until edges are lightly golden, as per your recipe instructions.