
As I stirred the vibrant mixture of fresh fruit juices and creamy goodness, the kitchen transformed into a summer oasis. This Homemade Rainbow Sherbet captures the spirit of sunny days with its dazzling array of fruity flavors, offering a delicious escape from the mundane. Not only is this frozen delight a quick and easy treat to whip up, but it’s also a customizable dessert that will impress friends and family alike. Whether you’re hosting a birthday bash or simply craving a refreshing scoop on a hot afternoon, this sherbet is a cheerful addition to any occasion. Ready to dive into the world of colorful, creamy confections? Let’s create a delightful experience that will keep you coming back for more!
Why is Homemade Rainbow Sherbet a Must-Try?
Vibrant, Eye-Catching Colors: Each scoop of this sherbet is a feast for the eyes, making it a showstopper at any gathering.
Customizable Flavors: Tailor it to your taste—mix and match with different fruits like mango or blueberries for a unique combination!
Quick & Easy Preparation: With just a few simple steps, you can create this refreshing treat without a fuss.
Crowd-Pleasing Delight: Perfect for summer parties or casual get-togethers, your guests will rave about this delicious, homemade dessert.
Healthier Option: Enjoy the goodness of real fruit flavors without the artificial ingredients found in store-bought versions. Want more fruity delight? Check out my Rainbow Juice Refreshing recipe for another vibrant twist!
Homemade Rainbow Sherbet Ingredients
For the Base
• Heavy Cream – Provides creaminess and richness for a smooth texture.
• Whole Milk – Contributes to the creamy consistency of your sherbet.
• Granulated Sugar – Sweetens the mixture and helps create a delightful texture; adjust according to fruit sweetness.
• Vanilla Extract – Enhances flavor and adds depth to your homemade rainbow sherbet.
For the Flavors
• Raspberries – Base for one of the fruity flavors; offers a sweet-tart profile. Frozen raspberries work well but should be thawed slightly for easier blending.
• Orange Juice (and zest) – Adds zesty citrus flavor for a refreshing twist in one variation.
• Lime Juice (and zest) – Introduces a tangy note, perfect for the third variation.
• Food Colorings (orange and green) – Optional but recommended for vibrant visual appeal, making your sherbet even more enticing!
Step‑by‑Step Instructions for Homemade Rainbow Sherbet
Step 1: Prepare Base
In a saucepan over medium heat, combine heavy cream, whole milk, and granulated sugar. Stir continuously for about 5-7 minutes, or until the sugar fully dissolves and the mixture is warm but not boiling. Remove from heat and stir in the vanilla extract. Allow the base to cool, then transfer it to a sealed container and refrigerate until chilled, at least 2 hours.
Step 2: Create Raspberry Puree
While the base is chilling, prepare the raspberry puree for your Homemade Rainbow Sherbet. In a blender, combine raspberries with 2 tablespoons of sugar and blend until completely smooth. To achieve a refined texture, strain the puree through a fine-mesh sieve into a bowl, discarding any seeds. Set the raspberry puree aside for later use.
Step 3: Churn Base
Once the base mixture is thoroughly chilled, pour it into your ice cream maker. Following the manufacturer’s instructions, churn the mixture until it reaches a soft-serve consistency, typically around 20-25 minutes. As the mixture churns, keep an eye on its thickness, which should appear creamy and slightly thickened for the perfect Homemade Rainbow Sherbet base.
Step 4: Flavor Variations
Divide the churned base into three equal parts in separate bowls. For the raspberry sherbet, mix the reserved raspberry puree into one-third of the base and churn for another minute to combine. Then, in another bowl, add freshly squeezed orange juice, zest, and a few drops of orange food coloring to the second third, stirring it in gently. For lime sherbet, mix lime juice, zest, and green food coloring into the last third, blending until smooth.
Step 5: Layer and Freeze
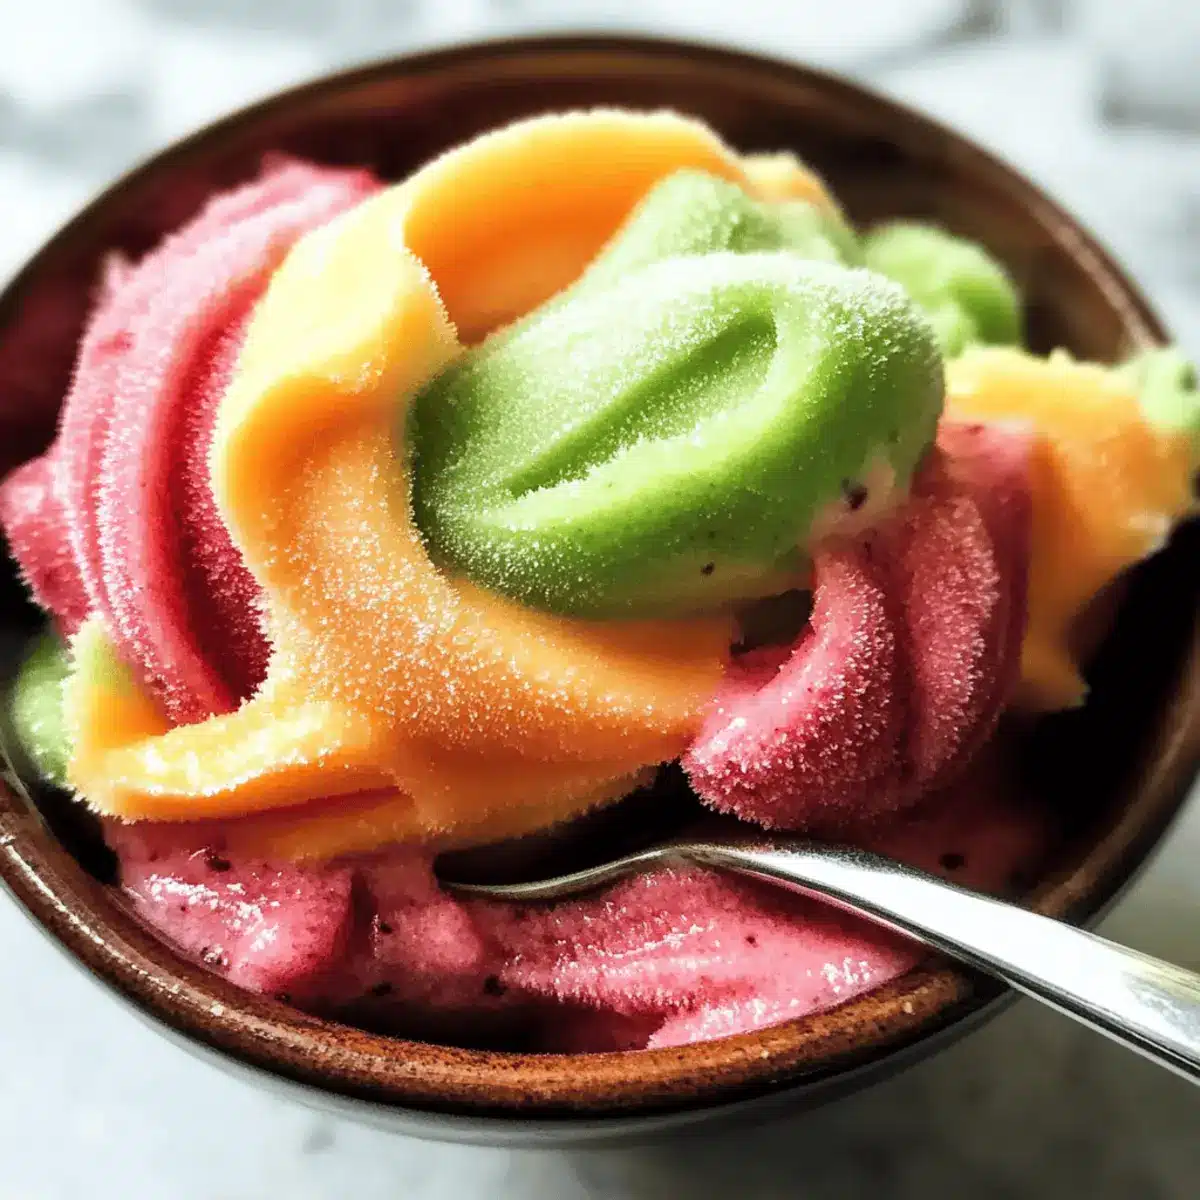
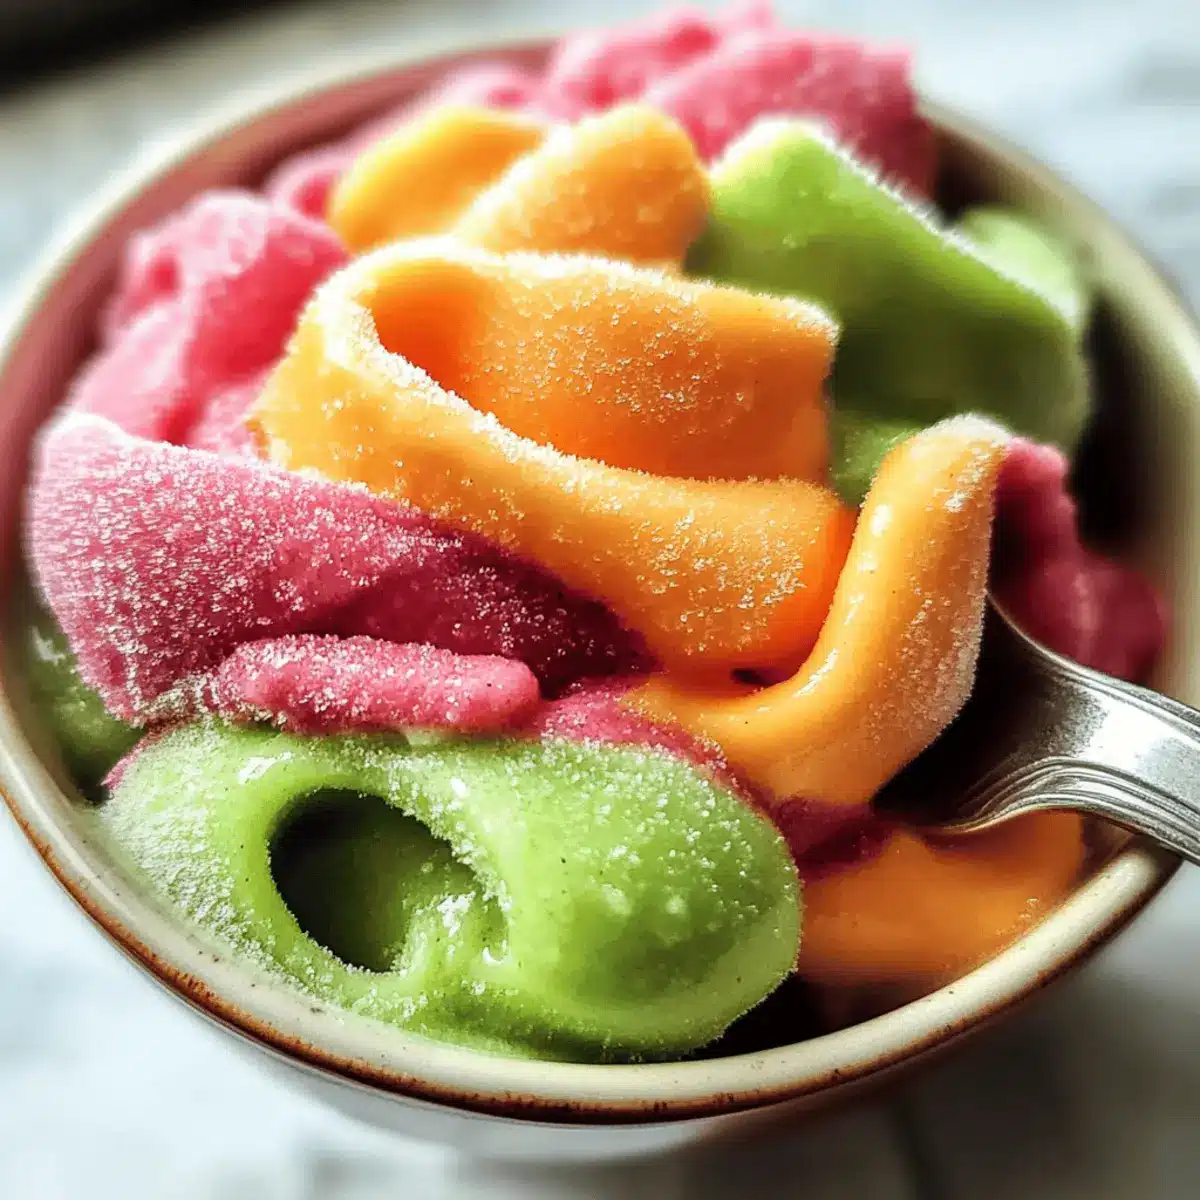
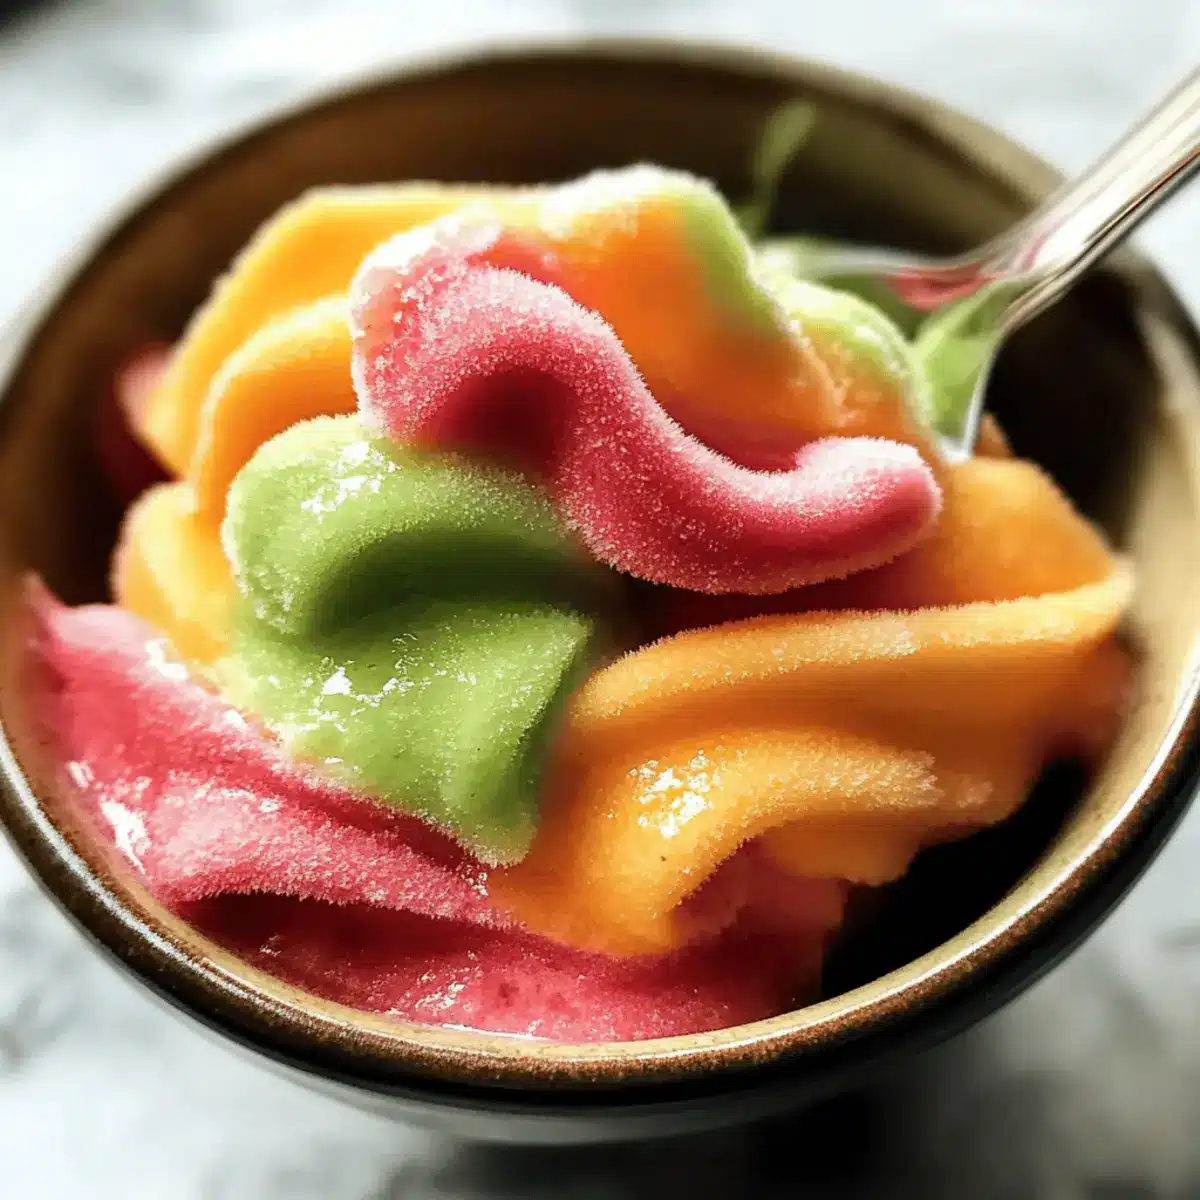
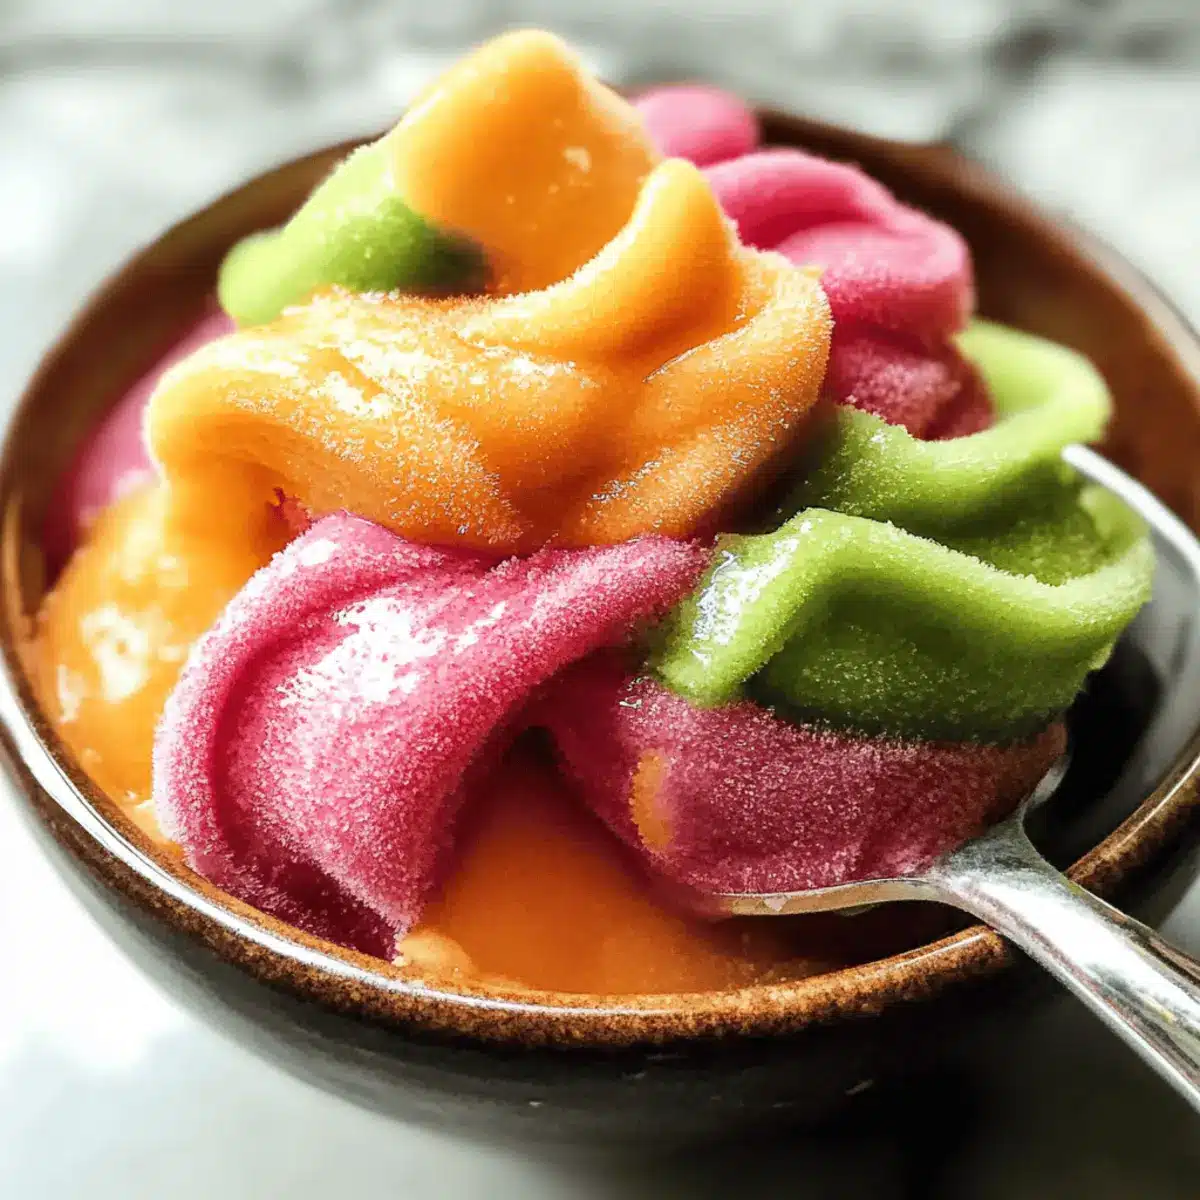
Now it’s time to layer your colorful sherbet! In a freezer-safe container, use a large spoon to alternate layers of each flavor, creating a marbled effect. Ensure a mix of the raspberry, orange, and lime flavors is visible, which adds to the visual appeal. Cover the container tightly with a lid or plastic wrap and freeze the sherbet for 4-6 hours, or until it is fully hardened and scoopable.
Make Ahead Options
These Homemade Rainbow Sherbet delights are perfect for busy home cooks looking to save time! You can prepare the base of the sherbet up to 24 hours in advance by cooling it in a sealed container in your refrigerator. Additionally, the fruit purees can be made ahead and stored in individual airtight containers for up to 3 days. When you’re ready to enjoy your sherbet, simply churn the chilled base and stir in the purees before layering and freezing. This approach preserves the vibrant flavors and delightful texture, ensuring your Homemade Rainbow Sherbet remains just as delicious and refreshing when enjoyed later!
What to Serve with Homemade Rainbow Sherbet?
Brighten your dessert table with delicious pairings that complement the fruity bliss of your sherbet!
-
Crispy Waffle Cones: Their satisfying crunch provides a delightful contrast to the creamy sherbet, making every scoop irresistible.
-
Fresh Fruit Salad: A refreshing mix of seasonal fruits enhances the fruity notes, adding freshness and color to your dessert spread.
-
Chocolate Drizzle: Warm, rich chocolate gives a decadent touch, balancing the sweetness with a creamy contrast that everyone loves.
-
Mint Leaves: This aromatic garnish adds a refreshing hint that elevates the flavors and gives a beautiful presentation to your treat.
-
Sparkling Lemonade: A bubbly citrus drink complements the sherbet’s fruit flavors while adding an extra layer of festive excitement to your gathering.
-
Start with Tri-Flavor Sorbet Cups: Offer a small taste of each flavor, showcasing the rainbow and giving guests a preview of the delight that awaits.
Indulge in these delightful accompaniments to create an unforgettable dessert experience that will leave your guests asking for more!
Tips for the Best Homemade Rainbow Sherbet
- Chill Thoroughly: Make sure your base is completely chilled before churning; this ensures a smooth and creamy texture.
- Strain Purees: Straining fruit purees prevents any seeds from ruining the texture of your Homemade Rainbow Sherbet.
- Use Fresh Ingredients: Fresh, ripe fruit yields the best flavor; consider seasonal fruits for maximum taste and vibrancy.
- Experiment Freely: Don’t hesitate to mix in other fruits or herbs; try mango, blueberry, or mint to create unique flavor profiles.
- Layer Thoughtfully: When layering, alternate colors and flavors carefully to enhance the visual appeal of your sherbet masterpiece.
Homemade Rainbow Sherbet Variations
Customize your vibrant Homemade Rainbow Sherbet with these delightful twists that are sure to excite your taste buds!
- Dairy-Free: Substitute whole milk and cream with coconut milk for a tropical flavor. Coconut adds a rich creaminess without dairy.
- Berry Bliss: Mix in blueberries alongside raspberries for a berry medley that brings a stunning color contrast and extra flavor.
- Tropical Delight: Use pineapple juice and coconut cream to create a refreshing tropical sherbet that’ll transport you to a sunny beach.
- Minty Fresh: Incorporate fresh mint leaves into the fruit purees for a cool and fragrant twist that livens up every scoop. Blend well for an even flavor!
- Sugar-Free: Swap granulated sugar with your preferred sweetener, like agave or stevia, to make a guilt-free version, perfect for health-conscious friends.
- Spicy Kick: For those who crave heat, add a pinch of cayenne or jalapeño juice to the lime variation for a surprising spicy twist, amplifying the flavor profile!
- Chocolate Swirl: Drizzle some melted dairy-free chocolate into the sherbet before freezing for a luxurious chocolate and fruit combination.
- Herbal Infusion: Consider infusing the cream with fresh basil or rosemary during the heating step for a sophisticated and aromatic sherbet like no other.
Now that you’ve explored various avenues of delightful creativity, don’t forget to enjoy your homemade masterpiece! And if you’re looking for more fruity inspiration, try making my Orange Chicken Homemade recipe next!
How to Store and Freeze Homemade Rainbow Sherbet
Fridge: Keep your homemade rainbow sherbet in the refrigerator for up to 2 days if you’re planning to enjoy it soon after making. Ensure it’s in an airtight container to prevent it from absorbing any odors.
Freezer: For longer storage, place the sherbet in an airtight container or wrap it tightly in plastic wrap, then freeze for up to 2 months. This will help maintain its vibrant flavors and smooth texture.
Reheating: To make scooping easier after freezing, let the homemade rainbow sherbet sit at room temperature for about 10-15 minutes before serving. This allows it to soften just enough for easy scoops!
Homemade Rainbow Sherbet Recipe FAQs
How do I select the best fruit for my rainbow sherbet?
Absolutely! Choose ripe, fresh fruits for the best flavor—look for vibrant colors and no dark spots, which indicate overripeness. If you’re using frozen fruits, thaw them slightly before blending to make pureeing easier. Seasonal fruits often yield the best taste and enhance your homemade rainbow sherbet.
How should I store homemade rainbow sherbet and for how long?
Homemade rainbow sherbet should be kept in an airtight container in the refrigerator for up to 2 days if you plan to serve it soon. For longer storage, transfer the sherbet to an airtight container, tightly wrap it in plastic wrap, and freeze for up to 2 months. This method helps maintain its creamy texture and vibrant flavors.
Can I freeze homemade rainbow sherbet, and what’s the best way to do it?
Yes, you can freeze homemade rainbow sherbet! First, layer the different flavors in an airtight container, ensuring they are tightly sealed to prevent freezer burn. To serve, let it sit at room temperature for 10-15 minutes before scooping to soften. It will maintain its delicious flavors and textures for up to 2 months in the freezer.
What should I do if my sherbet gets icy or hard in the freezer?
If your homemade rainbow sherbet becomes too icy or hard, it could be due to insufficient churning or freezing. To fix this, allow the sherbet to sit at room temperature for about 15 minutes to soften, then use a fork to break apart any icy clumps. Don’t skip the churning process; it’s what creates that smooth, creamy texture!
Is this recipe safe for people with dairy allergies?
No, the traditional recipe for homemade rainbow sherbet contains dairy. However, you can create a dairy-free version using coconut milk or almond milk instead of whole milk and heavy cream for a delicious alternative. Just keep in mind this may alter the flavor and texture slightly, but it’s definitely worth trying!
Can I use other fruits instead of the ones listed?
Very! Feel free to experiment with different fruits like mango, blueberries, or even more unique options like passionfruit for a twist on your homemade rainbow sherbet. Just ensure they are ripe and fresh, and adjust the sugar content based on the sweetness of the fruit you choose!
Homemade Rainbow Sherbet: Refreshing Fruity Bliss Awaits
Ingredients
Equipment
Method
- In a saucepan over medium heat, combine heavy cream, whole milk, and granulated sugar. Stir continuously for about 5-7 minutes, until sugar dissolves and mixture is warm. Remove from heat and stir in vanilla extract. Cool and refrigerate for at least 2 hours.
- In a blender, combine raspberries with 2 tablespoons of sugar and blend until smooth. Strain puree through a fine-mesh sieve, discarding seeds, and set aside.
- Pour the chilled base into your ice cream maker and churn until soft-serve consistency, around 20-25 minutes.
- Divide churned base into three bowls. In one bowl, mix in the raspberry puree. In the second, stir in orange juice, zest, and orange food coloring. In the last, combine lime juice, zest, and green food coloring.
- In a freezer-safe container, alternate layers of raspberry, orange, and lime mixtures. Cover tightly and freeze for 4-6 hours until hardened.