
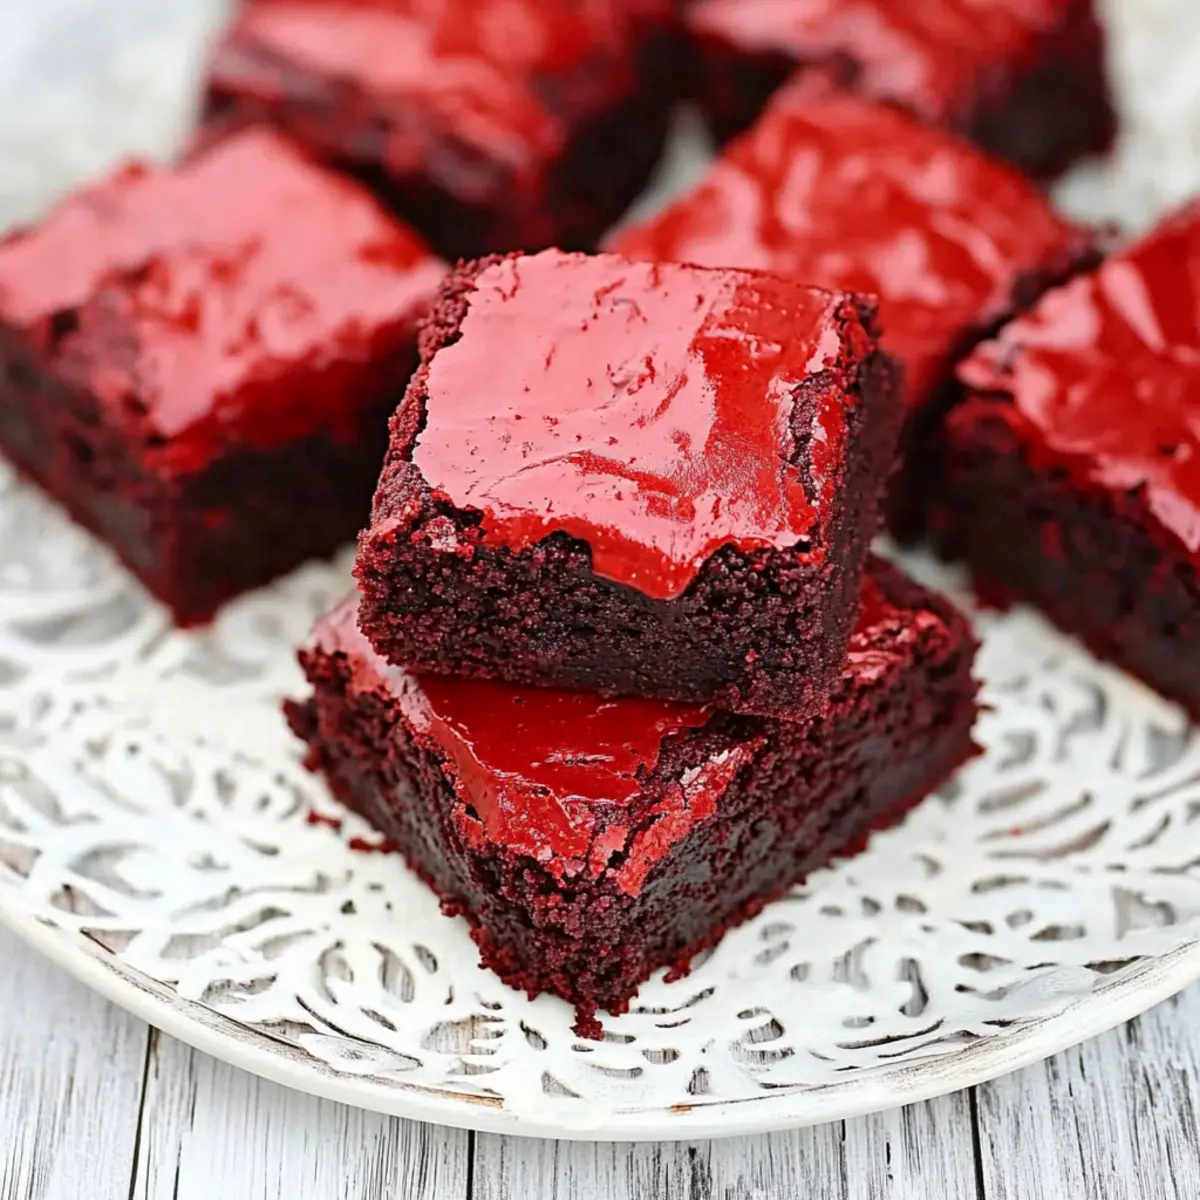
Chocolate and crimson collide in the most scrumptious way with these homemade Red Velvet Brownies! I can still taste the rich, fudgy goodness mixed with a delightful hint of cream cheese frosting that takes ordinary brownies to a whole new level. Perfect for a Valentine’s Day treat or any occasion that calls for indulgence, these brownies are not only incredibly easy to whip up but also serve as a show-stopping dessert to impress your loved ones. Imagine how their eyes will light up at the sight of that glossy top, beckoning them to take a bite! Ready to discover how to bring this creamy, chocolaty wonder into your kitchen? Let’s dive into the delicious details!
Why are these brownies irresistible?
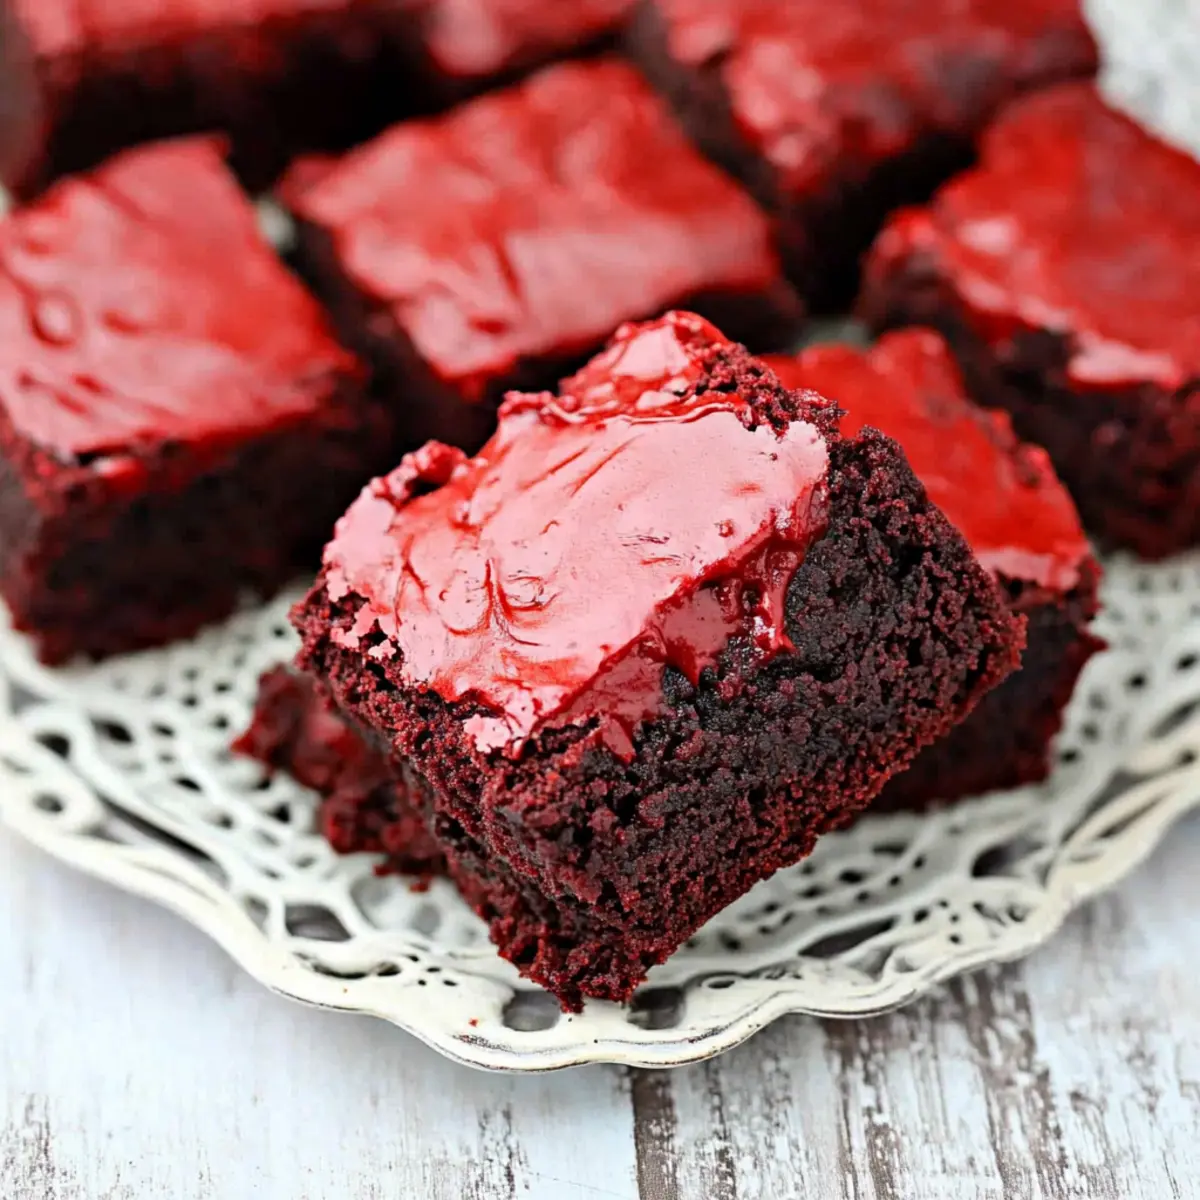
Decadent flavors abound in these Red Velvet Brownies, elevating your dessert game to spectacular heights! Fudgy texture ensures each bite is rich and satisfying, while creamy cream cheese frosting adds a luscious tang that perfectly complements the chocolatey goodness. Easily customizable, you can swap in different chocolates or add nuts for a unique twist. Plus, they’re a cinch to make, even if you’re just starting to experiment in the kitchen! Impress friends and family with these stunning treats that are perfect for Valentine’s Day or simply any day you crave something extraordinary. For an equally delightful dessert experience, don’t forget to check out my recipe for Lemon Velvet Cake or Orange Chicken for savory pairings!
Homemade Red Velvet Brownies Ingredients
• Get ready to create a delicious treat!
For the Brownie Batter
- Unsalted Butter – Adds moisture and richness; use salted butter if unsalted is unavailable, but omit additional salt.
- Ghirardelli Milk Chocolate Chips – Provides a deep chocolate flavor; dark chocolate can be substituted for a richer taste.
- Large Eggs – Acts as a binder for structure; room temperature eggs mix better into the batter.
- Granulated Sugar – Sweetness and texture; can be replaced with coconut sugar for a lower glycemic option.
- Brown Sugar (packed) – Adds moisture and helps achieve a chewy texture; light or dark brown sugar can be used interchangeably.
- Salt – Enhances flavor; reduce slightly if using salted butter.
- Vanilla Extract – Adds depth of flavor; using homemade vanilla extract provides superior taste.
- Red Food Coloring – Gives the brownies their signature red color; natural alternatives like beet powder can be used.
- All-Purpose Flour – Provides structure; for a gluten-free version, use a gluten-free flour blend.
- Baking Powder – Acts as a leavening agent to create a light texture; ensure it is fresh for best results.
- Ghirardelli Unsweetened Cocoa Powder – Deepens the chocolate flavor; other quality unsweetened cocoa powders can be used.
For the Cream Cheese Frosting
- Cream Cheese – Adds creaminess and tang for the frosting; Neufchâtel cheese can be substituted for a lighter version.
- Unsalted Butter (for frosting) – Gives the frosting the right consistency; make sure it’s at room temperature before mixing.
- Confectioners Sugar – Sweetens and stabilizes the frosting; can be reduced for a less sweet topping.
- Heavy Cream or Milk – Adjusts frosting consistency; almond or oat milk works great for a dairy-free option.
Get ready to bake a batch of these Homemade Red Velvet Brownies that will not only satisfy your sweet tooth but also bring a smile to everyone who tries them!
Step‑by‑Step Instructions for Homemade Red Velvet Brownies
Step 1: Preheat and Prepare
Begin by preheating your oven to 350°F (175°C). While it’s heating, take a 9×13 inch baking pan and line it with foil or parchment paper, ensuring you lightly grease it to prevent sticking. This will help create the perfect environment for your decadent homemade Red Velvet Brownies to rise beautifully and easily release when they’re done baking.
Step 2: Melt the Chocolate
In a medium heat-safe bowl, combine the unsalted butter and Ghirardelli milk chocolate chips. Melt them together in the microwave or over a double boiler, stirring until the mixture is completely smooth. Once melted, let it cool slightly for about 5-10 minutes so it won’t cook the eggs when you mix everything together.
Step 3: Combine the Wet Ingredients
In a large mixing bowl, whisk together the large eggs, granulated sugar, brown sugar, vanilla extract, and red food coloring until everything is well combined and has a slightly frothy appearance. This step creates a rich base for your homemade Red Velvet Brownies, blending the sweetness and vibrant color for maximum impact.
Step 4: Mix in the Chocolate
Pour the cooled chocolate mixture into the wet ingredients and stir until smooth and fully combined. This luscious chocolate blend will add a rich, fudgy texture to your brownies, enhancing their overall chocolate flavor. Make sure not to skip this step as it’s crucial for achieving that deep taste you desire!
Step 5: Combine Dry Ingredients
In another bowl, whisk together all-purpose flour, baking powder, salt, and Ghirardelli unsweetened cocoa powder. Gradually fold this dry mixture into your wet ingredients until just combined, being careful not to over-mix. You want to maintain a light texture so your brownies remain chewy and fudgy.
Step 6: Bake the Brownies
Carefully pour the brownie batter into your prepared baking pan, spreading it evenly. Bake in the preheated oven for 35-40 minutes, or until you insert a toothpick and it comes out clean with a few moist crumbs attached. Keep an eye on them as they bake, looking for a shiny top and edges that pull slightly away from the pan.
Step 7: Cool the Brownies
After baking, remove the pan from the oven and allow the brownies to cool in the pan for about 15 minutes. Then, transfer them to the refrigerator to chill until they are set, which will make frosting and slicing much easier. The cooling step is vital for enhancing the fudgy texture of your homemade Red Velvet Brownies.
Step 8: Prepare the Cream Cheese Frosting
While the brownies are cooling, whip together the cream cheese, unsalted butter, vanilla extract, and confectioners sugar in a large mixing bowl. Beat on medium speed until the mixture is smooth and creamy, adjusting the consistency with heavy cream or milk if necessary. This delightful frosting adds a tangy complement to your brownies.
Step 9: Frost the Brownies
Once the brownies are fully cooled and firm, spread the cream cheese frosting generously over the top using an offset spatula for a smooth finish. For a decorative touch, you can pipe the frosting into pretty designs. Return the frosted brownies to the refrigerator until ready to serve, allowing the frosting to set nicely on top.
Homemade Red Velvet Brownies Variations
Feel free to get creative with these brownies and make them your own; there’s so much fun to be had in the kitchen!
- Dairy-Free: Use coconut oil and dairy-free chocolate chips for a vegan version. Enjoy the same rich flavor without the dairy!
- Nutty Delight: Add 1 cup of chopped pecans or walnuts to the batter for an ideal crunch, elevating both taste and texture.
- Minty Twist: Swap vanilla extract for mint extract to create a refreshing mint chocolate flavor that surprises the palate. This adds a delightful aroma!
- Extra Chocolate: Mix in an additional half cup of chocolate chips for a deeper chocolate experience. These brownies will become truly decadent!
- Spicy Kick: Add a pinch of cayenne pepper to the batter to give these brownies a sweet and spicy twist. A great conversation starter that tantalizes the taste buds!
- Fruity Flavor: Stir in 1 cup of raspberry or cherry preserves into the batter for a fruity layer that perfectly complements the chocolate. Think of summer gardens in every bite!
- Gluten-Free: Utilize a gluten-free flour blend to make these brownies suitable for those avoiding gluten. They’ll taste just as divine!
- Frosting Alternatives: Experiment by swapping cream cheese for mascarpone or ricotta cheese in the frosting for a different creamy texture.
Consider also pairing these gorgeous brownies with a scoop of ice cream or drizzling a luscious chocolate sauce on top. If you’re in the mood for something savory to complement the sweetness, you might enjoy trying out my delightful Homemade Butter Chicken recipe. Don’t shy away from mixing!
Make Ahead Options
These delectable homemade Red Velvet Brownies are perfect for meal prep enthusiasts! You can prepare the brownie batter up to 24 hours in advance; just mix all the ingredients, transfer it to your baking dish, cover tightly, and refrigerate. This not only saves time but ensures they stay fresh. Additionally, you can also whip up the cream cheese frosting ahead of time and store it in the fridge for up to 3 days. Just make sure to keep it in an airtight container to prevent drying out. When you’re ready to enjoy, bake the brownies and frost them once completely cooled. You’ll have a delightful dessert ready with minimal effort, letting you savor every chocolaty bite!
Expert Tips for Homemade Red Velvet Brownies
- Get the Right Temperature: Ensure your melted chocolate is warm, not hot, to prevent curdling the eggs when mixed, keeping your brownies smooth.
- Cool Before Frosting: Always allow the brownies to cool completely before adding cream cheese frosting for a cleaner application and better flavor integration.
- Use the Right Tools: An offset spatula or piping bag makes frosting easier and offers a professional finish to your homemade Red Velvet Brownies.
- Test for Doneness: Insert a toothpick into the center; if it comes out with a few moist crumbs, your brownies are perfectly fudgy!
- Keep It Fresh: Store brownies in an airtight container in the fridge to maintain texture and flavor, perfect for enjoying later.
How to Store and Freeze Homemade Red Velvet Brownies
Airtight Container: Keep your brownies in an airtight container at room temperature for up to 3 days, allowing them to retain their tender, fudgy texture.
Refrigeration: If you’d like to extend their life, refrigerate the brownies for up to a week. Just make sure they’re well wrapped or in a container to avoid drying out.
Freezing: For longer storage, you can freeze your homemade Red Velvet Brownies. Wrap them tightly in plastic wrap and then in aluminum foil, freezing for up to 3 months.
Reheating: When ready to enjoy, let the brownies thaw in the fridge overnight and reheat gently in the microwave for about 10-15 seconds to restore their delightful gooeyness.
What to Serve with Decadent Red Velvet Brownies with Cream Cheese Frosting
Let’s elevate your dessert experience by pairing these irresistibly rich brownies with the perfect accompaniments.
-
Vanilla Ice Cream: The creamy texture of ice cream beautifully contrasts with the fudgy brownies, creating a deliciously delightful experience. Serve it warm for a heavenly melty pairing.
-
Fresh Berries: Strawberries, raspberries, or blueberries bring a burst of freshness and acidity that cuts through the richness of the brownies, enhancing their chocolatey goodness beautifully.
-
Chocolate Sauce: An extra drizzle of warm chocolate sauce on top adds decadence and richness. It’s a chocolate lover’s dream, amplifying the brownie experience.
-
Espresso or Coffee: The bold flavors of coffee complement the sweetness of the brownies, enhancing their chocolate notes. A warm cup of brew elevates the cozy dessert atmosphere.
-
Mint Chocolate Chip Cookies: For an added texture twist, enjoy alongside crunchy mint chocolate chip cookies. The cool mint flavor offers a refreshing contrast to the brownies.
-
Creamy Milkshake: A thick chocolate or vanilla milkshake brings a fun twist to your dessert spread. This combination invites a nostalgic feeling of indulgence.
-
Whipped Cream: Light and airy whipped cream balances the dense texture of the brownies, making every bite an enjoyable contrast of flavors.
-
Sangria: If you’re looking for a drink pairing, a fruity red sangria beautifully complements the chocolate and cream cheese frosting while adding a refreshing touch to your dessert table.
These pairings will transform your homemade Red Velvet Brownies into a truly unforgettable dessert experience for any occasion!
Homemade Red Velvet Brownies Recipe FAQs
What type of red food coloring should I use?
I recommend using gel food coloring for the brightest and most vibrant color. It’s thicker and requires less volume than liquid food coloring, so you achieve that striking red hue without altering the brownie batter’s consistency. If you’re looking for a more natural option, beet powder is a great alternative that will impart a lovely color while being free from artificial additives.
How should I store leftover brownies?
To keep your homemade Red Velvet Brownies fresh, store them in an airtight container at room temperature for up to 3 days. If you’d like them to last longer, transfer them to the refrigerator, where they’ll stay good for about a week. Remember to wrap them well to prevent any drying out!
Can I freeze these brownies? If so, how?
Absolutely! Freezing is a fantastic option for your brownies. To freeze, first, cut them into squares, then wrap each piece tightly in plastic wrap. Place the wrapped brownies in an airtight freezer bag or container, and pop them in the freezer. They can last up to 3 months. When you’re ready to enjoy, simply let them thaw overnight in the refrigerator. For an extra treat, warm them in the microwave for about 10-15 seconds after thawing.
What if my brownies are too dry?
If your brownies turned out dry, it might be due to overbaking or using the wrong measurements. To salvage them, try serving with a scoop of ice cream or warm a piece in the microwave for a few seconds to add back some moisture. For future batches, be sure to take them out of the oven as soon as a toothpick inserted comes out with just a few moist crumbs to maintain that fudgy texture you’re after!
Are these brownies safe for pets or those with allergies?
While brownies are delicious for us, they contain ingredients that may not be suitable for pets, especially chocolate, which is toxic to dogs and cats. If you have guests with specific allergies (like gluten or dairy), consider making substitutions—like using gluten-free flour or dairy-free alternatives for the frosting—to ensure everyone can indulge in a piece of your homemade Red Velvet Brownies. Always double-check the ingredients used, especially for allergens.
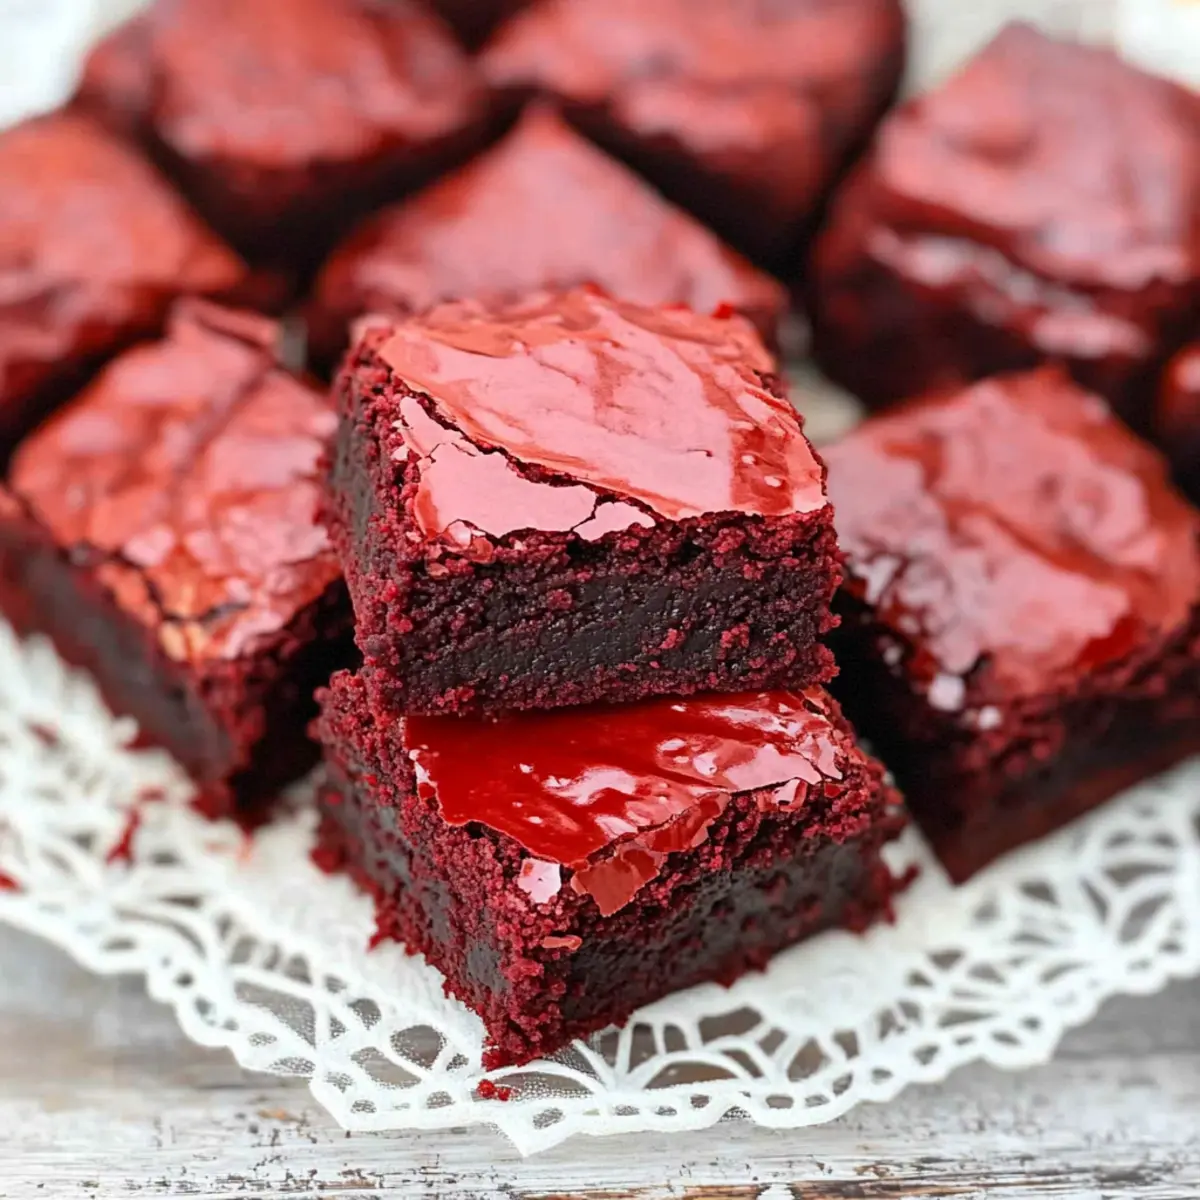
Chewy Homemade Red Velvet Brownies with Creamy Frosting
Ingredients
Equipment
Method
- Preheat your oven to 350°F (175°C) and prepare a 9x13 inch baking pan with foil or parchment paper, greasing lightly.
- Melt the unsalted butter and Ghirardelli milk chocolate chips together until smooth, then let cool slightly.
- Whisk together the large eggs, granulated sugar, brown sugar, vanilla extract, and red food coloring in a large bowl.
- Add the cooled chocolate mixture to the wet ingredients and stir until smooth.
- In a separate bowl, combine all-purpose flour, baking powder, salt, and cocoa powder. Fold into the wet ingredients until just combined.
- Pour the brownie batter into the prepared pan and bake for 35-40 minutes or until a toothpick comes out clean.
- Allow the brownies to cool in the pan for 15 minutes, then refrigerate until fully set.
- Prepare the cream cheese frosting by mixing cream cheese, unsalted butter, vanilla extract, and confectioners sugar until smooth, adjusting consistency with cream or milk.
- Spread the frosting over the cooled brownies and refrigerate until ready to serve.