
The aroma of sesame oil wafting through the air brought me a comforting wave of nostalgia, reminding me of my first culinary adventure in Korean cooking. If you’re looking for a delicious, hands-on recipe that allows you to unleash your creativity in the kitchen, Korean rice balls—known as Jumeokbap—are the answer! These delightful morsels are not only customizable, ensuring everyone can find their perfect filling, but they also pack well in lunchboxes or for a picnic. Easy to whip up, this recipe transforms ordinary rice into a flavorful snack that’s both satisfying and fun to make. Curious about how to blend tradition with your personal touch? Let’s delve into the world of Korean rice balls and explore the countless filling possibilities together!
Why are Korean Rice Balls so versatile?
Customizable options mean you can tailor these rice balls to suit any palate, whether it’s savory tuna, spicy kimchi, or tender bulgogi beef. Easy to make, they come together quickly, making them perfect for a last-minute snack or lunch. Unique flavors from sesame oil and seaweed elevate each bite, providing a delightful taste experience. Ideal for sharing, these rice balls are a hit at potlucks or picnics, paired beautifully with a side of pickled radish. Plus, they’re great for meal prep, allowing you to whip up a batch and enjoy them throughout the week—simply grab and go! Check out options like Korean Ground Beef or Pineapple Fried Rice for more delicious flavor combinations to try!
Korean Rice Balls Ingredients
• Prepare to create your own flavorful Korean rice balls; they are so versatile!
For the Rice Mixture
- Cooked Short-Grain Rice – Essential for that sticky texture; make sure it’s warm before combining.
- Sesame Oil – Adds a rich, nutty flavor; opt for Korean sesame oil for authenticity.
- Salt – Enhances the overall taste of the rice; a pinch goes a long way.
For the Filling Options
- Canned Tuna – Provides a protein boost; mix with mayo for extra creaminess.
- Cooked Bulgogi Beef – Offers savory flavors; chop finely for better blending.
- Kimchi – Brings in a spicy kick; remember to squeeze out extra liquid.
- Shredded Cooked Chicken – Keeps things light and tasty; a splash of soy sauce can elevate it.
For Seasoning & Coating
- Roasted Seaweed Flakes (Gim) – Adds umami goodness; choose pre-seasoned or crush your own sheets.
- Sesame Seeds – Provides crunch and nuttiness; sprinkle generously.
- Soy Sauce – Introduces a savory touch; low-sodium options are available if preferred.
- Gochugaru (Korean Red Pepper Flakes) – Optional for some heat; adds a vibrant color as well.
Now that you have your ingredients set and ready to go, let’s dive into the fun part: crafting your perfect Korean rice balls!
Step‑by‑Step Instructions for Customizable Korean Rice Balls (Jumeokbap)
Step 1: Cook Rice
Begin by cooking 2 cups of short-grain rice according to the package instructions, ensuring it reaches a sticky yet fluffy consistency. This should take about 15–20 minutes. Once done, remove it from the heat and let it sit until slightly warm—this texture is essential for shaping the delicious Korean rice balls.
Step 2: Flavor Rice
While the rice is still warm, transfer it to a large mixing bowl and drizzle in 1 tablespoon of sesame oil along with ½ teaspoon of salt. Gently fold the rice with a spatula or wooden spoon, mixing until the oil and salt are evenly distributed. The warmth will help the rice absorb the flavors, enhancing your Korean rice balls.
Step 3: Prepare Filling
Choose your desired filling for the Korean rice balls. Whether you opt for creamy canned tuna mixed with mayonnaise, well-seasoned bulgogi beef, spicy kimchi, or tender shredded chicken, make sure to prepare them in advance. Finely chop or mix ingredients as necessary to ensure a well-integrated, flavorful bite in each rice ball.
Step 4: Combine Ingredients
In the bowl with your flavored rice, gently fold in your chosen filling, adding a sprinkle of roasted seaweed flakes, sesame seeds, and a splash of soy sauce. If you like a bit of heat, incorporate gochugaru as well. Mix everything together until it’s evenly combined, creating a colorful and appetizing rice mixture ready for shaping.
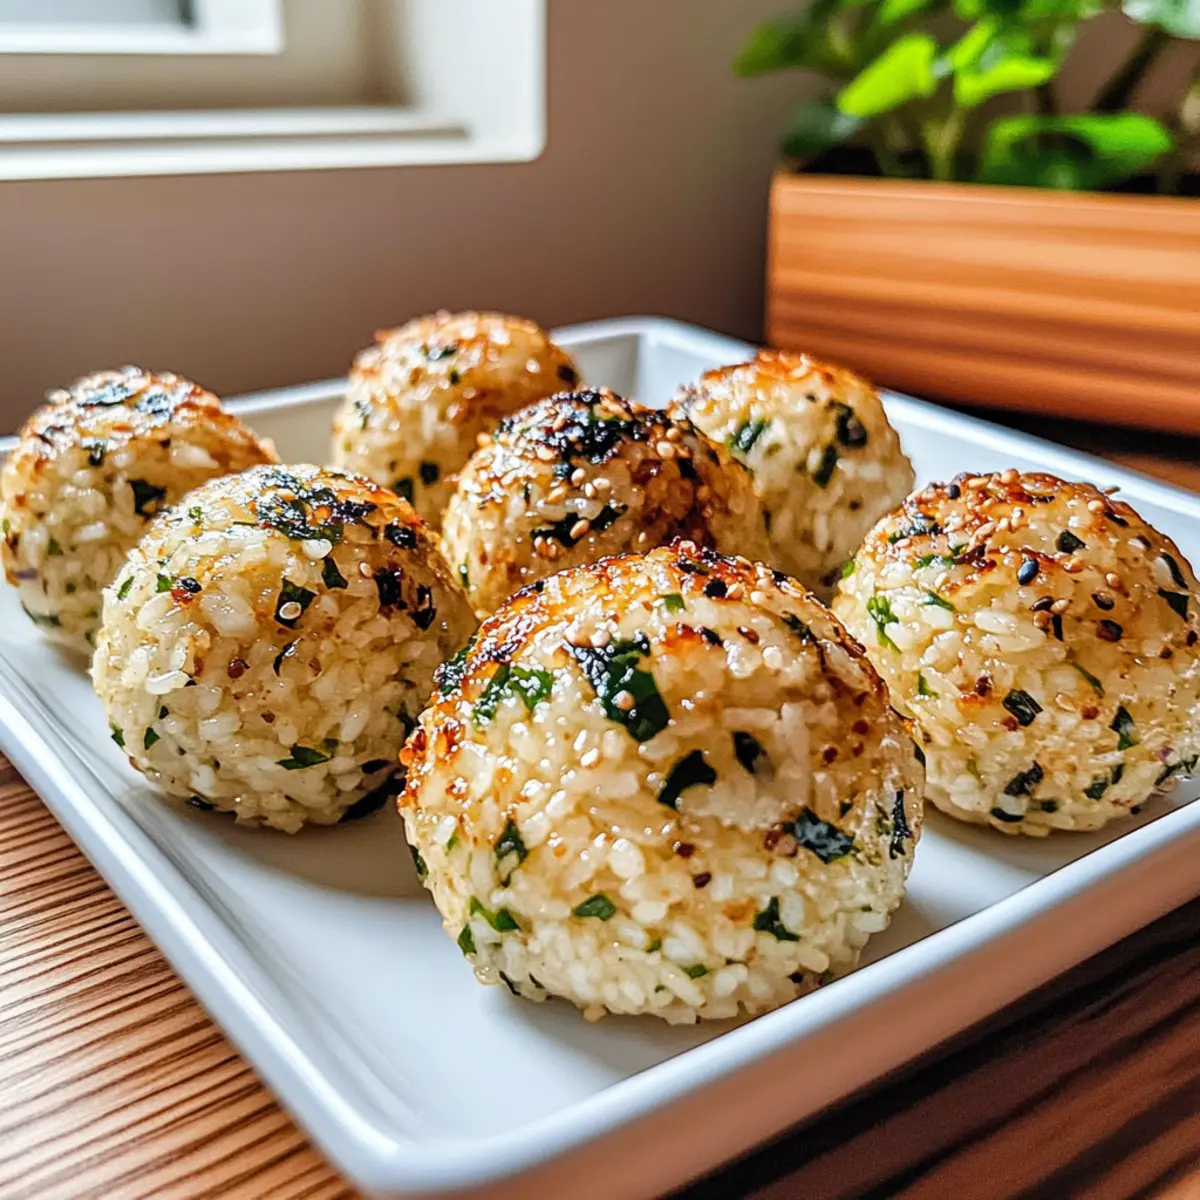
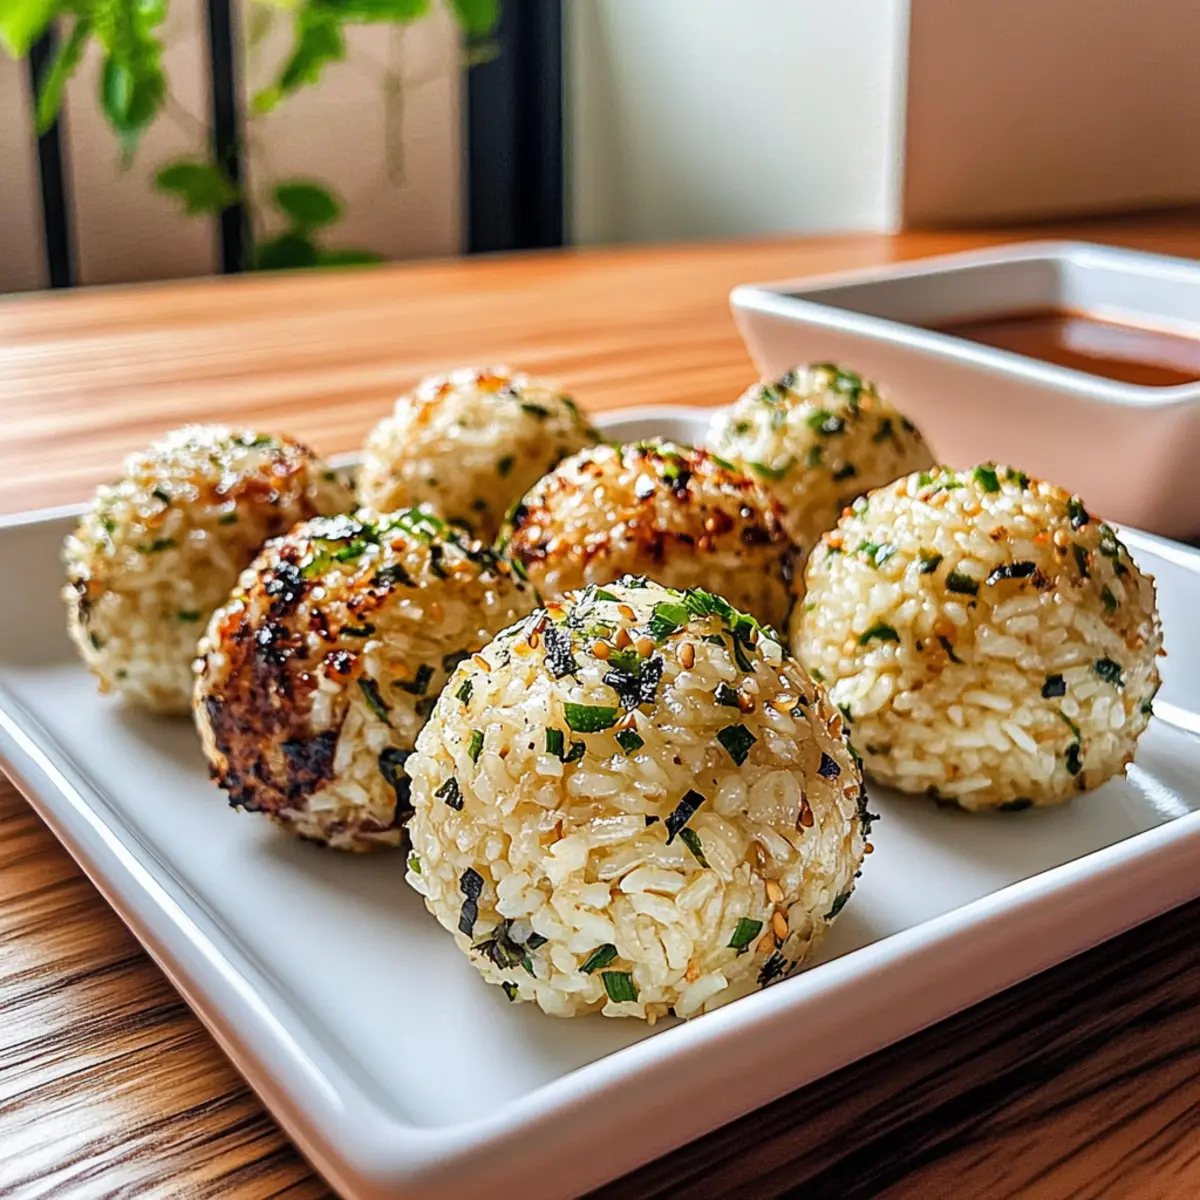
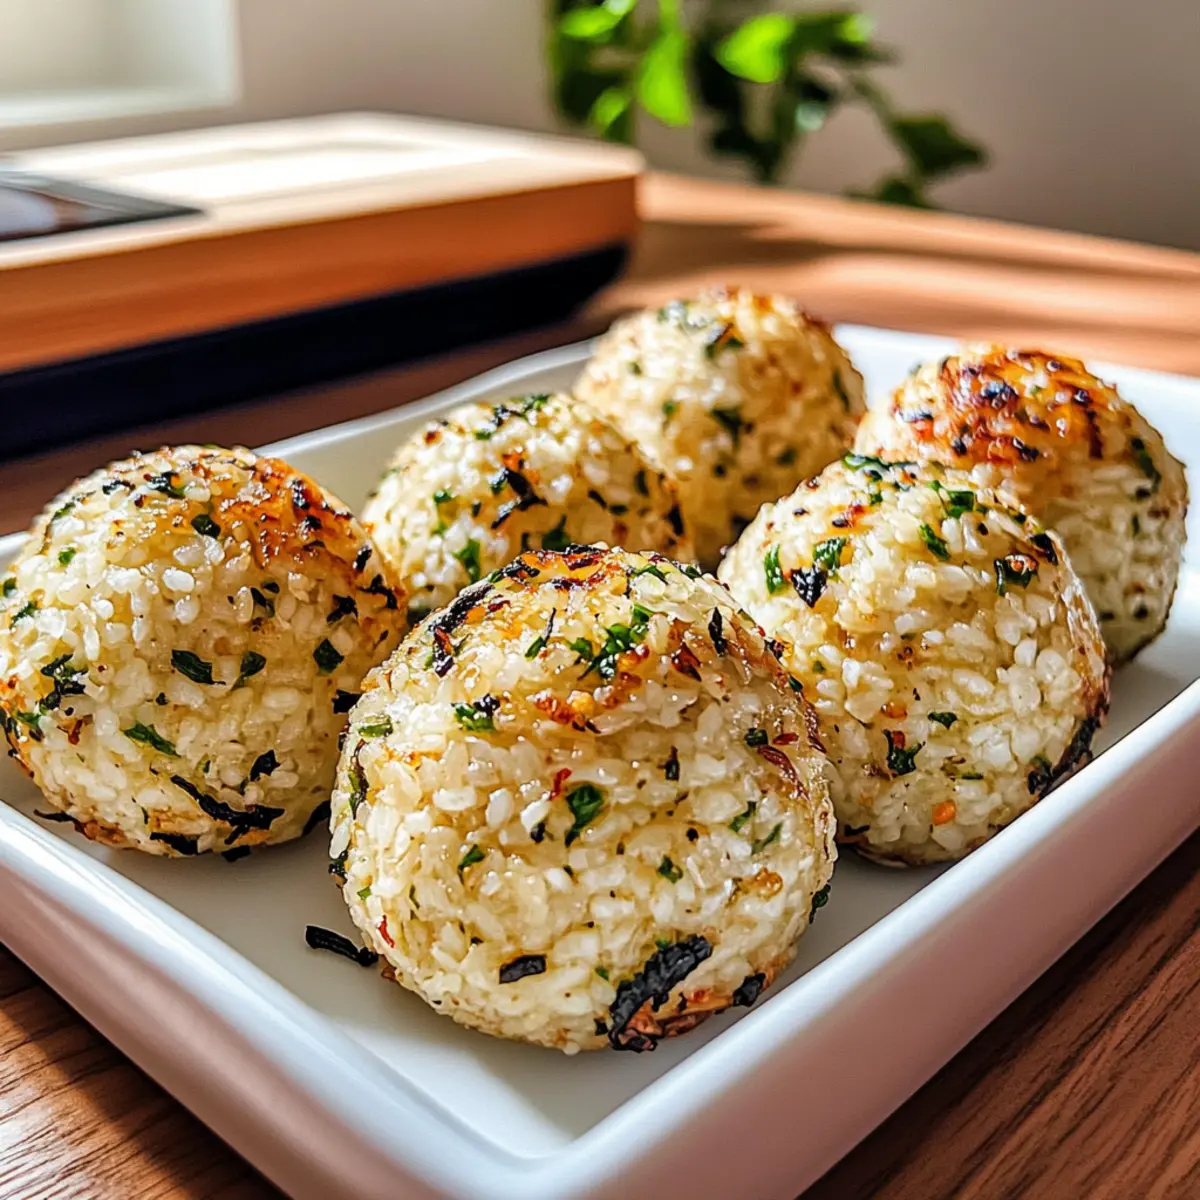
Step 5: Shape Rice Balls
To shape the Korean rice balls, lightly wet your hands to prevent sticking. Take ¼ cup of the rice mixture in your palm, pressing it firmly yet gently to form a cohesive ball shape. Repeat this process until all the rice mixture is used up, creating beautiful, compact rice balls that showcase your chosen flavors.
Step 6: Serve or Store
Your customizable Korean rice balls are now ready! Enjoy them immediately while warm, or for later, wrap each rice ball in plastic wrap to keep them fresh. You can store them in the refrigerator for up to 24 hours, making them a convenient snack for lunchboxes or picnics.
Expert Tips for Korean Rice Balls
- Use Warm Rice: Always use warm, cooked short-grain rice for better adhesion when molding the Korean rice balls. Cold rice can crumble easily.
- Gentle Pressure: Shape the rice balls with gentle pressure to avoid a dense texture. Firm but not too tight is the key to a delightful bite!
- Experiment with Fillings: Explore stuffing options by placing your filling in the center of the rice ball instead of mixing it in—this adds a fun surprise in each bite!
- Storage Matters: Wrap each rice ball individually in plastic wrap to retain moisture, or place a damp paper towel in the container for added freshness.
- Mix and Match: Don’t hesitate to mix fillings! Combining flavors like bulgogi and kimchi adds depth and excitement to your Korean rice balls.
What to Serve with Customizable Korean Rice Balls?
A perfect meal is all about balancing flavors and textures, and these savory rice balls are no exception.
-
Pickled Radish:
Its tangy crunch cuts through the richness of the rice balls, providing a refreshing contrast with every bite. -
Boiled Eggs:
Creamy and nutrient-rich, these eggs add a comforting element, making for a satisfying and balanced meal. -
Spicy Kimchi:
Perfectly complements the rice balls’ flavor, adding an exciting heat and tang—ideal for adventurous palates! -
Fresh Vegetable Salad:
Crunchy greens tossed with a tangy dressing creates a light pair, enhancing each bite while keeping the meal bright. -
Ginger Tea:
A soothing and aromatic beverage to sip on during your meal, warming your soul and elevating the experience. -
Miso Soup:
Warm and savory, this classic soup pairs wonderfully with the rice balls, offering depth to your meal. -
Fruity Dessert:
End on a sweet note with fresh fruit or a light sorbet; the natural sweetness will balance the savory rice balls beautifully.
Let your imagination be your guide as you explore these delightful pairings!
Make Ahead Options
These Korean Rice Balls are perfect for busy home cooks looking to save time during the week! You can prepare the rice and mix in the sesame oil and salt up to 24 hours in advance, storing it in an airtight container in the refrigerator to keep it fresh. The filling options, such as canned tuna, cooked bulgogi, or shredded chicken, can also be prepped and refrigerated separately for 1-3 days. When you’re ready to enjoy your meal, simply combine the rice with your chosen filling, shape the rice balls, and they’ll be just as delicious as if made fresh! To maintain quality, wrap each rice ball tightly in plastic wrap for the best moisture retention.
Korean Rice Balls Variations & Substitutions
Feel free to get creative—these rice balls are a canvas for your culinary imagination!
- Vegetarian: Substitute tuna or bulgogi with marinated tofu or tempeh for a protein-packed option bursting with flavor.
- Cheesy Delight: Add shredded mozzarella or cream cheese to your fillings, delivering a melty, indulgent interior that’s hard to resist.
- Spice It Up: Mix in diced jalapeños or sprinkle some extra gochugaru for a fiery kick that adds an exhilarating twist to each bite.
- Saucy Boost: Drizzle some spicy mayo or sriracha on top for an extra layer of flavor and creaminess that complements any filling.
- Loaded Veggies: Incorporate finely chopped carrots, bell peppers, or spinach in your rice mixture to enhance nutrition and add a splash of color to your rice balls.
- Sweet Surprise: For a dessert twist, use sweetened red bean paste or fruit jams as fillings, combining traditional flavors with a hint of sweetness.
- Nori Wrap: Wrap the rice balls in sheets of nori (seaweed) for a sushi-inspired version that adds layers of oceanic flavor—a perfect pairing for picnics!
For more tasty inspirations, consider trying out the delicious Corn Chicken Rice or the savory Beef Bulgogi Korean which can also enhance your meal prep game! Enjoy experimenting!
How to Store and Freeze Korean Rice Balls
-
Fridge: Store Korean rice balls in an airtight container or wrap them individually in plastic wrap to maintain moisture. They can be kept fresh for up to 24 hours.
-
Freezer: For longer storage, freeze the rice balls by wrapping them tightly in plastic wrap and then placing them in a freezer-safe bag. They’ll keep well for up to one month.
-
Thawing: When ready to enjoy, thaw your frozen rice balls in the refrigerator overnight before reheating to help maintain their texture and flavor.
-
Reheating: To reheat, microwave the rice balls for about 30 seconds to 1 minute, or until heated through. For best results, avoid overcooking to keep them from drying out.
Korean Rice Balls (Jumeokbap) Recipe FAQs
What kind of rice is best for making Korean rice balls?
Absolutely! For the best results, always use short-grain rice. It has a sticky and chewy texture that holds together perfectly when shaping the rice balls. Make sure the rice is warm when mixed with seasonings and fillings for optimal adhesion!
How do I store leftover rice balls?
Very simply! Place the Korean rice balls in an airtight container or wrap each one individually in plastic wrap. They can be stored in the refrigerator for up to 24 hours without losing their delightful texture. Just remember, warm rice helps maintain moisture!
Can I freeze Korean rice balls? If so, how?
Of course! To freeze, wrap each rice ball tightly in plastic wrap and then place them in a freezer-safe bag. They’ll stay fresh for up to one month. When you’re ready to enjoy, let them thaw in the refrigerator overnight before reheating.
What if my rice balls fall apart when shaping?
No worries! If your rice balls are crumbling, it might be because the rice is too cold or not sticky enough. Make sure to use warm, freshly cooked rice and apply gentle pressure when forming them. You can also adjust the amount of sesame oil or salt to improve cohesion!
Are Korean rice balls safe for people with gluten allergies?
Definitely! You can make gluten-free Korean rice balls by choosing gluten-free fillings and ensuring your seasoning and condiments are also gluten-free. Ingredients like boiled chicken, sautéed vegetables, or even tofu work great and keep it delicious and safe for everyone.
Can pets eat Korean rice balls? Are there any ingredients I should avoid?
Great question! While plain rice is generally safe for pets, many fillings like onion (in some kimchi) or soy sauce can be harmful to them. It’s best to avoid giving your pets any rice balls and stick to pet-specific treats instead. Always consult your vet if unsure about specific foods!

Irresistible Korean Rice Balls: Customize Your Perfect Snack
Ingredients
Equipment
Method
- Cook 2 cups of short-grain rice according to the package instructions, ensuring it reaches a sticky yet fluffy consistency (15–20 minutes). Let it sit until slightly warm.
- While the rice is warm, transfer it to a large mixing bowl and add 1 tablespoon of sesame oil and ½ teaspoon of salt. Mix gently until evenly distributed.
- Prepare your chosen filling by mixing or chopping ingredients to ensure they are well-integrated.
- Fold in your chosen filling, adding roasted seaweed flakes, sesame seeds, and soy sauce. Mix until evenly combined.
- Wet your hands and take ¼ cup of the rice mixture to form a ball. Repeat until all rice is used.
- Enjoy your rice balls immediately or wrap them in plastic wrap for later storage.