
Walking into my kitchen, the air is thick with a sugary aroma that instantly transports me to a cozy café, where velvety cheesecakes beckon from the display case. Today, I’m excited to share my no-bake Mini Biscoff Cheesecakes, a delightful creation that brings the irresistible flavor of cookie butter right to your dessert table. These petite treats are not only a breeze to whip up, but they also deliver a perfect balance of creamy goodness and crunchy texture, making them an instant crowd-pleaser. Whether it’s for a special occasion or a simple weeknight indulgence, this quick dessert is sure to satisfy your sweet cravings with minimal fuss. Ready to treat yourself to something extraordinary? Let’s dive into the deliciousness of these Mini Biscoff Cheesecakes!
Why are Mini Biscoff Cheesecakes a Must-Try?
Decadent Dessert: These Mini Biscoff Cheesecakes are a heavenly blend of rich, spiced cookie butter and creamy filling that will leave your taste buds dancing with joy.
No-Bake Simplicity: Perfect for busy home cooks, this easy dessert requires no oven, just simple steps to deliciousness.
Crowd-Pleasing Goodness: With their charming presentation, these delightful bites are sure to impress guests at your next gathering.
Versatile Options: Feel free to customize with different cookie crusts or toppings; the possibilities are endless! Need more ideas? Check out my Biscoff Cake Gooey recipe for inspiration.
Make-Ahead Convenience: Prepare these treats a day in advance, freeing up your schedule for the occasion.
Indulge in a dessert that balances effortless preparation with outstanding flavor!
Mini Biscoff Cheesecakes Ingredients
For the Crust
- Biscoff Cookie Crumbs – A delightful base structure for the crust; can substitute with graham cracker crumbs for a different flavor.
- Granulated Sugar – Adds the perfect sweetness to the crust; consider reducing or swapping with a sugar substitute for a lower-sugar option.
- Salted Butter – Binds the crust ingredients together for a rich finish; use unsalted butter if you prefer to reduce salt.
For the Cheesecake Filling
- Cream Cheese – The creamy heart of the cheesecake; using full-fat yields the best texture, while reduced fat is less rich.
- Powdered Sugar – Sweetens and smooths the filling; you can use an alternative sweetener to reduce calories.
- Biscoff Spread (Cookie Butter) – Essential for delivering that signature flavor of the Mini Biscoff Cheesecakes; be cautious of substituting it, as this may alter the taste.
- Vanilla Extract – Enhances all the flavors beautifully; consider using vanilla bean paste for a richer taste.
- Heavy Cream – Creates a fluffy and luxurious texture in the filling; light cream may not whip to the same volume.
For the Topping
- Additional Biscoff Spread – Use this for drizzling-on top, warming it slightly to make pouring easier.
- Biscoff Cookies – Perfect for topping and garnish; feel free to swap with chopped nuts or chocolate shavings for added texture.
These Mini Biscoff Cheesecakes come together with these simple ingredients, ensuring a delightful experience for all cookie butter lovers!
Step‑by‑Step Instructions for Mini Biscoff Cheesecakes
Step 1: Prepare the Crust
In a medium mixing bowl, combine Biscoff cookie crumbs and granulated sugar with melted salted butter until well mixed. The mixture should resemble wet sand. Spoon this blend evenly into mini cheesecake pans or cupcake liners, pressing down firmly with the back of a spoon to form a solid crust. Chill the crusts in the refrigerator for about 10 minutes while you prepare the filling.
Step 2: Make the Cheesecake Filling
In a large bowl, beat softened cream cheese until smooth, using an electric mixer on medium speed for about 2 minutes. Gradually add powdered sugar, Biscoff spread, and vanilla extract, mixing until creamy. Next, slowly pour in heavy cream and whip the mixture until it’s thick and fluffy, about 3-4 minutes. The filling should hold soft peaks, perfect for your Mini Biscoff Cheesecakes.
Step 3: Pipe the Filling
Once your crusts have chilled, take the cheesecake filling and, using a piping bag fitted with a large round tip, pipe it onto the chilled crusts. Fill each cup generously, slightly overfilling them to create a lovely dome shape. Smooth the tops if desired, then cover the pans with plastic wrap and place them in the refrigerator. Chill for at least 12 hours or overnight to let them set perfectly.
Step 4: Prepare the Whipped Cream
In a clean mixing bowl, whip heavy cream, powdered sugar, and a splash of vanilla extract together on high speed for about 3-5 minutes. Whip until you achieve medium-stiff peaks, which will give the whipped cream a light and airy texture. Once whipped, transfer it to a piping bag to beautifully adorn your set Mini Biscoff Cheesecakes.
Step 5: Assemble and Decorate
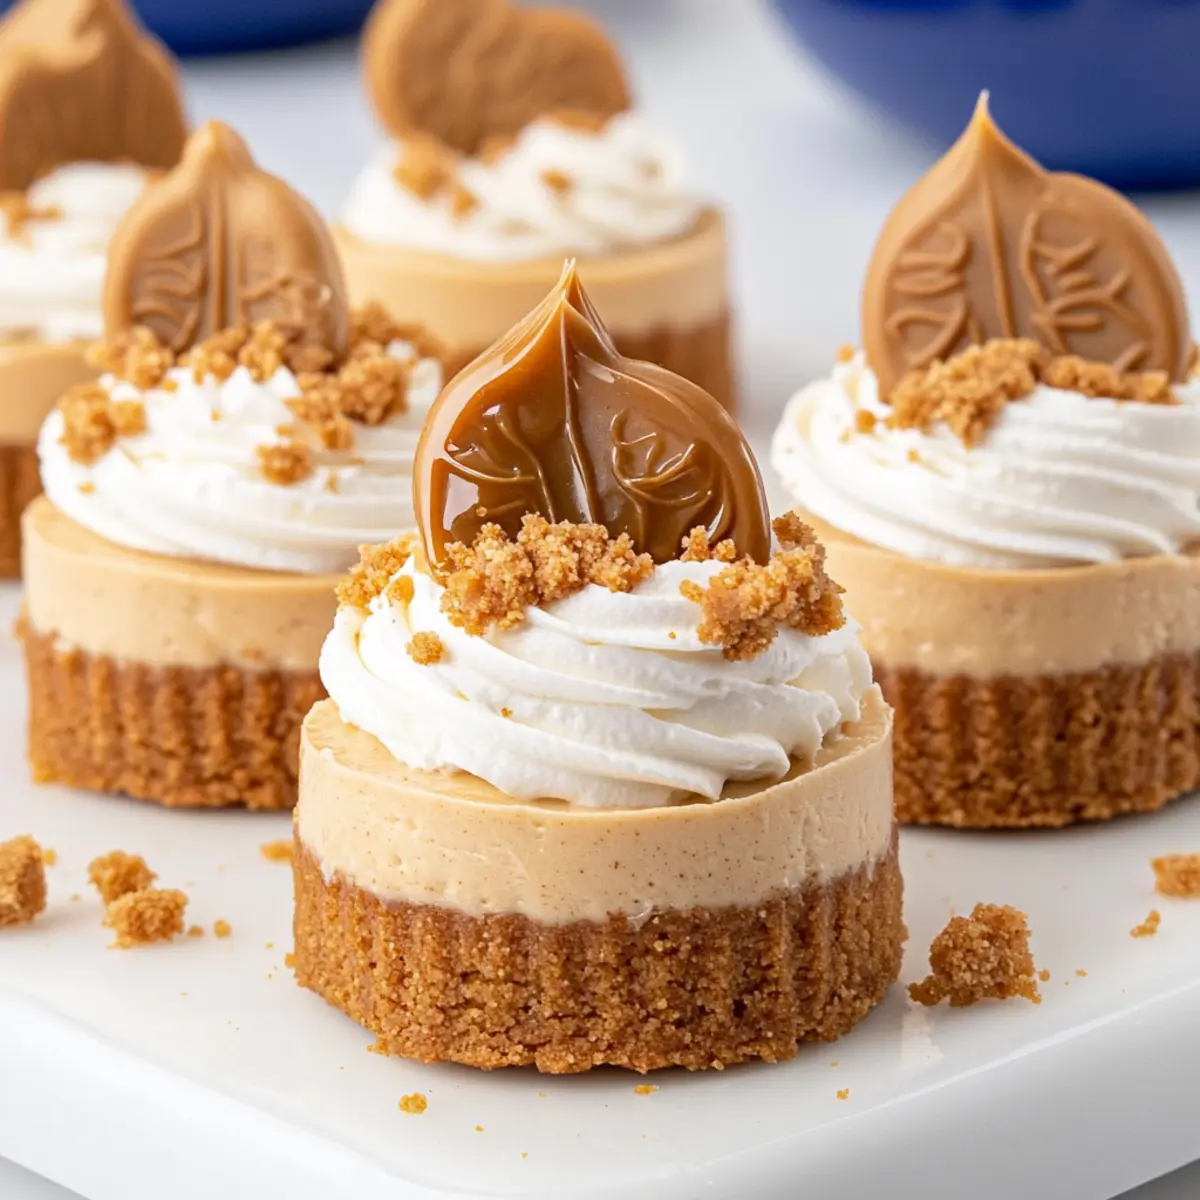
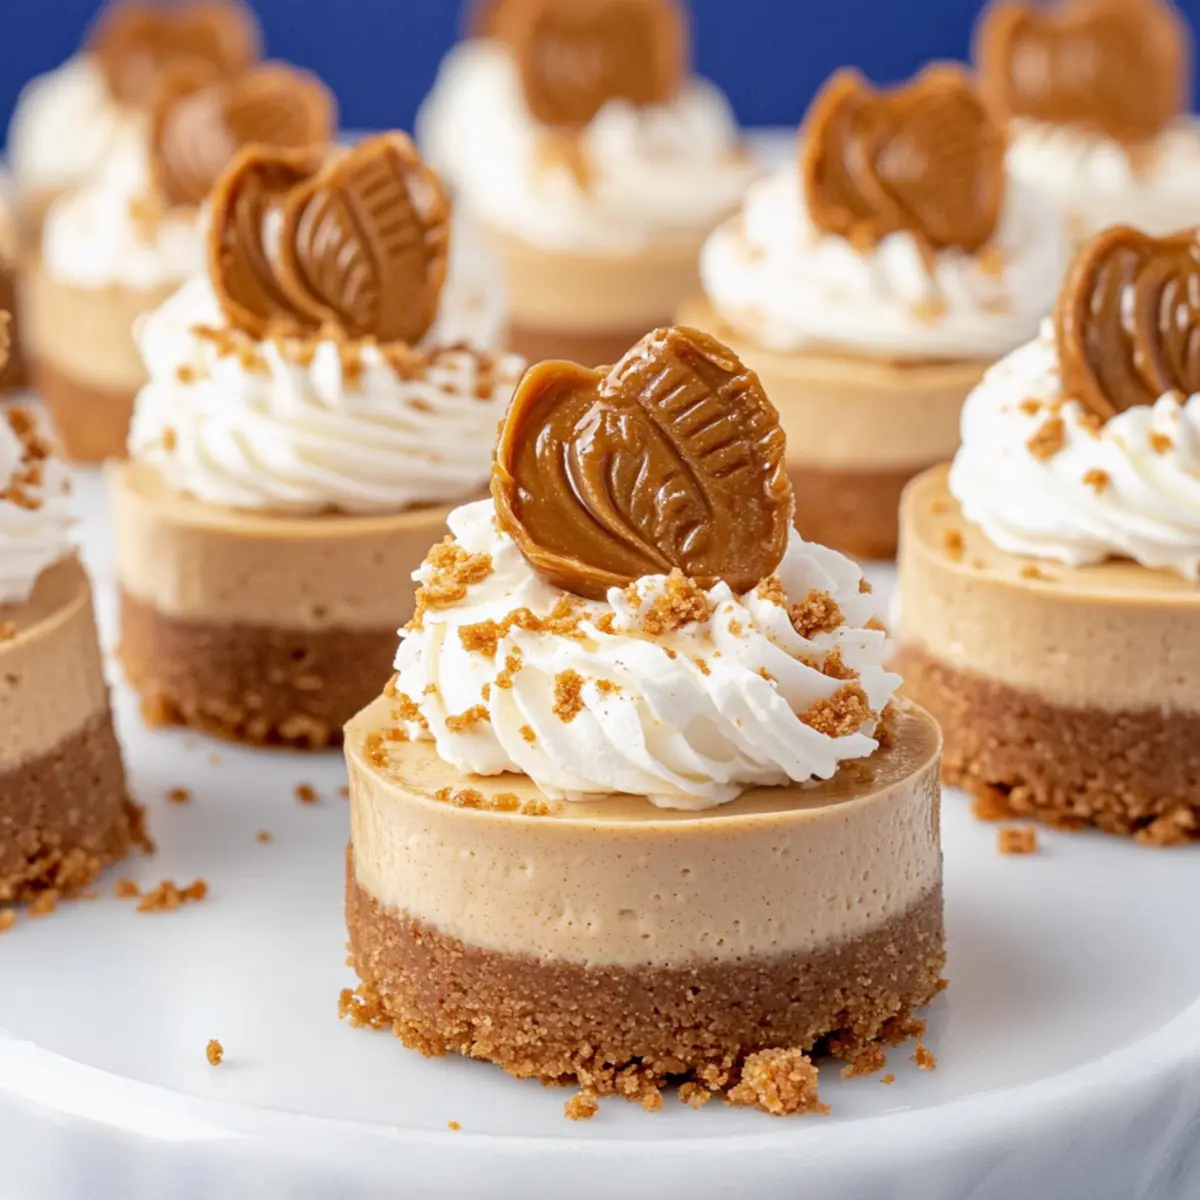
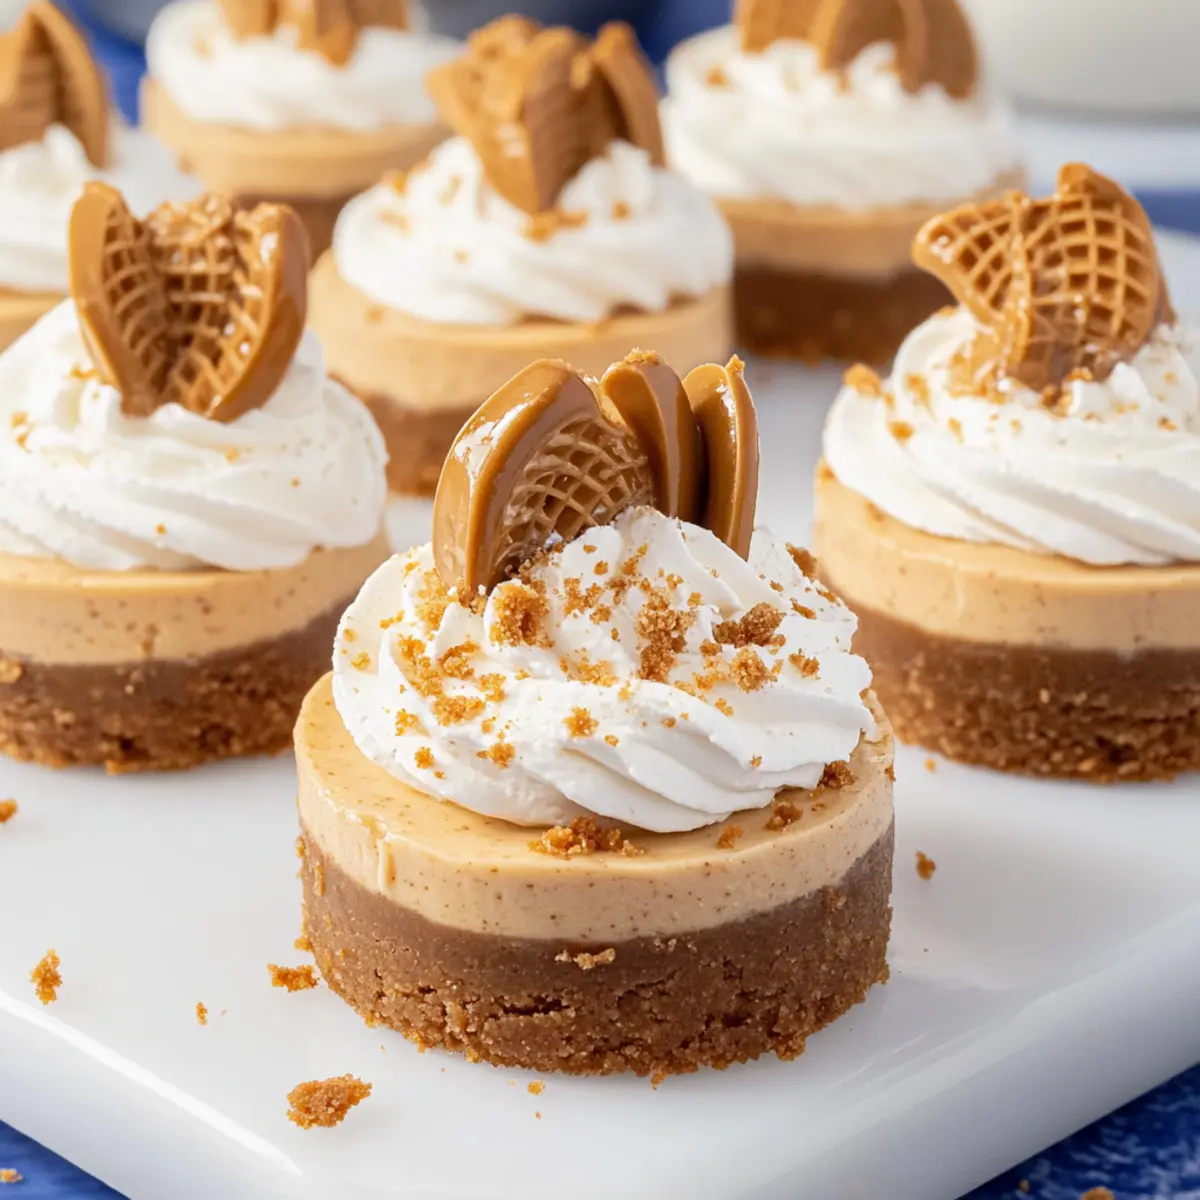
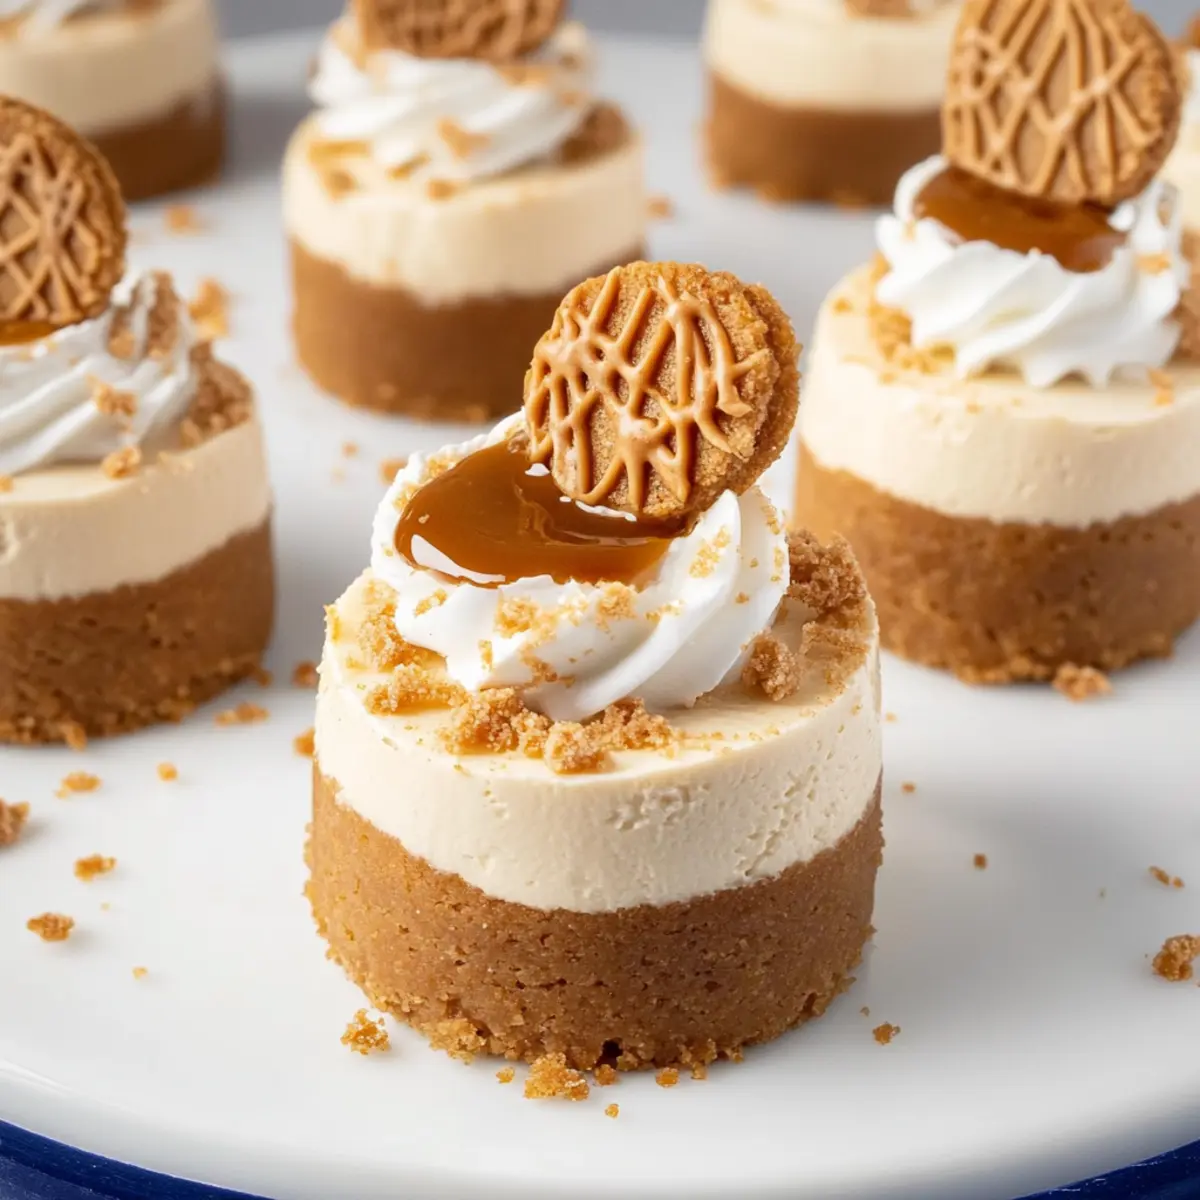
Before serving, melt additional Biscoff spread in the microwave for about 15-20 seconds until pourable. Drizzle a generous amount over the tops of each Mini Biscoff Cheesecake. Then, pipe the whipped cream on top in a decorative swirl. Finish with a sprinkle of cookie crumbs and a halved Biscoff cookie for a stunning garnish, ensuring your treats are ready to impress!
Expert Tips for Mini Biscoff Cheesecakes
-
Room Temperature Cream Cheese: Make sure your cream cheese is at room temperature to achieve a smooth, lump-free filling. Cold cream cheese can create a grainy texture.
-
Chill Time is Crucial: Allow the Mini Biscoff Cheesecakes to chill overnight for optimal flavor melding and texture. This step ensures they set perfectly and enhances their creamy consistency.
-
Piping Perfection: Use a piping bag fitted with a star tip to create beautiful, professional-looking whipped cream swirls. This adds elegance to your dessert presentation!
-
Warm Biscoff Spread: When drizzling Biscoff spread on top, warm it slightly in the microwave. This will help maintain a pourable consistency for an even drizzle without clumping.
-
Crust Firmness: Press the crust mixture firmly into the cups to prevent them from crumbling when you remove the cheesecakes. A well-packed crust is essential for structure.
Mini Biscoff Cheesecakes Variations & Substitutions
Feel free to let your creativity shine by tweaking these Mini Biscoff Cheesecakes to suit your taste and dietary needs!
-
Gluten-Free: Swap Biscoff cookie crumbs for gluten-free graham cracker crumbs or a gluten-free cookie option to make this dessert suitable for everyone.
-
Vegan: Replace cream cheese with a plant-based cream cheese alternative and use coconut whipped cream for a delightful dairy-free option. Your guests may not even realize it’s vegan!
-
Flavor Boost: Add a splash of almond or orange extract to the cheesecake filling for a surprising twist that complements the cookie butter beautifully. Each flavor variation adds a unique character to the cheesecake.
-
Chocolate Layer: Mix in melted dark chocolate to the cheesecake filling for a chocolatey delight that perfectly pairs with the spice of cookie butter. It’s a rich twist that chocolate lovers will adore!
-
Fresh Fruit: Top with fresh raspberries or strawberries for a refreshing pop of color and a sweet-tart contrast to the creamy filling. This not only adds flavor but also a lovely presentation.
-
Spiced Cheesecake: Incorporate a pinch of cinnamon or nutmeg into the cheesecake filling to amplify the warm spices from the Biscoff spread, giving your cheesecakes an extra cozy feel.
-
Dairy-Free Whipped Cream: Use a coconut cream whipped topping to replace traditional whipped cream for a lovely, light finish on top of your cheesecakes. It adds a different flavor profile yet remains delightful.
For more dessert inspiration, consider checking out my Biscoff Cake Gooey for additional variations or treat ideas utilizing that delightful cookie butter you love!
How to Store and Freeze Mini Biscoff Cheesecakes
Fridge: Keep the Mini Biscoff Cheesecakes in an airtight container for up to 3 days. This maintains their fresh flavor and creamy texture.
Freezer: If you want to extend storage, freeze the cheesecakes for up to 1 month. Wrap them individually in plastic wrap and a layer of foil to prevent freezer burn.
Thawing: To enjoy, transfer frozen cheesecakes to the fridge overnight for a gentle thaw. Avoid microwave thawing to retain their creamy consistency.
Reheating: These no-bake delights are best enjoyed chilled, so there’s no need for reheating. Just add fresh toppings before serving for an extra special treat!
Make Ahead Options
These Mini Biscoff Cheesecakes are perfect for busy cooks looking to save time without sacrificing flavor! You can prepare the crusts and cheesecake filling up to 24 hours in advance, simply refrigerating them separately. To maintain quality, ensure the crusts are stored in an airtight container and cover the filling tightly with plastic wrap. When you’re ready to serve, just pipe the cheesecake filling over the crusts, refrigerate again for about an hour to firm up, then top with whipped cream and a drizzle of cookie butter. This way, you can enjoy a stunning dessert with minimal last-minute effort!
What to Serve with Mini Biscoff Cheesecakes
Elevate your dessert experience by creating a delightful spread that perfectly complements these creamy, cookie butter-filled treats.
-
Fresh Berries: Tart raspberries or sweet strawberries lend a bright contrast, enhancing the rich flavors of the cheesecakes.
-
Coffee: A warm cup of coffee complements the dessert beautifully, providing a balanced flavor and a cozy atmosphere.
-
Chocolate Drizzle: Add a touch of decadence by drizzling melted dark chocolate over your cheesecakes for an indulgent twist.
-
Vanilla Ice Cream: The creamy, cold ice cream pairs harmoniously with the cheesecakes, offering a luscious texture to each bite.
-
Mint Leaves: Fresh mint adds a vibrant burst of flavor and a refreshing finish that brightens up the richness of the dessert.
-
Chilled Herbal Tea: A fruity or floral herbal tea can cleanse the palate, making your mini cheesecakes even more enjoyable.
-
Cheesecake Topping Variations: Experiment with crushed nuts or cookie crumbles for a different textural experience and enhanced crunch.
As you gather these delightful accompaniments, you create a banquet that transforms a simple dessert into a memorable culinary experience.
Mini Biscoff Cheesecakes Recipe FAQs
How do I choose ripe ingredients for the cheesecake filling?
Absolutely! Ensure your cream cheese is at room temperature for the best mixing results. It’s ideal to take it out of the fridge at least an hour before you start. This allows it to soften and blend smoothly with the other ingredients.
What is the best way to store Mini Biscoff Cheesecakes?
The cheesecakes can be stored in an airtight container in the refrigerator for up to 3 days. If you have leftovers, this method maintains their fresh flavor and creamy texture while preventing them from drying out. Just make sure they are well covered to avoid absorbing any strong odors from the fridge!
Can I freeze Mini Biscoff Cheesecakes, and how should I do it?
Very! To freeze, wrap each cheesecake individually in plastic wrap, then place them in a freezer-safe bag or container. This prevents freezer burn and maintains their delicious flavor. They can be frozen for up to 1 month. When ready to enjoy, simply transfer the cheesecakes to the refrigerator for a gentle overnight thaw.
What should I do if the cheesecake filling is too runny?
If your filling turns out runny, don’t worry! It may need more whipping to incorporate air and thicken. You can also add a little more powdered sugar to help achieve the desired consistency. Chill it again in the fridge for at least an hour to set before serving.
Are Mini Biscoff Cheesecakes safe for allergies?
While these cheesecakes are delicious, they contain common allergens like dairy (cream cheese and heavy cream) and gluten (Biscoff cookies). If you’re accommodating specific dietary restrictions, consider using dairy alternatives for the cream cheese and a gluten-free cookie option for the crust. Always check ingredient labels and consult with guests if there are allergy concerns!
How long should I chill the cheesecakes before serving?
For the best results, I recommend chilling the Mini Biscoff Cheesecakes for at least 12 hours or overnight. This not only allows them to set perfectly but also helps the flavors meld together beautifully, providing an even richer and more satisfying taste experience when served!
Irresistible Mini Biscoff Cheesecakes for Easy Sweet Cravings
Ingredients
Equipment
Method
- In a medium mixing bowl, combine Biscoff cookie crumbs, granulated sugar and melted salted butter until well mixed. Spoon this into mini cheesecake pans, pressing down firmly to form a solid crust. Chill in the refrigerator for about 10 minutes.
- In a large bowl, beat softened cream cheese until smooth. Gradually add powdered sugar, Biscoff spread, and vanilla extract, mixing until creamy. Slowly pour in heavy cream and whip until thick and fluffy, about 3-4 minutes.
- Once crusts have chilled, pipe the cheesecake filling onto the chilled crusts, slightly overfilling for a dome shape. Cover and chill for at least 12 hours to set.
- Whip heavy cream, powdered sugar, and a splash of vanilla together until medium-stiff peaks form. Transfer to a piping bag to decorate the cheesecakes.
- Melt additional Biscoff spread in the microwave, drizzle over the tops, pipe whipped cream in a decorative swirl and garnish with cookie crumbs and a halved cookie.