

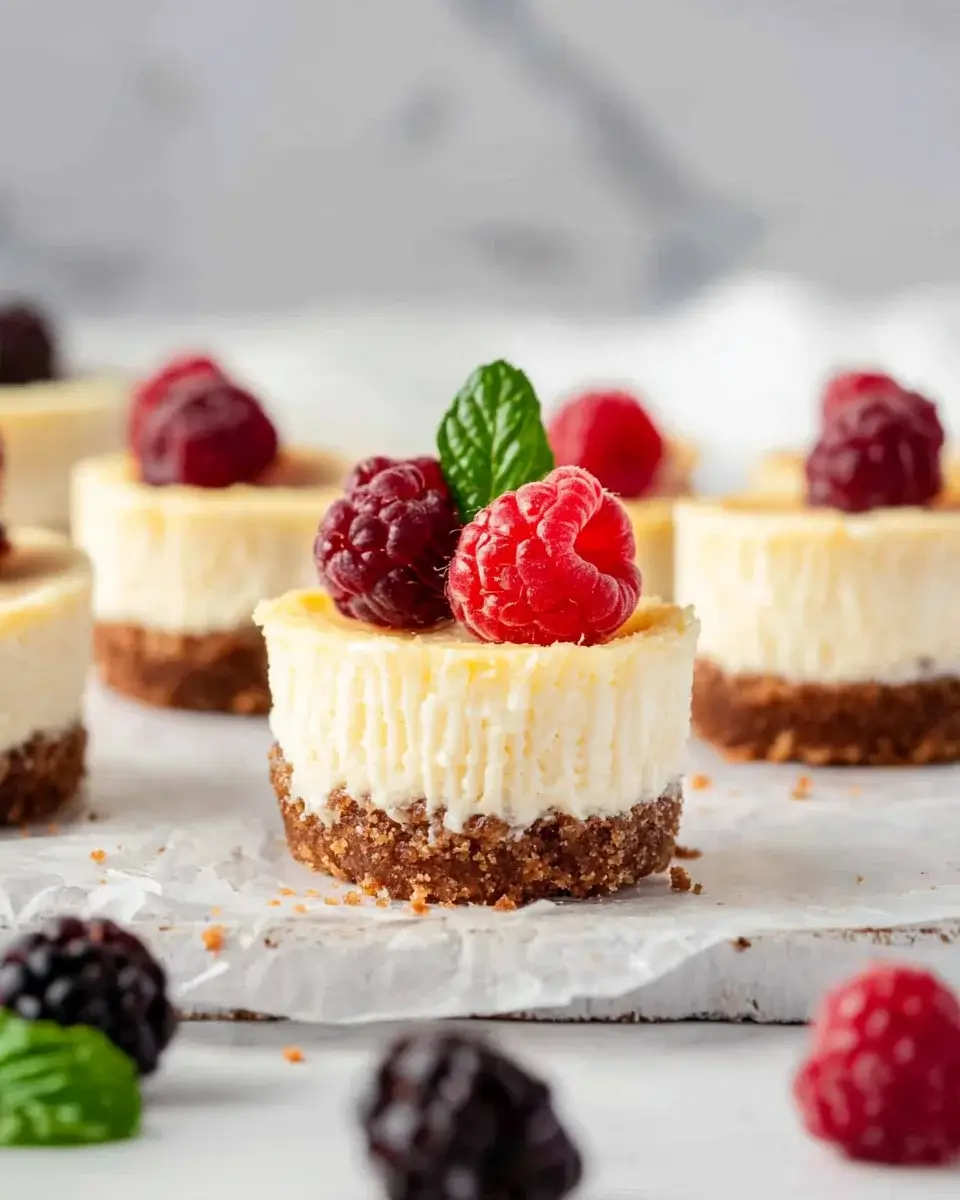
Introduction to Mini Protein Cheesecakes
There’s something magical about dessert, isn’t there? It can turn an ordinary day into a celebration. That’s where these Mini Protein Cheesecakes come in. They’re not just any dessert; they’re a guilt-free indulgence that packs a protein punch.
Whether you’re looking for a quick solution after a long day or a sweet treat to impress your friends, these little delights fit the bill perfectly. With their creamy texture and rich flavor, they’ll satisfy your sweet tooth without derailing your healthy eating goals. Let’s dive into this delicious journey together!
Why You’ll Love This Mini Protein Cheesecakes
These Mini Protein Cheesecakes are a game changer for anyone who loves dessert but wants to stay on track with their health goals.
They’re incredibly easy to whip up, taking just a few minutes of prep time.
Plus, they bake quickly, so you won’t be waiting long to enjoy your treat.
With a creamy texture and delightful flavor, they’re sure to become a favorite in your dessert rotation!
Ingredients for Mini Protein Cheesecakes
Creating these Mini Protein Cheesecakes is a breeze, especially with the right ingredients. Here’s what you’ll need to bring this delightful dessert to life:
- Low-fat cream cheese: This is the star of the show, providing that classic cheesecake flavor while keeping the calories in check.
- Greek yogurt: A creamy addition that boosts protein content and adds a tangy twist to the filling.
- Vanilla protein powder: This not only enhances the protein profile but also infuses a lovely vanilla flavor. Feel free to choose your favorite brand!
- Honey or maple syrup: A natural sweetener that adds just the right amount of sweetness. You can adjust based on your taste preference.
- Vanilla extract: A must-have for that aromatic depth, making each bite feel indulgent.
- Lemon juice: Just a splash brightens the flavors and balances the sweetness beautifully.
- Salt: A pinch enhances all the flavors, making the cheesecake taste even better.
- Crushed graham crackers: These create a delicious crust that adds a satisfying crunch. You can use store-bought or crush your own!
- Unsalted butter: This binds the crust together and adds richness. If you’re looking for a lighter option, coconut oil works well too.
For exact measurements, check the bottom of the article where you can find everything listed for easy printing. Happy baking!
How to Make Mini Protein Cheesecakes
Making Mini Protein Cheesecakes is a straightforward process that anyone can master.
With just a few simple steps, you’ll have a delicious dessert ready to impress.
Let’s get started!
Step 1: Preheat the Oven
First things first, preheat your oven to 325°F (163°C).
While it warms up, line a muffin tin with paper liners.
This will make it easy to remove your cheesecakes later.
Step 2: Prepare the Crust
In a mixing bowl, combine the crushed graham crackers and melted butter.
Mix until everything is well combined.
Now, press about 1 tablespoon of this mixture into the bottom of each muffin liner.
This forms a solid crust that adds a delightful crunch.
Step 3: Make the Cheesecake Filling
In a separate bowl, beat the softened cream cheese until it’s smooth and creamy.
Add in the Greek yogurt, vanilla protein powder, honey (or maple syrup), vanilla extract, lemon juice, and salt.
Mix everything together until fully combined and creamy.
This filling is where the magic happens!
Step 4: Assemble the Cheesecakes
Spoon the cheesecake mixture evenly over the crusts in the muffin tin.
Fill each liner about 3/4 full.
This allows room for the cheesecakes to rise slightly while baking.
Step 5: Bake
Now, it’s time to bake!
Place the muffin tin in the preheated oven and bake for 15-18 minutes.
You’ll know they’re done when the edges are set but the centers are still slightly jiggly.
This ensures a creamy texture.
Step 6: Cool and Refrigerate
Once baked, remove the cheesecakes from the oven.
Let them cool at room temperature for about 30 minutes.
After that, refrigerate them for at least 2 hours to fully set.
This step is crucial for achieving that perfect cheesecake consistency.
Step 7: Serve and Enjoy
Finally, it’s time to serve!
Enjoy your mini protein cheesecakes chilled.
They’re perfect as a healthy dessert or a post-workout treat.
Dig in and savor every bite!
Tips for Success
- Make sure your cream cheese is softened for easy mixing.
- Don’t skip the chilling time; it’s essential for the perfect texture.
- Use a cookie scoop for even filling distribution.
- Experiment with different protein powder flavors for variety.
- Top with fresh fruit or a drizzle of chocolate for an extra touch.
- Store leftovers in an airtight container in the fridge for up to a week.
Equipment Needed
- Muffin tin: Essential for shaping your mini cheesecakes. A silicone mold works great too!
- Mixing bowls: Use a large bowl for the filling and a smaller one for the crust.
- Electric mixer: A hand mixer makes blending easy, but a whisk will do in a pinch.
- Measuring cups and spoons: For accurate ingredient portions, essential for baking success.
Variations
- Chocolate Mini Protein Cheesecakes: Swap out the vanilla protein powder for chocolate protein powder and add a tablespoon of cocoa powder for a rich, chocolatey twist.
- Fruit-Infused Cheesecakes: Mix in pureed fruits like strawberries or blueberries into the cheesecake filling for a fruity flavor. You can also top them with fresh fruit for a vibrant presentation.
- Nut Butter Swirl: Add a swirl of almond or peanut butter to the cheesecake mixture before baking for a nutty flavor that complements the creaminess.
- Vegan Option: Use vegan cream cheese and a plant-based protein powder, along with maple syrup as a sweetener, to create a delicious vegan version.
- Spiced Pumpkin Cheesecakes: For a seasonal treat, mix in pumpkin puree and pumpkin spice to the filling for a fall-inspired dessert.
Serving Suggestions
- Pair your Mini Protein Cheesecakes with a dollop of Greek yogurt for added creaminess.
- Serve alongside fresh berries like strawberries or blueberries for a burst of flavor.
- Drizzle with sugar-free chocolate sauce for a decadent touch.
- Enjoy with a cup of herbal tea or coffee for a delightful afternoon treat.
- Garnish with mint leaves for a pop of color and freshness.
FAQs about Mini Protein Cheesecakes
Can I use a different sweetener instead of honey or maple syrup?
Absolutely! You can use stevia, agave nectar, or even a sugar substitute that you prefer. Just adjust the amount to taste, as some sweeteners are sweeter than others.
How long do Mini Protein Cheesecakes last in the fridge?
These delightful treats can last up to a week in the fridge when stored in an airtight container. They make for a great grab-and-go snack!
Can I freeze Mini Protein Cheesecakes?
Yes, you can freeze them! Just make sure to wrap each cheesecake individually in plastic wrap and then place them in a freezer-safe container. They’ll keep for about a month.
What can I use instead of Greek yogurt?
If you don’t have Greek yogurt on hand, you can substitute it with regular yogurt or even cottage cheese for a similar creamy texture. Just blend it well to ensure smoothness.
Are Mini Protein Cheesecakes suitable for a low-carb diet?
Yes! These cheesecakes are relatively low in carbs, especially if you use a low-carb sweetener. They can fit nicely into a low-carb or keto lifestyle.
Final Thoughts
Creating these Mini Protein Cheesecakes is more than just baking; it’s about crafting a delightful experience.
Each bite offers a creamy, satisfying taste that feels indulgent yet guilt-free.
Whether you’re treating yourself after a workout or sharing them with friends, these cheesecakes bring joy to any occasion.
They’re a reminder that healthy eating doesn’t have to be boring.
So, roll up your sleeves, gather your ingredients, and let the magic happen in your kitchen.
You’ll be amazed at how something so simple can bring so much happiness to your day!
Mini Protein Cheesecakes: A Healthy Dessert Delight!
Ingredients
Method
- Preheat your oven to 325°F (163°C) and line a muffin tin with paper liners.
- In a mixing bowl, combine the crushed graham crackers and melted butter. Mix until well combined, then press about 1 tablespoon of the mixture into the bottom of each muffin liner to form the crust.
- In a separate bowl, beat the softened cream cheese until smooth. Add the Greek yogurt, vanilla protein powder, honey (or maple syrup), vanilla extract, lemon juice, and salt. Mix until fully combined and creamy.
- Spoon the cheesecake mixture evenly over the crusts in the muffin tin, filling each liner about 3/4 full.
- Bake in the preheated oven for 15-18 minutes, or until the edges are set but the centers are slightly jiggly.
- Remove from the oven and let cool at room temperature for about 30 minutes. Then, refrigerate for at least 2 hours to fully set.
- Serve chilled, and enjoy your mini protein cheesecakes!
Nutrition
Notes
- For a chocolate version, substitute chocolate protein powder and add a tablespoon of cocoa powder to the cheesecake mixture.
- Top each cheesecake with fresh berries or a drizzle of sugar-free chocolate sauce for added flavor and presentation.