
The aroma of melting cheese and savory chicken fills the kitchen, whisking me away to those cozy family dinners that feel like a warm hug. Enter my Quick and Customizable Queso Chicken Enchiladas—a dish that effortlessly marries comfort food with the joy of home-cooking. Not only do these enchiladas require just 10 minutes of prep time, but they also allow for endless customization to suit every palate, making them a perfect weeknight meal for both families and dinner parties. Whether you stick with the classic chicken and cheese or unleash your creativity with vegetarian options and spicy twists, these enchiladas are bound to be a hit. Ready to dive into cheesy goodness and make mealtime a delight?
Why Are Queso Chicken Enchiladas Perfect?
Quick Preparation: Enjoy a comforting meal without spending hours in the kitchen. These enchiladas take just 10 minutes to prep, perfect for busy nights.
Endless Customization: Whether you prefer chicken, black beans, or extra spice, tailor the recipe to your taste, making it suitable for everyone—from picky eaters to adventurous palates.
Indulgent Comfort: Each bite is a delightful combination of gooey cheese and savory chicken, reminiscent of cozy family dinners that warm the heart.
Family-Friendly: With a crowd-pleasing flavor profile and recipe simplicity, they’re sure to be a hit with adults and kids alike. Pair them with a fresh salad or Garlic Chicken Broccoli for a complete meal!
Queso Chicken Enchiladas Ingredients
• Here’s everything you need to create these delicious quesadilla chicken enchiladas!
For the Filling
- Shredded Chicken – Main protein; use rotisserie chicken for convenience and flavor.
- Taco Seasoning – Adds a punch of flavor; feel free to use homemade for an extra personal touch!
- Sour Cream – Brings creaminess; substitute with Greek yogurt for a healthier alternative.
- Shredded Cheddar Cheese – Provides that gooey cheesiness; swap with Monterey Jack or pepper jack for a different flair.
- Chopped Green Chilies – Adds a subtle heat; omit them for a milder version or use jalapeños for a spicy kick.
For the Queso Sauce
- Velveeta Cheese – Delivers a smooth, creamy texture in your queso sauce; consider a reduced-fat variant for a lighter dish.
- Diced Tomatoes with Green Chilies – Serves as the flavor base; remember to keep undrained for that perfect consistency!
For Assembling
- Tortillas – Your delicious wraps; opt for corn, flour, or whole wheat based on your preference.
Dive into making these Queso Chicken Enchiladas, where comfort meets creativity! Perfect for customization to suit everyone at your table!
Step‑by‑Step Instructions for Queso Chicken Enchiladas
Step 1: Preheat the Oven
Begin by preheating your oven to 350°F (175°C) to ensure a perfectly baked finish for your Queso Chicken Enchiladas. This temperature helps the cheese melt beautifully while allowing the enchiladas to warm through, resulting in gooey, cheesy goodness. Preheating is essential to achieve a golden top and ensure everything bakes evenly.
Step 2: Mix the Filling
In a large mixing bowl, combine the shredded chicken, taco seasoning, sour cream, shredded cheddar cheese, and chopped green chilies. Stir vigorously until all ingredients are well blended, creating a flavorful and creamy filling. This step should take about 2-3 minutes, and you’ll know it’s ready when the mixture is uniform in color and consistency.
Step 3: Prepare the Queso Sauce
In a saucepan over medium-high heat, melt the Velveeta cheese along with the undrained diced tomatoes with green chilies. Stir continuously until the mixture is smooth and creamy, roughly 5-7 minutes. Keep a close eye on it to prevent sticking or burning, as the melted concoction will form the rich, indulgent sauce that crowns the enchiladas.
Step 4: Fill the Tortillas
Lay tortillas flat on a clean surface and spoon about ½ to ¾ cup of the chicken filling onto each one. Gently fold the sides over the filling and roll them tightly to secure the contents. Ensure the tortillas are filled without overflowing, making the assembly smoother and allowing for easier rolling. This step should take about 5 minutes for all tortillas.
Step 5: Assemble the Enchiladas
Place the rolled tortillas seam-side down in a 9×13-inch casserole dish, arranging them snugly together. Aim for an even distribution to maximize space and ensure they bake evenly. The visual appeal of these Queso Chicken Enchiladas starts here, as you’ll see the vibrant colors of the tortillas and filling come together in the dish.
Step 6: Pour the Queso Sauce
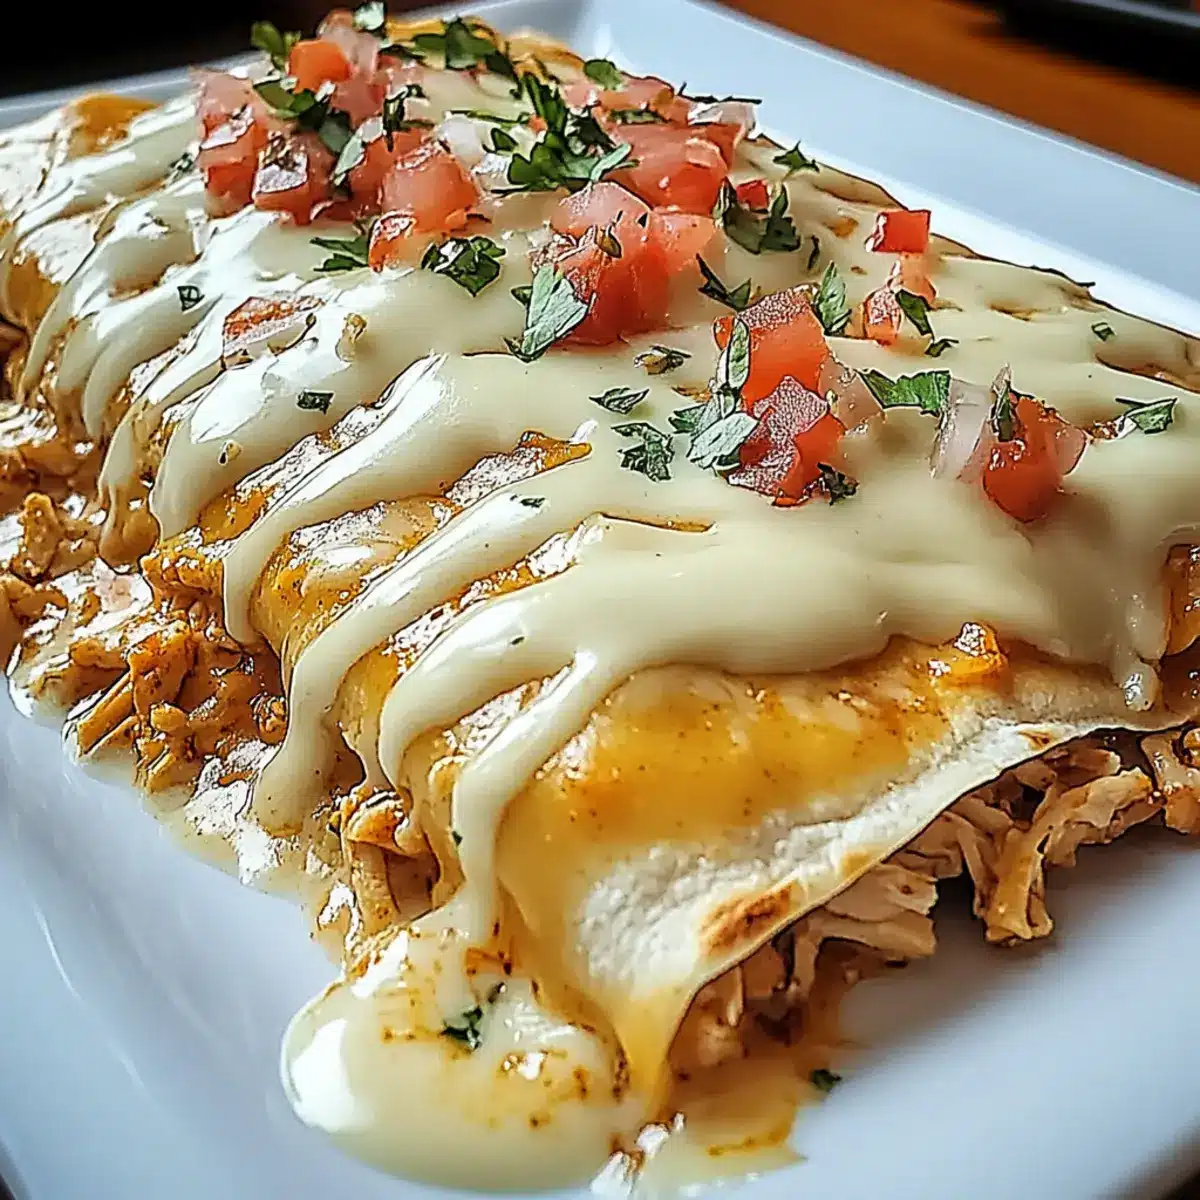
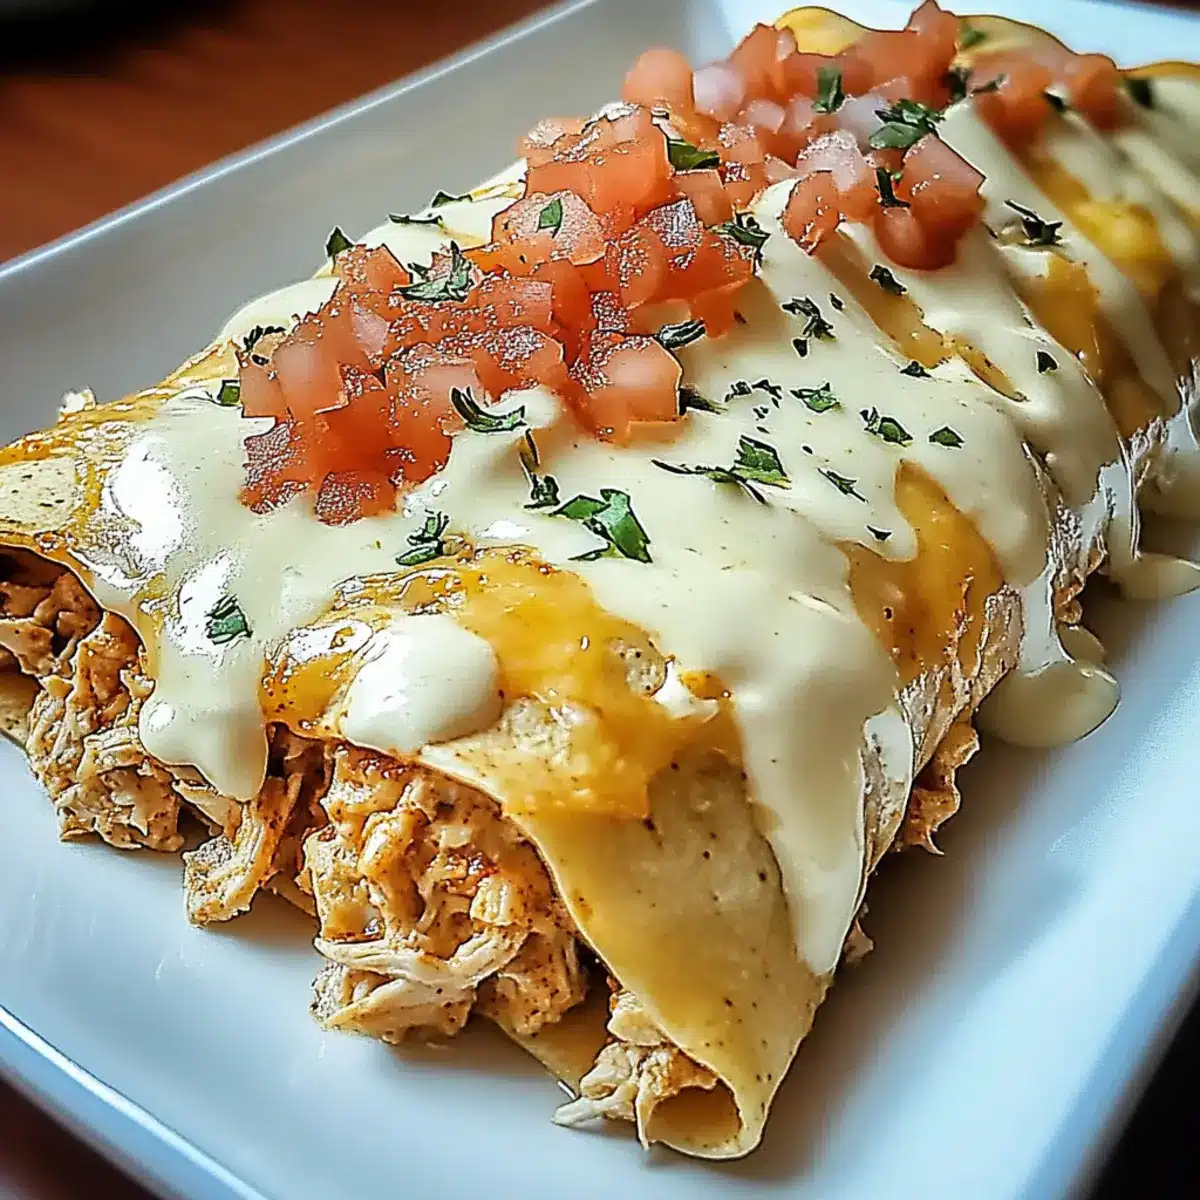
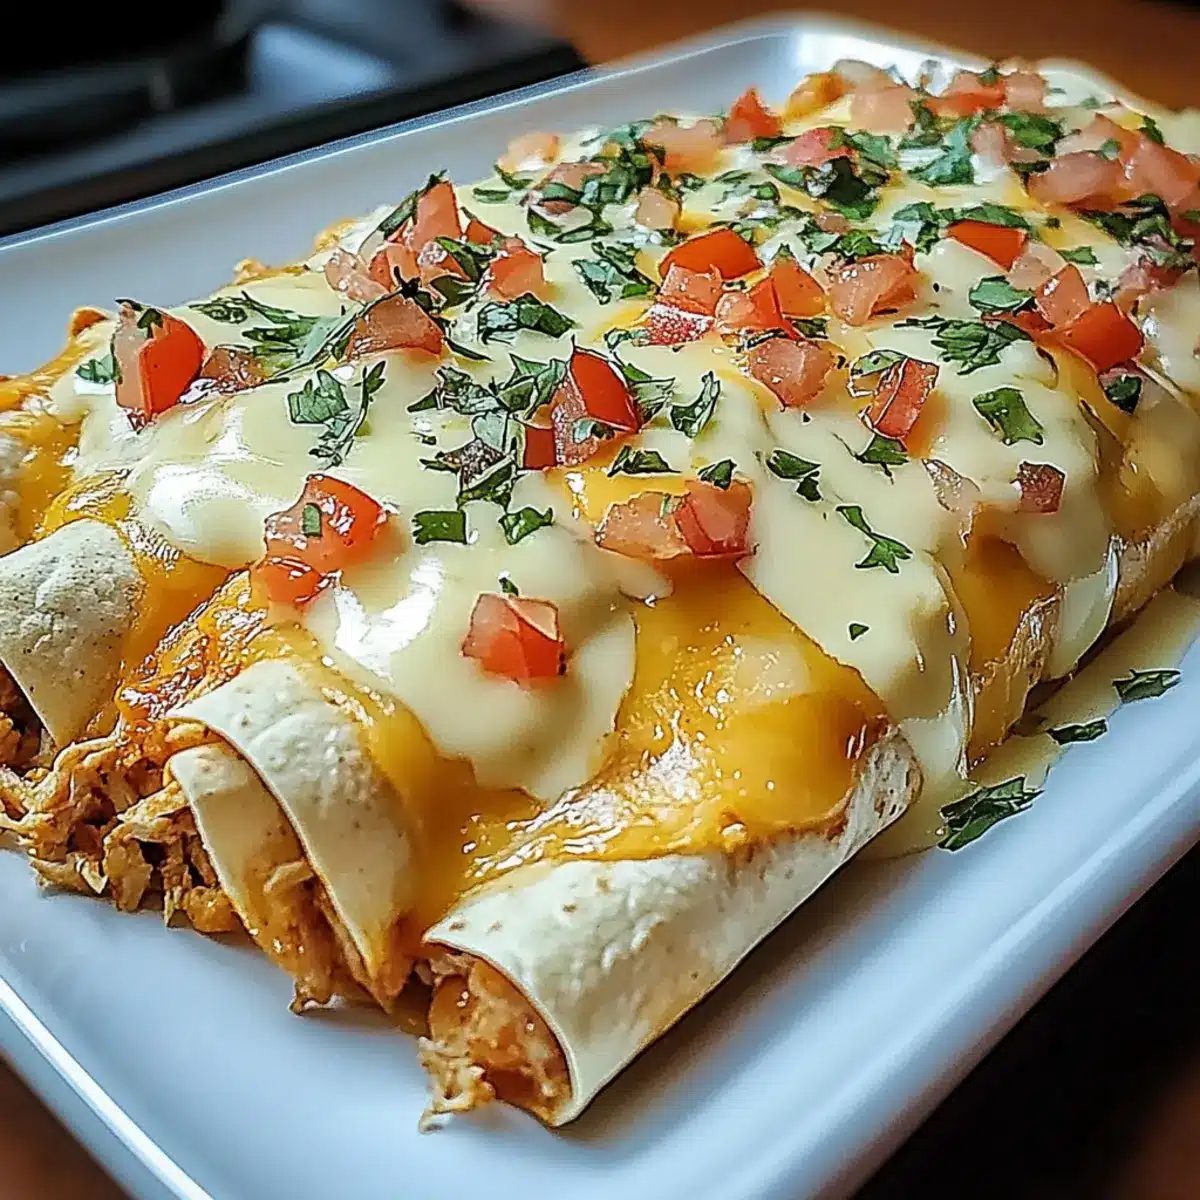
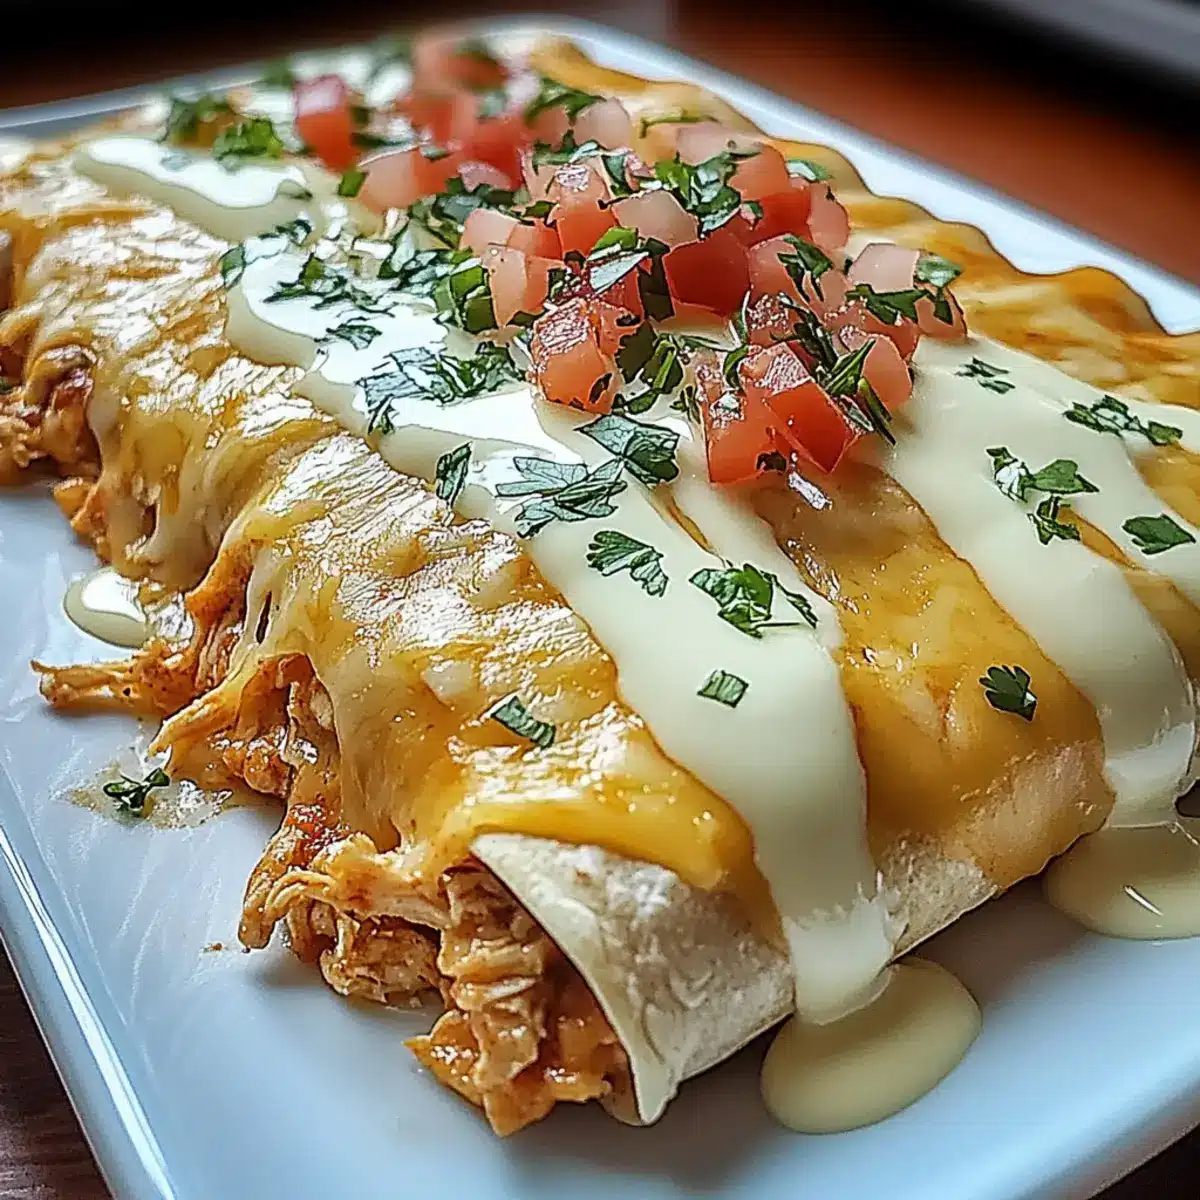
Carefully pour the melted queso sauce over the arranged enchiladas, ensuring each one is well-coated. Use a spatula to spread the sauce evenly across the top if needed. This will create a deliciously gooey layer that bakes into a delightful topping, sending aromatic scents wafting through your kitchen—a hallmark of tasty Queso Chicken Enchiladas.
Step 7: Bake to Perfection
Place the casserole dish in the preheated oven and bake for 20-25 minutes or until the enchiladas are hot, bubbly, and the edges are slightly crispy. You’ll know they’re ready when the cheese is melted and golden, creating a visually tempting top that beckons to be served right away.
Step 8: Serve Hot
Once baked, remove the enchiladas from the oven and let them rest for a few minutes. This resting time allows the flavors to meld beautifully. Serve your warm Queso Chicken Enchiladas immediately, paired with a fresh salad or rice for a complete meal that’s sure to impress family and friends.
Queso Chicken Enchiladas Variations & Substitutions
Feel free to put your unique spin on these enchiladas and let your taste buds guide you to deliciousness!
-
Vegetarian: Replace shredded chicken with black beans or lentils for a hearty, meat-free option. The richness of cheese combines beautifully with the earthiness of beans, making every bite a delight.
-
Spicy Kick: Add diced jalapeños or a splash of your favorite hot sauce to the filling. It brings a pleasant heat that elevates the dish, perfect for those who crave a bit of spice!
-
Seasonal Veggies: Toss in fresh vegetables like zucchini, spinach, or corn. Not only will this boost nutrition, but it will also add exciting textures and vibrant colors to your enchiladas.
-
Cheese Lovers: Experiment with different cheeses like pepper jack or mozzarella for varied flavors. Combining cheeses can create a unique melting experience, making your enchiladas even more indulgent.
-
Personal Serve: Use individual ramekins for single servings. This enhances presentation and provides perfect portion control, allowing everyone to enjoy their own cheesy creation.
-
Creamy Green Sauce: Swap queso sauce for a creamy green sauce made from pureed avocados and Greek yogurt. It’s a refreshing twist that adds a cool contrast to the warm filling.
-
Tortilla Choice: Switch corn tortillas for whole wheat if you’re looking for a healthier option. Whole wheat offers a nuttier flavor that complements the richness of the filling.
For more savory options, consider pairing with a side salad or Santa Chicken Skillet for a complete meal!
Make Ahead Options
These Queso Chicken Enchiladas are perfect for busy weeknights and meal prep! You can prepare both the filling and the queso sauce up to 24 hours in advance by simply storing them in airtight containers in the refrigerator. To keep your filling fresh and avoid any moisture loss, ensure you seal the containers well. When you’re ready to bake, assemble the tortillas with the filling, roll them up, and pour the queso sauce on top. Bake as directed, and you’ll have a delicious, comforting meal ready to enjoy in no time, just as tasty as if you had made them fresh!
How to Store and Freeze Queso Chicken Enchiladas
Room Temperature: Enchiladas should not be left out for more than 2 hours to maintain safety and freshness.
Fridge: Store leftovers in an airtight container for up to 3 days to keep your Queso Chicken Enchiladas tasty and ready to reheat.
Freezer: Wrapped tightly in plastic wrap and aluminum foil, enchiladas can be frozen for up to 2 months. Thaw overnight in the fridge before baking.
Reheating: For best results, reheat in the oven at 350°F (175°C) for about 15-20 minutes, or until heated through, ensuring the cheese is melty again.
What to Serve with Queso Chicken Enchiladas
Enjoying these scrumptious enchiladas is only the start of a delightful meal experience, and pairing them with the right sides can elevate your family dinner to a feast of flavors.
-
Creamy Mexican Rice: This fluffy side dish complements the cheesy enchiladas with its mild flavor and adds a beautiful color contrast to the plate. Every forkful of rice becomes a perfect companion, soaking up any leftover queso sauce.
-
Fresh Garden Salad: Crisp, refreshing greens dressed in a light vinaigrette brighten up the rich flavors of the enchiladas, providing a fantastic crunch that balances the cheesy meltiness. Toss in some cherry tomatoes and avocado for an extra layer of taste!
-
Guacamole Dip: The cool, creamy texture of guacamole enhances the flavor profile while adding a delightful richness that pairs excellently with the spice of the enchiladas. Serve with crispy tortilla chips for a fun appetizer or shareable side.
-
Spicy Black Beans: Spiced black beans bring a hearty and zesty element to your meal, marrying well with the flavors of the enchiladas. Their protein-packed goodness adds depth and nourishes, making each bite even more satisfying.
-
Pineapple Salsa: Sweet and tangy pineapple salsa offers a refreshing contrast to the savory enchiladas, cutting through the richness with its vibrant flavors. The fruitiness will have everyone coming back for more!
-
Margaritas or Mojitos: Sip on these refreshing cocktails to elevate your dining experience. The bright, citrus notes pair beautifully with the rich flavors of the Queso Chicken Enchiladas, making every bite and sip a celebration.
These sides create a culinary adventure that both delights and nourishes, transforming your meal into a warm gathering of flavors!
Expert Tips for Queso Chicken Enchiladas
-
Proper Melting: Make sure to melt Velveeta cheese over medium heat slowly. This prevents it from clumping and ensures a smooth queso sauce.
-
Don’t Overfill: Stick to ½ to ¾ cup of filling per tortilla. Overfilling can lead to messy rolls and spills during baking.
-
Use Fresh Ingredients: Always opt for fresh ingredients for the filling to enhance overall flavor, making your Queso Chicken Enchiladas even more enjoyable.
-
Monitor Baking Time: Keep an eye on the oven. Overbaking can dry out the enchiladas, so aim for bubbly and golden perfection.
-
Customize Wisely: Feel free to experiment with fillings like black beans or seasonal vegetables, but make sure to adjust the liquid in the sauce if necessary.
Queso Chicken Enchiladas Recipe FAQs
What is the best way to select ripe ingredients for my Queso Chicken Enchiladas?
Absolutely! When selecting ingredients, look for ripe tomatoes with bright color and smooth skin. For the chilies, choose bright green and firm ones. If using shredded chicken, rotisserie chicken works great for convenience, but ensure it’s of high quality and freshly prepared.
How should I store leftover Queso Chicken Enchiladas?
Very! Store your leftovers in an airtight container in the fridge for up to 3 days. Be sure to let them cool to room temperature before sealing to avoid condensation that can make them soggy.
Can I freeze Queso Chicken Enchiladas, and if so, how?
Yes, you can! To freeze, wrap them tightly in plastic wrap and then in aluminum foil to prevent freezer burn. They can be stored this way for up to 2 months. When you’re ready to enjoy them, simply thaw in the fridge overnight and reheat in the oven at 350°F (175°C) for 15-20 minutes until warmed through.
What should I do if my enchiladas are too dry after baking?
If your Queso Chicken Enchiladas end up a bit dry, it may be due to overbaking. To remedy this next time, keep the baking time to about 20-25 minutes and check for bubbly cheese. If they do turn out dry, serve with extra queso sauce on top or a side of sour cream to enhance moisture and creaminess.
Are there any dietary considerations I should be aware of when making these enchiladas?
Definitely! These Queso Chicken Enchiladas contain both dairy and gluten. If you’re cooking for those with dietary restrictions, consider swapping sour cream for a dairy-free yogurt and using gluten-free tortillas. For pet considerations, make sure to avoid any ingredient containing onions or garlic, as they’re harmful to cats and dogs.
How can I customize my Queso Chicken Enchiladas to suit different tastes?
Make it your own! For a vegetarian option, swap the chicken for black beans or lentils. Feel free to add seasonal veggies like bell peppers or zucchini to the filling. For heat, include diced jalapeños in the filling or drizzle hot sauce on top before serving. Enjoy personalizing it to fit the flavor palette of everyone at your table!
Delicious Queso Chicken Enchiladas for Cozy Family Nights
Ingredients
Equipment
Method
- Preheat your oven to 350°F (175°C).
- In a large mixing bowl, combine the shredded chicken, taco seasoning, sour cream, shredded cheddar cheese, and chopped green chilies. Stir until well blended.
- In a saucepan over medium-high heat, melt the Velveeta cheese along with the undrained diced tomatoes with green chilies. Stir until smooth and creamy.
- Lay tortillas flat and spoon about ½ to ¾ cup of the chicken filling onto each. Fold sides over and roll tightly.
- Place the rolled tortillas seam-side down in a 9×13-inch casserole dish.
- Pour the melted queso sauce over the enchiladas, ensuring each one is well-coated.
- Bake for 20-25 minutes or until hot, bubbly, and edges are slightly crispy.
- Let the enchiladas rest for a few minutes before serving warm with a fresh salad or rice.