
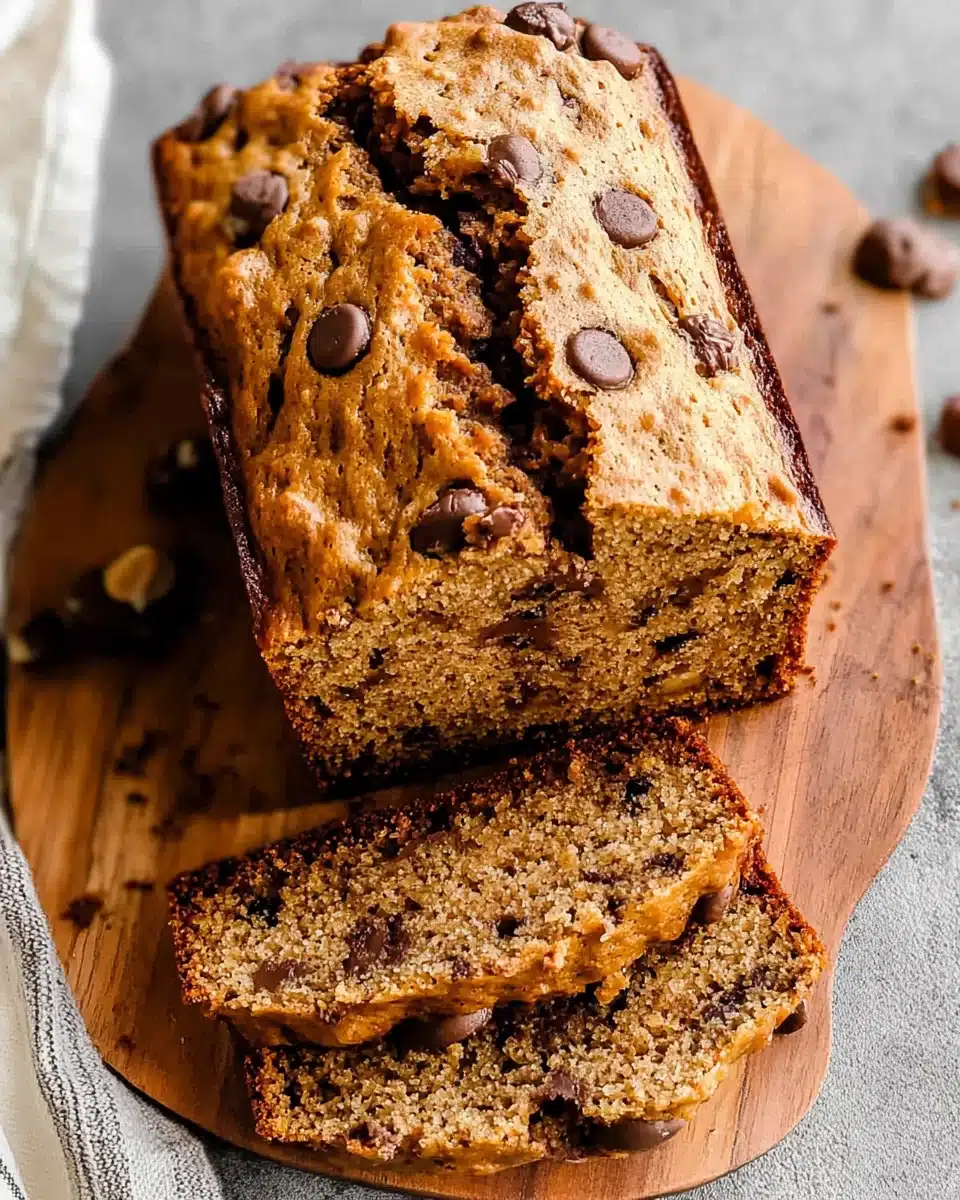
Introduction to Reese’s Peanut Butter Banana Bread
There’s something magical about the aroma of freshly baked banana bread wafting through the house. It takes me back to my childhood, where my mom would whip up a loaf every Sunday. Now, I’ve taken that nostalgia and added a twist with this Reese’s Peanut Butter Banana Bread. This recipe is not just a treat; it’s a quick solution for busy days or a delightful way to impress your loved ones. With creamy peanut butter and chunks of Reese’s Peanut Butter Cups, it’s a sweet escape that’s both comforting and indulgent. Trust me, you’ll want to make this again and again!
Why You’ll Love This Reese’s Peanut Butter Banana Bread
This Reese’s Peanut Butter Banana Bread is a game-changer in the kitchen. It’s incredibly easy to whip up, making it perfect for those hectic mornings or lazy weekends. The combination of rich peanut butter and sweet banana creates a flavor explosion that’s hard to resist. Plus, with chunks of Reese’s Peanut Butter Cups, every bite feels like a mini celebration. You’ll find yourself reaching for another slice before you even realize it!
Ingredients for Reese’s Peanut Butter Banana Bread
Gathering the right ingredients is the first step to creating this delightful treat. Here’s what you’ll need:
- Ripe bananas: The star of the show! They add natural sweetness and moisture.
- Creamy peanut butter: This gives the bread its rich, nutty flavor. You can use crunchy if you prefer a bit of texture.
- Granulated sugar: For that classic sweetness that balances the flavors.
- Brown sugar: Adds depth and a hint of caramel flavor, making the bread even more delicious.
- Unsalted butter: Melted for richness; it helps create a moist crumb.
- Large eggs: They bind everything together and add structure to the bread.
- Vanilla extract: A splash of this elevates the flavor profile, making it more aromatic.
- Baking soda: This is your leavening agent, helping the bread rise beautifully.
- Salt: Just a pinch enhances all the flavors and balances the sweetness.
- All-purpose flour: The base of the bread; it provides the necessary structure.
- Chocolate chips: For extra sweetness and a delightful chocolatey surprise in every bite.
- Chopped Reese’s Peanut Butter Cups: The ultimate indulgence! They add chunks of chocolate and peanut butter bliss.
For those looking to mix things up, consider adding a teaspoon of cinnamon for warmth or swapping half the all-purpose flour with whole wheat flour for a healthier twist. You can find the exact quantities for each ingredient at the bottom of the article, ready for printing!
How to Make Reese’s Peanut Butter Banana Bread
Now that you have all your ingredients ready, let’s dive into the fun part—making this delicious Reese’s Peanut Butter Banana Bread! Follow these simple steps, and you’ll have a warm loaf ready to enjoy in no time.
Step 1: Preheat the Oven
First things first, preheat your oven to 350°F (175°C). This ensures your bread bakes evenly. While the oven warms up, prepare your loaf pan by greasing it or lining it with parchment paper. This will make it easier to remove the bread later.
Step 2: Mix Wet Ingredients
In a large mixing bowl, combine the mashed bananas, creamy peanut butter, granulated sugar, brown sugar, and melted butter. Mix everything together until it’s smooth and well blended. The bananas should be fully incorporated, creating a luscious base for your batter.
Step 3: Add Eggs and Vanilla
Next, crack in the eggs and pour in the vanilla extract. Stir until everything is well combined. This step adds richness and a lovely aroma to your batter. You’ll start to see the mixture come together beautifully!
Step 4: Combine Dry Ingredients
In a separate bowl, whisk together the baking soda, salt, and all-purpose flour. This helps to evenly distribute the leavening agent and ensures your bread rises perfectly. It’s a small but important step that makes a big difference!
Step 5: Mix Wet and Dry Ingredients
Now, gradually add the dry ingredients to the wet mixture. Stir gently until just combined. Be careful not to overmix; a few lumps are perfectly fine. This will keep your bread tender and moist, which is exactly what we want!
Step 6: Fold in Chocolate and Reese’s
Here comes the fun part! Fold in the chocolate chips and chopped Reese’s Peanut Butter Cups. This is where the magic happens. Each bite will be a delightful surprise of chocolate and peanut butter goodness. Make sure they’re evenly distributed throughout the batter.
Step 7: Bake the Bread
Pour the batter into your prepared loaf pan and smooth the top with a spatula. Pop it into the oven and bake for 55-65 minutes. You’ll know it’s done when a toothpick inserted into the center comes out clean. The aroma will fill your kitchen, making it hard to wait!
Step 8: Cool and Serve
Once baked, allow the bread to cool in the pan for about 10 minutes. Then, carefully transfer it to a wire rack to cool completely. For the best flavor, let it sit for a few hours or even overnight before slicing. Trust me, the wait is worth it!
Tips for Success
- Use overripe bananas for maximum sweetness and moisture.
- Don’t skip the cooling time; it enhances the flavors.
- Store leftover bread in an airtight container to keep it fresh.
- For a fun twist, try adding chopped nuts or dried fruit.
- Experiment with different types of peanut butter for unique flavors.
Equipment Needed
- 9×5-inch loaf pan: Essential for baking; a round cake pan works in a pinch.
- Mixing bowls: Use any size; a large bowl is best for combining ingredients.
- Whisk: Perfect for mixing dry ingredients; a fork can also do the job.
- Spatula: Great for folding in ingredients; a wooden spoon works too.
- Wire rack: Ideal for cooling; a plate can substitute if needed.
Variations
- Nutty Delight: Add chopped walnuts or pecans for a crunchy texture that complements the creamy peanut butter.
- Chocolate Lovers: Swap in dark chocolate chips for a richer flavor or use white chocolate for a sweeter twist.
- Healthier Option: Substitute half of the all-purpose flour with whole wheat flour for added fiber and nutrients.
- Spiced Up: Incorporate a teaspoon of cinnamon or nutmeg to warm up the flavor profile.
- Vegan Version: Replace eggs with flaxseed meal mixed with water and use a plant-based butter alternative.
Serving Suggestions
- Pair slices of this Reese’s Peanut Butter Banana Bread with a dollop of whipped cream for a decadent treat.
- Enjoy it alongside a hot cup of coffee or a glass of cold milk for the ultimate comfort.
- For a fun presentation, dust with powdered sugar or drizzle with chocolate sauce.
FAQs about Reese’s Peanut Butter Banana Bread
Can I use frozen bananas for this recipe?
Absolutely! Frozen bananas work great in this Reese’s Peanut Butter Banana Bread. Just thaw them and mash them up. They’ll add the same moisture and sweetness as fresh ones.
How do I store leftover banana bread?
To keep your banana bread fresh, store it in an airtight container at room temperature for up to three days. You can also refrigerate it for a week or freeze it for longer storage.
Can I make this recipe gluten-free?
Yes! You can substitute the all-purpose flour with a gluten-free flour blend. Just make sure to check the blend’s instructions for the best results.
What can I serve with Reese’s Peanut Butter Banana Bread?
This banana bread pairs wonderfully with a scoop of vanilla ice cream or a dollop of peanut butter. A hot cup of coffee or a glass of cold milk also makes for a perfect match!
How can I make this recipe healthier?
For a healthier twist, consider using less sugar, adding whole wheat flour, or incorporating nuts and seeds for added nutrition. You can also reduce the amount of chocolate chips if you prefer a lighter version.
Final Thoughts
Creating this Reese’s Peanut Butter Banana Bread is more than just baking; it’s about crafting memories. The blend of flavors brings a smile to my face, reminding me of cozy afternoons spent in the kitchen. Each slice is a delightful mix of nostalgia and indulgence, perfect for sharing with family or enjoying solo with a cup of coffee. Whether it’s a special occasion or just a Tuesday, this bread transforms ordinary moments into something extraordinary. So, roll up your sleeves and dive into this recipe; I promise it will become a cherished favorite in your home!
Reese’s Peanut Butter Banana Bread: A Must-Try Delight!
Ingredients
Method
- Preheat your oven to 350°F (175°C). Grease a 9×5-inch loaf pan or line it with parchment paper.
- In a large mixing bowl, combine the mashed bananas, peanut butter, granulated sugar, brown sugar, and melted butter. Mix until smooth.
- Add the eggs and vanilla extract, and stir until well combined.
- In a separate bowl, whisk together the baking soda, salt, and flour.
- Gradually add the dry ingredients to the wet mixture, stirring until just combined.
- Fold in the chocolate chips and chopped Reese’s Peanut Butter Cups.
- Pour the batter into the prepared loaf pan and smooth the top.
- Bake for 55-65 minutes, or until a toothpick inserted into the center comes out clean.
- Allow the bread to cool in the pan for about 10 minutes before transferring it to a wire rack to cool completely.
- For best flavor, let the bread sit for a few hours or overnight before slicing.
Nutrition
Notes
- For a richer flavor, try adding a teaspoon of cinnamon to the dry ingredients.
- You can substitute half of the all-purpose flour with whole wheat flour for added nutrition.