
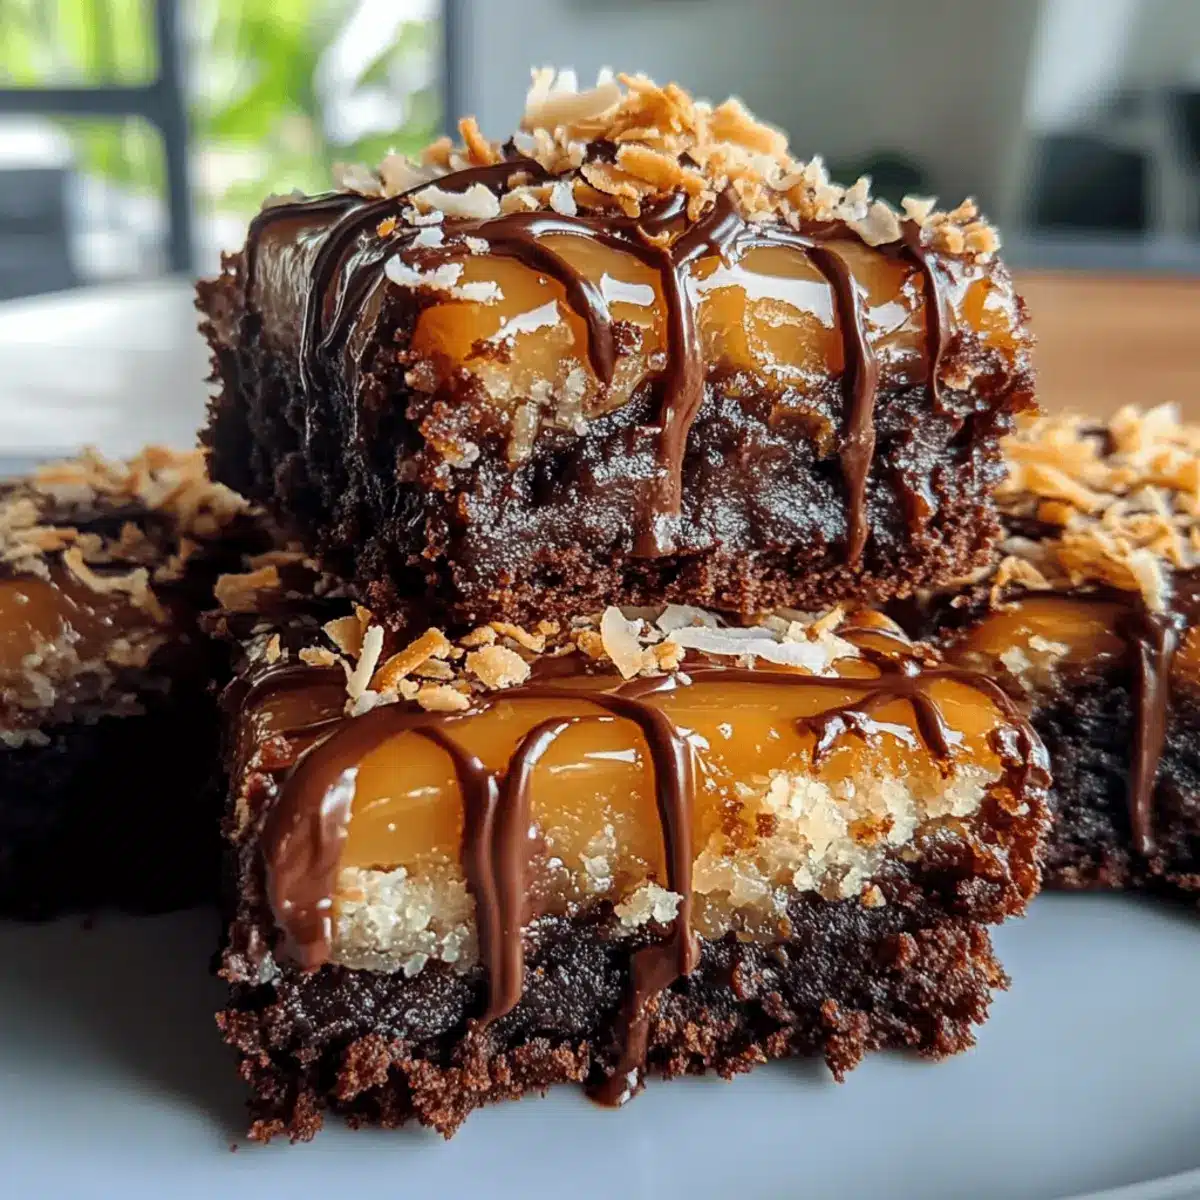
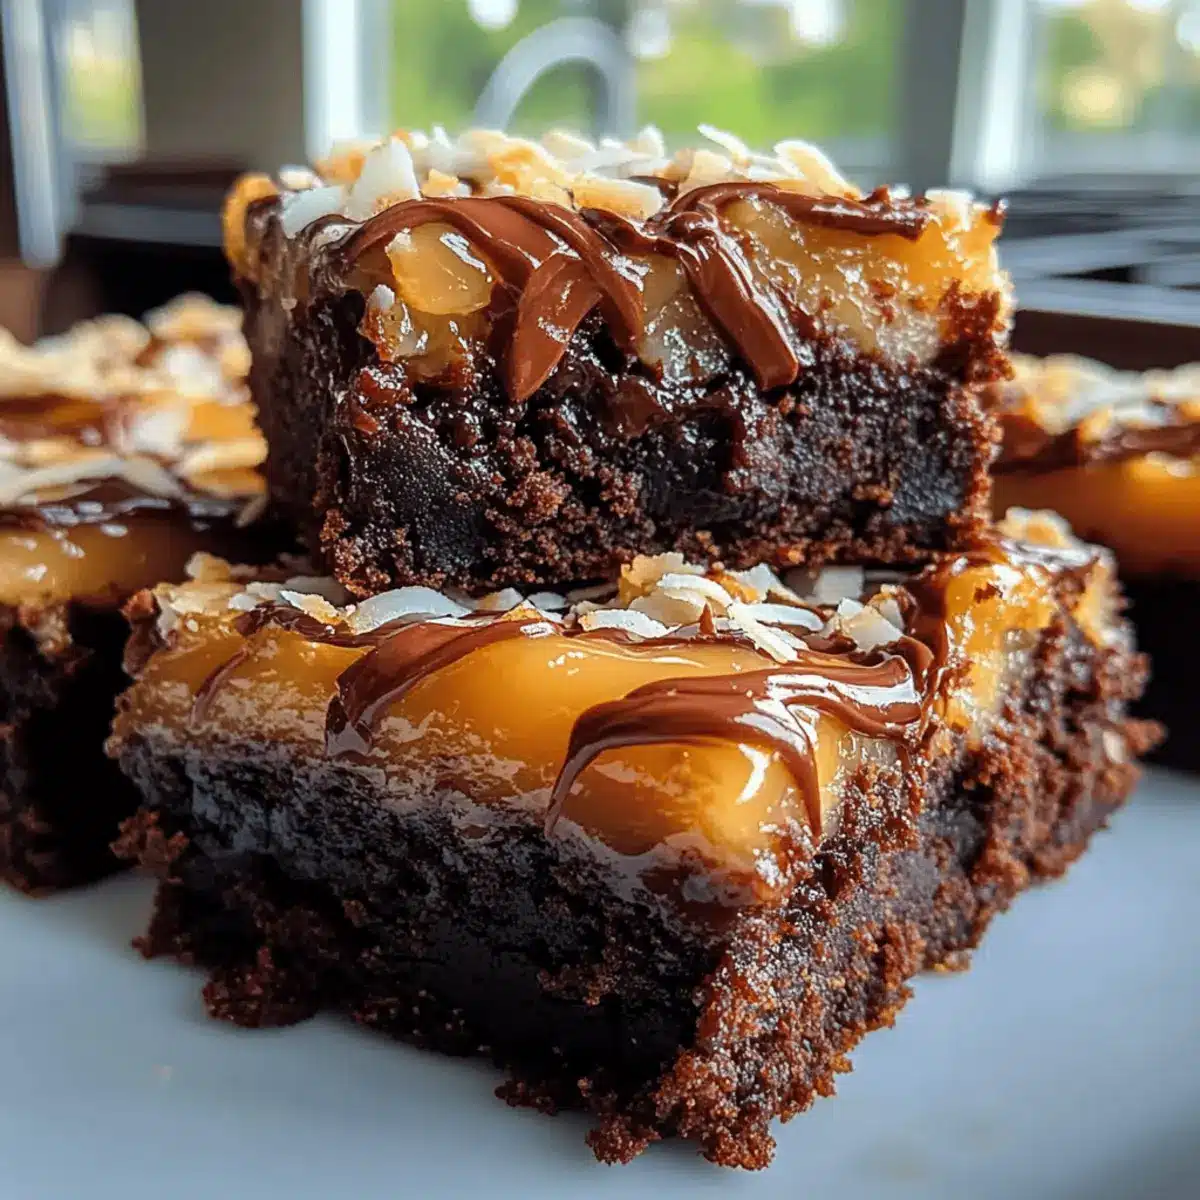
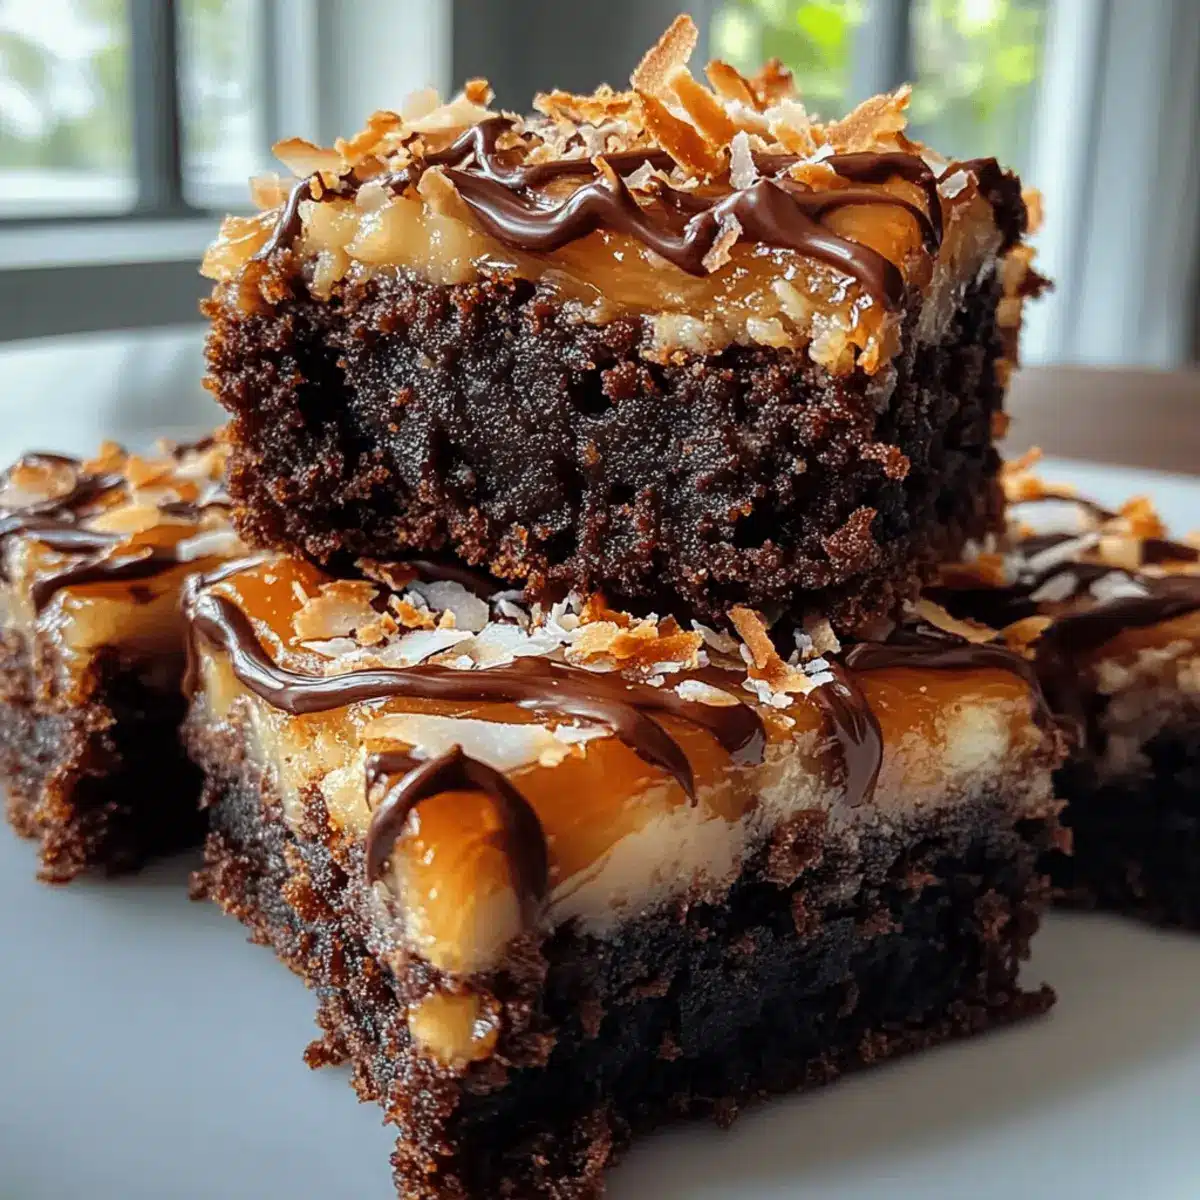
In a cozy kitchen filled with the sweet aroma of melting chocolate and caramel, I found myself captivated by a delightful twist on a nostalgic favorite: Easy Samoa Brownies. Combining rich chocolate with the chewy texture of toasted coconut and a gooey caramel drizzle, these brownies are a quick 45-minute indulgence that will transport you right back to those cherished childhood cookie moments. Whether you’re hosting friends or simply craving a delicious homemade treat, these brownies serve as the perfect crowd-pleaser that requires minimal effort but offers maximum satisfaction. Ready to indulge? Let’s dive into this delectable recipe and bring something truly special to your dessert table!
Why Will You Love These Brownies?
Irresistible Flavor: The combination of rich chocolate, sweet caramel, and toasted coconut creates a heavenly treat that will leave you craving more.
Quick and Easy: In just 45 minutes, you can whip up a batch that’s perfect for unexpected guests or a cozy night in.
Ultimate Crowd-Pleaser: Everyone loves brownies, and these Samoa-inspired delights will have your friends raving about them.
Customizable Delight: Feel free to add nuts or different types of chocolate to make this recipe your own.
No Need for Experience: With simple instructions, even novice bakers can impress friends and family with this delightful dessert!
Perfect for Sharing: These brownies are perfect for parties or bake sales. Cut them into small squares, and watch them disappear!
Samoa Brownie Ingredients
For the Brownies
• Unsweetened Cocoa Powder – Adds a deep and rich chocolate flavor essential for those Samoa brownies.
• All-Purpose Flour – Provides structure; swap with gluten-free flour if needed.
• Granulated Sugar – Sweetens the brownies; reduce if using sweetened cocoa powder.
• Brown Sugar – Contributes moisture and a touch of caramel flavor; no substitutes necessary.
• Salt – Balances out the sweetness; essential for enhancing all flavors.
• Butter – Gives richness; can be replaced with margarine or coconut oil for a dairy-free option.
• Eggs – Binds the ingredients and helps the brownies rise; flax eggs work for a vegan alternative.
• Vanilla Extract – Enhances the overall flavor; not to be substituted.
• Chopped Toasted Coconut – Adds a delightful texture and the signature flavor of Samoa cookies; no alternative required but feel free to experiment with other nuts.
• Caramel Sauce – Creates that signature gooeyness; both pre-made and homemade versions work beautifully.
Step‑by‑Step Instructions for Easy Samoa Brownies
Step 1: Preheat the Oven
Begin by preheating your oven to 350°F (175°C). While it heats up, prepare a 9×13 inch baking pan by greasing it lightly or lining it with parchment paper for easy removal. This will ensure your Samoa brownies bake evenly and come out beautifully.
Step 2: Mix Dry Ingredients
In a medium bowl, whisk together the unsweetened cocoa powder, all-purpose flour, granulated sugar, brown sugar, and salt until well combined. Look for a smooth mixture without lumps, as this will contribute to the fudgy texture of your brownies. Set this bowl aside while you work on the wet ingredients.
Step 3: Combine Wet Ingredients
In a small saucepan, melt the butter over low heat. Once melted, remove it from the heat and stir in the eggs and vanilla extract until fully integrated. This mixture should be glossy and smooth. Combine it with your dry ingredients, stirring gently until just mixed to maintain the rich density of the Samoa brownies.
Step 4: Add Coconut and Caramel
Now, fold in the chopped toasted coconut, ensuring it’s evenly distributed throughout the batter. Next, drizzle in your caramel sauce, swirling it gently to create a marbled effect. This will give your Samoa brownies a divine gooeyness and a delightful texture with each bite.
Step 5: Bake
Pour the brownie batter into your prepared baking pan, spreading it evenly with a spatula. Place the pan in the preheated oven and bake for about 30 minutes. To check for doneness, insert a toothpick into the center—when it comes out with a few moist crumbs, your brownies are perfectly baked and ready to cool.
Step 6: Cool and Serve
Once removed from the oven, let the Samoa brownies cool completely in the pan on a wire rack. This cooling step is crucial for achieving clean cuts. After they are cooled, slice into squares and serve these delightful treats to family and friends, reliving those cherished cookie moments with each gooey bite.

Expert Tips for Samoa Brownies
-
Cool Completely: Allow brownies to cool fully before cutting to achieve clean edges and a neater presentation.
-
Sharp Knife: Use a sharp knife to slice the brownies, cleaning it between cuts for perfectly square pieces.
-
Check Doneness: To prevent overbaking, start checking for doneness around 25 minutes; a toothpick should come out with a few moist crumbs.
-
Gluten-Free Substitutes: When using gluten-free flour for your Samoa brownies, opt for a 1:1 blend to maintain texture and taste.
-
Extra Gooeyness: For an even more indulgent treat, drizzle additional caramel sauce over your brownies before serving!
What to Serve with Easy Samoa Brownies
Indulging in a rich brownie experience goes beyond just dessert; find the perfect companions to elevate your treat.
-
Vanilla Ice Cream: A classic pair, the cool creaminess complements the warm gooeyness of the brownies perfectly. The vanilla richness enhances the chocolate and caramel flavors beautifully.
-
Whipped Cream: Light and airy, a dollop of freshly whipped cream adds a luxurious touch and balances the brownies’ density. It turns each bite into an elegant dessert experience.
-
Fresh Berries: Strawberries, raspberries, or blueberries add a fruity freshness that cuts through the sweetness. Their natural tartness offers a delightful contrast to the rich flavors of the brownies.
-
Coffee or Espresso: Sip on a freshly brewed coffee or a shot of espresso to bring out the chocolate notes in the brownies. The bitterness of coffee enhances the sweetness and adds depth to your dessert.
-
Chocolate Sauce Drizzle: For the true chocolate lover, a drizzle of warm chocolate sauce takes these brownies to the next level. It adds another layer of decadence and visual appeal.
-
Nutty Caramel Sauce: If you can’t get enough caramel, consider pouring over a nutty caramel sauce. Adding crunch from nuts for an extra layer of texture makes them irresistible!
Make Ahead Options
These Easy Samoa Brownies are perfect for busy home cooks looking to save time during the week! You can prepare the brownie batter up to 24 hours in advance by mixing all your dry ingredients and wet ingredients separately, then refrigerate them in airtight containers. Fold in the toasted coconut and caramel just before baking to maintain their irresistible gooeyness and texture. When ready to bake, simply combine the components, pour into the pan, and pop them into the oven. Rest assured, these brownies will be just as delicious and satisfying, allowing you to indulge without the last-minute rush!
Storage Tips for Samoa Brownies
Room Temperature: Store brownies in an airtight container at room temperature for up to 3 days for the best texture and flavor.
Fridge: If you want to keep them fresh longer, you can refrigerate the Samoa brownies for up to a week; just make sure they’re covered to prevent drying out.
Freezer: For extended storage, wrap brownies tightly in plastic wrap and then aluminum foil before freezing them. They can last up to 3 months.
Reheating: To enjoy your frozen Samoa brownies, simply thaw them in the fridge overnight, then warm them briefly in the microwave for a gooey treat that tastes freshly baked!
Samoa Brownies: Variations & Substitutions
Feel free to personalize your Samoa brownies; the options for customization are as delightful as the brownies themselves!
- Nutty Addition: Stir in chopped walnuts or pecans for a crunchy twist and added depth of flavor. The extra texture pairs beautifully with the chewy coconut.
- Gluten-Free Version: Swap all-purpose flour with a gluten-free blend for a celiac-friendly treat. Just make sure the blend is 1:1 for seamless baking.
- Dairy-Free Delight: Substitute butter with coconut oil or margarine to make these brownies suitable for vegan diets. You’ll still savor that rich flavor!
- Chocolate Variation: Use dark or white chocolate chips instead of cocoa powder for a different flavor profile. The sweetness of white chocolate adds a lovely contrast!
- Enhanced Caramel: Drizzle more caramel sauce on top of the brownies before baking for an extra gooey layer. Every bite will indulge your sweet tooth!
- Spicy Kick: Add a pinch of cayenne or chili powder to the brownie batter for a surprising and delightful heat. It balances the sweetness and offers a unique experience.
- Minty Freshness: Mix in a few drops of mint extract to the batter for a refreshing take that echoes classic mint chocolate treats. It pairs well with the rich chocolate!
- Fruit Infusion: Consider folding in dried cherries or apricots for a fruity twist that elevates the flavor profile. The sweetness of the fruit complements the chocolate beautifully.
Each of these variations enhances the Samoa brownie experience, transforming your treats while keeping their core deliciousness intact. Don’t hesitate to explore these options, and share your favorite combination with friends! If you’re looking for more inspiration, check out my tips for storing brownies or ideas on which sauces pair deliciously with these treats!
Easy Samoa Brownies Recipe FAQs
How do I choose the right ripe ingredients for the brownies?
Absolutely! For the best flavor, use high-quality cocoa powder and fresh eggs. Cocoa powder should be unsweetened and fine, free from any clumps. Eggs should be fresh – a good way to check is by placing them in water; if they sink, they’re fresh, but if they float, it’s time to toss them!
How should I store leftover Samoa brownies?
Very simply! Store your brownies in an airtight container at room temperature for up to 3 days to keep them perfectly gooey. If you want to extend their life, pop them in the fridge for up to a week. Just make sure they’re sealed well to maintain moisture!
Can I freeze Samoa brownies, and how?
Absolutely! To freeze your delectable brownies, wrap them tightly in plastic wrap, then in aluminum foil. This double wrapping prevents freezer burn. They can last up to 3 months. When you’re ready to enjoy them, just thaw them in the fridge overnight, then warm briefly in the microwave for that fresh-baked taste.
How can I troubleshoot if my brownies are too dry?
Ah, the classic brownie dilemma! If your brownies turn out dry, it could be due to overbaking. Always start checking for doneness around the 25-minute mark. To add moisture back, consider drizzling a little more warm caramel sauce on top, or serve with vanilla ice cream for that extra richness. If you prefer a fudgier texture, you can lower the baking time a little next time!
Are there any dietary considerations for Samoa brownies?
Absolutely! This recipe is vegetarian-friendly. If you need to cater to specific diets, you can swap out eggs for flax eggs (1 tablespoon ground flaxseed mixed with 2.5 tablespoons water per egg, let it sit to thicken) for a vegan option. Additionally, ensure all your ingredients, especially the caramel sauce, are gluten-free if necessary.
Can I customize the flavor of my Samoa brownies?
Very! You can personalize these brownies by adding nuts like walnuts or pecans for extra crunch. Alternatively, try mixing in different types of chocolate chips, like dark chocolate for a richer taste or white chocolate for a sweet contrast—be creative!
Samoa Brownies that Bring Joy and Gooey Chocolate Bliss
Ingredients
Equipment
Method
- Preheat your oven to 350°F (175°C) and prepare a 9x13 inch baking pan by greasing it lightly or lining it with parchment paper.
- In a medium bowl, whisk together the cocoa powder, flour, granulated sugar, brown sugar, and salt until well combined.
- In a small saucepan, melt the butter over low heat, then remove from heat and stir in the eggs and vanilla extract until glossy and smooth. Combine with dry ingredients.
- Fold in the chopped toasted coconut and drizzle in the caramel sauce, swirling gently to create a marbled effect.
- Pour the brownie batter into the prepared baking pan, spreading it evenly and bake for about 30 minutes.
- Allow the brownies to cool completely in the pan on a wire rack before slicing into squares.