
Introduction to Thai Peanut Chicken
There’s something magical about a dish that brings the family together, and Thai Peanut Chicken does just that. This recipe is not just a meal; it’s a warm hug on a plate. With its creamy peanut sauce and tender chicken, it’s a quick solution for those busy weeknights when you want to impress without the fuss. I remember the first time I made this dish; the aroma filled my kitchen, and my kids couldn’t wait to dig in. Trust me, this is a recipe that will become a staple in your home, bringing smiles and satisfied bellies.
Why You’ll Love This Thai Peanut Chicken
This Thai Peanut Chicken is a game-changer for your dinner routine. It’s incredibly easy to whip up, taking just 45 minutes from start to finish. The rich, nutty flavor of the peanut sauce pairs perfectly with juicy chicken, making it a hit with both kids and adults. Plus, it’s versatile enough to serve with rice or noodles, ensuring everyone leaves the table happy and satisfied. You’ll find yourself making this dish again and again!
Ingredients for Thai Peanut Chicken
Gathering the right ingredients is the first step to creating this delightful dish. Here’s what you’ll need:
- Boneless, skinless chicken thighs: These are juicy and flavorful, perfect for soaking up the peanut sauce. You can also use chicken breasts for a leaner option.
- Vegetable oil: This helps in searing the chicken to a golden perfection. Feel free to use olive oil if that’s what you have on hand.
- Salt and black pepper: Simple seasonings that enhance the chicken’s natural flavor.
- Creamy peanut butter: The star of the show! It adds richness and a nutty flavor that makes this dish irresistible.
- Soy sauce: This brings a savory depth to the sauce. For a gluten-free option, use tamari instead.
- Honey: A touch of sweetness balances the flavors beautifully. Maple syrup can be a great substitute if you prefer.
- Rice vinegar: This adds a tangy kick. If you don’t have it, apple cider vinegar works in a pinch.
- Lime juice: Freshly squeezed lime juice brightens the dish and adds a refreshing zing.
- Garlic and fresh ginger: These aromatics infuse the sauce with warmth and depth. Fresh is best, but you can use powdered versions if needed.
- Red pepper flakes: For those who like a bit of heat, adjust the amount to your taste. Sriracha is another option for a spicier kick.
- Chopped green onions and cilantro: These are optional garnishes that add freshness and color to your dish.
- Cooked jasmine rice or rice noodles: Serve your Thai Peanut Chicken over these for a complete meal.
Exact measurements for these ingredients can be found at the bottom of the article, ready for printing. Happy cooking!
How to Make Thai Peanut Chicken
Now that you have all your ingredients ready, let’s dive into the cooking process. This is where the magic happens! Follow these simple steps to create a dish that will have your family asking for seconds.
Step 1: Preheat the Oven
First things first, preheat your oven to 400°F (200°C). This ensures even cooking and helps the chicken get that perfect golden color. Trust me, a hot oven is key to a delicious outcome!
Step 2: Prepare the Peanut Sauce
In a large bowl, combine the creamy peanut butter, soy sauce, honey, rice vinegar, lime juice, minced garlic, grated ginger, and red pepper flakes. Whisk everything together until it’s smooth and well combined. The aroma will start to fill your kitchen, and you’ll know you’re on the right track!
Step 3: Season the Chicken
Next, season the chicken thighs with salt and pepper. This simple step enhances the chicken’s natural flavor and sets the stage for the delicious peanut sauce to shine.
Step 4: Sear the Chicken
Heat the vegetable oil in a large oven-safe skillet over medium-high heat. Once hot, add the chicken thighs and sear them for about 4-5 minutes on each side until they’re golden brown. This step locks in the juices and adds a lovely texture.
Step 5: Coat with Peanut Sauce
Now, pour that luscious peanut sauce over the seared chicken. Make sure to coat each piece well. The sauce will cling to the chicken, creating a mouthwatering glaze that’s hard to resist.
Step 6: Bake the Chicken
Transfer the skillet to your preheated oven and bake for 20-25 minutes. You want the chicken to be cooked through and reach an internal temperature of 165°F (75°C). This is where the magic happens, as the flavors meld together beautifully.
Step 7: Rest and Garnish
Once done, remove the skillet from the oven and let the chicken rest for about 5 minutes. This allows the juices to redistribute. Garnish with chopped green onions and cilantro if you like a fresh touch!
Step 8: Serve
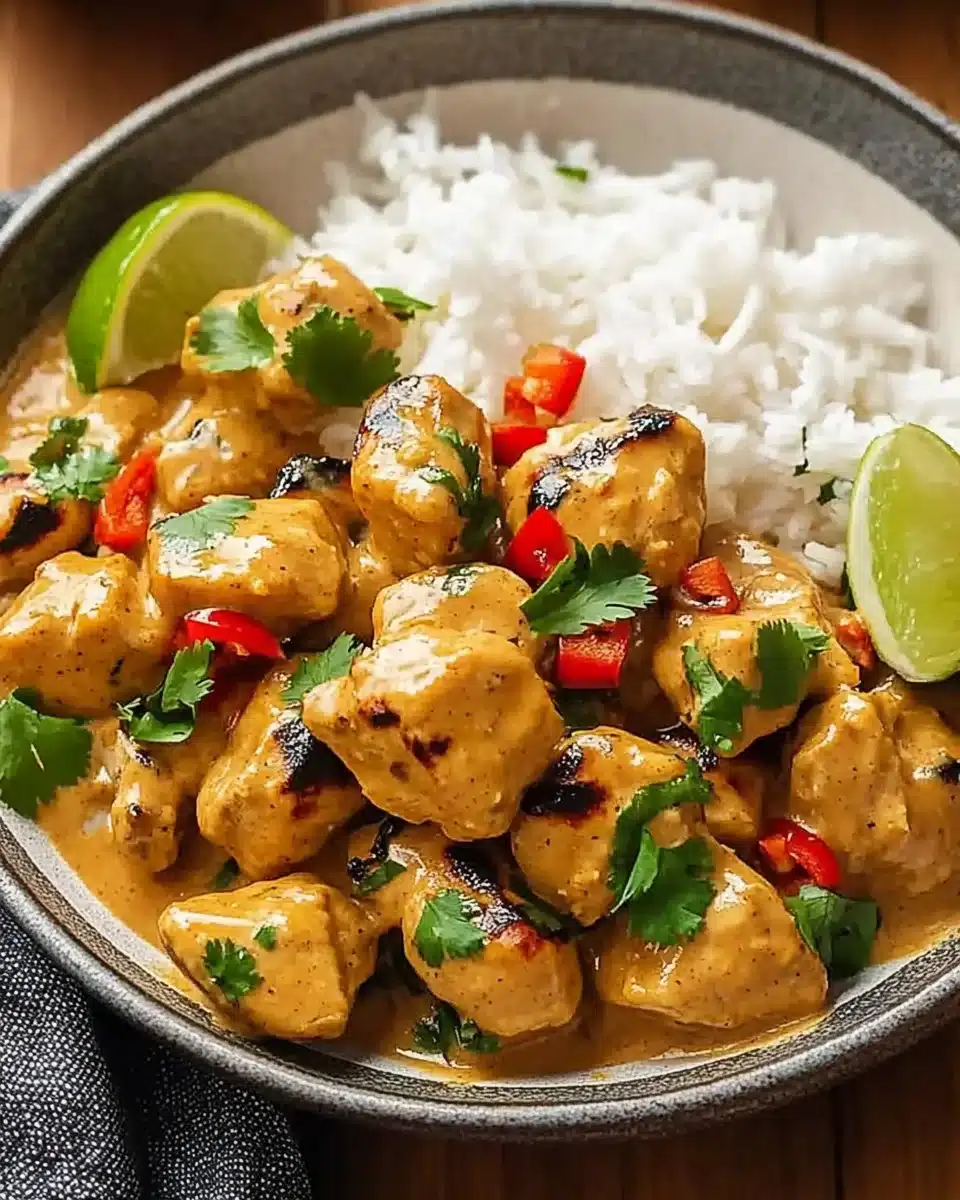
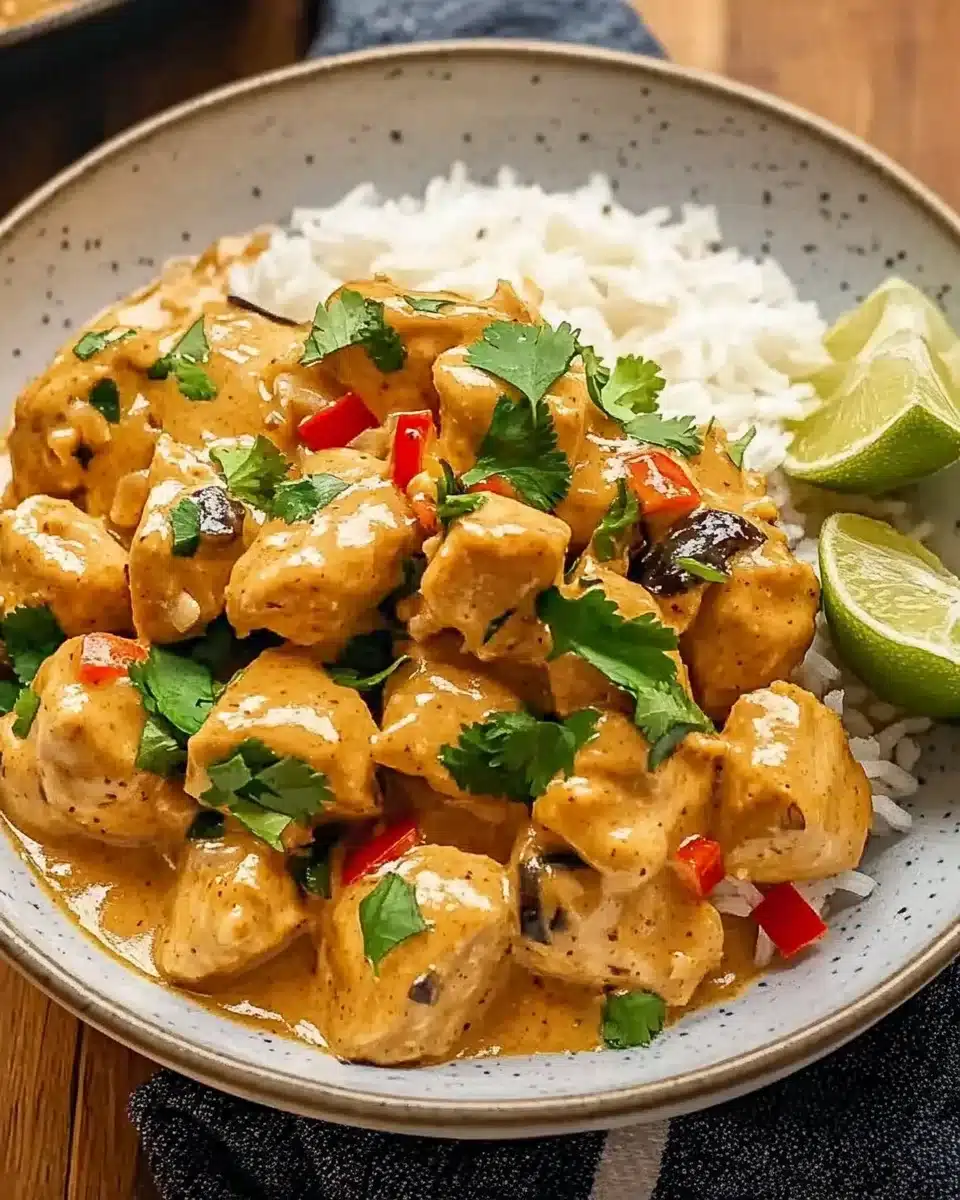
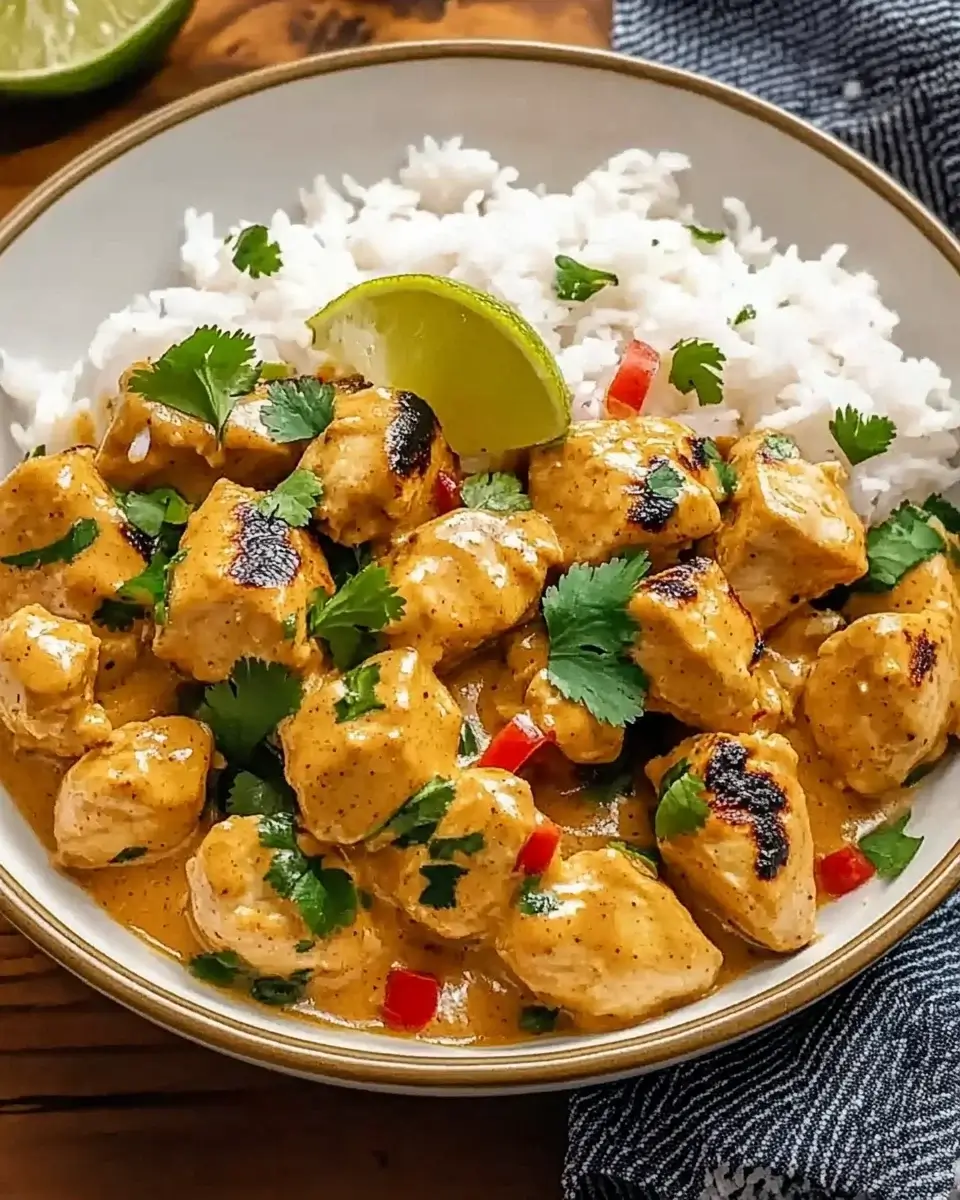
Finally, serve your Thai Peanut Chicken over cooked jasmine rice or rice noodles. Drizzle any remaining sauce from the skillet over the top for an extra burst of flavor. Enjoy every bite!
Tips for Success
- Always taste your peanut sauce before pouring it over the chicken. Adjust sweetness or spice as needed.
- Let the chicken rest after baking to keep it juicy and tender.
- For a quicker prep, use pre-minced garlic and ginger.
- Double the sauce if you love extra for drizzling over rice or noodles.
- Experiment with veggies like bell peppers or broccoli for added nutrition.
Equipment Needed
- Oven-safe skillet: A cast-iron or stainless-steel skillet works great. If you don’t have one, any baking dish will do.
- Whisk: Essential for mixing the peanut sauce. A fork can work in a pinch.
- Meat thermometer: To ensure your chicken is cooked perfectly. A simple knife can help check doneness too.
Variations
- Spicy Thai Peanut Chicken: Add more red pepper flakes or a splash of sriracha to the sauce for an extra kick.
- Vegetarian Option: Substitute chicken with firm tofu or tempeh, and follow the same cooking instructions for a plant-based delight.
- Nut-Free Version: Use sunbutter or tahini instead of peanut butter for those with nut allergies.
- Low-Carb Adaptation: Serve the chicken over cauliflower rice instead of jasmine rice for a healthier twist.
- Extra Veggies: Toss in some bell peppers, snap peas, or broccoli during the baking process for added nutrition and color.
Serving Suggestions
- Jasmine Rice: Serve your Thai Peanut Chicken over fluffy jasmine rice to soak up the delicious sauce.
- Rice Noodles: For a different twist, try it with rice noodles for a delightful texture.
- Fresh Salad: Pair with a crisp cucumber and carrot salad for a refreshing crunch.
- Cold Beverages: Enjoy with a chilled Thai iced tea or a light beer to complement the flavors.
- Garnish: Add lime wedges and extra cilantro on the side for a vibrant presentation.
FAQs about Thai Peanut Chicken
Can I use chicken breasts instead of thighs for this recipe?
Absolutely! Chicken breasts can be used for a leaner option. Just keep an eye on the cooking time, as they may cook faster than thighs.
Is Thai Peanut Chicken gluten-free?
Yes, this dish can be made gluten-free by using tamari instead of soy sauce. Always check labels to ensure all ingredients meet your dietary needs.
How can I make the peanut sauce spicier?
If you love heat, simply add more red pepper flakes or a splash of sriracha to the sauce. Adjust to your taste for the perfect kick!
Can I prepare the peanut sauce in advance?
Definitely! You can make the peanut sauce ahead of time and store it in the fridge for up to a week. Just give it a good stir before using.
What sides pair well with Thai Peanut Chicken?
This dish is fantastic served with jasmine rice or rice noodles. You can also add a fresh salad or steamed veggies for a complete meal.
Final Thoughts
Cooking Thai Peanut Chicken is more than just preparing a meal; it’s about creating memories around the dinner table. The rich, creamy sauce and tender chicken come together to form a dish that warms the heart and satisfies the soul. I love how this recipe invites everyone to gather, share stories, and enjoy each other’s company. Whether it’s a busy weeknight or a special occasion, this dish is sure to impress. So roll up your sleeves, embrace the flavors, and let the joy of cooking fill your kitchen. Your family will thank you for it!
Thai Peanut Chicken: Easy Recipe for Family Delight!
Ingredients
Method
- Preheat your oven to 400°F (200°C).
- In a large bowl, combine the peanut butter, soy sauce, honey, rice vinegar, lime juice, garlic, ginger, and red pepper flakes. Whisk until smooth and well combined.
- Season the chicken thighs with salt and pepper.
- Heat the vegetable oil in a large oven-safe skillet over medium-high heat. Add the chicken thighs and sear for about 4-5 minutes on each side until golden brown.
- Pour the peanut sauce over the seared chicken, making sure to coat each piece well.
- Transfer the skillet to the preheated oven and bake for 20-25 minutes, or until the chicken is cooked through and reaches an internal temperature of 165°F (75°C).
- Remove from the oven and let it rest for 5 minutes. Garnish with chopped green onions and cilantro, if desired.
- Serve the Thai peanut chicken over cooked jasmine rice or rice noodles, drizzling any remaining sauce from the skillet over the top.
Nutrition
Notes
- For a spicier version, add more red pepper flakes or a splash of sriracha to the sauce.
- Substitute chicken thighs with boneless, skinless chicken breasts for a leaner option, adjusting cooking time as needed.