
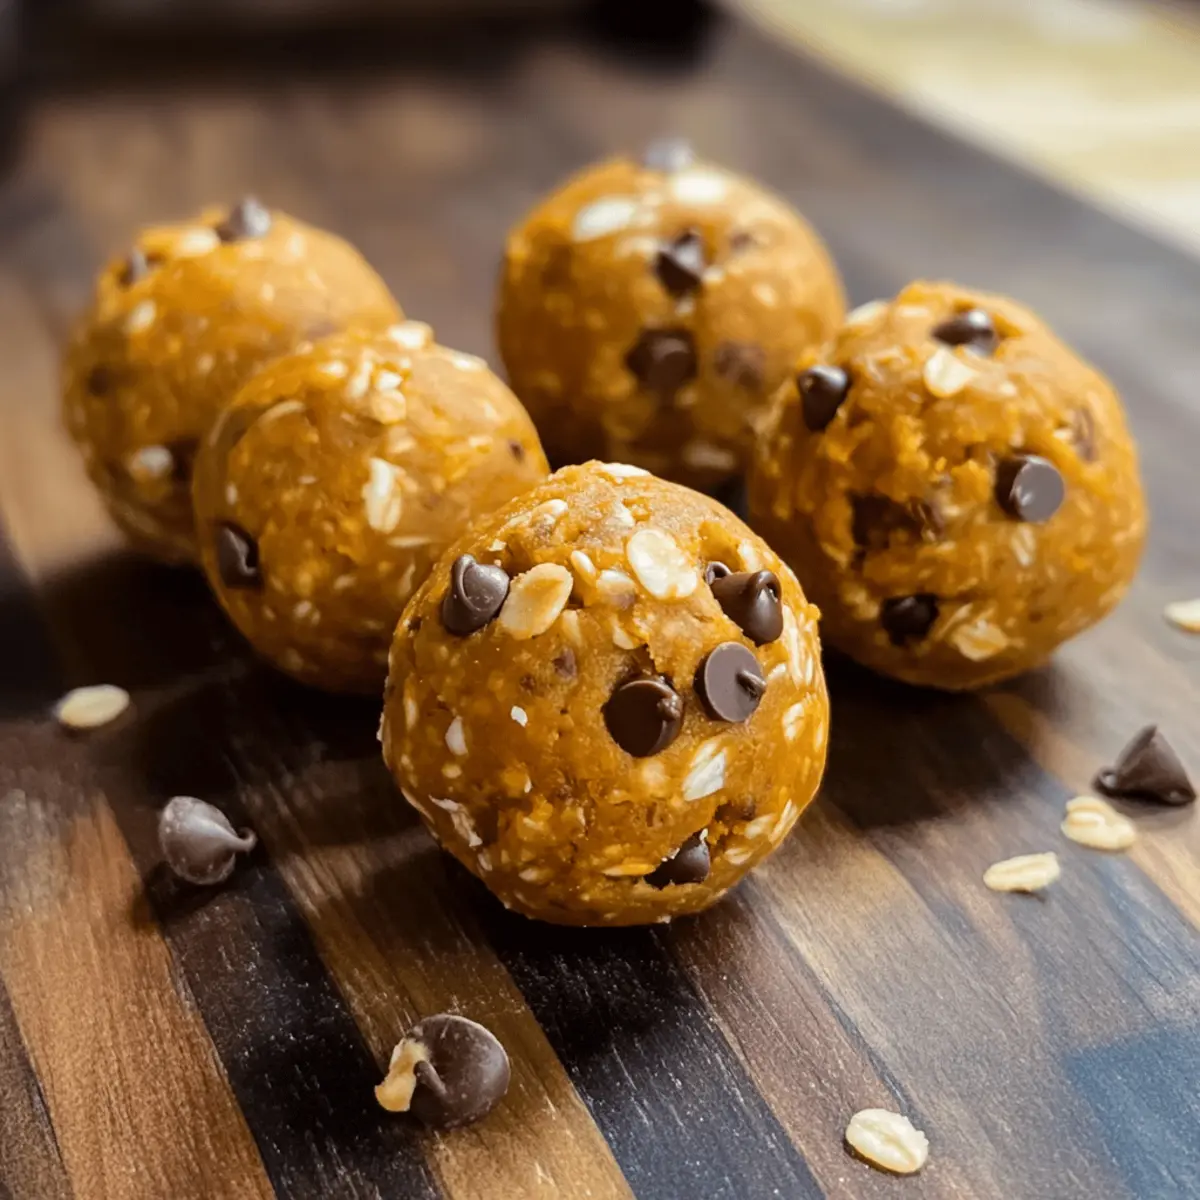
As the leaves turn golden and the air becomes crisp, it’s the perfect time to whip up a batch of No-Bake Pumpkin Protein Balls that capture the essence of fall in every bite. These delightful snacks are not just a treat; they’re a powerhouse of nutrition, combining creamy pumpkin and nut butter for a healthy pick-me-up that keeps your energy soaring throughout the day. With just 10 minutes of prep and minimal ingredients, these protein-packed bites are ideal for meal prepping or as a quick post-workout snack. Plus, they’re gluten-free and customizable, so you can easily cater to your preferences. What’s your favorite way to enjoy pumpkin this season?
Why Are Pumpkin Protein Balls Amazing?
Simplicity at its finest: With just a handful of ingredients, these no-bake Pumpkin Protein Balls are incredibly easy to whip up in only 10 minutes.
Nutritious and satisfying: Packed with high-quality protein and healthy fats, they’re great for keeping your energy levels up through busy days.
Customizable options: Whether you’re gluten-free or nut-free, these bites are versatile, allowing you to tailor them to your dietary needs—try Cinnamon Roll Protein for a different flavor twist!
Perfect for any occasion: These pumpkin snacks shine during fall festivities or as a nutritious boost for your lunchbox or post-workout recovery.
Crowd-pleaser: With their delightful taste and chewy texture, they’ll have everyone coming back for more!
Pumpkin Protein Balls Ingredients
-
For the Base
• Rolled Oats – Provides structure and fiber; substitute with gluten-free oats for a gluten-free option.
• Pumpkin Puree – Adds moisture, flavor, and nutrients; canned pumpkin works best—avoid pumpkin pie filling.
• Nut Butter – Delivers healthy fats and protein; almond or sunflower seed butter can be used for flavor variations or nut allergies.
• Maple Syrup – Sweetener that perfectly complements pumpkin flavor; honey can be a substitute if preferred. -
For the Boost
• Vanilla Protein Powder – Boosts protein content; use plant-based protein powder for a dairy-free version.
• Pumpkin Pie Spice – Offers seasonal flavor depth; substitute with a mix of cinnamon, nutmeg, and ginger if needed.
• Vanilla Extract – Enhances overall flavor; skip if necessary, but recommended for the best taste.
• Sea Salt – Balances sweetness. -
Optional Extras
• Mini Chocolate Chips – Added for a delightful chocolatey richness; optional for a healthier version.
Step‑by‑Step Instructions for Pumpkin Protein Balls
Step 1: Mix Wet Ingredients
In a large bowl, combine 1 cup of pumpkin puree, 1/2 cup of nut butter, 1/4 cup of maple syrup, and 1 teaspoon of vanilla extract. Using a spatula, mix vigorously until the mixture is creamy and well-blended, about 2-3 minutes. You’ll know it’s ready when the ingredients are smoothly integrated, and no lumps remain.
Step 2: Incorporate Dry Ingredients
Gradually stir in 2 cups of rolled oats, 1 scoop of vanilla protein powder, 2 teaspoons of pumpkin pie spice, and 1/2 teaspoon of sea salt. Continue mixing until a thick dough forms, which should take about 3-4 minutes. The mixture will be dense and not overly sticky, making it perfect for shaping your Pumpkin Protein Balls.
Step 3: Add Chocolate Chips
Gently fold in 1/2 cup of mini chocolate chips to the dough, ensuring they are evenly distributed throughout the mixture. This step adds a delightful texture and richness to your Pumpkin Protein Balls, and it should take about 1-2 minutes to thoroughly incorporate the chocolate without breaking up the mix.
Step 4: Form Balls
With damp hands or a small scoop, take portions of the dough and roll them into bite-sized balls, roughly 1 to 1.5 inches in diameter. Place each ball on a parchment-lined baking sheet to prevent sticking. Aim for uniformity so they chill evenly, which should take approximately 10-15 minutes to complete this step.
Step 5: Chill
Refrigerate the baking sheet with the Pumpkin Protein Balls for 20-30 minutes to allow them to firm up. This chilling process is essential for maintaining their shape, so be sure not to skip this step. Check them visually; when they are set and slightly firm to the touch, they are ready for storage.
Step 6: Store and Enjoy
Once chilled, transfer your delicious Pumpkin Protein Balls to an airtight container. Store them in the refrigerator for up to a week or freeze for up to three months. These healthy snacks are perfect for on-the-go energy or a nutritious treat any time of the day, and they’re sure to become a family favorite!
What to Serve with No-Bake Pumpkin Protein Balls
The season’s essence is beautifully captured in these protein-packed delights, making them the perfect centerpiece for a warm and cozy table.
-
Warm Apple Cider: The sweet, spiced notes of this classic beverage elevate the flavors, creating a quintessential fall pairing.
-
Creamy Yogurt Dip: A dollop of Greek yogurt drizzled with honey adds a refreshing contrast and boosts your protein intake.
-
Crunchy Veggie Sticks: Carrot and celery sticks provide a crisp, fresh crunch, balancing the soft texture of the pumpkin balls and adding nutrients.
-
Nutty Granola: A sprinkle of granola offers delightful crunch and complements the pumpkin’s sweetness, making it perfect for snack time or breakfast.
-
Chai Tea: The spiced warmth of chai tea blends harmoniously with the pumpkin flavors, inviting you to relish each sip alongside your snack.
-
Chocolate Almond Milk: This creamy drink enhances the chocolatey bits in the protein balls and makes for a delightful, satisfying treat.
-
Trail Mix: A mix of nuts, seeds, and dried fruits adds a portable, crunchy richness that pairs excellently with the soft, chewy texture of the pumpkin balls.
-
Apple Slices with Peanut Butter: This classic combination offers a fruity freshness that complements the spice and sweetness of the protein balls.
Indulge in these complementary flavors and textures to create a memorable fall snack experience!
Make Ahead Options
These No-Bake Pumpkin Protein Balls are perfect for meal prep enthusiasts! You can make the mixture ahead of time and refrigerate it for up to 24 hours before rolling them into balls. Just prepare the dough by mixing your wet and dry ingredients, and then store it in an airtight container in the fridge. When you’re ready to enjoy your pumpkin protein balls, simply roll the chilled mixture into bite-sized balls and refrigerate again for 20-30 minutes to firm them up. This way, you’ll have delicious, nutritious snacks ready to grab on busy days while maintaining their flavor and texture just as delightful as when freshly made!
How to Store and Freeze Pumpkin Protein Balls
Fridge: Keep Pumpkin Protein Balls in an airtight container for up to one week. This helps maintain their chewy texture and delicious flavor.
Freezer: For longer storage, freeze the balls in a single layer on a baking sheet, then transfer them to a freezer-safe container. They can be frozen for up to three months.
Thawing: To enjoy frozen Pumpkin Protein Balls, simply thaw them in the fridge overnight or leave at room temperature for a few hours.
Portion Control: Consider pre-portioning them into snack-sized bags before freezing, making it easy to grab a healthy treat on the go!
Pumpkin Protein Balls Variations
Feel free to mix and match flavors to make these Pumpkin Protein Balls your own!
-
Nut-Free: Substitute nut butter with sunflower seed butter or tahini to keep it allergen-friendly.
This will still provide healthy fats while making it suitable for school lunches and gatherings. -
Extra Crunch: Fold in chopped walnuts or almonds for a delightful crunch in every bite.
These additions not only boost the texture but also add an extra layer of flavor. -
Spice It Up: Experiment with different spices by adding more cinnamon or a dash of ginger for added warmth.
This is especially delightful if you enjoy a spicy kick during the cooler months. -
Nutritional Boost: Incorporate chia seeds or flaxseeds for a healthy dose of omega-3 fatty acids and fiber.
It’s a great way to enhance both the nutritional profile and texture, making these bites even more satisfying. -
Adjust Sweetness: Mix and match sweeteners—try honey, maple syrup, or a low-calorie sweetener to suit your taste.
This flexibility ensures that everyone can enjoy these treats just the way they like. -
Chocolate Lovers: Add extra mini chocolate chips or cocoa powder for a more decadent experience.
These additions will satisfy your sweet tooth while still being a healthier snack option. -
Protein Twist: For a different protein boost, swap the vanilla protein powder for a chocolate flavor.
This can give your Pumpkin Protein Balls a rich, unexpected taste that chocolate enthusiasts will love. -
Dairy-Free Option: Use a dairy-free protein powder to keep the whole recipe plant-based if desired.
This makes the recipe accessible for those following vegan or plant-based diets without sacrificing flavor.
Expert Tips for Pumpkin Protein Balls
-
Stay Consistent: Ensure all ingredients are measured accurately for the best texture and flavor in your Pumpkin Protein Balls. A little discrepancy can lead to a different outcome.
-
Adjusting Stickiness: If your mixture is too sticky, simply add more oats or protein powder a tablespoon at a time. This will help achieve the right consistency for rolling.
-
Don’t Overdo It: Avoid adding excessive protein powder to your mix; too much can result in a chalky texture. Stick to the recommended amount for a pleasant chew.
-
Chill Time Matters: Refrigerating your Pumpkin Protein Balls is crucial for maintaining their shape. Don’t skip this step for a satisfying bite!
-
Get Creative: Feel free to experiment with spices or add-ins. Mix and match spices like cinnamon or nutmeg to customize your Pumpkin Protein Balls to your taste preference.
Pumpkin Protein Balls Recipe FAQs
What type of pumpkin puree should I use?
I recommend using canned pumpkin puree for the best consistency and flavor. Be sure to avoid pumpkin pie filling, as it contains added sugars and spices that can alter the taste and texture of your Pumpkin Protein Balls.
How do I store Pumpkin Protein Balls?
Store your Pumpkin Protein Balls in an airtight container in the fridge for up to 7 days. They’ll stay fresh and maintain their delightful chewy texture, making them perfect for snacking throughout the week.
Can I freeze Pumpkin Protein Balls for later?
Absolutely! To freeze, place the balls in a single layer on a baking sheet and freeze until solid. After that, transfer them to a freezer-safe container or a zip-top bag, and they can be stored for up to 3 months. Just remember to thaw them in the fridge overnight before enjoying!
What if my mixture is too sticky or too dry?
If your mixture is sticky, simply sprinkle in a tablespoon of rolled oats or protein powder gradually until you achieve the desired consistency. Conversely, if it’s too dry, add a small amount of pumpkin puree or nut butter to bring everything together. It’s all about finding that perfect balance!
Are Pumpkin Protein Balls safe for nut allergies?
Yes, absolutely! If you or someone you’re preparing these for has a nut allergy, you can easily swap out the nut butter for sunflower seed butter or tahini. Just make sure to check all ingredient labels to avoid any cross-contamination. Everyone should be able to enjoy these delicious little bites!
Can pets eat Pumpkin Protein Balls?
While many of the ingredients are safe for pets (like pumpkin), the added sweeteners, salt, and chocolate chips are not recommended for them. It’s always best to share human snacks with caution and ensure they’re suited for your furry friends!
Pumpkin Protein Balls: A Guilt-Free Snack You’ll Love
Ingredients
Equipment
Method
- In a large bowl, combine 1 cup of pumpkin puree, 1/2 cup of nut butter, 1/4 cup of maple syrup, and 1 teaspoon of vanilla extract. Mix until creamy.
- Gradually stir in 2 cups of rolled oats, 1 scoop of vanilla protein powder, 2 teaspoons of pumpkin pie spice, and 1/2 teaspoon of sea salt until a thick dough forms.
- Gently fold in 1/2 cup of mini chocolate chips until evenly distributed.
- Roll portions of the dough into bite-sized balls, roughly 1 to 1.5 inches in diameter, and place on a parchment-lined baking sheet.
- Refrigerate for 20-30 minutes to allow them to firm up.
- Transfer to an airtight container. Store in the refrigerator for up to a week or freeze for up to three months.