
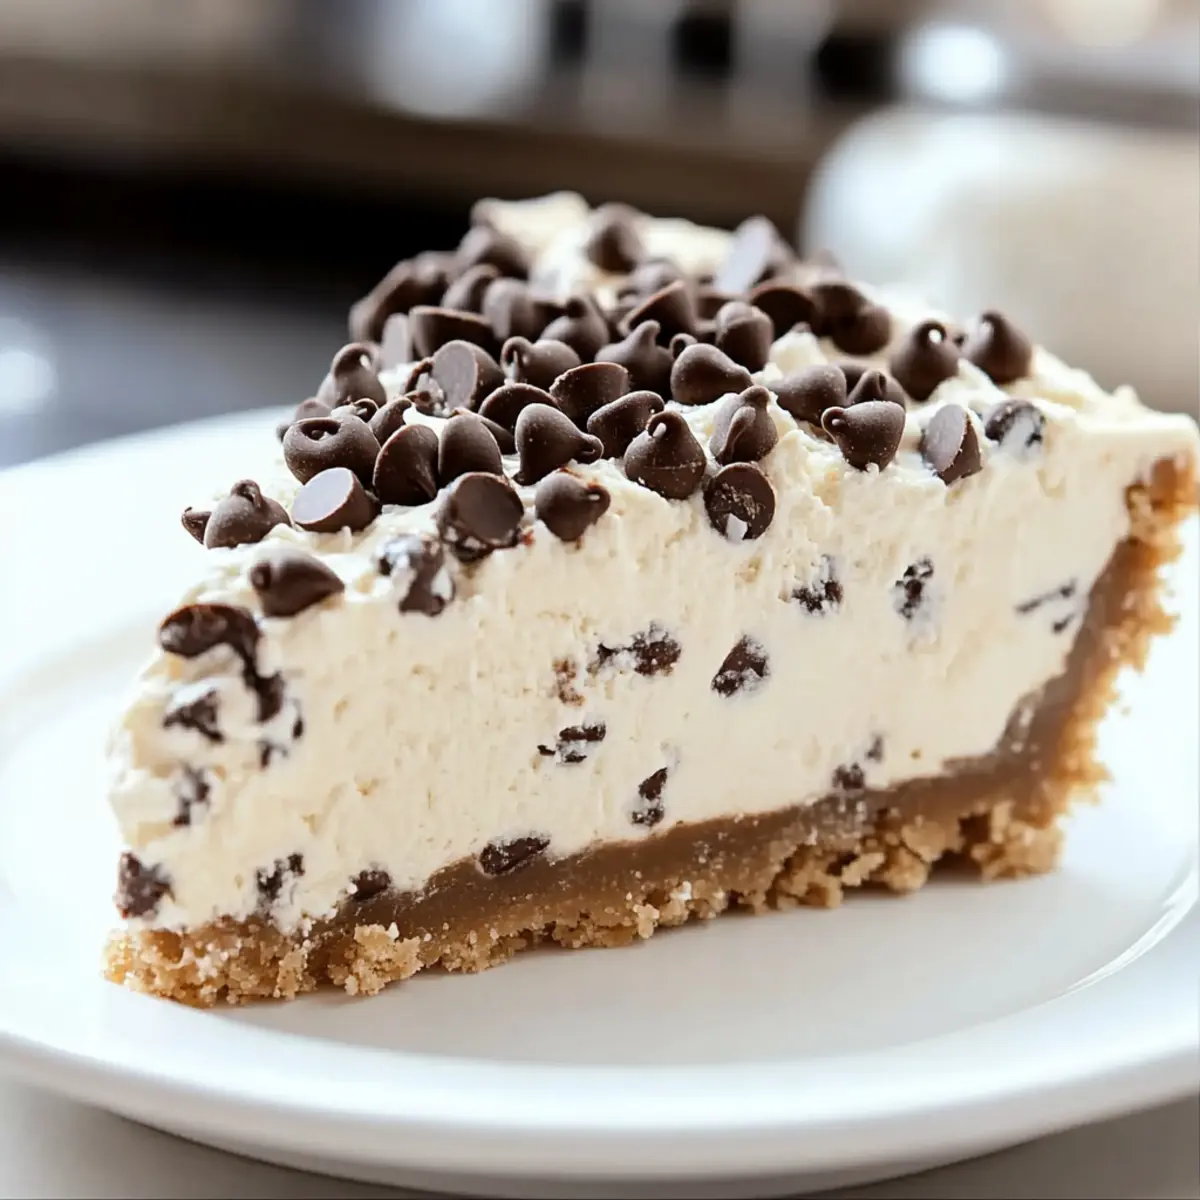
As I took a bite of this Cannoli Cheesecake with Crunchy Cone Crust, I was instantly transported to a charming Italian café, where every dessert whispers of love and tradition. This rich and creamy dessert brings together the luscious flavors of classic cannoli, but with an exciting twist that’s sure to impress your friends and family. What’s more, this recipe is a breeze to prepare and can even be made ahead, making it perfect for gatherings where you want to shine without the last-minute stress. Whether you’re a seasoned chef or just someone who loves a delicious homemade treat, this cheesecake will satisfy your sweet tooth like no other. Curious about how to create this indulgent masterpiece? Let’s dive in!
Why Is This Cannoli Cheesecake Special?
Irresistible Flavor Fusion: This Cannoli Cheesecake combines creamy ricotta and mascarpone with a crunchy cannoli cone crust, creating a delightful contrast.
Effortless Preparation: Simple steps and common ingredients mean you can whip this up in no time, making it perfect for both novice bakers and seasoned pros.
Versatile Options: Whether you’re hosting a dinner party or craving a sweet treat, the variations allow everyone to enjoy a slice—think gluten-free cookie crumbs or dairy-free whipped coconut cream!
Stunning Presentation: With its gorgeous layers and fluffy topping, it’s a show-stopper, ideal for impressing guests alongside a fresh berry compote or a strong espresso, just like at your favorite café.
Make-Ahead Magic: Prepare it a day in advance to ease your hosting duties, and enjoy the rich flavors as they meld overnight. For more delectable ideas, check out this Chicken with Bacon and Cheese or indulge in Cheesecake Stuffed Strawberries.
Cannoli Cheesecake Ingredients
-
For the Crust
• Graham Cracker Crumbs – This is the base ingredient for the crust; substitute with gluten-free cookie crumbs for a gluten-free option.
• Crushed Cannoli Shells – Adds both texture and authentic cannoli flavor to the crust; crushed waffle cones can be used as an alternative.
• Butter (melted) – Binds all crust ingredients together nicely; remember to use unsalted for better control of flavor.
• Sugar – Sweetens the crust to perfection; opt for white granulated sugar for best results. -
For the Filling
• Ricotta Cheese – The star ingredient for a rich, creamy filling; opt for whole milk ricotta for optimal taste and texture—drain excess moisture if necessary.
• Mascarpone Cheese – Adds an extravagant layer of creaminess; cream cheese is a suitable alternative for those who are in a pinch.
• All-Purpose Flour – Provides necessary structure and stability to the filling; omit for a gluten-free version.
• Cinnamon (ground) – Enhances the overall flavor profile of the filling, bringing warmth to the dessert.
• Vanilla Extract – Adds depth and complexity; use high-quality extract for superior flavor.
• Eggs – Essential for binding the ingredients and adding moisture; incorporate them one at a time to avoid overmixing. -
For Topping
• Heavy Cream – Whipped to create a luscious topping; for a dairy-free version, whipped coconut cream can be used instead.
• Powdered Sugar – Sweetens the whipped topping, balancing the flavors beautifully.
• Mini Chocolate Chips – Optional garnish for added sweetness, bringing a delightful surprise to each slice.
• Chopped Pistachios – Optional garnish that adds a bit of crunch and a lovely flavor contrast.
Step‑by‑Step Instructions for Cannoli Cheesecake with Crunchy Cone Crust
Step 1: Preheat the Oven
Begin by preheating your oven to 325°F (163°C). While the oven is warming up, prepare a 9-inch springform pan by lining the bottom with parchment paper and spraying the sides lightly with cooking spray. This will ensure that your Cannoli Cheesecake releases easily without sticking.
Step 2: Make the Crust
In a mixing bowl, combine the graham cracker crumbs, crushed cannoli shells, melted butter, and sugar until the mixture resembles damp sand. Ensure all ingredients are well combined. Press this mixture evenly into the bottom of the prepared pan, creating a firm, compact crust that will hold together nicely when baked.
Step 3: Bake the Crust
Place the crust in the preheated oven and bake for 10 minutes. You’ll know it’s ready when the edges are slightly golden and it has set. Once baked, remove it from the oven and allow it to cool slightly while you wrap the sides of the pan in aluminum foil to prevent water from seeping in during the next step.
Step 4: Reduce Oven Temperature
Once the crust is cooled and wrapped, lower the oven temperature to 300°F (150°C). This gradual reduction will help create the perfect environment for baking your Cannoli Cheesecake without cracking. Make sure your oven is fully preheated to the new temperature before proceeding.
Step 5: Prepare the Filling
In a large mixing bowl, beat the ricotta cheese and mascarpone together with sugar and flour until smooth. Add the ground cinnamon and vanilla extract, mixing until fully incorporated and creamy. The filling should be rich and fluffy, ready to pour over your cooled crust.
Step 6: Add Eggs
Incorporate the eggs into the filling mixture one at a time, mixing gently after each addition to ensure a cohesive batter without over-mixing. Once all the eggs are incorporated, pour the smooth filling over the cooled crust in the springform pan, ensuring it is evenly distributed.
Step 7: Create a Water Bath
To prevent the cheesecake from cracking, carefully place your springform pan into a larger roasting pan. Fill the roasting pan with warm water so that it reaches halfway up the sides of the springform pan. This water bath will create a gentle steaming effect in the oven, resulting in a creamy, smooth cheesecake.
Step 8: Bake the Cheesecake
Bake the Cannoli Cheesecake in the water bath for 105 to 115 minutes. The edges should be set, while the center will still have a slight jiggle—it will firm up as it cools. Keep an eye on it towards the end to avoid overbaking.
Step 9: Cool the Cheesecake
Once baking is complete, turn off the oven and leave the cheesecake inside for an additional 30 minutes. This slow cooling process will prevent sudden temperature changes, which can crack the surface. After half an hour, crack open the oven door and let it cool for another 30 minutes.
Step 10: Refrigerate
After cooling, carefully remove the cheesecake from the water bath and refrigerate for at least 4 hours, or overnight if time allows. This chilling phase is essential for setting the filling to achieve that perfect sliceable texture for your Cannoli Cheesecake.
Step 11: Prepare the Topping
When ready to serve, whip the heavy cream along with powdered sugar and ricotta until stiff peaks form. This creamy topping should be light and fluffy, perfect for spreading generously over your chilled cheesecake.
Step 12: Garnish and Serve
Finally, top the Cannoli Cheesecake with mini chocolate chips or chopped pistachios for a delightful crunch and presentation. Slice into pieces straight from the fridge, and serve chilled for an indulgent dessert that’s sure to impress!

Make Ahead Options
These Cannoli Cheesecakes are perfect for busy home cooks looking to save time while impressing guests! You can prepare the crust and filling up to 24 hours in advance. Simply make the crust as directed, cool it, and refrigerate. For the filling, mix and pour it over the crust, then cover tightly with plastic wrap to keep it fresh and prevent browning. Bake the cheesecake and let it cool as instructed, then refrigerate for at least 4 hours or overnight. When it’s time to serve, simply whip up the topping and garnish before presenting this delicious Cannoli Cheesecake with Crunchy Cone Crust, ensuring it’s just as indulgent as if made that day!
How to Store and Freeze Cannoli Cheesecake
Fridge: Store your Cannoli Cheesecake in an airtight container in the fridge for up to 5 days. This will keep it fresh and delicious, ready for whenever you need a sweet treat.
Freezer: If you want to keep it longer, wrap individual slices tightly in plastic wrap and place them in a freezer-safe container. Enjoy your cheesecake for up to 3 months!
Thawing: To defrost, simply transfer the frozen cheesecake slices to the fridge for a few hours or overnight until fully thawed.
Reheating: Serve chilled directly from the fridge for the best texture and flavor; there’s no need to reheat this indulgent dessert!
What to Serve with Cannoli Cheesecake
Indulging in a slice of this creamy dessert is a moment to savor, and pairing it with complementary flavors can elevate your dining experience even further.
-
Fresh Berries: Their tartness contrasts beautifully with the creamy richness of the cheesecake, making every bite refreshing. Strawberries, raspberries, or blueberries add a delightful pop of color and taste.
-
Espresso: A robust espresso creates a wonderful balance with the sweetness of the cheesecake. It complements the rich flavors while invigorating the palate, similar to the Italian cafés that inspired this dessert.
-
Chocolate Sauce: Drizzling warm chocolate sauce over the cheesecake adds an extra layer of decadence. The velvety chocolate enhances the dessert’s richness, making it a true indulgence.
-
Pistachio Crumble: Adding a sprinkle of pistachio crumble on top provides a satisfying crunch, enhancing the unique flavors of the cannoli. The nuttiness offers a lovely contrast to the smooth filling.
-
Whipped Cream: A cloud of light whipped cream on the side can balance the cheesecake’s richness. Infuse it with vanilla for an extra touch of flavor that harmonizes beautifully with the sweet filling.
-
Arugula Salad: A simple arugula salad dressed with lemon vinaigrette brings a refreshing, peppery element to the table. It cuts through the sweet indulgence, offering a delightful counterpoint.
-
Gelato: Serve a scoop of Italian gelato alongside for a classic Italian twist. The creamy texture and subtle flavor options like pistachio or hazelnut can accentuate the cheesecake’s richness.
-
Limoncello: A shot of chilled limoncello provides a zesty finish, cleansing the palate after dessert. Its sweetness complements the cheesecake while adding a hint of citrusy brightness.
Variations & Substitutions for Cannoli Cheesecake
Feel free to put your personal twist on this Cannoli Cheesecake and make it uniquely yours with these delicious variations!
-
Gluten-Free: Use gluten-free cookies or crumbs in place of graham crackers to create a modified crust that everyone can enjoy. Don’t forget to omit the flour in the filling!
-
Dairy-Free: Replace ricotta and mascarpone with blended silken tofu and coconut cream for a delightful dairy-free option that’s still rich and creamy.
-
Nutty Delight: Substitute mini chocolate chips with crushed pistachios for a crunchy texture and nutty flavor, adding a delightful contrast to the cheesecake.
-
Fruity Surprise: Stir in fresh berries, such as raspberries or blueberries, into the filling for a burst of fruity flavor that pairs beautifully with the rich creams.
-
Caramel Bliss: Swirl in some caramel sauce before baking for an extra layer of gooey sweetness that will have everyone coming back for seconds.
-
Almond Extract: Swap out vanilla extract for almond extract to enhance that classic cannoli flavor. For true authenticity, this slight change can transform your cheesecake into a traditional Italian treat.
-
Spicy Twist: Add a pinch of nutmeg or more cinnamon to the filling for a warm, spiced flavor profile that’s perfect for cozy gatherings.
-
Chocolate Lovers: For an indulgent variation, fold in semi-sweet or dark chocolate into the filling before baking for a rich chocolatey cheesecake that still holds onto the beloved cannoli essence.
Combining these fun twists not only diversifies your dessert options but creates a new family favorite for sure! And for more delightful recipes, why not check out our delectable Velvet Cake Cream or the comforting Creamy Rotel Pasta with Ground Beef? Happy baking!
Expert Tips for Cannoli Cheesecake
-
Fresh Ingredients: Use fresh ricotta and mascarpone for the creamiest texture in your Cannoli Cheesecake. Avoid pre-packaged options when possible.
-
Avoid Cracks: Don’t skip the water bath—it’s crucial for preventing cracks during baking. A gentle environment ensures a smooth surface.
-
Check Baking Time: Keep a close eye on your cheesecake; it should be set around the edges but still jiggly in the center when done to avoid dryness.
-
Gradual Cooling: Allow the cheesecake to cool slowly in the oven. This minimizes the risk of cracking due to sudden temperature changes.
-
Chill Overnight: For the best flavor and texture, refrigerate your Cannoli Cheesecake overnight before serving. This allows the flavors to meld beautifully.
Cannoli Cheesecake with Crunchy Cone Crust Recipe FAQs
What type of ricotta cheese should I use for the filling?
I recommend using whole milk ricotta for the richest flavor and creaminess. Be sure to drain any excess moisture that’s accumulated in the packaging. This will prevent your filling from becoming watery and ensure a smooth texture in your Cannoli Cheesecake.
How should I store leftovers of the Cannoli Cheesecake?
Store your Cannoli Cheesecake in an airtight container in the refrigerator for up to 5 days. If you have any remaining slices, individual portions can be wrapped tightly in plastic wrap and placed in a freezer-safe container for up to 3 months.
Can I freeze my Cannoli Cheesecake?
Absolutely! To freeze, carefully wrap individual slices of your Cannoli Cheesecake in plastic wrap and place them in a suitable freezer-safe container. When you’re ready to enjoy it, take a slice out and thaw it in the refrigerator for a few hours or overnight until fully defrosted.
What should I do if my cheesecake cracks during baking?
If you notice cracks, don’t worry—this can happen sometimes! To avoid it in the future, be sure to use a water bath, as this provides a moist environment and controls the baking temperature. Also, allow the cheesecake to cool gradually inside the oven after baking, which minimizes the risk of cracking from sudden temperature changes.
Is this Cannoli Cheesecake suitable for people with dietary restrictions?
Yes! You can easily modify this recipe to accommodate various dietary needs. For a gluten-free version, use gluten-free cookie crumbs for the crust. For a dairy-free option, substitute the mascarpone with a dairy-free cream cheese alternative and use whipped coconut cream for the topping. Always check for allergens in your ingredients to ensure everyone’s safety.
Indulge in Cannoli Cheesecake with Crunchy Cone Crust
Ingredients
Equipment
Method
- Preheat your oven to 325°F (163°C). Prepare a 9-inch springform pan with parchment paper and cooking spray.
- In a mixing bowl, combine graham cracker crumbs, crushed cannoli shells, melted butter, and sugar until combined. Press into bottom of the prepared pan.
- Bake the crust for 10 minutes until edges are golden. Allow to cool slightly.
- Lower oven temperature to 300°F (150°C) and make sure it’s fully preheated.
- Beat the ricotta and mascarpone with sugar and flour until smooth. Add cinnamon and vanilla, mixing until creamy.
- Incorporate eggs one at a time, mixing gently. Pour filling over cooled crust.
- Place the springform pan in a larger roasting pan. Fill the roasting pan with warm water halfway up the sides.
- Bake the Cannoli Cheesecake for 105 to 115 minutes until edges are set and center jiggles.
- Turn off oven and leave cheesecake inside for 30 minutes, then open the oven door to cool for another 30 minutes.
- Remove from water bath and refrigerate for at least 4 hours or overnight.
- Whip heavy cream with powdered sugar until stiff peaks form. Spread over cheesecake.
- Top with mini chocolate chips or chopped pistachios. Slice and serve chilled.