
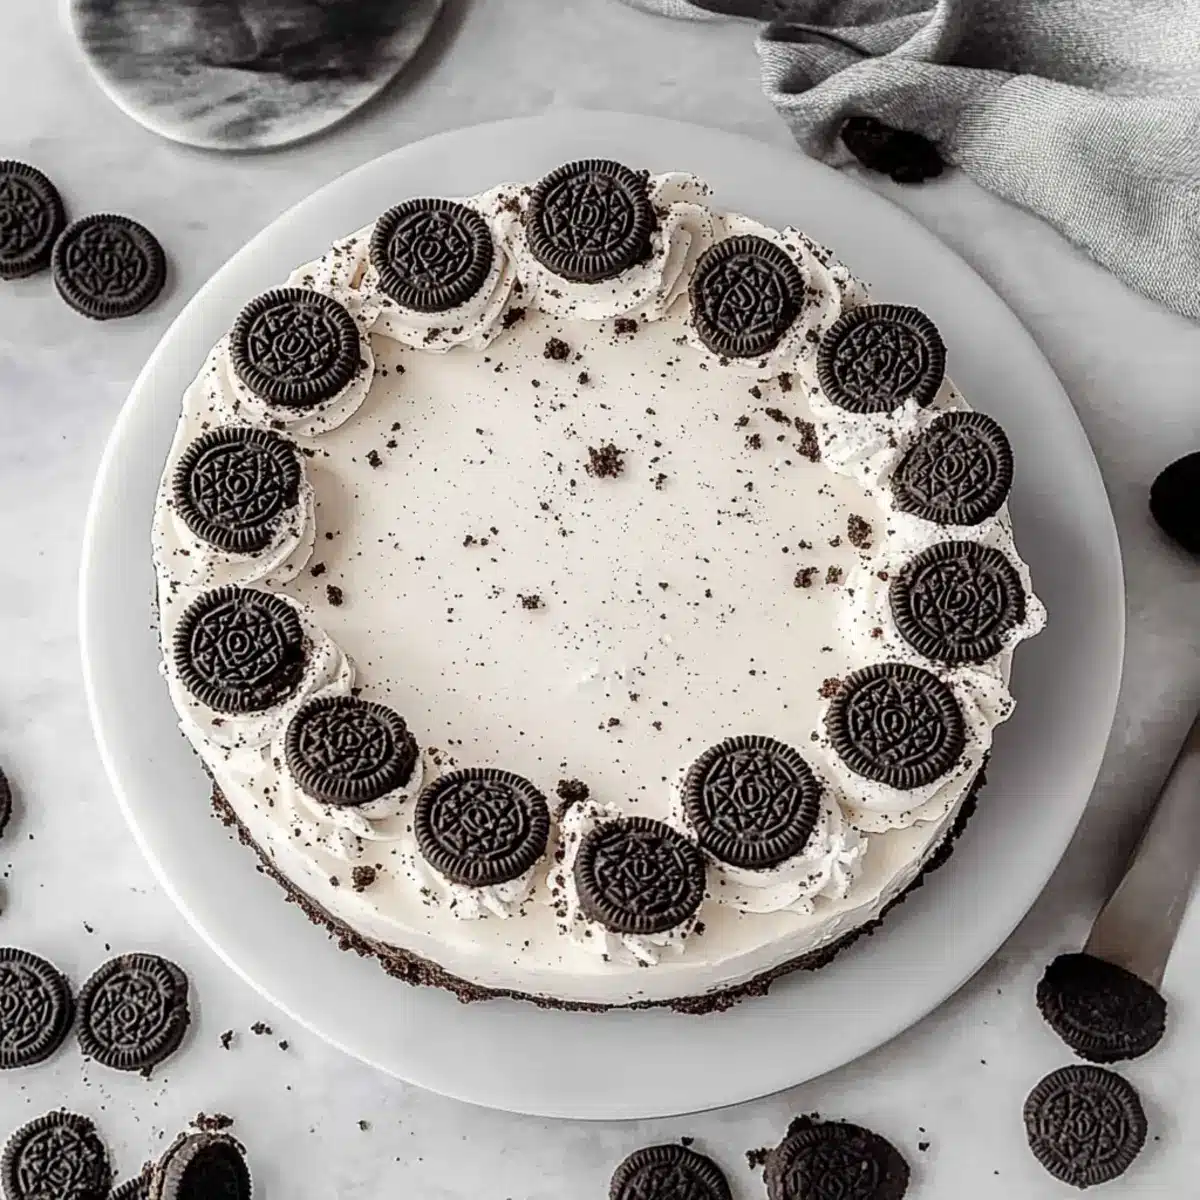
As I rummaged through my pantry, my eyes landed on a forgotten stash of Oreo cookies, instantly sparking the urge for a sweet escape. That’s how my journey into crafting the ultimate No-Bake Oreo Cheesecake began. This creamy delight is not only a breeze to whip up but also a fantastic make-ahead dessert that’s perfect for any occasion. With just a handful of ingredients and less than 30 minutes of prep time, you’ll be well on your way to impressing guests or simply treating yourself and your loved ones. The best part? Each slice offers a luscious, chocolatey experience that appeals to all ages, ensuring it’s a crowd-pleaser at birthday parties, family gatherings, or cozy nights at home. Are you ready to dive into making this deliciously simple creation?
Why Is This Cheesecake So Irresistible?
Creamy, Dreamy Delight: Each bite of this No-Bake Oreo Cheesecake offers a smooth, velvety texture that melts in your mouth, making it a hit for all dessert lovers.
Effortless Elegance: With just a few ingredients, you can craft a stunning dessert that’s incredibly simple to prepare. Ideal for both novice bakers and busy home chefs!
Make-Ahead Magic: Perfect for gatherings, this cheesecake can be prepared in under 30 minutes and chilled till you’re ready to serve—making it a stress-free option for entertaining!
Crowd-Pleasing Flavor: Packed with rich Oreo goodness, it appeals to both kids and adults, making it a standout at birthday parties or holiday feasts.
Flexible & Fun: Feel free to explore variations! Substitute Oreos with your favorite cookie for a unique twist, or elevate it with toppings like homemade whipped cream for added flair.
No-Bake Oreo Cheesecake Ingredients
For the Crust
• Oreo Cookies – Provides the crust and adds flavor, texture, and sweetness; you can substitute with Double Stuf or gluten-free Oreos.
• Unsalted Butter – Binds the crust together and adds richness; remember to melt before mixing with crumbs.
For the Filling
• Brick-style Cream Cheese – The main filling component for a creamy texture; opt for lite cream cheese but avoid fat-free options.
• Powdered Sugar – Sweetens the cheesecake filling; adjust the quantity if using a sweetened whipped topping.
• Vanilla Extract – Enhances the overall flavor profile of the cheesecake.
• Heavy Whipping Cream – Creates a light and airy texture; can be replaced with whipped topping if desired (reduce powdered sugar accordingly).
• Chopped Oreos – Adds delightful texture to the filling; whole Oreos are best for maximum flavor.
Optional Toppings
• Mini Oreos – Adds visual appeal and more Oreo flavor on top of your cheesecake.
• Homemade Whipped Cream – Perfect for a decorative touch and an extra layer of creaminess.
Now that you have all the ingredients lined up, you’re ready to create this delectable No-Bake Oreo Cheesecake!
Step‑by‑Step Instructions for No-Bake Oreo Cheesecake
Step 1: Make the Crust
Begin by processing 24 Oreo cookies in a food processor until they turn into fine crumbs. In a separate bowl, melt 5 tablespoons of unsalted butter and then combine it with the Oreo crumbs, mixing well. Press this mixture firmly into the bottom of a 9-inch springform pan to form an even layer. Chill the crust in the refrigerator for about 15 minutes until it firms up.
Step 2: Prepare the Filling
In a large mixing bowl, beat 16 ounces of brick-style cream cheese with an electric mixer on medium speed until it is smooth and creamy, approximately 2-3 minutes. Gradually add in 1 cup of powdered sugar and 1 teaspoon of vanilla extract, continuing to mix until well combined and no lumps remain. This silky mixture will be the heart of your No-Bake Oreo Cheesecake.
Step 3: Whip the Cream
In a separate bowl, pour 1 cup of heavy whipping cream and beat it with an electric mixer on high speed until stiff peaks form, about 3-5 minutes. The whipped cream should hold its shape and look light and fluffy. This step is crucial for achieving the airy texture that balances the rich filling in your No-Bake Oreo Cheesecake.
Step 4: Combine Mixtures
Gently fold the whipped cream into the cream cheese mixture using a spatula. Be careful to incorporate it without deflating the whipped cream, ensuring a light and creamy filling. Once combined, fold in 1 cup of chopped Oreo cookies for extra texture throughout the cheesecake. The filling should look smooth and delicious, ready for the crust.
Step 5: Assemble Cheesecake
Remove the chilled crust from the refrigerator and spoon the creamy filling onto it, spreading it evenly with a spatula. For an added touch, you can pipe some whipped cream along the edges of the cheesecake and sprinkle more mini Oreos on top. This assembly will set the stage for a stunning presentation once finished.
Step 6: Chill
Cover the assembled No-Bake Oreo Cheesecake with plastic wrap and refrigerate it for at least 4 hours, but ideally overnight. This chilling time allows the cheesecake to set properly, enhancing the flavors and texture. Once set, remove the cheesecake from the springform pan, slice, and get ready to serve this delightful treat!
How to Store and Freeze No-Bake Oreo Cheesecake
Fridge: Store any leftover No-Bake Oreo Cheesecake in an airtight container in the refrigerator for up to 4 days to maintain its creamy texture and flavor.
Freezer: If you’re looking to keep it longer, the cheesecake can be frozen for up to 2 months. Slice it into pieces, wrap individually in plastic wrap, and place in a freezer-safe container.
Thawing: To enjoy, transfer the frozen cheesecake to the fridge and allow it to thaw overnight. This will keep it moist and delicious upon serving again.
Reheating: There’s no need to reheat this dessert; serve it chilled for the best taste experience!
Expert Tips for No-Bake Oreo Cheesecake
-
Cream Cheese Temperature: Make sure your cream cheese is at room temperature for a smooth, lump-free filling. This simple step can make a world of difference!
-
Stiff Peaks Required: When whipping the cream, aim for stiff peaks—this ensures your No-Bake Oreo Cheesecake has a light, airy texture that holds its shape beautifully.
-
Springform Pan Advantage: Always use a springform pan for easier removal and presentation; avoid disposable or flimsy pans which can lead to messy servings.
-
Don’t Overfill: If you end up with extra filling, use a separate bowl instead of adding it all in—this helps avoid a spilling disaster and keeps your cheesecake looking immaculate.
-
Chill Time is Key: Be patient and allow the cheesecake to chill for at least 4 hours or overnight for the best flavor and texture. Rushing can make it less enjoyable!
No-Bake Oreo Cheesecake Variations
Feel free to experiment with this recipe and make it your own with these delicious twists!
-
Gluten-Free: Substitute regular Oreos with gluten-free Oreos for a similar delightful flavor without the gluten.
-
Peanut Butter Swirl: Add creamy peanut butter into the filling for a nutty twist that pairs beautifully with Oreos.
-
Minty Fresh: Mix in a few drops of peppermint extract to the filling for a refreshing mint flavor that complements the chocolate.
-
Layered Delight: Create layers by adding a thin layer of chocolate ganache or caramel sauce in between the crust and the cheesecake filling.
-
Fruit Fusion: Top the cheesecake with fresh berries or a berry compote for a bright contrast to the rich Oreo flavor.
-
Chocolate Lovers: Sprinkle chocolate shavings or drizzle melted chocolate over the top for an extra decadent finish.
-
Coffee Kick: Add a teaspoon of instant coffee granules into the cream cheese mixture for a coffee-flavored twist that enhances the chocolate notes.
-
Mini Cheesecakes: Create individual servings by dividing the crust and filling into muffin tins lined with paper cups for easy grab-and-go treats.
Adding these variations will take your No-Bake Oreo Cheesecake to new heights, so why not try one? It’s delightful as is, but as you might find when making these treats, it can be exciting to explore different flavors, just as you’d do with something like my Cheesecake Stuffed Strawberries.
What to Serve with Easy No-Bake Oreo Cheesecake
Elevate your dessert experience by pairing this creamy delight with complementary flavors and textures that enhance every bite.
- Fresh Berries: Juicy strawberries or raspberries add a bright, tart contrast that balances the sweetness of the cheesecake.
- Chocolate Sauce: A drizzle of warm chocolate sauce enhances the Oreo flavor, creating a rich, indulgent experience.
- Whipped Cream: Light and airy, a dollop of homemade whipped cream offers a creamy touch that pairs beautifully with the cheesecake’s rich filling.
- Crushed Nuts: Chopped almonds or walnuts add a delightful crunch, contrasting the smoothness of the cheesecake while providing a subtle earthiness.
- Coffee: A cup of freshly brewed coffee balances the sweetness, making for a perfect post-dinner pairing that awakens the palate.
- Ice Cream: A scoop of vanilla or cookies and cream ice cream takes this indulgence to the next level, creating a deliciously creamy combo.
- Mint Leaves: Sprinkling fresh mint adds a refreshing burst of flavor that complements the rich Oreo experience and adds a pop of color.
- Lemon Sorbet: This refreshing dessert offers a zesty, tart note that cuts through the creamy richness of the cheesecake, brightening the overall meal.
- Sparkling Wine: A glass of bubbly complements this dessert by adding a festive touch to your gathering while enhancing the Oreo flavors.
- Chocolate Chip Cookies: For the ultimate Oreo lover, serve with chewy chocolate chip cookies, layering the dessert experience with more cookie goodness.
Make Ahead Options
These No-Bake Oreo Cheesecakes are perfect for those busy days when you need to plan ahead! You can prepare the crust and filling up to 24 hours in advance. Simply follow the first five steps of the recipe, then cover the assembled cheesecake with plastic wrap and refrigerate. This chilling not only allows the flavors to meld but also ensures the cheesecake sets perfectly. To maintain quality, keep it stored airtight to prevent any absorption of odors from the fridge. When you’re ready to serve, simply garnish with mini Oreos and whipped cream, and enjoy a hassle-free dessert that’s just as delicious as if made fresh!
No-Bake Oreo Cheesecake Recipe FAQs
What type of Oreo cookies should I use?
You can use regular Oreo cookies for the best flavor, but feel free to experiment with Double Stuf or gluten-free Oreos if that’s your preference! Just keep in mind that the amount of filling might affect the overall texture.
How long can I store the cheesecake?
Leftovers can be kept in an airtight container in the refrigerator for up to 4 days. This ensures the cheesecake retains its creamy texture and flavor. Remember, it’s best enjoyed fresh!
Can I freeze No-Bake Oreo Cheesecake?
Absolutely! To freeze, slice the cheesecake into individual pieces, wrap each slice in plastic wrap, and store them in a freezer-safe container. It can last up to 2 months in the freezer.
How do I thaw the frozen cheesecake?
To thaw, simply transfer the cheesecake to the refrigerator and allow it to thaw overnight. This gentle method keeps it moist and delicious until you’re ready to serve!
What if my whipped cream doesn’t get stiff peaks?
If your whipped cream doesn’t reach stiff peaks, it might be due to using cold cream or not whipping long enough. Always ensure the cream is cold and whip on high speed for 3-5 minutes until the cream holds its shape.
Is this cheesecake suitable for people with allergies?
This recipe contains dairy and gluten due to the cream cheese and Oreo cookies, so it’s not suitable for individuals with lactose intolerance or gluten allergies. For a gluten-free version, be sure to use gluten-free cookies and cream cheese alternatives!
Decadent No-Bake Oreo Cheesecake That's So Easy to Make
Ingredients
Equipment
Method
- Process 24 Oreo cookies in a food processor until fine crumbs. Melt 5 tablespoons of unsalted butter and mix with Oreo crumbs. Press mixture into a 9-inch springform pan and chill for 15 minutes.
- Beat 16 ounces of cream cheese on medium speed until smooth. Gradually add 1 cup of powdered sugar and 1 teaspoon of vanilla extract until well combined.
- In a separate bowl, beat 1 cup of heavy whipping cream on high speed until stiff peaks form, about 3-5 minutes.
- Gently fold the whipped cream into the cream cheese mixture. Fold in 1 cup of chopped Oreo cookies.
- Spoon the filling onto the chilled crust, spreading evenly. Pipe whipped cream and sprinkle mini Oreos on top if desired.
- Cover with plastic wrap and refrigerate for at least 4 hours or overnight to set. Slice and serve.