
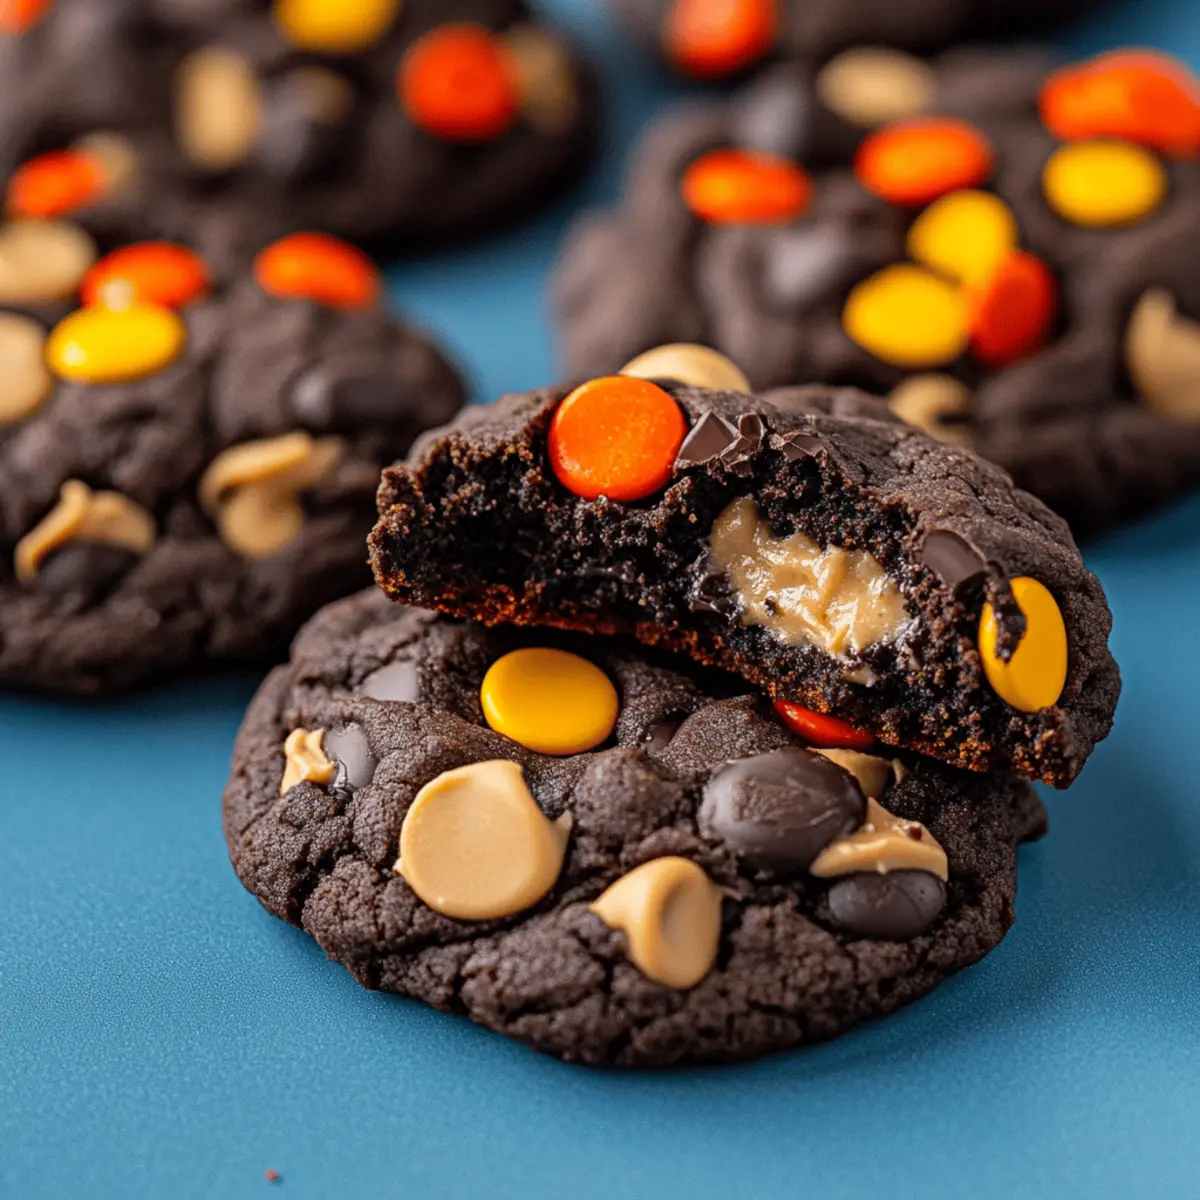
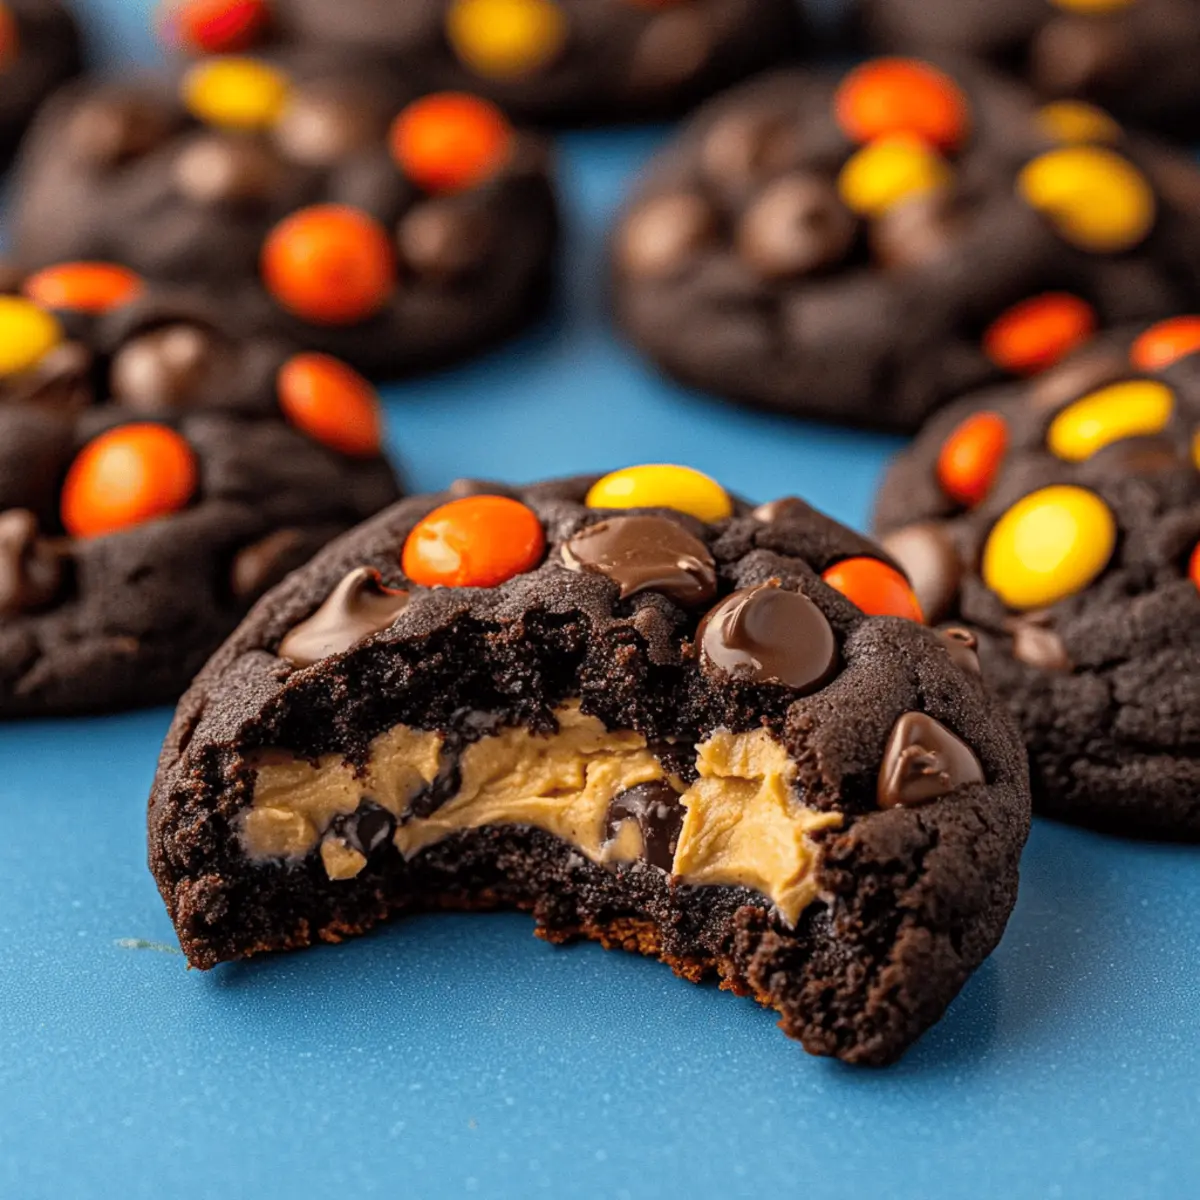
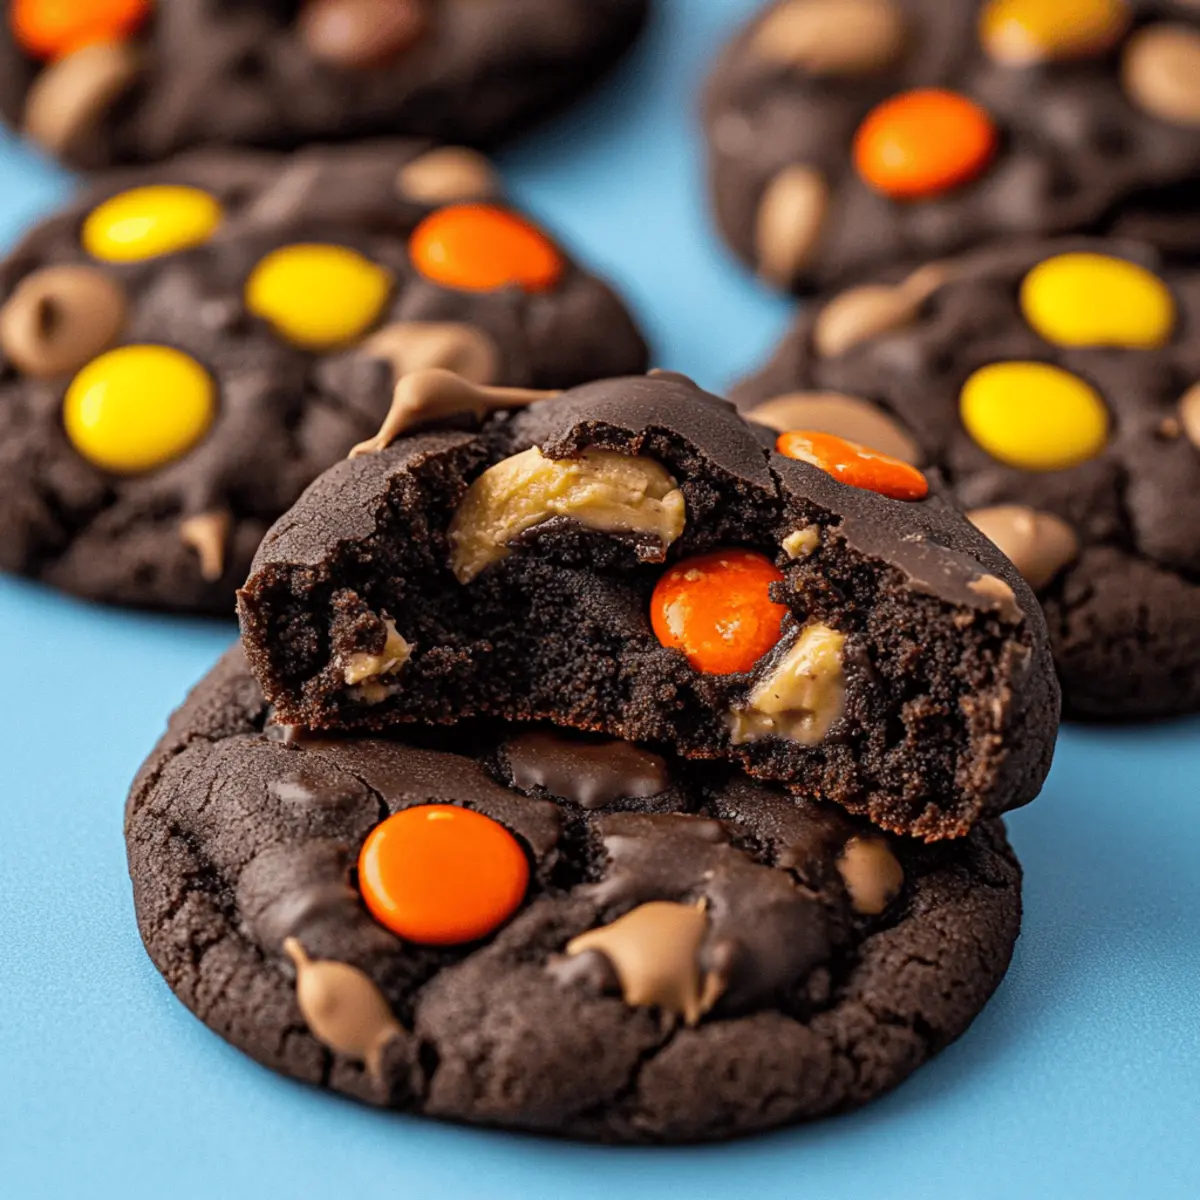
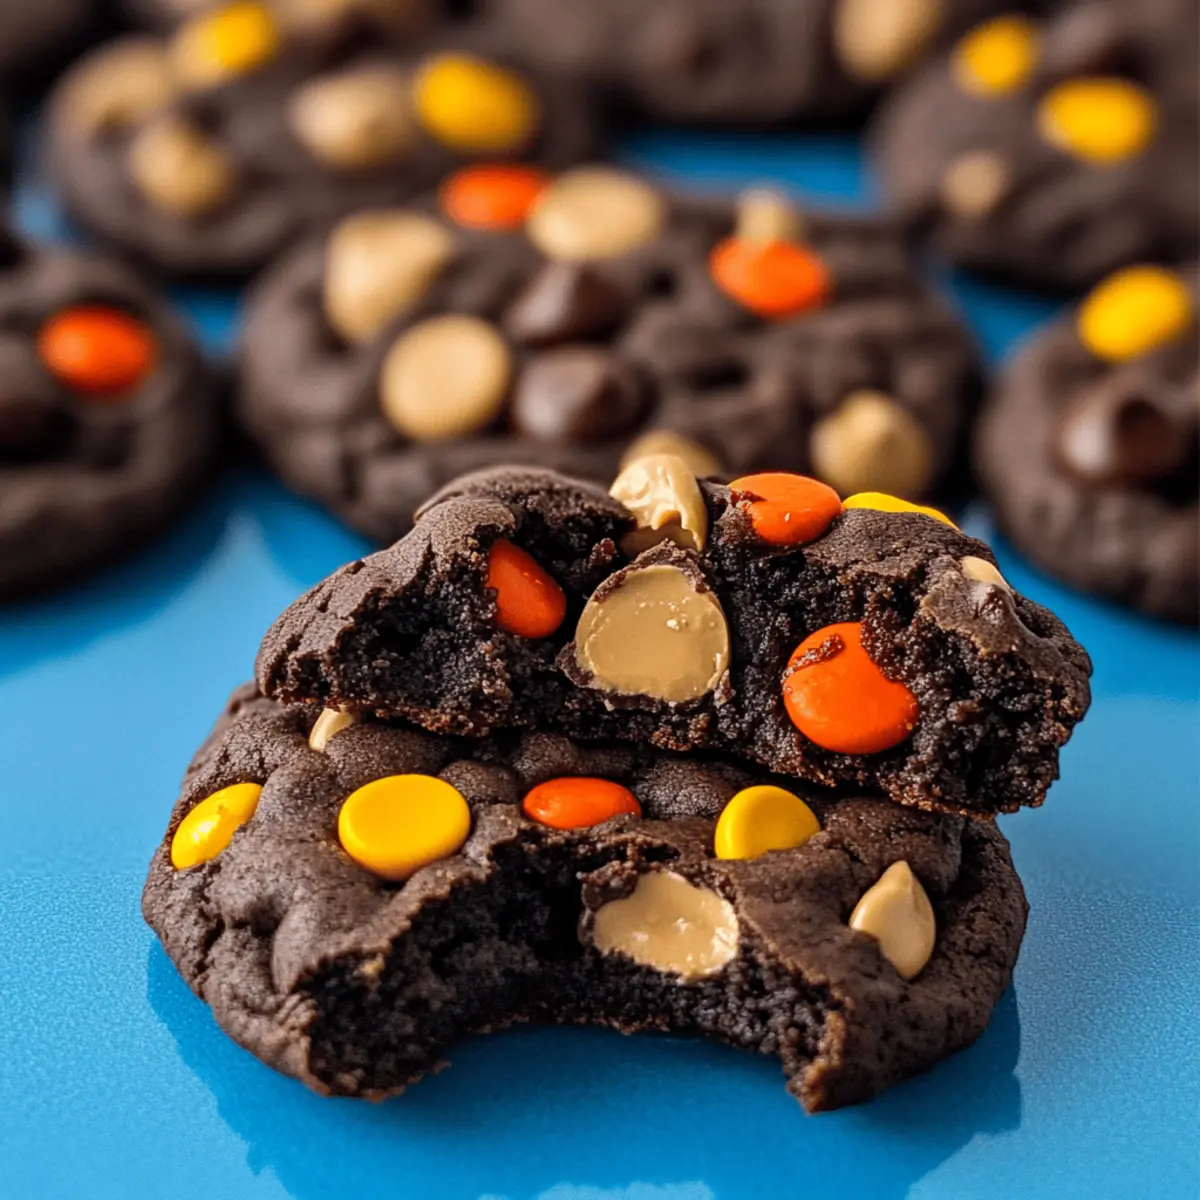
As I stood in my kitchen, the rich aroma of melting chocolate and peanut butter swirled around me like a warm embrace. These Chocolate Peanut Butter Cookies have become my go-to for a quick indulgence that feels like a special occasion. In less than an hour, you’ll have a batch of soft, chewy cookies stuffed with irresistible peanut butter filling—perfect for satisfying those late-night cravings or impressing friends at a gathering. The beauty of this recipe lies not only in its quick prep time but also in the way it beautifully marries two beloved flavors. Curious about how these cookies can bring joy to your kitchen? Let’s dive in!
Why Are These Cookies So Irresistible?
Decadent Flavor Combination: The fusion of rich chocolate and creamy peanut butter creates a flavor explosion that will have everyone coming back for seconds.
Quick Prep: With a total preparation time of under an hour, even the busiest home cooks can whip up a batch for any occasion.
Soft, Chewy Texture: Each bite offers a perfectly soft exterior surrounding a fudgy peanut butter center that just melts in your mouth.
Endless Customization: Want more crunch? Throw in extra Reese’s Pieces or swap the peanut butter for almond butter. The possibilities are endless!
Crowd-Pleasing Delight: These cookies are sure to impress guests, making them a favorite at gatherings or as a surprise treat for family. Enjoy them warm with a glass of milk or alongside a scoop of ice cream for a truly indulgent dessert experience!
Chocolate Peanut Butter Cookies Ingredients
• Get ready to bake a delicious treat!
For the Peanut Butter Filling
- Peanut Butter – Adds creamy richness and serves as the cookie filling; smooth varieties like Jif or Skippy work best.
- Powdered Sugar – Provides sweetness and structure to the filling; stick with regular powdered sugar for consistent results.
- Whole Milk – Combines with peanut butter for a smooth filling; low-fat can be used if you’re in a pinch.
- Vanilla Extract – Elevates the flavor profile; opt for pure vanilla for an authentic taste.
For the Cookie Dough
- All-Purpose Flour – Creates the cookie’s structure; remember to spoon it into the measuring cup to avoid packing!
- Unsweetened Cocoa Powder – Delivers rich chocolate flavor without added sweetness; it’s key to those decadent Chocolate Peanut Butter Cookies.
- Black Cocoa Powder – Enhances color and flavor; can be replaced with more unsweetened cocoa if necessary.
- Instant Chocolate Fudge Pudding Mix – Boosts moisture and richness without preparation; perfect for an extra chocolatey bite.
- Powdered Milk – Adds creaminess to the dough for that perfect texture.
- Baking Soda – Helps the cookies rise slightly for a delightful chewiness.
- Granulated Sugar – Contributes to sweetness and browning when baking.
- Salted Butter – Imparts richness and moisture; use unsalted if you prefer but add a pinch of salt to balance sweetness.
- Large Eggs – Binds the ingredients together; bring them to room temperature for improved mixing.
For Extra Flavor and Crunch
- Reese’s Pieces – Folded into the dough for delightful bursts of flavor; add some on top for a decorative finish!
- Peanut Butter Chips – These optional additions elevate the cookie experience with extra sweetness and texture.
Step‑by‑Step Instructions for Chocolate Peanut Butter Cookies
Step 1: Prepare the Peanut Butter Filling
In a medium bowl, combine 1 cup of smooth peanut butter, 1 cup of powdered sugar, a pinch of salt, 1 teaspoon of vanilla extract, and 2 tablespoons of whole milk. Mix until the filling is smooth and creamy, resembling a thick frosting. Set aside; this delightful filling will be the heart of your scrumptious Chocolate Peanut Butter Cookies.
Step 2: Mix Dry Ingredients
In a large mixing bowl, whisk together 2 cups of all-purpose flour, ½ cup of unsweetened cocoa powder, ¼ cup of black cocoa powder, 1 package of instant chocolate fudge pudding mix, 1 cup of powdered milk, ½ teaspoon of salt, and 1 teaspoon of baking soda. Ensure the ingredients are thoroughly combined and set aside; this mixture is essential for achieving the perfect cookie texture.
Step 3: Cream Butter and Sugar
Using a stand mixer or a large mixing bowl with an electric mixer, beat together ¾ cup of salted butter and 1 cup of granulated sugar until the mixture is creamy and light in color, about 2-3 minutes. This step is crucial as it creates a fluffy base for your Chocolate Peanut Butter Cookies, enhancing their chewy texture.
Step 4: Incorporate Eggs and Vanilla
Add 1 large egg and 1 egg yolk, 2 tablespoons of whole milk, and 1 teaspoon of pure vanilla extract to the sugar and butter mixture. Beat until everything is well combined and just mixed. This wet mixture adds moisture and richness to the cookie dough, ensuring a rich flavor profile in the final product.
Step 5: Combine Dry and Wet Ingredients
Gradually mix the dry ingredient mixture into the wet mixture using a spatula or wooden spoon until just incorporated, being careful not to overmix. The dough will start to come together, and flour should be barely visible. This step helps maintain the desired soft and chewy texture in your Chocolate Peanut Butter Cookies.
Step 6: Add the Candies
Gently fold in 1 cup of Reese’s Pieces and ½ cup of peanut butter chips into the cookie dough. These additions will provide bursts of flavor and texture within your cookies, making each bite an indulgent experience. Ensure they are evenly distributed throughout the dough.
Step 7: Shape Cookies
Scoop portions of the dough using a cookie scoop or your hands, flatten each scoop slightly, and place about 1 tablespoon of the peanut butter filling in the center. Wrap the dough around the filling and roll it into a ball. Make sure the filling is fully encased; this step is essential for that delicious hidden surprise in your Chocolate Peanut Butter Cookies.
Step 8: Bake
Preheat your oven to 350°F (175°C) and line a baking sheet with parchment paper. Place the cookie balls on the prepared baking sheet, spacing them about 2 inches apart. Bake for 10-12 minutes until the edges are set but the centers still look slightly underbaked. These Chocolate Peanut Butter Cookies will firm up as they cool.
Step 9: Cooling
Allow the cookies to cool on the baking sheet for 15 minutes before transferring them to a wire rack. This resting time helps them achieve the perfect soft and chewy texture, giving you a delightful cookie experience savory enough to satisfy any sweet tooth.
What to Serve with Decadent Chocolate Peanut Butter Stuffed Cookies
Indulging in warm, gooey cookies is a delightful experience on its own, but pairing them with just the right sides can elevate your dessert game.
-
Glass of Milk: The classic companion, cold milk complements the rich flavors and balances the sweetness, making each bite better.
-
Vanilla Ice Cream: A scoop of creamy vanilla ice cream melting over the warm cookies creates a wonderful temperature contrast and an indulgent treat.
-
Whipped Cream: Light and airy, whipped cream adds a delightful texture. A dollop on top of the cookies makes for an elegant presentation.
-
Fresh Berries: Strawberries or raspberries provide a tart contrast to the sweet cookies, enhancing flavors while adding a refreshing touch. Serve them alongside for a lovely color pop!
-
Espresso or Coffee: The deep, robust flavors of espresso balance the sweetness, making each cookie taste even richer. Perfect for an afternoon pick-me-up!
-
Chocolate Sauce Drizzle: For the ultimate indulgence, drizzle some chocolate sauce over your cookies right before serving—double the chocolatey goodness!
Storage Tips for Chocolate Peanut Butter Cookies
Room Temperature: Store cookies in an airtight container at room temperature for up to 3-4 days to maintain their soft, chewy texture.
Fridge: If you prefer, you can refrigerate the cookies for up to a week; just be sure to separate layers with parchment paper to prevent sticking.
Freezer: For longer freshness, freeze baked cookies or unbaked dough balls in a sealed freezer bag for up to 3 months. This way, you can always have a quick indulgent treat on hand!
Reheating: To enjoy warm cookies, reheat them briefly in the microwave for about 10-15 seconds or until just warm, bringing back that fresh-out-of-the-oven deliciousness.
Make Ahead Options
These Chocolate Peanut Butter Cookies are an excellent choice for meal prep, saving you precious time on busy days! You can prepare the peanut butter filling and cookie dough up to 24 hours in advance. Simply mix the filling and store it in an airtight container in the refrigerator. The dough can also be shaped into balls and kept in the fridge for up to 3 days. When you’re ready to bake, just place the chilled cookie dough on a lined baking sheet, bake as directed, and enjoy the same delicious results. This way, you can enjoy fresh, homemade cookies anytime without the fuss!
Expert Tips for Chocolate Peanut Butter Cookies
Perfect Dough Consistency: Ensure not to overmix the dough; stop mixing when dry ingredients are just incorporated for tender cookies.
Flour Measurement: Spoon the flour into your measuring cup rather than packing it down to avoid dense cookies that lose their chewiness.
Underbaking is Key: Cookies may look slightly underdone when you take them out. They will continue to cook and set while cooling, achieving that perfect texture.
Cooling Time Matters: Allow the cookies to cool on the baking sheet for at least 15 minutes. This helps them firm up without becoming hard.
Chocolate Variations: Feel free to replace Reese’s Pieces with chocolate chunks or your favorite candies for a new twist on these Chocolate Peanut Butter Cookies.
Chocolate Peanut Butter Cookies Variations
Feel free to explore these delightful twists and substitutions to make your cookies even more uniquely yours!
-
Nut-Free Alternative: Substitute almond butter or sun butter for the filling to create a delicious nut-free version. These alternatives retain that creamy texture while appealing to those with nut allergies.
-
Candy Swap: Replace Reese’s Pieces with chocolate chunks, M&M’s, or your favorite candies for a surprise in every bite. Experiment with different flavors to keep things exciting!
-
Lower Sugar Option: Use sugar substitutes suitable for baking, like erythritol or monk fruit sweetener, to reduce sugar content while still enjoying a sweet treat. You might find a new favorite!
-
Cookie Dough Variations: Add a pinch of espresso powder for a delightful mocha flavor or mix in a dash of cinnamon for a warm, cozy twist. These small additions elevate the overall experience of each bite.
-
Additional Crunch: Try folding in chopped nuts, such as pecans or walnuts, for a satisfying crunch that complements the softness of the cookie dough. The texture contrast is simply delightful.
-
Chocolate Lovers’ Dream: Incorporate mini chocolate chips into the dough for an extra chocolatey experience. Combine them with peanut butter chips for a double dose of deliciousness!
-
Fruity Twist: For a fruity profile, add dried cherries or cranberries instead of candies. The tartness balances the richness of chocolate and peanut butter for a unique flavor.
Feel inspired? You can also check out how to enhance your baking adventures with Garlic Butter Honey or treat yourself to a slice of Chocolate Chip Kodiak for a delightful balance of flavors. Enjoy your baking journey!
Chocolate Peanut Butter Cookies Recipe FAQs
How do I choose the right peanut butter for this recipe?
Absolutely! For the best results, opt for smooth, processed peanut butter like Jif or Skippy. These types create a creamy filling that blends well with the other ingredients, ensuring a rich flavor and smooth texture. Avoid natural peanut butters that can separate and affect the consistency of the filling.
What is the best way to store leftover cookies?
Very! Store your Chocolate Peanut Butter Cookies in an airtight container at room temperature for up to 3-4 days to keep them soft and chewy. If you prefer to extend their freshness, refrigerating them can keep them good for up to a week, but be sure to separate layers with parchment paper to prevent them from sticking together.
Can I freeze the cookie dough for later use?
Absolutely! To freeze unbaked dough balls, scoop the dough and roll them into balls before laying them on a baking sheet. Place the sheet in the freezer until the dough is firm, then transfer the frozen dough balls to a sealed freezer bag. They can be kept for up to 3 months. When you’re ready to bake, simply bake them straight from the freezer, adding a couple of extra minutes to the baking time.
What should I do if my cookies turn out hard?
Very! If your cookies end up hard, it’s often due to overbaking or overmixing the dough. To ensure soft cookies, remove them from the oven when the edges are set but the centers appear slightly underbaked. Also, make sure to stop mixing as soon as the dry ingredients are incorporated. If you’ve already baked and they’re hard, try microwaving them briefly for about 10 seconds with a damp paper towel to restore some moisture.
Are these cookies suitable for people with nut allergies?
Definitely! If you’re looking for a nut-free option, simply substitute the peanut butter with sunflower seed butter or a similar alternative. These swaps work great without sacrificing flavor, allowing everyone to enjoy these Chocolate Peanut Butter Cookies safely. Just be mindful of the specific allergies when selecting other ingredients as well!
Irresistible Chocolate Peanut Butter Cookies in Under an Hour
Ingredients
Equipment
Method
- In a medium bowl, combine peanut butter, powdered sugar, a pinch of salt, vanilla extract, and whole milk. Mix until smooth and creamy. Set aside.
- In a large bowl, whisk together flour, cocoa powders, pudding mix, powdered milk, salt, and baking soda. Set aside.
- Beat together butter and granulated sugar until creamy and light in color. This takes about 2-3 minutes.
- Add eggs, milk, and vanilla to the butter and sugar mixture. Beat until well combined.
- Gradually mix the dry ingredients into the wet ingredients, being careful not to overmix.
- Gently fold in Reese’s Pieces and peanut butter chips.
- Scoop portions of the dough, place peanut butter filling in the center, and roll into a ball.
- Preheat the oven to 350°F (175°C). Place cookie balls on a baking sheet and bake for 10-12 minutes.
- Cool cookies on the baking sheet for 15 minutes before transferring to a wire rack.