
As I was savoring a steaming bowl of takeout the other night, a realization struck me: what if I could recreate that beloved dish right in my own kitchen? Enter Mongolian Chicken, a sweet and savory stir-fry that whisks you away from the monotonous fast food routine. This recipe transforms crispy, cornstarch-kissed chicken into a vibrant meal that bursts with flavors of garlic, ginger, and scallions. Not only does it make for a quick weeknight feast, but it also doubles as the ultimate comfort food that’s easily adaptable for gluten-free diets or to incorporate your favorite veggies. So, are you ready to dive into this delightful stir-fry and impress your friends at the dinner table?
Why is Mongolian Chicken a Must-Try?
Quick and Easy: This recipe whips up in no time, perfect for busy weeknights when you crave something flavorful without the fuss.
Crispy Perfection: With cornstarch-coated chicken, each bite offers an irresistible crunch that is hard to resist—much better than typical takeout!
Sweet and Savory Harmony: The lovely balance of garlic, ginger, and sweet sauce creates a tantalizing flavor explosion that captivates every palate.
Versatile Ingredients: Easily adapt this dish to include your favorite veggies or protein alternatives like shrimp or tofu—endless possibilities!
If you enjoy this, you might also love my Corn Chicken Rice for another delicious twist on home-cooked comfort food.
Mongolian Chicken Ingredients
For the Chicken
- Chicken thighs – Juicy and tender; for the best results, choose thighs for added flavor.
- Cornstarch – Essential for achieving that crispy coating; potato starch can be used as a substitute.
For the Sauce
- Light Soy Sauce – Provides salty depth and umami; consider low-sodium for a healthier option.
- Dark Soy Sauce – Adds richness and a deep color to your sauce.
- Brown Sugar – Contributes sweetness to the sauce; honey works well as a delightful alternative.
- Chicken Stock – Forms the base of the sauce; vegetable broth is great for a lighter version.
- Dried Chilies (optional) – Spice it up based on your heat preference; adjust the amount accordingly.
For the Aromatics
- Garlic – Freshly minced enhances the sauce’s aroma and flavor; slice or chop as desired.
- Ginger – Offers a fragrant and zesty punch; fresh ginger is preferred for the best taste.
- Scallions – Use white parts in the cooking process and green for colors and garnish; they bring freshness to the dish.
For Frying
- Neutral Oil – Necessary for frying; choose oils with high smoke points, such as canola or vegetable oil, avoiding olive oil.
Enjoy making this flavorful Mongolian Chicken, perfect for those cozy nights when you want comfort food without the takeout hassle!
Step‑by‑Step Instructions for Mongolian Chicken
Step 1: Marinate the Chicken
In a large mixing bowl, combine the chicken thighs with light soy sauce, dark soy sauce, garlic, ginger, and brown sugar. Mix everything well to ensure all the pieces are coated. Cover the bowl with plastic wrap and let it marinate for 15-20 minutes at room temperature to absorb the flavors, while you prepare the other ingredients.
Step 2: Prepare the Sauce
In a separate bowl, whisk together chicken stock, light soy sauce, dark soy sauce, and brown sugar until fully combined. This mixture will serve as the rich and sticky sauce for your Mongolian Chicken. Make sure there are no clumps of sugar, as it will help create that delightful glaze once cooked.
Step 3: Dissolve Starch
Take a small bowl and add a few tablespoons of the prepared sauce. Sprinkle in the cornstarch and stir vigorously until you achieve a smooth slurry. This starch slurry will help thicken your sauce later. Set this aside while you move on to frying the chicken.
Step 4: Fry Chicken
Heat about 1/2 inch of neutral oil in a wok or deep skillet over medium-high heat until shimmering but not smoking, approximately 350°F (175°C). Shallow fry the marinated chicken pieces in batches for about 3-4 minutes on each side, or until they turn golden brown and crispy. Use a slotted spoon to remove them and drain on paper towels to absorb excess oil.
Step 5: Stir-Fry Aromatics
With the leftover oil in the pan, reduce the heat to medium and add dried chilies, sautéing for about 30 seconds until fragrant. Then, toss in the minced garlic, ginger, and the white parts of the scallions. Stir-fry for an additional 30 seconds, taking care not to let them burn, as you want their flavors to meld beautifully without bitterness.
Step 6: Thicken Sauce
Return the flame to high and pour the prepped sauce around the wok. Bring it to a simmer, stirring occasionally for about 1-2 minutes. Gradually add in the cornstarch slurry, stirring constantly until the sauce thickens and becomes glossy—this should take about 1-2 minutes.
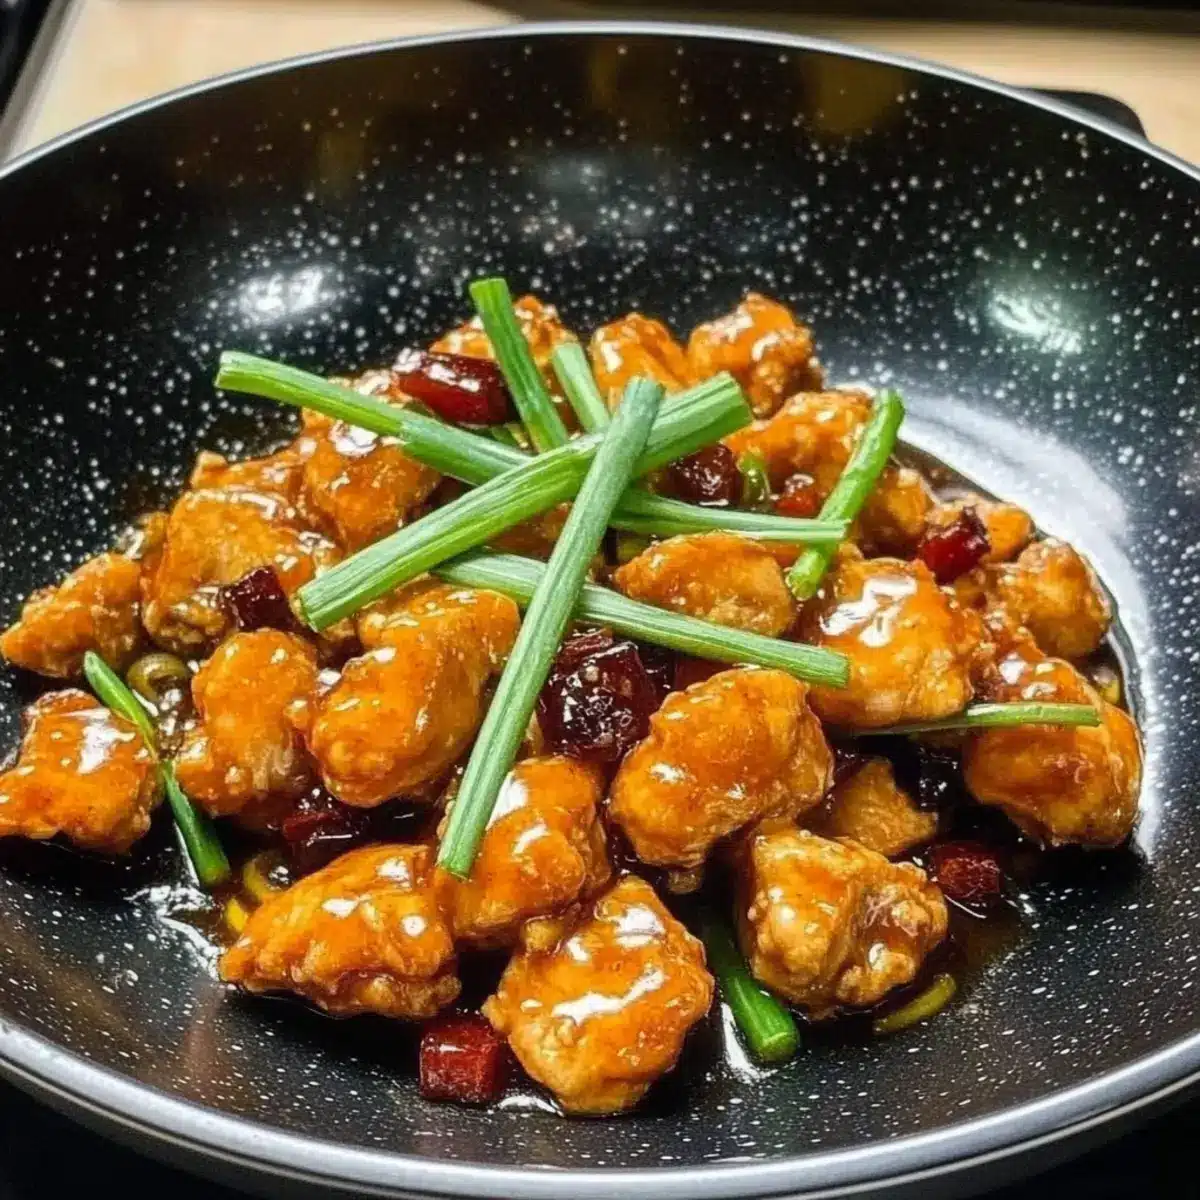
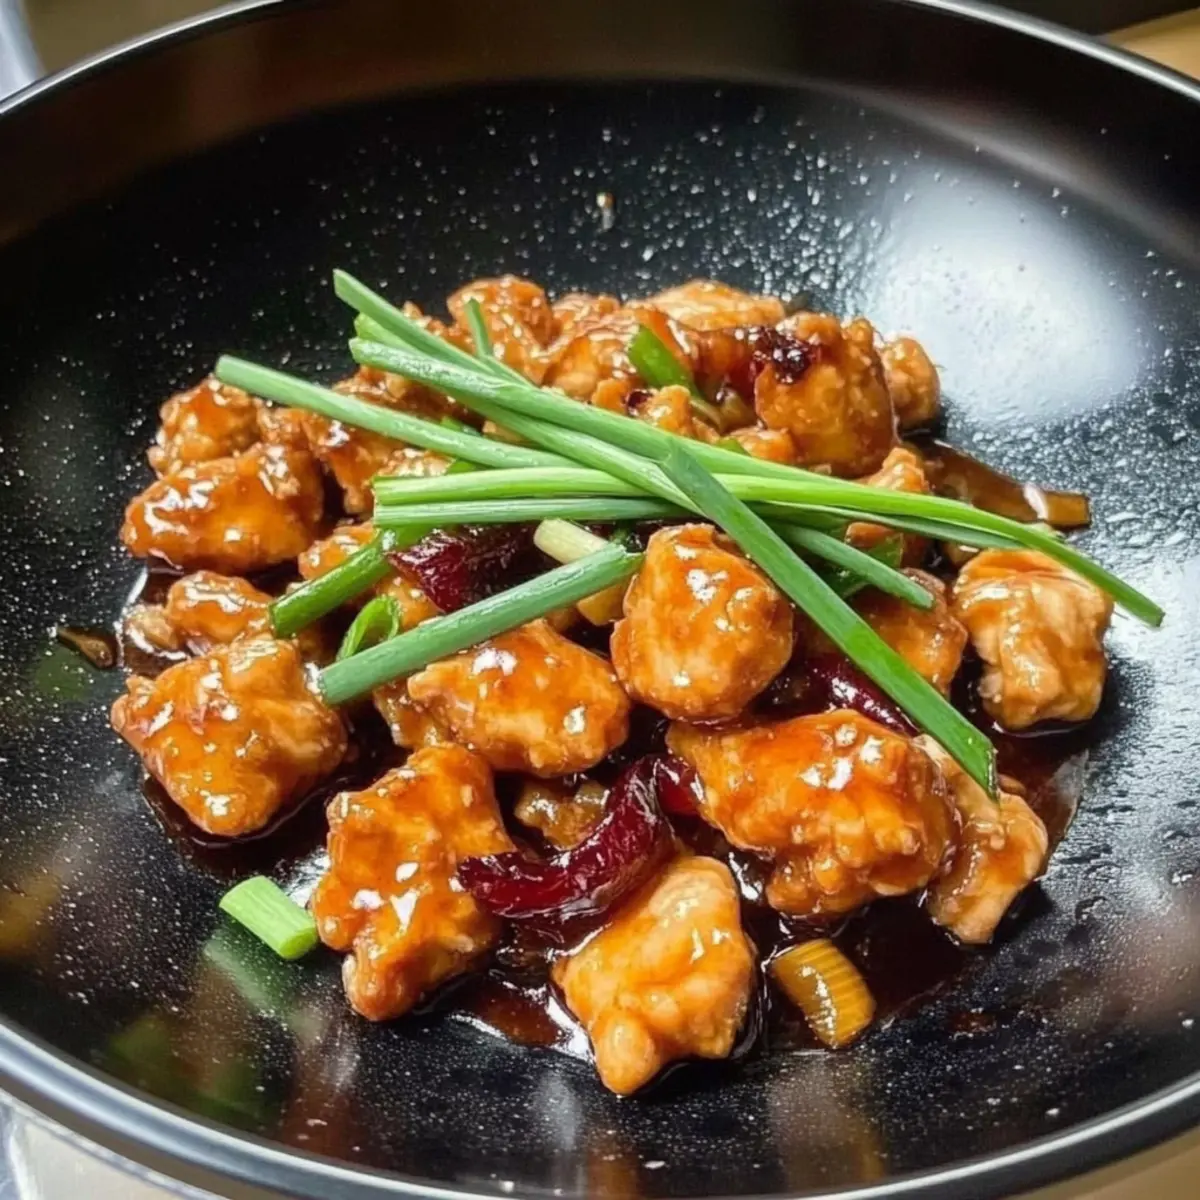
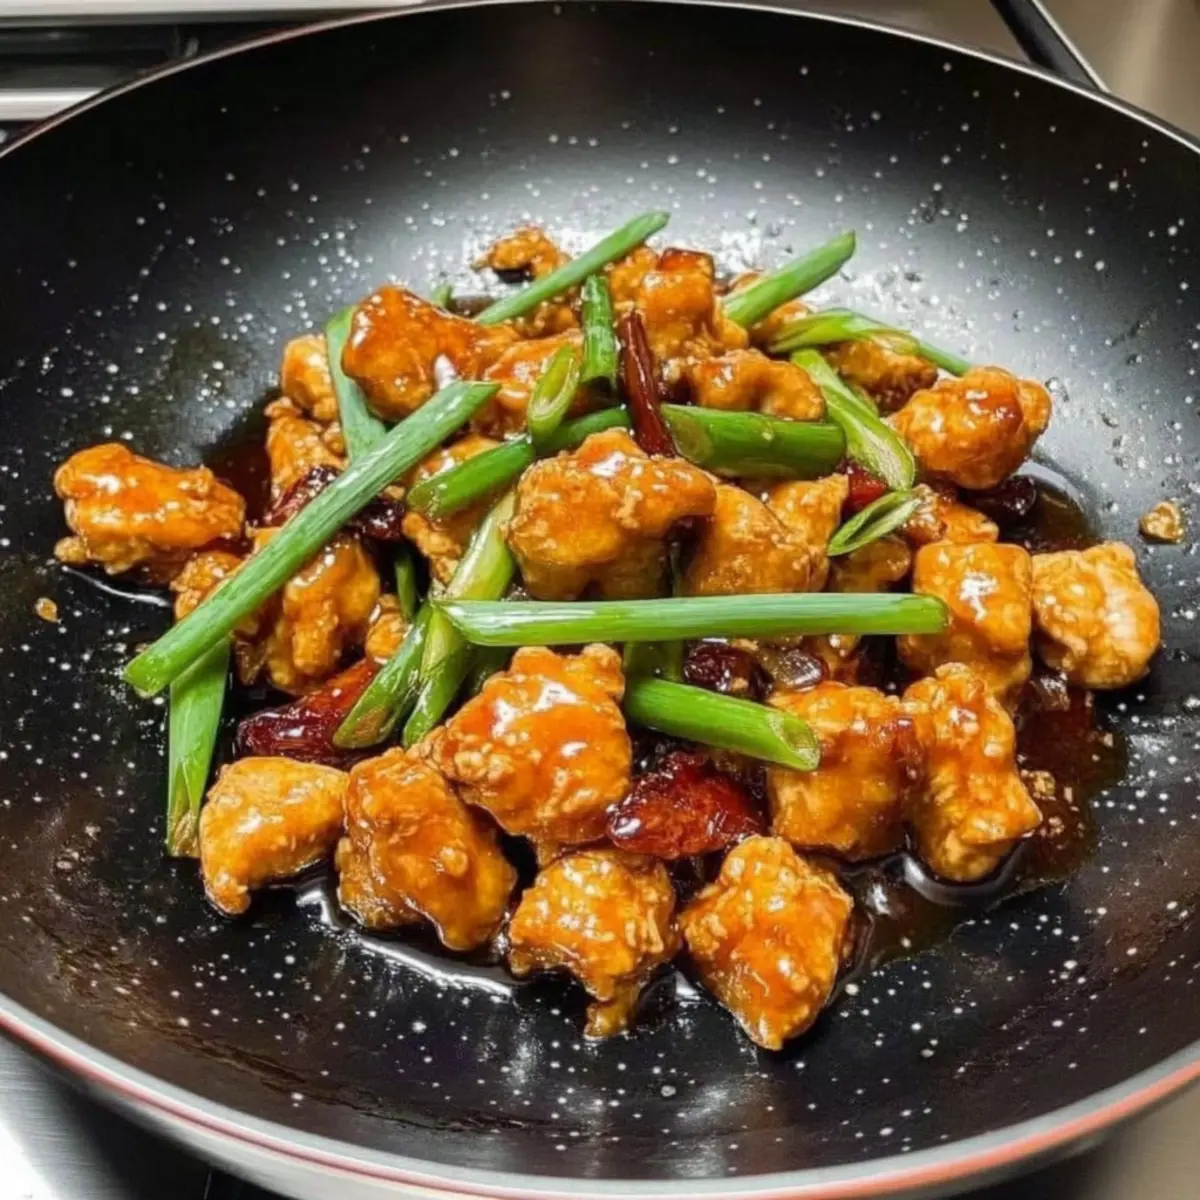
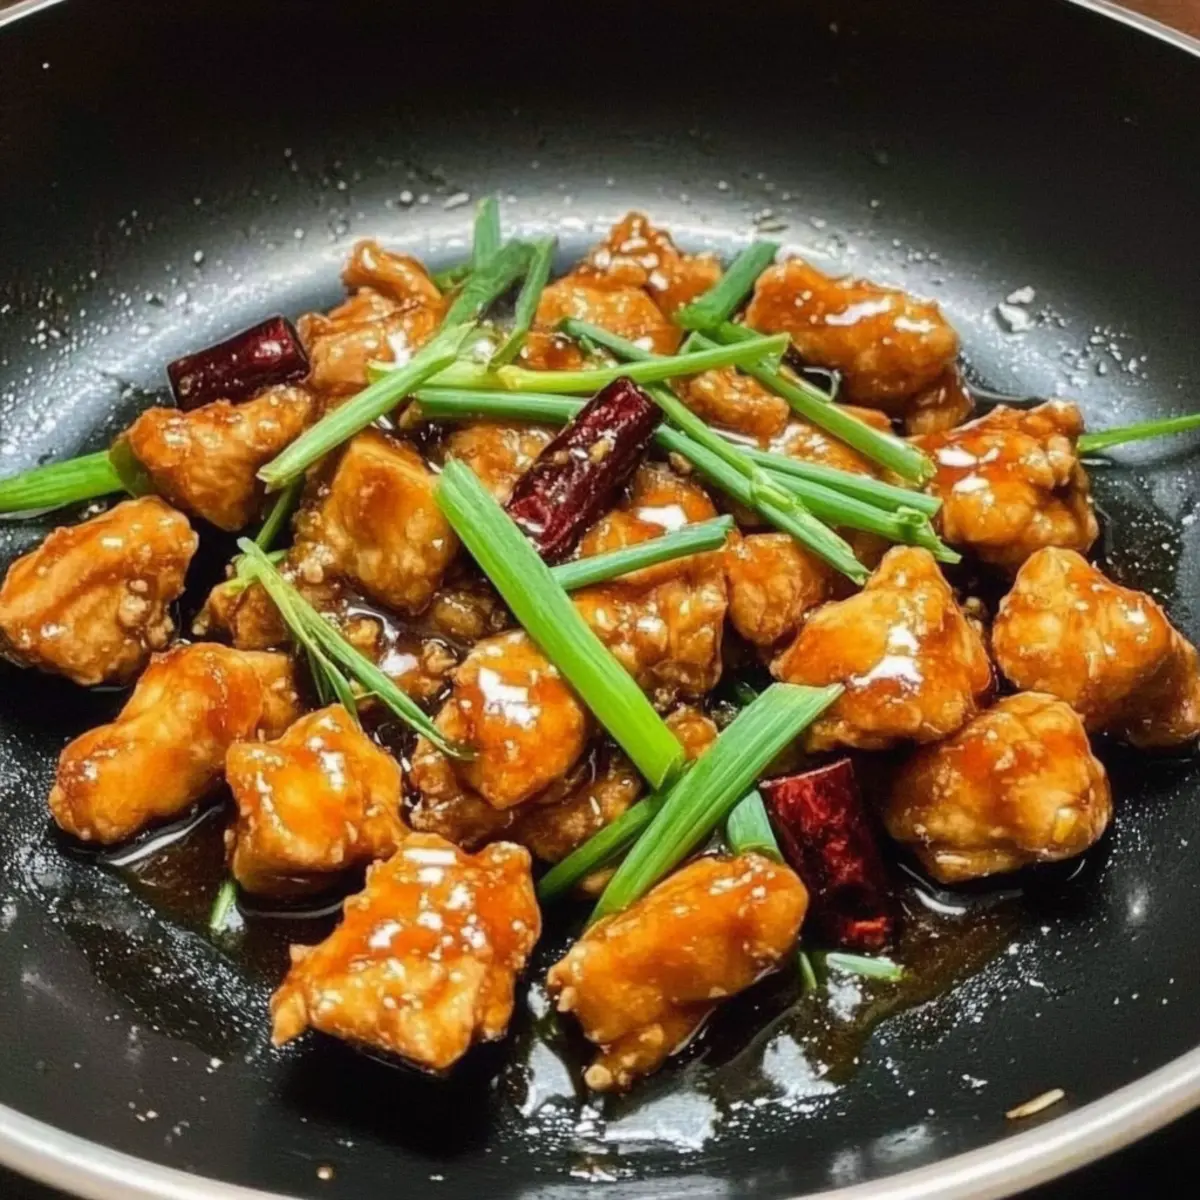
Step 7: Combine and Finish
Once the sauce has thickened to your liking, carefully add the fried chicken back into the wok. Toss everything together to ensure the crispy chicken pieces are evenly coated with the thickened sauce. Drizzle in a little sesame oil for added flavor, then serve your delicious Mongolian Chicken immediately with your choice of rice or noodles to soak up all that wonderful sauce.
Storage Tips for Mongolian Chicken
Fridge: Store leftover Mongolian Chicken in an airtight container for up to 3 days. The flavors will deepen, making the dish even more delicious upon reheating.
Freezer: To freeze, portion the chicken into manageable servings and place them in freezer-safe bags or containers. It will keep well for up to 2 months.
Reheating: For the best texture, reheat leftovers in a skillet over medium heat. Add a splash of water or stock to revive the sauce and ensure it’s moist.
Room Temperature: It’s advisable to let Mongolian Chicken cool at room temperature for no more than 2 hours before refrigerating or freezing to maintain food safety.
Mongolian Chicken: Customize Your Dish
Embrace the joy of personalizing your meal and make this recipe truly yours with these delightful variations!
- Gluten-Free: Substitute soy sauce with tamari or coconut aminos for a gluten-free option, ensuring everyone can enjoy this dish.
- Crispy Tofu: Replace chicken with cubed, drained tofu for a vegetarian twist. Coat and fry until golden for that satisfying crunch.
- Heat Lover’s Delight: Add crushed red pepper flakes or fresh sliced chilies while stir-frying for an extra kick that elevates your flavors.
- Veggie Boost: Toss in seasonal veggies like bell peppers, snow peas, or carrots towards the end of cooking to add color and nutrition.
- Sweet Alternatives: Instead of brown sugar, try maple syrup or agave nectar to give a unique sweetness with a hint of flavor.
- Noodle Upgrade: Serve over lo mein or rice noodles instead of plain rice for a more substantial meal that embraces those flavors.
- Coconut Cream: For a creamy texture, stir in a spoonful of coconut cream just before serving; it provides a delightful richness!
- Citrus Freshness: A squeeze of lime or lemon juice just before serving brings brightness and helps balance the dish’s sweetness beautifully.
If you’re going for heartier fare, my Santa Fe Chicken Skillet is another great recipe to check out, or enjoy this Mongolian Chicken over a warm side of Garlic Chicken Broccoli for a nutritious twist.
Make Ahead Options
These Mongolian Chicken delights are perfect for meal prep enthusiasts on the go! You can marinate the chicken and store it in the refrigerator for up to 24 hours, allowing it to soak up all the delicious flavors. Additionally, you can prepare the sauce in advance and refrigerate it for up to 3 days; this way, when you’re ready to cook, you can simply heat the sauce and finish the dish. To maintain quality, ensure the chicken is sealed tightly to prevent any moisture loss. When you’re ready to serve, fry the chicken, thicken the sauce, and combine everything as directed in the recipe. This will save you precious time while delivering that same irresistible, crispy goodness!
What to Serve with Mongolian Chicken
Imagine a bustling dinner table, brimming with delightful flavors and textures that perfectly complement the savory essence of this dish.
-
Steamed Jasmine Rice: Light and fluffy, it soaks up the rich sauce beautifully, creating a satisfying balance with every bite.
-
Stir-Fried Vegetables: A colorful medley of bell peppers and broccoli adds a fresh crunch and vibrant color, enhancing the visual and nutritional appeal of your meal.
-
Sesame Noodles: These lightly dressed noodles provide a nuanced texture and tantalizing flavor that pairs harmoniously with the sweetness of Mongolian chicken.
-
Crispy Garlic Bread: Golden-brown slices offer a delightful crunch while adding an inviting aroma, perfect for scooping up that sticky sauce.
-
Sweet and Sour Cucumber Salad: The refreshing acidity of cucumbers offsets the richness of the dish, making each bite a perfectly balanced experience.
-
Chilled White Wine: A glass of crisp Sauvignon Blanc or a light Riesling enhances the sweet and savory notes of the chicken, setting a pleasant dining mood.
Don’t forget dessert; a light fruit sorbet can cleanse the palate, wrapping up your meal on a refreshing note.
Expert Tips for Mongolian Chicken
-
Fry in Batches: To achieve perfectly crispy chicken, avoid frying too many pieces at once. Fry them in smaller batches to prevent steaming.
-
Dry Chicken Pieces: Make sure to pat the chicken dry before coating it with cornstarch. A dry surface helps achieve that desired crunch.
-
Taste Test: Always taste the sauce before completing the dish. Adjust sweetness or saltiness with more soy sauce or sugar as needed.
-
High Heat Cooking: Use high heat throughout the cooking process to keep the chicken crispy. If aromatics start to burn, lower the heat immediately.
-
Customize the Dish: Feel free to add your favorite vegetables for extra nutrition and flavor. Bell peppers and snap peas pair wonderfully with Mongolian Chicken!
Mongolian Chicken Recipe FAQs
What type of chicken is best for Mongolian Chicken?
I recommend using chicken thighs for this recipe, as they remain juicy and flavorful even after frying. You can also use chicken breasts, but make sure to cut them thinly for even cooking. Opt for fresh chicken that’s firm and devoid of any dark spots.
How can I store leftover Mongolian Chicken?
You can store leftovers in an airtight container in the refrigerator for up to 3 days. Be sure to let it cool at room temperature for no more than 2 hours before sealing to maintain food safety. The flavors deepen as it sits, making it even more delightful upon reheating.
Can I freeze Mongolian Chicken?
Absolutely! To freeze, portion the chicken into meal-sized servings and place them in freezer-safe bags or containers. It will stay fresh in the freezer for up to 2 months. When you’re ready to enjoy it again, simply thaw in the fridge overnight and reheat in a skillet.
What if my chicken isn’t crispy after frying?
If your chicken isn’t crispy, it could be due to overcrowding the pan or not allowing the oil to reach the proper temperature. Make sure to fry in batches to prevent steaming and ensure your oil is around 350°F (175°C). Pat the chicken dry before coating with cornstarch to help achieve that mouthwatering crunch.
Is Mongolian Chicken suitable for gluten-free diets?
Yes, you can easily make Mongolian Chicken gluten-free by using a gluten-free soy sauce such as tamari. Also, ensure that any other sauce or broth you use does not contain gluten. With these simple substitutions, you’ll still enjoy the comforting flavors without compromising dietary needs.
Mongolian Chicken: Quick Crispy Comfort Food That Delivers
Ingredients
Equipment
Method
- In a large mixing bowl, combine the chicken thighs with light soy sauce, dark soy sauce, garlic, ginger, and brown sugar. Mix well and let marinate for 15-20 minutes.
- In a separate bowl, whisk together chicken stock, light soy sauce, dark soy sauce, and brown sugar until fully combined.
- Take a small bowl, add a few tablespoons of the prepared sauce, sprinkle in the cornstarch and stir until you achieve a smooth slurry.
- Heat neutral oil in a wok over medium-high heat and shallow fry the marinated chicken for about 3-4 minutes on each side until golden brown.
- With leftover oil in the pan, reduce heat and add dried chilies, sauté for 30 seconds, then add garlic, ginger, and the white parts of the scallions.
- Return the flame to high, pour in the prepped sauce, bring to a simmer, and gradually stir in the cornstarch slurry until thickened.
- Add the fried chicken back into the wok, toss to coat with the sauce, drizzle in sesame oil, and serve immediately.