
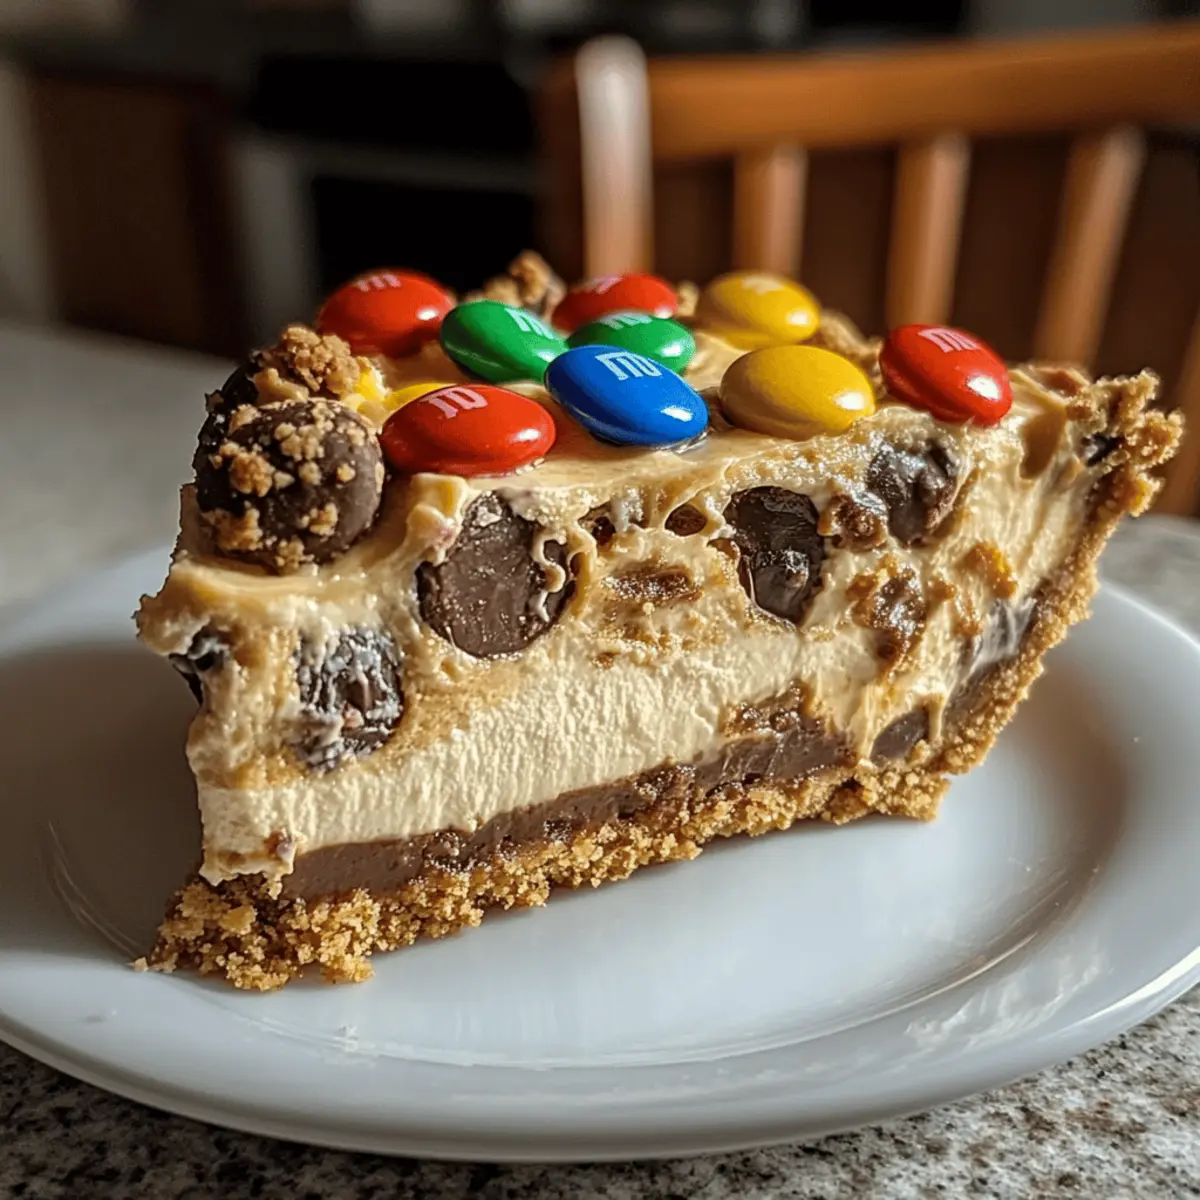
Have you ever thought about how a dessert can bring together the playful joy of childhood and the rich creaminess of adult indulgence? That’s exactly what my Monster Cookie Peanut Butter Cheesecake Pie delivers—a delightful fusion of flavors and textures that invites everyone to gather around for a slice. With a velvety peanut butter cheesecake filling nestled in a crunchy layer of crushed monster cookies, this dessert is not only vegetarian-friendly but also a true crowd-pleaser. Perfect for celebrations, it’s incredibly easy to whip up and can even be made ahead, leaving you plenty of time to enjoy the company of your loved ones. So, are you ready to impress your guests with this whimsical twist on a classic? Let’s dive into the details!
Why is this cheesecake pie a must-try?
Decadent Layers: The combination of creamy peanut butter cheesecake and a crunchy monster cookie topping creates an unforgettable experience in every bite.
Crowd-Pleasing Appeal: Perfect for gatherings, whether it’s a birthday or a casual get-together, this dessert is bound to impress and delight, making it an instant favorite among family and friends.
Easy Preparation: This recipe is straightforward and allows you to make it ahead of time, freeing you to enjoy your celebration.
Fun and Whimsical: With vibrant mini M&Ms dotting the top, the pie not only tastes fantastic but looks visually stunning too, making it a feast for the eyes!
If you’re looking for other delicious options, you might want to try the Honey Butter Chicken or indulge in a slice of Cake Gooey Cookie.
Monster Cookie Peanut Butter Cheesecake Pie Ingredients
-
For the Pie Crust
-
Pie Crust – Use store-bought for convenience or make a homemade crust for a personal touch.
-
For the Cheesecake Filling
-
Cream Cheese (8 oz) – Adds creaminess and structure to the filling; ensure it’s softened for easy mixing.
-
Peanut Butter (1 cup) – Provides rich flavor and creaminess; use creamy or chunky based on preference.
-
Powdered Sugar (1 cup) – Sweetens the filling and contributes to a smooth texture.
-
Whipped Cream (1/2 cup) – Lightens the texture of the filling; make fresh or use store-bought.
-
For the Topping
-
Monster Cookies (2 cups, crushed) – Adds crunch and sweetness to the topping; store-bought can be used for convenience.
-
Mini M&Ms (1/2 cup) – Provides color and added crunch on top; substitute with chocolate chips for a simpler topping.
Get ready to create an irresistible Monster Cookie Peanut Butter Cheesecake Pie that will be the star of your next gathering!
Step‑by‑Step Instructions for Monster Cookie Peanut Butter Cheesecake Pie
Step 1: Preheat Your Oven
Start by preheating your oven to 350°F (175°C). This step ensures that your Monster Cookie Peanut Butter Cheesecake Pie will bake evenly. While the oven is heating, gather all your ingredients and equipment, including a mixing bowl and an electric mixer, to ensure everything is ready for the fun part.
Step 2: Prepare the Pie Crust
Next, prepare your pie crust in a suitable pie dish. If using a store-bought crust, simply place it in the dish and set it aside. For a homemade crust, crush your favorite cookies or graham crackers, mix with melted butter, and press into the bottom and up the edges of the dish. This creates a sturdy base for your delicious cheesecake filling.
Step 3: Mix the Cheesecake Filling
In a mixing bowl, blend together 8 oz of softened cream cheese, 1 cup of peanut butter, and 1 cup of powdered sugar using an electric mixer on medium speed. Mix until the ingredients form a smooth and lump-free mixture, about 2-3 minutes. The rich filling will be the heart of your Monster Cookie Peanut Butter Cheesecake Pie, so make sure it’s well combined!
Step 4: Fold in the Whipped Cream
Once your mixture is smooth, gently fold in 1/2 cup of whipped cream. Use a spatula to incorporate it carefully, ensuring you maintain the lightness of the filling. This step adds a fluffy texture that beautifully contrasts with the crunchiness of your cookie topping, making your dessert irresistibly delectable.
Step 5: Spread the Filling in the Crust
Take the luscious cream cheese and peanut butter filling you’ve created and carefully spread it evenly into the prepared pie crust. Use a spatula to smooth the top for an attractive presentation. This creamy layer is what makes the Monster Cookie Peanut Butter Cheesecake Pie heavenly—be sure not to leave any gaps!
Step 6: Add the Topping
Generously sprinkle 2 cups of crushed monster cookies over the cheesecake filling. Follow this by scatter 1/2 cup of mini M&Ms over the top, ensuring an even distribution for both sweetness and color. This topping not only adds texture but also enhances the visual appeal of your Monster Cookie Peanut Butter Cheesecake Pie.
Step 7: Bake the Pie
Place the pie in your preheated oven and bake for approximately 25 minutes. The pie should be set with a slight jiggle in the center—this indicates it’s perfectly baked. The cookies on top will become beautifully golden, creating a wonderful contrast with the creamy filling below.
Step 8: Cooling and Chilling Time
Once baked, allow the pie to cool for about 30 minutes at room temperature. This cooling step is critical as it allows the flavors to meld. After that, transfer your Monster Cookie Peanut Butter Cheesecake Pie to the refrigerator for at least 2 hours, or until completely chilled, before slicing and serving.
How to Store and Freeze Monster Cookie Peanut Butter Cheesecake Pie
Fridge: Store leftovers tightly wrapped in plastic wrap or in an airtight container for up to 3-4 days. This keeps the rich flavors intact while preventing drying out.
Freezer: You can freeze this cheesecake pie for up to 2 months. Slice and wrap each piece individually in plastic wrap, then place them in a freezer-safe container.
Thawing: To enjoy, transfer the frozen pie or slices to the fridge and let them thaw overnight before serving. This maintains the creamy texture of the Monster Cookie Peanut Butter Cheesecake Pie.
Reheating: If you prefer it slightly warm, briefly microwave individual slices for about 10-15 seconds. Enjoy the delightful contrast of warm and cold!
Monster Cookie Peanut Butter Cheesecake Pie Variations
Feel free to get creative with this delightful pie; there are so many ways to personalize it to your taste!
- Nut Alternative: Replace peanut butter with almond or cashew butter for a unique nutty flavor.
- Crust Swap: Use graham cracker crumbs or chocolate cookie crumbs to create a different crust experience.
- Chocolate Twist: Blend in cocoa powder with the cream cheese mixture for a rich, chocolatey cheesecake.
- Less Sweet: Decrease powdered sugar to 3/4 cup if you’re looking for a less sweet dessert.
- Fruit Addition: Fold in crushed strawberries or raspberries into the cheesecake filling for a fruity surprise.
- Gluten-Free: Opt for gluten-free cookies for the crust and topping to make this dessert accessible.
- Nut-Free: Substitute the peanut butter with sunflower seed butter to keep it nut-free, perfect for school events.
- Crunchy Texture Boost: Toss in chopped nuts like pecans or walnuts among the monster cookies for added crunch.
This pie is so versatile that you could even serve it alongside a slice of Garlic Butter Honey for the savory lovers at your gathering!
What to Serve with Monster Cookie Peanut Butter Cheesecake Pie
Bring your dessert game to the next level with these delightful pairings that enhance every bite of this luscious pie.
-
Fresh Berries: Juicy strawberries or raspberries offer a refreshing contrast to the rich cheesecake, making each bite balanced and bright. The acidity of the berries beautifully cuts through the creamy sweetness of the pie.
-
Vanilla Ice Cream: A scoop of velvety vanilla ice cream adds a luscious creaminess that complements the pie’s textures while enhancing its sweetness. It creates a wonderful harmony that’s perfect for a cozy dessert experience.
-
Coffee or Espresso: Rich, robust coffee acts as the perfect palate cleanser, allowing the dessert’s flavors to shine. A sip of espresso elevates the indulgent experience, making it feel extra special.
-
Chocolate Sauce Drizzle: Warm chocolate sauce adds a decadent touch to each slice, enhancing the already rich flavors of the pie. The glossy finish provides an extra layer of sweetness that chocolate lovers will adore.
-
Caramel Sauce: A drizzle of salted caramel introduces another layer of flavor and a delightful sticky texture that pairs wonderfully with the crunchy topping. The slight saltiness enhances the sweetness, creating an unforgettable dessert experience.
-
Whipped Cream Topping: Light, fluffy whipped cream adds a cloud-like texture atop each slice, elevating the overall experience. This classic pairing not only enhances presentation but also balances the richness of the pie.
Indulge your creativity with these delicious accompaniments and create a memorable dessert table!
Expert Tips for Monster Cookie Peanut Butter Cheesecake Pie
-
Cream Cheese Care: Ensure the cream cheese is softened to room temperature for effortless mixing and a creamy filling. Don’t skip this step!
-
Gentle Folding: When incorporating whipped cream, fold gently to keep the filling light and airy. Overmixing can lead to a denser texture.
-
Cooling is Key: Allowing the pie to cool at room temperature before refrigeration enhances the flavors. It’s a must for the best Monster Cookie Peanut Butter Cheesecake Pie!
-
Even Baking: Bake until the center has a slight jiggle; it will continue to set while cooling. Avoid overbaking, as this can affect the creamy texture.
-
Garnish with Care: Scatter mini M&Ms evenly for aesthetic appeal and flavor distribution. They add that pop of color and sweetness your dessert deserves!
Make Ahead Options
These Monster Cookie Peanut Butter Cheesecake Pies are perfect for busy home cooks looking to save time without sacrificing flavor! You can prepare the pie up to 24 hours in advance by mixing the creamy filling and spreading it into the crust; simply cover it tightly with plastic wrap and refrigerate. Additionally, you can crush the monster cookies and keep them separate (to retain their crunch) until you’re ready to bake. When the time comes to serve, just top with the crushed cookies and mini M&Ms before baking, ensuring your dessert is just as delightful and fresh as if it were made that day! With these make-ahead tips, you’ll be all set to impress your guests while enjoying a stress-free celebration!
Monster Cookie Peanut Butter Cheesecake Pie Recipe FAQs
What type of peanut butter should I use?
You can use either creamy or chunky peanut butter in this Monster Cookie Peanut Butter Cheesecake Pie. If you prefer a smoother filling, go for creamy. If you enjoy some texture and bites of peanut, then chunky is your best bet!
How should I store leftovers?
Store leftovers of the Monster Cookie Peanut Butter Cheesecake Pie tightly wrapped in plastic wrap or in an airtight container in the fridge for up to 3-4 days. This helps retain the pie’s rich flavors while preventing it from drying out.
Can I freeze the cheesecake pie?
Absolutely! You can freeze your Monster Cookie Peanut Butter Cheesecake Pie for up to 2 months. To do this, slice the pie and wrap each piece individually in plastic wrap, then place them in a freezer-safe container. For the best results, thaw in the fridge overnight before serving.
What if my cheesecake pie cracks while baking?
If you notice cracks during baking, don’t worry! It can happen when the filling is overbaked or if the oven temperature is too high. To avoid this in the future, ensure you bake until there’s a slight jiggle in the center and always preheat your oven before baking. If cracks do form, you can cover them with the crushed monster cookie topping for a rustic look!
Is this dessert suitable for vegetarians?
Yes! This Monster Cookie Peanut Butter Cheesecake Pie is completely vegetarian-friendly. However, if you have specific dietary restrictions or allergies, it’s always a good idea to double-check the labels of store-bought ingredients like the pie crust and whipped cream.
Can I make this pie ahead of time?
Definitely! This pie can be made a day in advance. It actually benefits from resting in the fridge for a bit, as this allows the flavors to meld beautifully. Just keep it tightly covered to ensure it stays fresh!
Irresistible Monster Cookie Peanut Butter Cheesecake Pie Delight
Ingredients
Equipment
Method
- Preheat your oven to 350°F (175°C) and gather all ingredients and equipment.
- Prepare your pie crust in a suitable pie dish. If using a store-bought crust, place it in the dish. For a homemade crust, crush cookies or graham crackers, mix with melted butter, and press into the dish.
- In a mixing bowl, blend cream cheese, peanut butter, and powdered sugar with an electric mixer on medium speed until smooth and lump-free, about 2-3 minutes.
- Gently fold in the whipped cream using a spatula.
- Spread the filling evenly into the prepared pie crust, smoothing the top.
- Sprinkle crushed monster cookies over the cheesecake filling and follow with mini M&Ms.
- Bake the pie in the preheated oven for approximately 25 minutes until set with a slight jiggle in the center.
- Allow the pie to cool for 30 minutes at room temperature, then refrigerate for at least 2 hours before serving.