
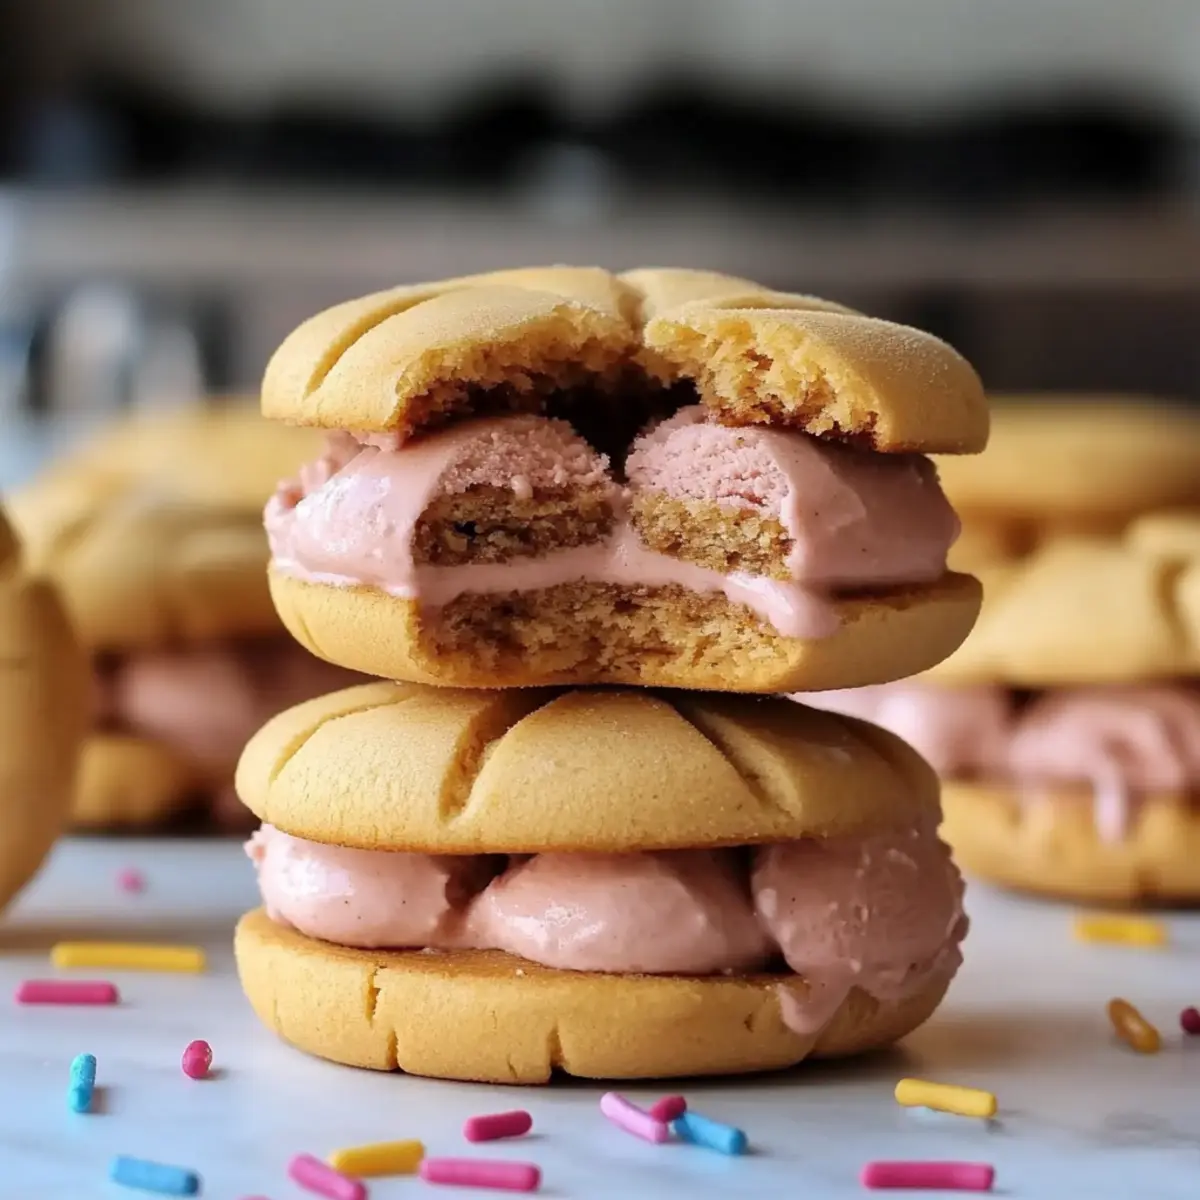
As summer days beckon, there’s no better way to indulge than with a parenting twist on a classic treat: Peanut Butter Cup Ice Cream Sandwiches. Picture this: the perfect combination of soft, chewy cookies embraced by creamy peanut butter ice cream, marrying two beloved confections in every delicious bite. Not only are these sandwiches an easy dessert recipe that will wow family and friends, but they also make for a sweet centerpiece at summer get-togethers or movie nights. With just a handful of ingredients, you can create an impressive treat that adults and kids alike will rush to enjoy. Ready to take your dessert game to the next level? Let’s dive into these creative ice cream sandwich recipes, and soon you’ll be serving up joy one scoop at a time!
Why Peanut Butter Cup Sandwiches?
Sumptuous blend of flavors: These Peanut Butter Cup Ice Cream Sandwiches marry the rich taste of chocolate and the nutty delight of peanut butter, creating an irresistible dessert. Easy assembly means you can whip them up in no time, making them a fantastic crowd-pleaser for gatherings. Kid-friendly and fun to make, they invite little hands to help scoop and assemble. Versatile options let you get creative by swapping in different ice cream flavors or adding crunchy nuts. Perfect for hot summer days or cozy movie nights, these sandwiches are sure to be a hit—just like our Honey Butter Chicken or Garlic Butter Steak!
Peanut Butter Cup Ice Cream Sandwich Ingredients
For the Cookies
• Butter – adds richness and helps achieve a soft, chewy texture.
• Granulated Sugar – sweetens the cookies and creates a delightful contrast with the ice cream.
• Brown Sugar – brings warmth and moisture, enhancing the chewiness of the cookies.
• All-Purpose Flour – provides structure; can be swapped for whole wheat or gluten-free flour.
• Baking Powder – helps the cookies rise slightly for that perfect texture.
• Egg – binds ingredients together for a cohesive dough; substitute with flax egg for a vegan option.
• Vanilla Extract – enhances flavor; feel free to experiment with other extracts for variety.
For the Ice Cream Filling
• Peanut Butter Ice Cream – serves as the creamy, nutty filling that takes these sandwiches to the next level; any flavor can be substituted if desired.
For Optional Toppings
• Miniature Chocolate Chips – sprinkle them on the ice cream layer for an extra crunch.
• Crushed Peanuts – adds texture and a salty contrast to sweet elements.
• Chocolate Sauce – drizzle over the sandwiches for additional sweetness and elegance.
Step‑by‑Step Instructions for Peanut Butter Cup Ice Cream Sandwiches
Step 1: Prep the Oven and Cookie Dough
Preheat your oven to 350°F (175°C). In a large mixing bowl, cream together the softened butter, granulated sugar, and brown sugar until the mixture appears light and fluffy, about 3 minutes. Next, add the egg and vanilla extract, mixing until combined. In a separate bowl, whisk together the flour and baking powder, then gradually blend this dry mixture into the wet ingredients until a cohesive dough forms.
Step 2: Scoop and Bake the Cookies
Use a tablespoon or cookie scoop to drop mounds of dough onto a parchment-lined baking sheet, spaced about 2 inches apart. Bake in the preheated oven for 10-12 minutes, or until the edges are lightly golden and firm while the centers remain soft. Once baked, remove them from the oven and allow the cookies to cool on a wire rack for about 10 minutes until completely cool.
Step 3: Prepare the Ice Cream Filling
While your cookies are cooling, take the peanut butter ice cream out of the freezer to soften slightly for easier scooping. Allow it to sit at room temperature for about 5-10 minutes until it’s easy to work with, but not melting. This creamy, nutty ice cream will create a delicious filling for your Peanut Butter Cup Ice Cream Sandwiches.
Step 4: Assemble the Ice Cream Sandwiches
Once the cookies are cool, turn half of them flat side up. Generously scoop a portion of softened peanut butter ice cream onto the center of each cookie. Gently press another cookie, flat side down, onto the ice cream, creating a sandwich. Ensure the cookies are evenly matched for a perfect bite-sized treat.
Step 5: Freeze the Sandwiches for Firmness
To achieve the ideal texture for your Peanut Butter Cup Ice Cream Sandwiches, place the assembled sandwiches in the freezer for at least 30 minutes. This will allow the ice cream to firm up and make the sandwiches easier to handle. Enjoy the process as the anticipation grows for your delightful summer treat!
Step 6: Serve and Enjoy!
After the sandwiches have chilled and firmed up, remove them from the freezer and let them sit for a few minutes at room temperature before serving. This short wait enhances the flavors and makes biting into your Peanut Butter Cup Ice Cream Sandwich even more enjoyable with that perfect creamy consistency.

Expert Tips for Peanut Butter Cup Ice Cream Sandwiches
- Cookie Consistency: Ensure you do not overbake the cookies; they should remain soft and chewy in the center for that perfect texture.
- Soften Ice Cream: Let the peanut butter ice cream sit out for 5-10 minutes before scooping. This makes assembly easier and smoother.
- Even Sizes: Use a cookie scoop or measuring spoon to ensure uniform cookie sizes, making your Peanut Butter Cup Ice Cream Sandwiches consistent and easy to enjoy.
- Chill Well: After assembling, freeze the sandwiches for at least 30 minutes. This helps the ice cream firm up, making them less messy to eat.
- Creative Toppings: Don’t hesitate to get creative with toppings like crushed peanuts or chocolate sauce. These add flavor and visual appeal to your sandwiches.
Variations & Substitutions for Peanut Butter Cup Ice Cream Sandwiches
Feel free to get creative with these sandwiches; your taste buds will thank you!
-
Nut-Free:
Swap peanut butter ice cream with sunflower seed butter ice cream for a delicious alternative that’s safe for nut allergies. -
Vegan Delight:
Use flax eggs, coconut oil, and dairy-free ice cream to tailor these treats for a plant-based lifestyle. Everyone deserves a tasty dessert! -
Gluten-Free:
Swap all-purpose flour for a gluten-free blend. Serve these sandwiches proudly to gluten-sensitive friends without missing out on flavor! -
Chunky Peanut Butter:
For a delightful crunch, mix in chunky peanut butter instead of creamy in your ice cream. This adds a fantastic texture to each bite! -
Flavor Swaps:
Experiment with different ice cream flavors—chocolate, cookie dough, or even strawberry for a fruity twist! Your imagination is the limit. -
Crunchy Toppings:
Roll the edges in crushed pretzels or chopped peanuts for a salty crunch that pairs beautifully with the sweet ice cream. -
Decadent Chocolate Drizzle:
Drizzle melted chocolate on top before serving for an impressive touch. Check out our recipe for Garlic Butter Honey to elevate your dessert experience. -
Flavor Infusion:
Add a teaspoon of espresso powder to the cookie dough for a coffee flavor boost—it pairs wonderfully with chocolate or peanut butter ice cream!
Now go on, let your creativity soar as you personalize your Peanut Butter Cup Ice Cream Sandwiches!
Storage Tips for Peanut Butter Cup Ice Cream Sandwiches
Fridge: Store any leftover sandwiches in an airtight container for up to 3 days, but freezing is recommended to maintain freshness and texture.
Freezer: Wrap each sandwich in plastic wrap or place in a zip-top freezer bag for up to 2 weeks. This keeps them firm and ready for indulgence whenever cravings strike.
Reheating: If you prefer a softer treat, let the sandwiches sit at room temperature for about 5 minutes before enjoying—this gives the ice cream an ideal creamy consistency.
Assembly Reminder: For best results, assemble sandwiches shortly before serving, allowing the peanut butter ice cream to retain its delightful texture and flavor.
What to Serve with Peanut Butter Cup Ice Cream Sandwiches
Nothing pairs better with a summer dessert than a few tasty sides to elevate the fun experience for your family and friends.
- Fresh Fruit Skewers: Juicy strawberries and pineapple slices provide a refreshing contrast to your rich ice cream sandwiches. The natural sweetness and vibrant colors will please every palate.
- Chocolate Milkshake: Creamy, indulgent, and utterly decadent, a thick chocolate milkshake adds a nostalgic touch, making each bite feel like a special occasion. Sip and savor while indulging in your treats!
- Salty Pretzel Bites: The crunchy, salty texture of pretzel bites contrasts perfectly with the smooth ice cream and cookies. Plus, they add a delightful playfulness to your snack table.
- Vanilla Whipped Cream: A dollop of freshly whipped cream complements the chocolate and peanut butter flavors and adds a light, airy texture that enhances each bite of your delightful sandwiches.
- Nutty Trail Mix: A side of homemade trail mix blends crunchy nuts, dried fruits, and a hint of chocolate, allowing guests to nibble on something wholesome while continuing to enjoy the sweetness of their ice cream sandwiches.
- Nutty Iced Coffee: An iced coffee with a hint of hazelnut or mocha flavor pairs beautifully, combining caffeine with dessert in a harmonious union of flavors that coffee lovers adore.
Make Ahead Options
These Peanut Butter Cup Ice Cream Sandwiches are a fantastic choice for meal prep aficionados! You can bake the cookies up to 3 days in advance; simply store them in an airtight container at room temperature to maintain their softness. Additionally, the peanut butter ice cream can be scooped on the cookies and assembled up to 24 hours ahead of time—just remember to freeze the sandwiches immediately to keep the ice cream firm. When it’s time to enjoy, let the sandwiches sit at room temperature for about 5 minutes before serving to achieve that perfectly creamy texture. By prepping in advance, you’ll save precious time, making these delightful treats ready to share with family and friends whenever the craving strikes!
Peanut Butter Cup Ice Cream Sandwiches Recipe FAQs
What kind of ice cream should I use for the filling?
Absolutely! While peanut butter ice cream works beautifully in these sandwiches, feel free to switch it up based on your preferences. You can use chocolate ice cream for a classic combination, or even vanilla for a more subtle blend. Just make sure the flavor complements the rich cookies.
How should I store my ice cream sandwiches?
Very good question! To keep your Peanut Butter Cup Ice Cream Sandwiches fresh, wrap each one tightly in plastic wrap or place them in a zip-top freezer bag. They can be stored in the freezer for up to 2 weeks. This way, you’ll always have a delightful treat on hand!
Can you freeze the assembled ice cream sandwiches?
Absolutely! After assembling the sandwiches, freeze them for at least 30 minutes to allow the ice cream to firm up. This step is crucial as it enhances the texture and makes them easier to bite into. Just remember to wrap them well to avoid freezer burn.
What if my cookies come out too hard?
No worries! If you find that your cookies have become too hard, it’s likely they were overbaked. Bake them just until the edges are light golden and soft in the center for that perfect chewy texture. If they do end up hard, try enjoying them with a scoop of ice cream on top to soften the impact!
Can I make these ice cream sandwiches vegan?
Very much so! To make your Peanut Butter Cup Ice Cream Sandwiches vegan, substitute butter with coconut oil or vegan margarine. For the egg, you can use a flax egg—mix 1 tablespoon of ground flaxseed with 2.5 tablespoons of water, let it sit until it thickens, and then add it to your cookie dough as a binder. For the ice cream, opt for your favorite dairy-free version to keep it totally plant-based.
How long can I keep the assembled ice cream sandwiches in the fridge?
For the best taste and texture, it’s recommended to store any leftover sandwiches in the fridge for up to 3 days; however, they will start to lose their freshness quickly. To maintain their delightful creaminess, keeping them in the freezer is ideal!
Peanut Butter Cup Ice Cream Sandwiches for a Sweet Retreat
Ingredients
Equipment
Method
- Preheat your oven to 350°F (175°C). Cream together the softened butter, granulated sugar, and brown sugar until light and fluffy, about 3 minutes.
- Add the egg and vanilla extract, mixing until combined. Whisk together flour and baking powder in a separate bowl, then blend into wet ingredients until a cohesive dough forms.
- Drop mounds of dough onto a parchment-lined baking sheet, spaced about 2 inches apart. Bake for 10-12 minutes until edges are golden and centers remain soft.
- Remove cookies from the oven and cool on a wire rack for about 10 minutes.
- Soften peanut butter ice cream at room temperature for 5-10 minutes until easy to scoop.
- Turn half the cookies flat side up, scoop peanut butter ice cream onto each, and press another cookie on top to create a sandwich.
- Freeze assembled sandwiches for at least 30 minutes to firm up the ice cream.
- Remove from freezer, let sit for a few minutes before serving for enhanced flavors.