
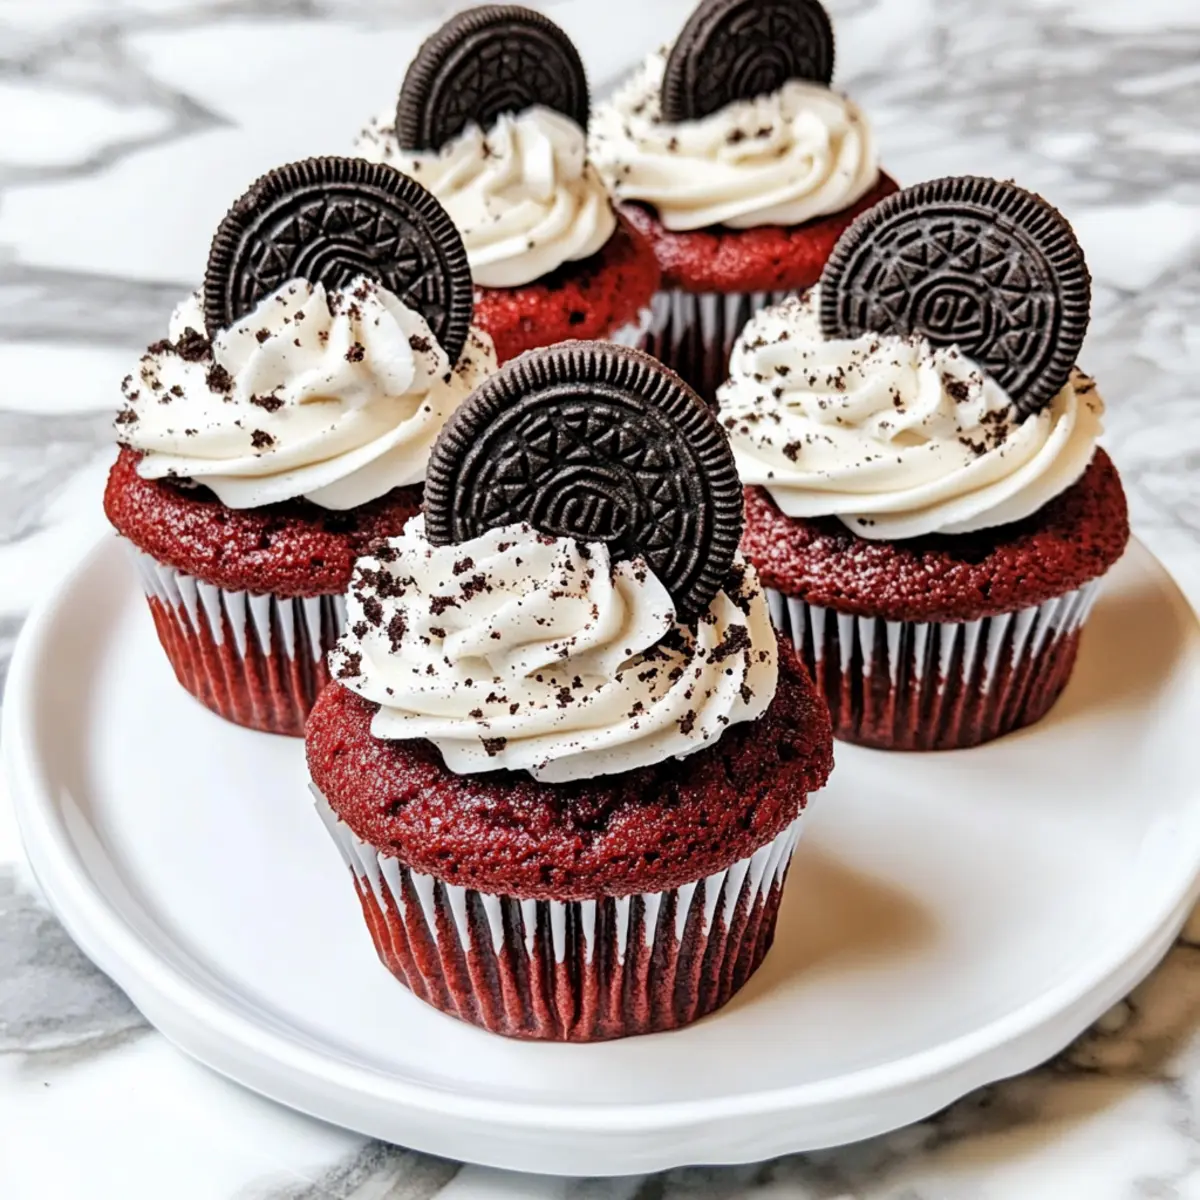
While rummaging through my pantry, I unearthed a forgotten treasure—half a pack of Oreos. Instantly inspired, I decided to whip up a batch of Easy Red Velvet Oreo Cupcakes that would make anyone’s sweet tooth sing. These delightful cupcakes are not only a breeze to make but also bring the whimsical twist of a hidden Oreo surprise at the bottom, making them an instant crowd-pleaser for any occasion. Topped with a luscious Oreo buttercream frosting, these treats are perfect for celebrations, cozy gatherings, or just a well-deserved indulgence after a long day. And the best part? They can be ready in just 35 minutes! Curious how to elevate your baking game with these irresistible cupcakes? Let’s dive into the recipe!
Why Are These Cupcakes So Irresistible?
Decadent Flavor: Each bite combines rich red velvet and creamy Oreo, creating a delightful explosion of taste.
Surprise Inside: A hidden Oreo at the bottom adds a fun twist, making these cupcakes a unique treat for guests.
Quick and Easy: With just 35 minutes from start to finish, you can whip up these treats in no time—a perfect solution for unexpected gatherings!
Versatile Treat: Dress them up for parties or enjoy them as a weeknight indulgence; they’re suitable for any occasion or craving.
Gorgeous Presentation: Topped with luscious Oreo buttercream and garnished with Oreo crumbs, these cupcakes are as visually stunning as they are delicious—just like our Lemon Velvet Cake.
Crowd-Pleaser: Whether it’s a birthday or just a cozy night in, these cupcakes will impress everyone. Trust me, they’ll vanish in no time!
Red Velvet Oreo Cupcake Ingredients
These ingredients combine to create the ultimate cupcake experience!
For the Batter
• All-purpose flour – Provides the structure; can substitute with gluten-free flour for a gluten-free version.
• Cocoa powder – Adds a rich chocolate flavor; ensure it’s unsweetened for the best taste.
• Baking soda – Essential leavening agent; helps the cupcakes rise beautifully.
• Salt – Enhances all the flavors; consider reducing if you use salted butter.
• Buttermilk – Offers moisture and a slight tang; substitute with milk + 1 tsp vinegar if needed.
• White vinegar – Reacts with baking soda to help the batter rise perfectly.
• Vanilla extract – Enhances the overall flavor; use pure vanilla for superior taste.
• Butter (softened) – Adds richness and fluffiness to the batter; make sure it’s at room temperature.
• Granulated sugar – Provides sweetness and structure; brown sugar can add a deeper flavor.
• Large egg – Binds ingredients together; no egg substitute suggested for the best result.
• Red food coloring – Gives that classic red hue; omit if you prefer a chocolate cupcake look.
• Oreo cookies – Delivers a delightful cookies-and-cream twist; feel free to choose any Oreo variety based on your taste.
For the Frosting
• Powdered sugar – Sweetens the frosting and contributes to a creamy texture.
• Heavy cream – Helps achieve a luscious frosting consistency; can substitute with milk for a lighter version.
• Crushed Oreo cookies – Adds decoration and an extra crunch on top of the frosting.
Dive into this delicious Red Velvet Oreo Cupcake recipe, and enjoy every sweet moment of baking!
Step‑by‑Step Instructions for Red Velvet Oreo Cupcakes
Step 1: Preheat and Prepare
Begin by preheating your oven to 350°F (175°C). While it warms up, line a muffin tin with your favorite cupcake liners, making sure they are placed securely to hold the batter. This step is crucial as it sets the stage for your red velvet Oreo cupcakes, giving them a lovely foundation.
Step 2: Mix Dry Ingredients
In a medium bowl, whisk together 1 ½ cups of all-purpose flour, 1 tablespoon of unsweetened cocoa powder, 1 teaspoon of baking soda, and ½ teaspoon of salt. This dry mixture is key to achieving the right balance and flavor in your cupcakes, so ensure there are no lumps. Set aside while you prepare the wet ingredients.
Step 3: Combine Wet Ingredients
In a small bowl, mix together 1 cup of buttermilk, 1 tablespoon of white vinegar, and 1 teaspoon of vanilla extract. Stir these together until well combined. This tangy mixture will play an essential role in making your red velvet Oreo cupcakes moist and delicious.
Step 4: Cream Butter and Sugar
In a large bowl, cream together ½ cup of softened butter and 1 cup of granulated sugar using a hand mixer on medium speed until the mixture is light and fluffy, about 3-4 minutes. This process incorporates air into the batter, essential for creating tender cupcakes.
Step 5: Add Egg and Coloring
Beat in 1 large egg and 1 tablespoon of red food coloring into the fluffy butter and sugar mixture until fully combined and vibrant. The egg serves to bind your ingredients and the food coloring gives these red velvet Oreo cupcakes their signature hue, making them irresistible.
Step 6: Alternate Adding Ingredients
Gently alternate adding the dry ingredients and the buttermilk mixture to the batter, starting and ending with the dry ingredients. Mix on low speed just until combined—be careful not to overmix, as this can affect the cupcakes’ fluffiness. The batter should be well-blended but still slightly lumpy.
Step 7: Assemble Cupcakes
Fill the cupcake liners halfway with batter, then gently press an Oreo into each one. Cover it with a bit more batter until each liner is about two-thirds full. This hidden treat will surprise your guests and elevate your red velvet Oreo cupcakes to the next level, adding a delightful cookies-and-cream twist.
Step 8: Bake to Perfection
Place the muffin tin in the preheated oven and bake for 20 minutes. To check for doneness, insert a toothpick into the center of one cupcake; it should come out clean or with a few moist crumbs. Once baked, allow the cupcakes to cool in the pan for 5 minutes before transferring them to a wire rack to cool completely.
Step 9: Make the Frosting
In a medium bowl, beat ½ cup of softened butter until creamy. Gradually add 2 cups of powdered sugar, 1 teaspoon of vanilla extract, a pinch of salt, and 2 tablespoons of heavy cream. Whip this frosting until it’s smooth and fluffy, achieving a lovely, spreadable texture for your red velvet Oreo cupcakes.
Step 10: Decorate with Delight
Fold in ½ cup of crushed Oreos into the frosting for an added crunch and flavor boost. Next, take a piping bag or simply use a knife to pipe or spread the fluffy Oreo buttercream frosting on top of each cooled cupcake. Finish with a sprinkle of more crushed Oreos and a half Oreo on top for a stunning visual presentation.
Red Velvet Oreo Cupcakes Variations
Feel free to get creative and tailor these decadent red velvet Oreo cupcakes to fit your taste buds!
-
Gluten-Free: Use a gluten-free flour blend to make them suitable for those with wheat sensitivities while keeping the texture delightful.
-
Chocolate Oreo Twist: Substitute the red food coloring with cocoa powder for a richer chocolate taste without losing that iconic flavor.
-
Cream Cheese Frosting: Replace the Oreo buttercream with a tangy cream cheese frosting for a classic red velvet touch that’s always a crowd-pleaser.
-
Different Oreo Varieties: Experiment with flavors like mint or peanut butter Oreos for an exciting twist that adds a unique flavor profile to your cupcakes.
-
Fruity Addition: Add a layer of raspberry or strawberry jam inside before baking for a beautifully fruity surprise, making every bite deliciously different.
-
Lighter Frosting: Swap heavy cream with whipped coconut cream for a lighter, dairy-free frosting option that still delivers on sweetness.
Combining flavors like coconut with Oreos can create a fantastic tropical feel. -
Mini Cupcakes: Scale down the recipe to create mini cupcakes that are perfect for parties or just to enjoy a bite-sized treat!
-
Spicy Kick: Add a hint of cinnamon or cayenne pepper to the batter for a spicy surprise; it complements the chocolate beautifully and adds depth.
These variations can make the experience even more fun and offer something for everyone enjoying your delightful treats. If you’re looking for more spectacular desserts, check out our scrumptious Patriotic Cupcakes Festive recipes!
Make Ahead Options
These Easy Red Velvet Oreo Cupcakes are perfect for busy home cooks looking to save time! You can make the cupcakes themselves up to 24 hours in advance; simply bake them, then allow them to cool completely. Once cooled, store them in an airtight container at room temperature to maintain their moist texture. For the best flavor, prepare the Oreo buttercream frosting a day ahead as well—just refrigerate it in an airtight container. When you’re ready to serve, simply frost the cupcakes and garnish with crushed Oreos or a half Oreo on top for that delightful finishing touch. Enjoy the convenience and deliciousness with minimal effort!
What to Serve with Easy Red Velvet Oreo Cupcakes
Indulging in these luscious treats is just the start—let’s elevate your dessert spread to heavenly heights!
- Milkshake Madness: A classic vanilla milkshake echoes the Oreo flavors while adding a nostalgic, creamy touch everyone will love.
- Rich Espresso: The bold flavors of a freshly brewed espresso complement the sweet cupcakes beautifully, creating a delightful contrast that awakens your palate.
- Berry Medley: A mix of fresh strawberries and blueberries adds a burst of freshness and balances out the rich sweetness of the desserts.
- Chocolate Dipped Strawberries: These decadent bites of fruit provide a luxurious touch that pairs perfectly with the chocolate notes of the cupcakes.
- Mini Cheesecakes: Their creamy texture and subtle tartness create a delightful interplay with the rich flavors of the red velvet Oreo cupcakes.
- Caramel Sauce Drizzle: A warm drizzle of caramel sauce atop these cupcakes adds an indulgent twist, enhancing the overall flavor experience.
- Fizzy Lemonade: The zesty brightness of a bubbly lemonade can cut through the sweetness, offering a refreshing sip alongside these chocolatey delights.
- Vanilla Ice Cream: Scoops of smooth vanilla ice cream melt in your mouth and complement the soft cupcakes in a blissful, creamy embrace.
- Chocolate Tart: This rich dessert heightens the chocolate experience, leaving your taste buds dancing with joy at every bite.
How to Store and Freeze Red Velvet Oreo Cupcakes
Fridge: Store cupcakes in an airtight container in the refrigerator for up to 5 days to maintain freshness and flavor.
Freezer: For longer storage, freeze un-frosted cupcakes in a single layer, wrapped tightly in plastic wrap and then placed in a freezer bag, for up to 2 months.
Thawing: When ready to enjoy, thaw cupcakes in the refrigerator overnight before frosting and serving, ensuring the best texture remains intact.
Reheating: Gently reheat frosted cupcakes in the microwave for about 10-15 seconds to soften the frosting and bring back that fresh-baked feel.
Expert Tips for Red Velvet Oreo Cupcakes
-
Avoid Overmixing: Mixing the batter too much can lead to dense cupcakes. Stir gently until just combined for a light and fluffy texture.
-
Cooling Is Key: Make sure your cupcakes are completely cool before frosting; otherwise, the frosting will melt and lose its beautiful shape.
-
Perfectly Pressed Oreos: Press the Oreos gently into the batter to ensure they stay in place while baking, creating a lovely hidden surprise in each cupcake.
-
Customize Your Flavors: Feel free to experiment with different Oreo varieties or even add a splash of espresso to the batter for an extra kick!
-
Presentation Matters: Garnish with more crushed Oreos or colorful sprinkles to elevate your red velvet Oreo cupcakes beautifully for any celebration.
Red Velvet Oreo Cupcakes Recipe FAQs
What type of Oreos should I use for my Red Velvet Oreo Cupcakes?
Feel free to use any variety of Oreos that you like or have on hand! Classic, double-stuffed, or even seasonal flavors can all add a unique twist to your cupcakes. I often experiment with different kinds to surprise my family and friends—this adds to the fun!
How should I store my Red Velvet Oreo Cupcakes?
Store cupcakes in an airtight container in the refrigerator for up to 5 days. This helps maintain their moisture and flavor. I recommend placing parchment paper between layers to prevent sticking and keep them fresh longer.
Can I freeze Red Velvet Oreo Cupcakes?
Absolutely! To freeze, first let the cupcakes cool completely. Then, wrap each un-frosted cupcake tightly in plastic wrap and place them in a freezer bag for up to 2 months. When ready to enjoy, simply thaw them in the refrigerator overnight before frosting them.
What if my cupcakes don’t rise?
If your cupcakes don’t rise properly, it could be due to a few factors. First, check that your baking soda is fresh; old baking soda can lose its leavening power. Also, ensure you’re adding the vinegar, as it reacts with the baking soda for that perfect rise. Finally, be cautious not to overmix your batter.
Is this recipe suitable for people with dietary restrictions?
The Red Velvet Oreo Cupcakes do contain gluten, dairy, and eggs. However, you can easily make substitutions: use gluten-free flour for a gluten-free version, and try a dairy-free milk and egg replacement. If there are allergy concerns, make sure to check the labels on the Oreos.
What should I do if my frosting is too runny?
If your Oreo buttercream frosting appears runny, it’s likely lacking powdered sugar. Gradually add more powdered sugar, mixing thoroughly until you reach your desired consistency. If it’s too thick, add a teaspoon of heavy cream or milk to loosen it up.
Decadent Red Velvet Oreo Cupcakes That Wow Every Bite
Ingredients
Equipment
Method
- Preheat your oven to 350°F (175°C) and line a muffin tin with cupcake liners.
- In a medium bowl, whisk together the dry ingredients: flour, cocoa powder, baking soda, and salt.
- In a small bowl, mix buttermilk, white vinegar, and vanilla extract until well combined.
- In a large bowl, cream butter and sugar until light and fluffy using a hand mixer.
- Beat in the egg and red food coloring until fully combined.
- Gently alternate adding dry ingredients and buttermilk mixture to the batter, mixing until just combined.
- Fill each cupcake liner halfway with batter, press an Oreo into each, then cover with more batter.
- Bake for 20 minutes, cool in the pan for 5 minutes before transferring to a wire rack.
- Beat together butter, powdered sugar, vanilla extract, a pinch of salt, and heavy cream to make frosting.
- Fold in crushed Oreos, then pipe or spread frosting on cooled cupcakes and garnish.