
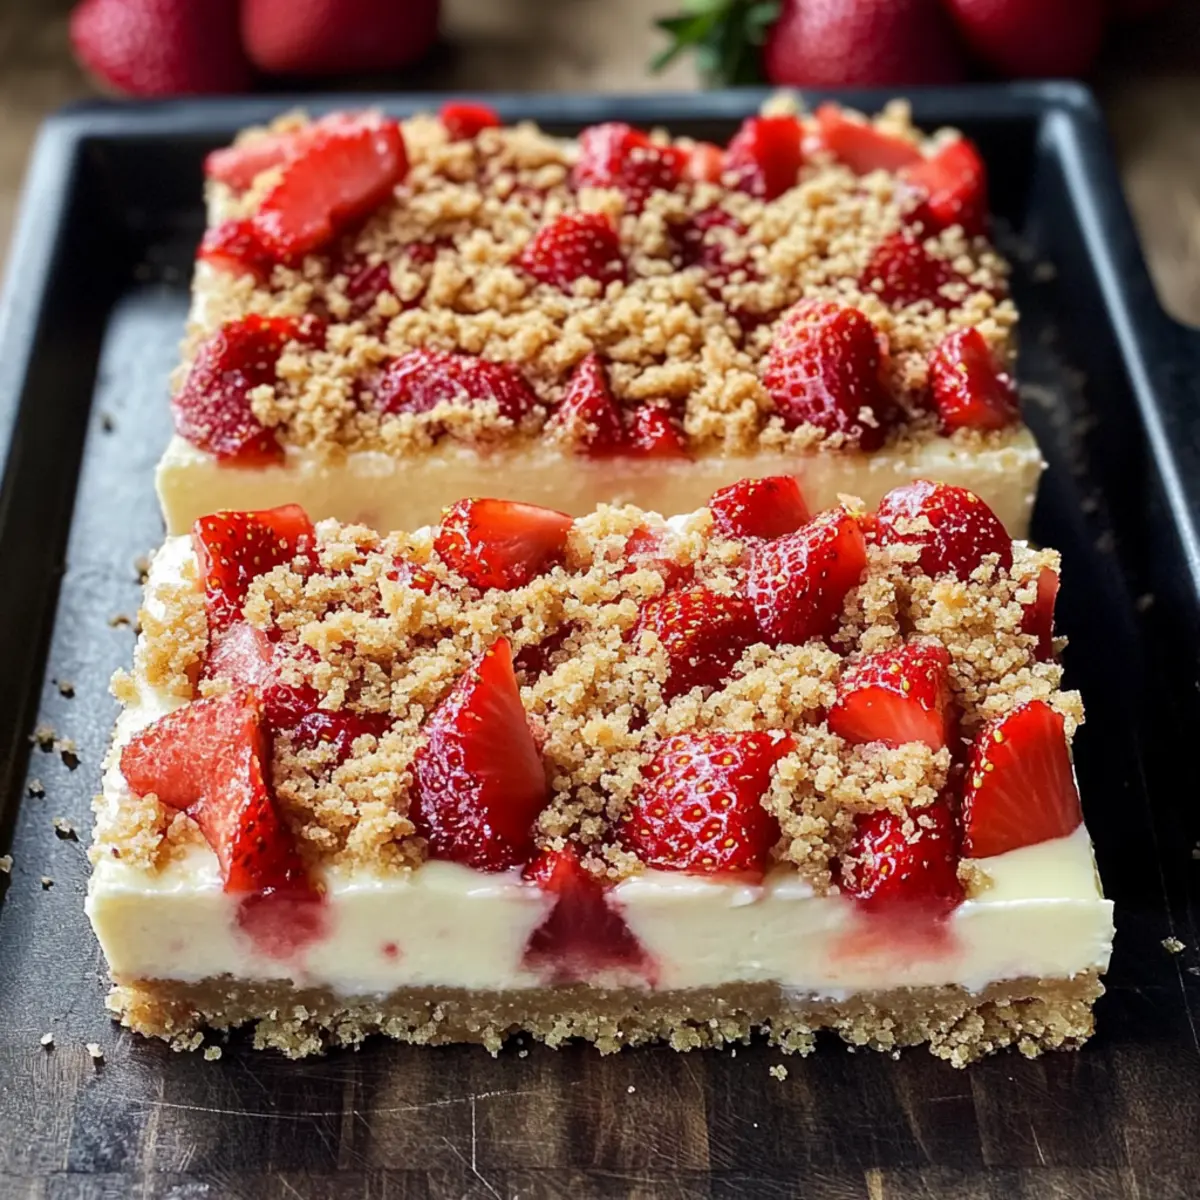
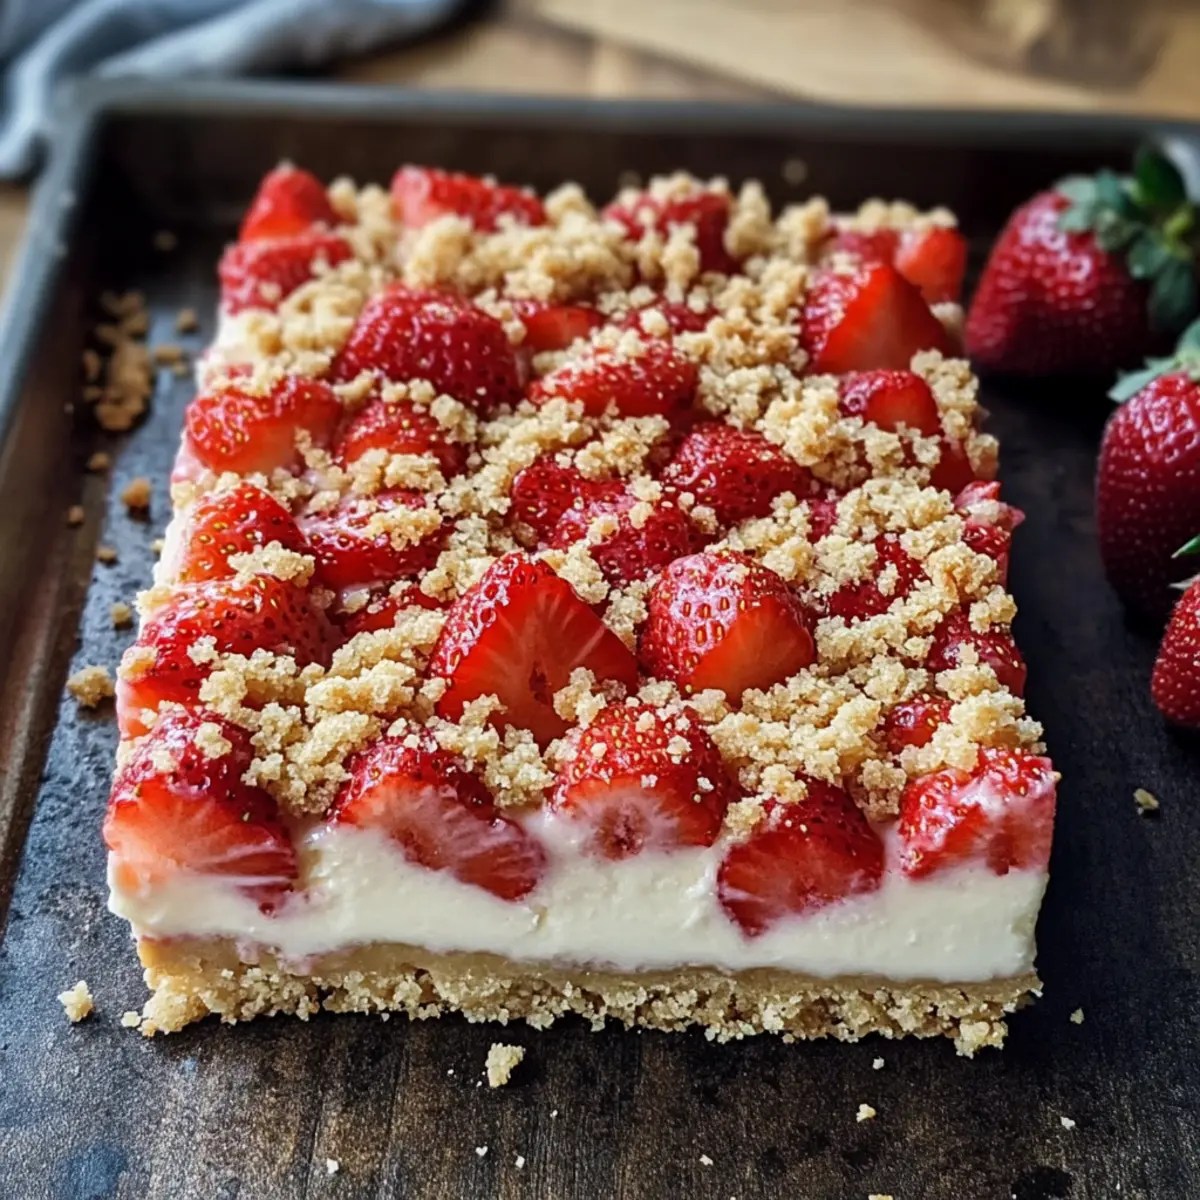
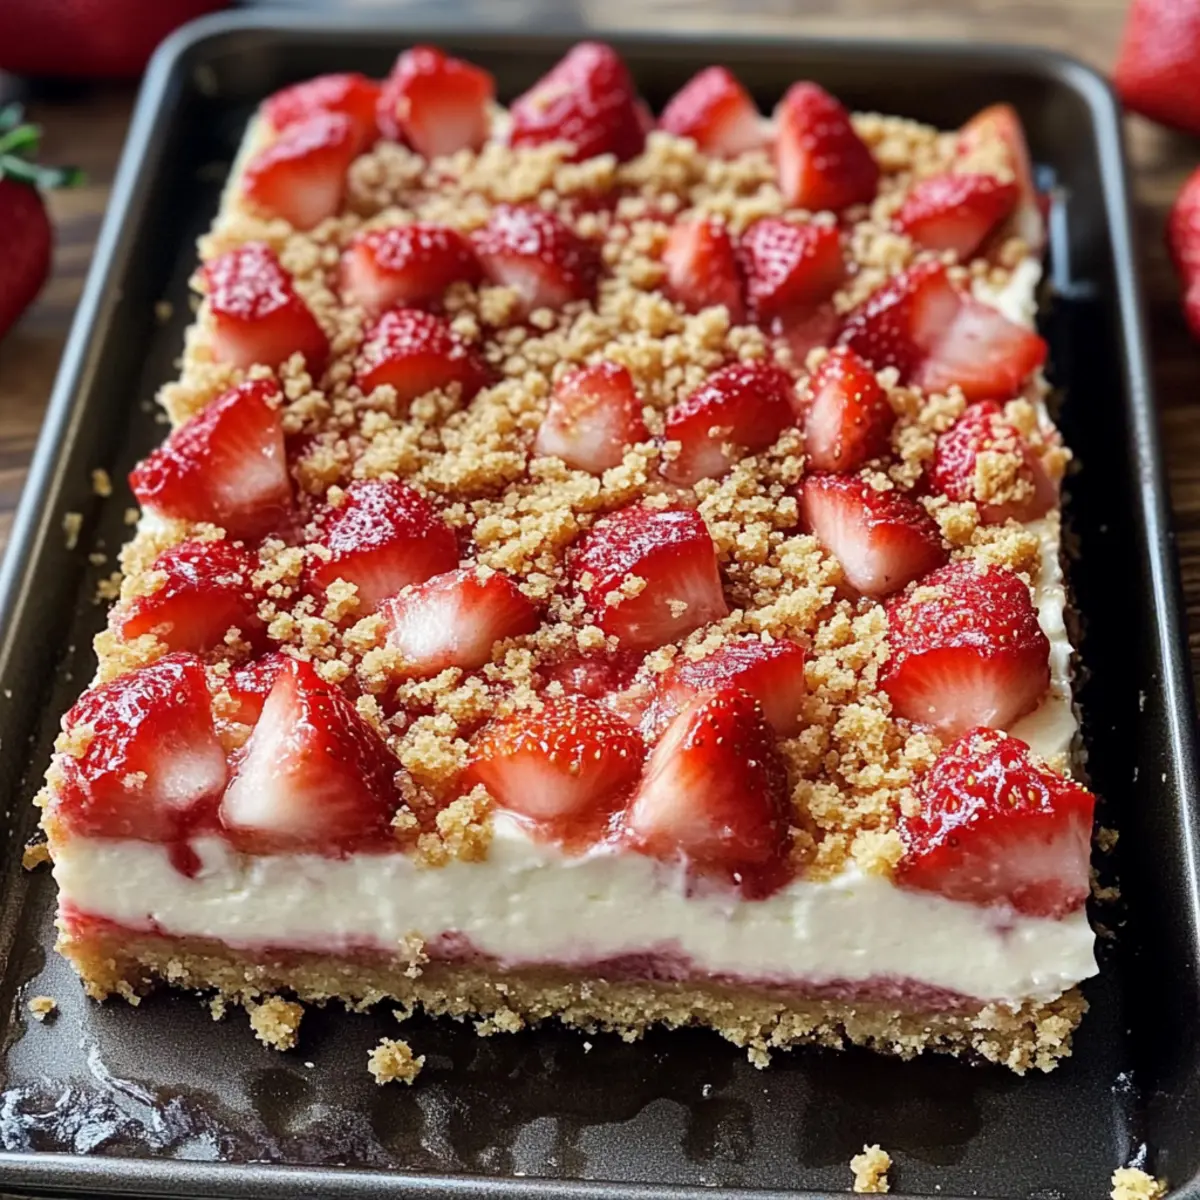
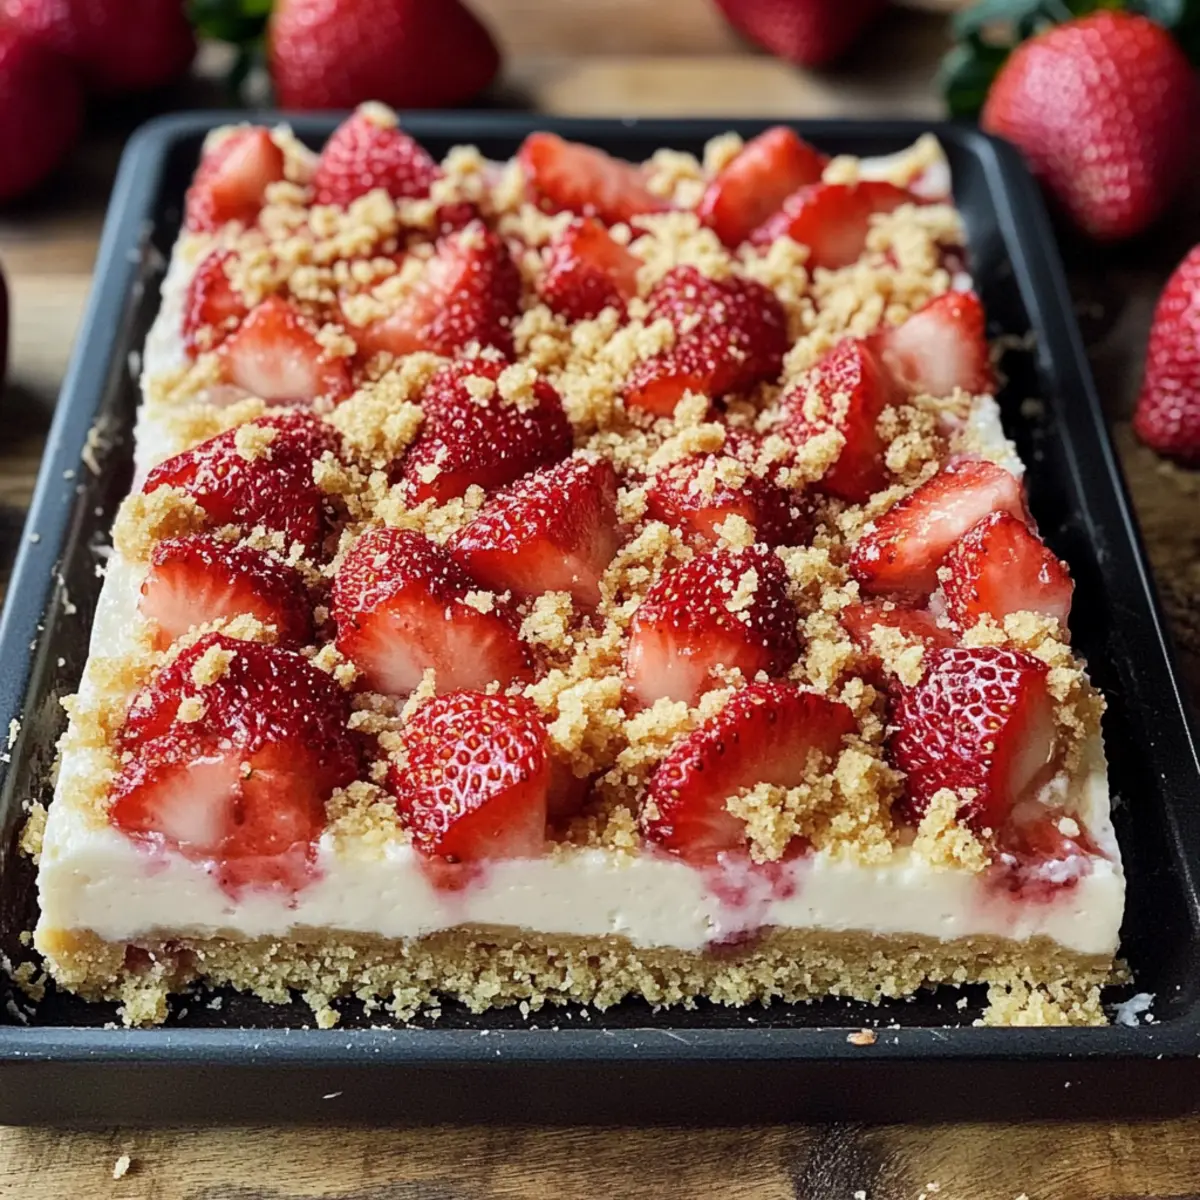
On a sunny afternoon, I found myself daydreaming about the perfect summer dessert—the kind that dazzles your taste buds while also reminding you of childhood picnics. That’s when the idea of making Strawberry Cheesecake Bars came to life. These delightful treats combine creamy cheesecake and juicy strawberries, all resting on a crunchy graham cracker crust that’s as satisfying to bite into as it is easy to make. With quick prep and serving versatility, they’re the ultimate dessert solution for any gathering, from casual barbecues to festive holidays. Plus, the gluten-free option means everyone can enjoy a slice! Are you ready to tantalize your friends and family with these luscious bars?
Why Choose Strawberry Cheesecake Bars?
Easy Preparation: These bars come together in just a few simple steps, making them a breeze for both novice and seasoned bakers alike.
Irresistible Flavor: The creamy cheesecake pairs beautifully with the fresh strawberries, creating a delightful contrast that’s bound to impress.
Gluten-Free Adaptable: Easily switch to gluten-free graham crackers, allowing everyone to indulge without worry.
Versatile Serving Options: Great for picnics, potlucks, or cozy family dinners, these bars can be served chilled or topped with whipped cream for extra flair.
Make-Ahead Perfection: Prep them a day in advance and let the flavors meld, making your entertaining effortless.
Creative Variations: Experiment with different fruits or mix in zesty flavors to suit your palate. The possibilities are endless, just like with my Cheesecake Stuffed Strawberries or a classic Strawberry Shortcake Cake!
Strawberry Cheesecake Bars Ingredients
For the Crust
• Graham Cracker Crumbs – Base structure for the crust; use gluten-free graham cracker crumbs for a gluten-free option.
• Melted Butter – Binds the crumb mixture; ensure it is melted for easy mixing.
• Granulated Sugar – Sweetens the crust and filling; can be replaced with powdered sugar for a smoother texture.
For the Filling
• Cream Cheese – Main component of the filling, providing creaminess; use full-fat for richer flavor.
• Eggs – Helps set the cheesecake filling; ensure they’re at room temperature for better incorporation.
• Vanilla Extract – Enhances flavor; can be substituted with almond extract for a different profile.
• Salt – Balances sweetness in the filling; use kosher salt for texture.
• Fresh Strawberries – Topping for the bars that add freshness; can substitute with other berries if desired.
For the Topping
• All-Purpose Flour – Creates a crumbly topping that adds texture; almond flour can be used for a gluten-free version.
• Brown Sugar – Sweetens the topping, contributing a deeper flavor; white sugar can be used but will alter taste.
These Strawberry Cheesecake Bars mix luscious flavors and textures that are sure to create lasting memories!
Step‑by‑Step Instructions for Strawberry Cheesecake Bars
Step 1: Prepare Oven and Dish
Preheat your oven to 350°F (175°C). While the oven heats up, line a 9×9-inch baking dish with parchment paper, leaving some overhang for easy removal later. This will ensure your Strawberry Cheesecake Bars come out perfectly and don’t stick to the pan, making your baking experience smoother.
Step 2: Make the Crust
In a mixing bowl, combine graham cracker crumbs, melted butter, and granulated sugar. Stir until the crumbs are fully coated and you achieve a sandy texture. Press this mixture firmly into the bottom of your lined baking dish, creating an even layer that forms the foundation for your strawberry cheesecake bars.
Step 3: Prepare the Filling
In a large mixing bowl, beat together cream cheese, eggs, granulated sugar, vanilla extract, and salt using an electric mixer on medium speed. Mix until the mixture is smooth and creamy, with no lumps remaining. Pour this luscious filling over the crust, spreading it evenly to ensure a delightful, creamy layer in each bar.
Step 4: Add Toppings
Wash and dice your fresh strawberries, then scatter them evenly over the cream cheese filling. Press them gently into the mixture to ensure they’ll bake nicely into your bars. These strawberries will not only add a burst of flavor to your Strawberry Cheesecake Bars but also a beautiful, vibrant appearance.
Step 5: Make and Add Crumble Topping
In a separate bowl, whisk together all-purpose flour, brown sugar, and a pinch of salt. Pour in melted butter and mix until it forms a crumbly texture. Sprinkle this topping over the strawberries, ensuring an even distribution that will create a delightful crunch atop your cheesecake bars once baked.
Step 6: Bake
Slide the baking dish into the preheated oven and bake for 35 to 40 minutes. Check for doneness by ensuring the center is slightly jiggly; it will firm up as it cools. The top should be a lovely golden brown, indicating that the Strawberry Cheesecake Bars are ready to take out.
Step 7: Cool and Chill
After baking, remove the dish from the oven and let it cool on a wire rack for about 1 hour. Once cooled, refrigerate the bars for at least 1 hour before slicing them. Chilling allows the flavors to meld beautifully while ensuring the cheesecake sets up perfectly, making the bars easier to cut.
What to Serve with Strawberry Cheesecake Bars?
These delightful bars are ready to shine as the star of your dessert table, but they pair beautifully with a few simple accompaniments.
-
Whipped Cream: A dollop of fluffy whipped cream adds a light and airy contrast, enhancing the creamy texture of the cheesecake bars.
-
Fresh Berries: Serve with additional fresh strawberries or a medley of berries for a vibrant burst of flavor that complements each bite.
-
Mint Sprigs: Garnishing with fresh mint not only adds a pop of color but also infuses a refreshing herbal note that brightens this sweet dessert.
-
Chocolate Sauce: A drizzle of rich chocolate sauce creates a decadent twist, balancing the sweetness with a bold, contrasting flavor that chocolate lovers will adore.
-
Ice Cream: A scoop of vanilla or strawberry ice cream brings a delightful creaminess and temperature contrast, perfect for those hot summer days.
-
Sparkling Wine: For an adult touch, serve with chilled sparkling wine or champagne, which adds a celebratory feel and pairs wonderfully with the cheesecake’s richness.
-
Coffee or Tea: A warm cup of coffee or herbal tea rounds out the experience, providing a comforting counterpart to the fruity sweetness of the bars.
-
Lemon Zest: A sprinkle of lemon zest can awaken the flavors, adding a zesty contrast that plays well with the sweet strawberries and creamy cheesecake.
With these delightful accompaniments, your Strawberry Cheesecake Bars will not only satisfy your sweet tooth but will leave your guests raving!
Expert Tips for Strawberry Cheesecake Bars
Perfect Temperature: Ensure your eggs and cream cheese are at room temperature for a smoother filling that incorporates better.
Avoid Excess Moisture: If using frozen strawberries, thaw and drain them well to prevent a watery filling.
Watch for Jiggle: When baking, the center should be slightly jiggly; it will firm up as it cools down, ensuring your bars are just right.
Cut Cleanly: For neat slices, let the Strawberry Cheesecake Bars chill in the refrigerator for at least an hour after cooling.
Customize To Taste: Feel free to experiment with different toppings or fruits; the versatility of these bars makes them perfect for seasonal fruits!
Make Ahead Options
These Strawberry Cheesecake Bars are a dream for busy home cooks who love meal prep! You can easily prepare the crust and filling up to 24 hours in advance. To do this, make the crust and filling according to the recipe and bake them as instructed. After cooling, cover the pan tightly with plastic wrap and refrigerate. For best results, add the strawberries and crumble topping just before baking to maintain their freshness and texture. This way, you’ll have sweet, creamy bars ready to pop in the oven whenever you need a quick dessert, ensuring they are just as delicious and delightful for any gathering!
Strawberry Cheesecake Bars Variations
Feel free to mix things up with these fun twists and substitutions that will make your Strawberry Cheesecake Bars truly your own!
-
Berries Galore: Replace fresh strawberries with blueberries, raspberries, or even diced peaches for a seasonal explosion of flavor. Each fruit adds its unique touch, making every bite a delightful surprise.
-
Zesty Infusion: For a citrusy twist, mix in a tablespoon of lemon or orange zest into the filling. This brightens the flavor profile and adds a refreshing zing that’s perfect for summer.
-
Chocolate Delight: Add chocolate chips to the crumble topping for a rich, decadent flavor. Mix in semi-sweet or dark chocolate for a delightful surprise; it creates a delicious contrast with the creamy cheesecake.
-
Nutty Crunch: Swap part of the graham cracker crumbs for finely chopped nuts, such as almonds or walnuts. This variation gives the crust an extra crunch and a delightful nutty aroma.
-
Dairy-Free Option: Use dairy-free cream cheese for a vegan-friendly alternative. Pair it with a vegan buttery spread in the crust, and you’ll have a dessert that everyone can enjoy.
-
Different Flours: Experiment with almond flour or coconut flour in place of all-purpose for a gluten-free twist. Each adds a touch of nutty flavor and a unique texture that complements the cheesecake.
-
Layered Perfection: Create a layered effect by alternating layers of filling and fruit. Start with a layer of cheesecake mixture, followed by a layer of berries, then repeat for a beautiful presentation.
These variations open the door to endless possibilities! For more fruit-inspired treats, you might enjoy my delectable Cheesecake Stuffed Strawberries or take a look at this luscious Strawberry Shortcake Cake recipe that will surely delight!
How to Store and Freeze Strawberry Cheesecake Bars
Room Temperature: These bars are best enjoyed chilled, but can be left out for serving at room temperature for up to 2 hours.
Fridge: Store in an airtight container in the refrigerator for up to 5 days to maintain freshness and flavor.
Freezer: For longer storage, wrap individual slices in plastic wrap and freeze for up to 2 months. Thaw in the fridge overnight before serving.
Reheating: If you prefer your bars a bit warm, gently reheat in the microwave for 15-20 seconds, ensuring not to overheat and affect the creamy texture of the cheesecake.
Strawberry Cheesecake Bars Recipe FAQs
What type of strawberries should I use for the bars?
Absolutely! Fresh, ripe strawberries are best for making Strawberry Cheesecake Bars. Look for berries that are vibrant red and firm, with a fresh aroma. Avoid those with dark spots or mushiness, as they can indicate overripeness. If fresh strawberries aren’t available, feel free to use frozen ones, but remember to thaw and drain them first to prevent an overly wet filling.
How should I store Strawberry Cheesecake Bars after baking?
Very simple! Store your Strawberry Cheesecake Bars in an airtight container in the refrigerator for up to 5 days. This keeps them fresh and ready to enjoy. If you have slices left over, simply place them in layers separated by parchment paper to prevent sticking.
Can I freeze Strawberry Cheesecake Bars?
Absolutely! For longer-lasting enjoyment, wrap individual slices of Strawberry Cheesecake Bars tightly in plastic wrap and then place them in a freezer-safe bag or container. They can be frozen for up to 2 months. When you’re ready to enjoy them again, let the bars thaw in the fridge overnight for the best texture.
What do I do if my cheesecake bars are too runny?
If your cheesecake bars turn out runny after baking, it might be due to undercooking or excess moisture from the strawberries. For best results, ensure the center is slightly jiggly when you remove them from the oven, as they will set as they cool. If using frozen strawberries, thaw and drain them thoroughly to avoid extra moisture affecting your filling.
Can I make these bars ahead of time?
Very much so! In fact, making your Strawberry Cheesecake Bars a day in advance is a fantastic idea! This allows the flavors to meld beautifully and makes your entertaining effortless. Simply prepare, bake, cool, and refrigerate them overnight before serving for the best results.
Are these cheesecake bars safe for people with gluten intolerance?
Certainly! To make gluten-free Strawberry Cheesecake Bars, simply substitute regular graham cracker crumbs with gluten-free versions. Always check labels to ensure all ingredients are certified gluten-free, especially for those with celiac disease or gluten sensitivity. Enjoy without worry!
Dreamy Strawberry Cheesecake Bars for a Sweet Summer Treat
Ingredients
Equipment
Method
- Preheat your oven to 350°F (175°C) and line a 9x9-inch baking dish with parchment paper.
- Combine graham cracker crumbs, melted butter, and granulated sugar in a mixing bowl. Press mixture firmly into the baking dish.
- Beat together cream cheese, eggs, granulated sugar, vanilla extract, and salt until smooth. Pour over the crust.
- Wash and dice strawberries, then scatter them evenly over the filling. Press gently to embed.
- Mix all-purpose flour, brown sugar, and a pinch of salt in a bowl. Pour in melted butter and mix until crumbly. Sprinkle over strawberries.
- Bake for 35 to 40 minutes until the center is slightly jiggly. Let cool on a wire rack.
- Refrigerate for at least 1 hour before slicing to allow flavors to meld.