
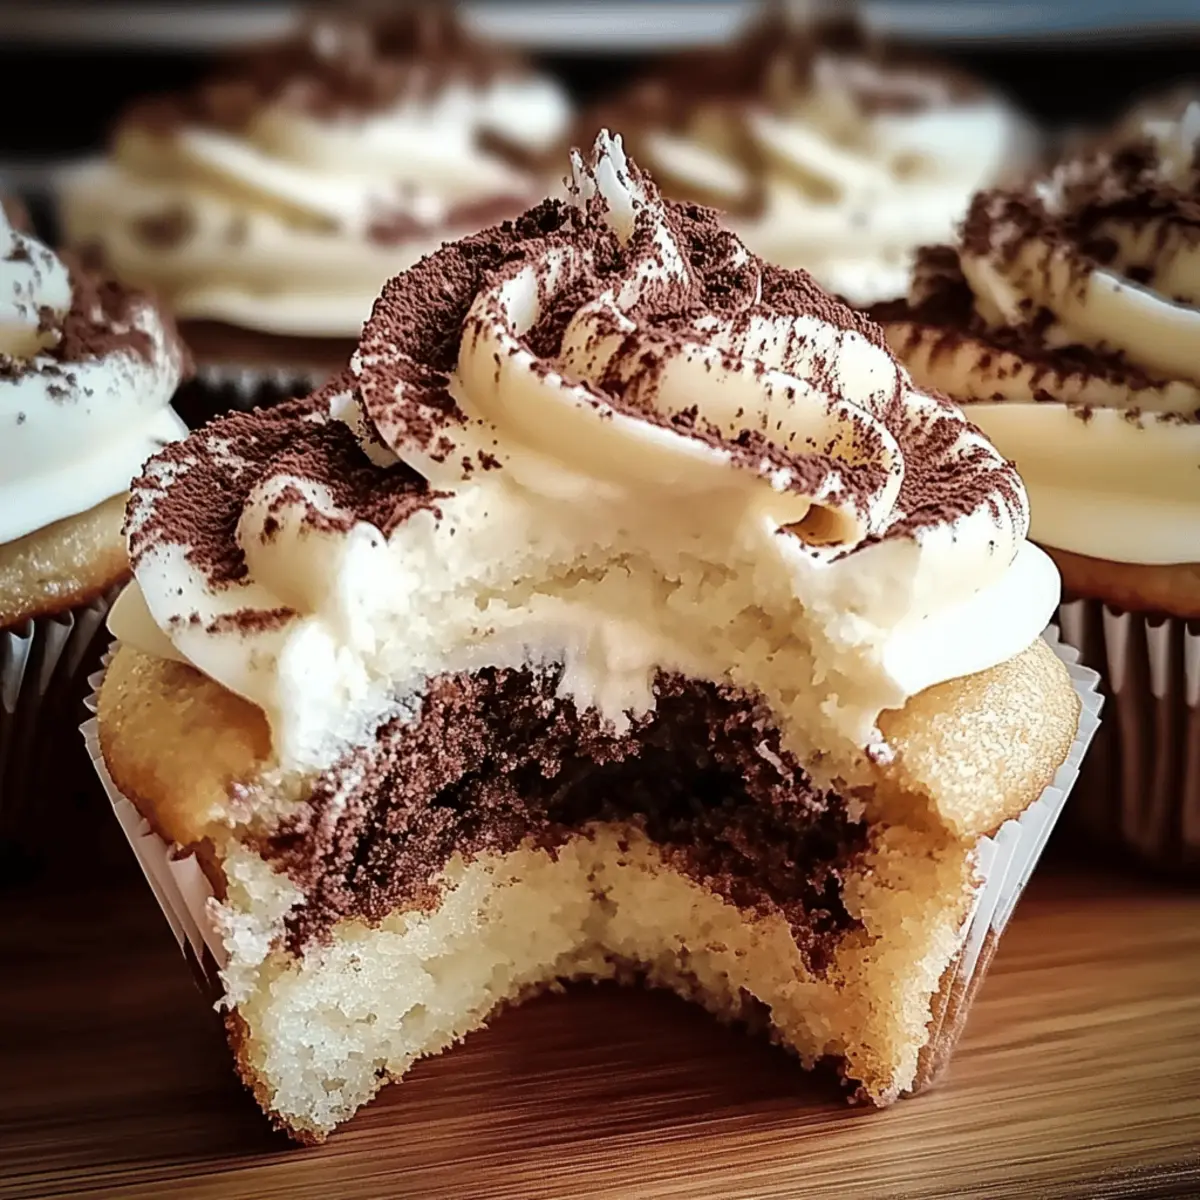
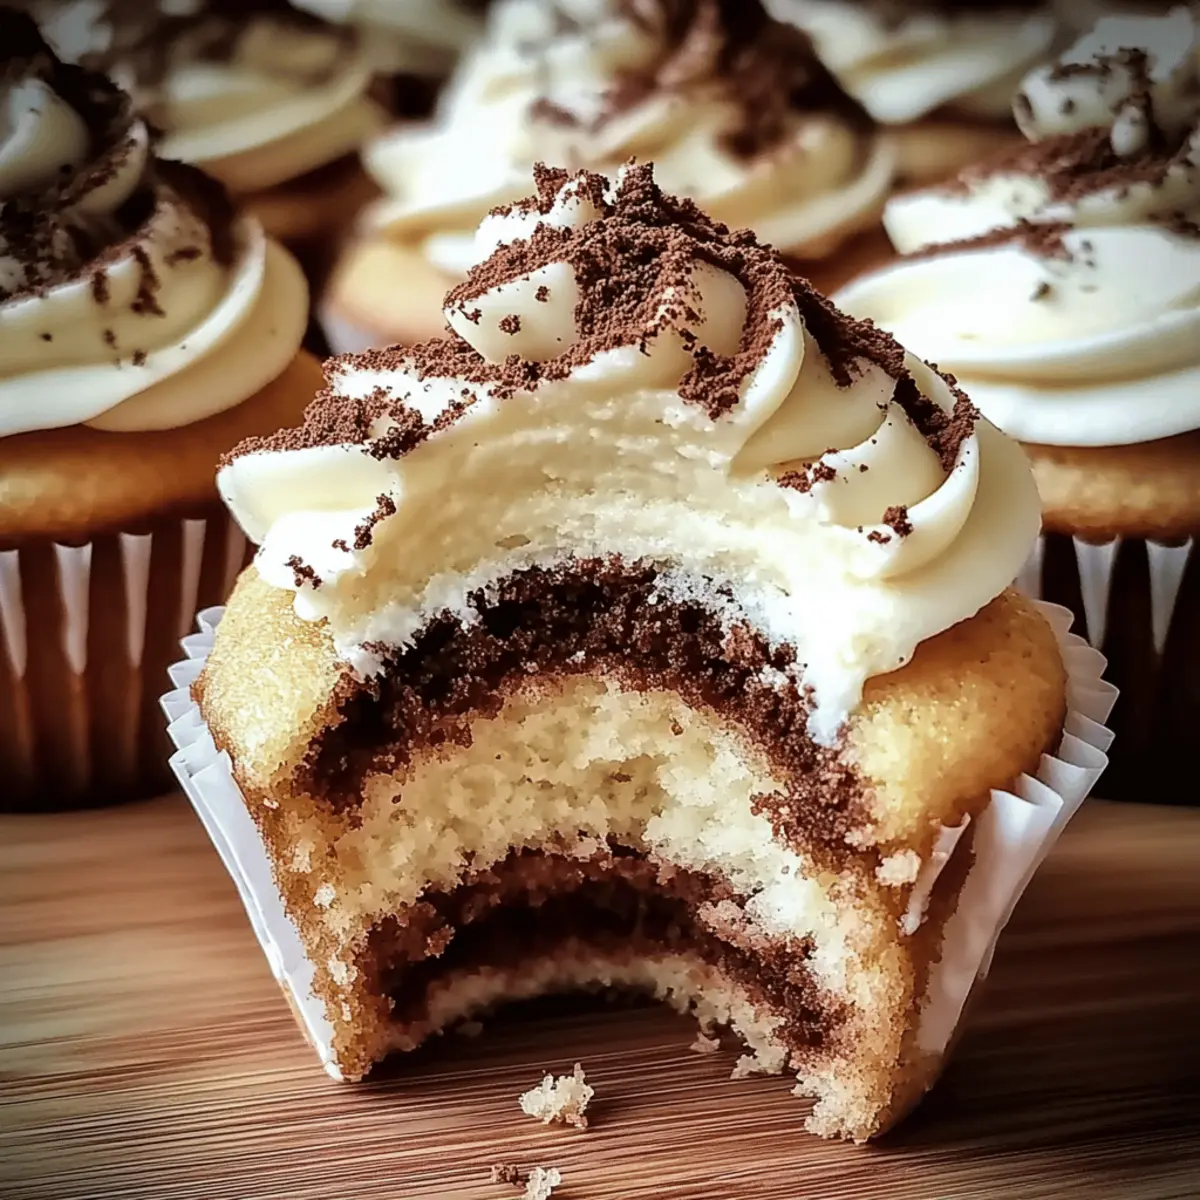
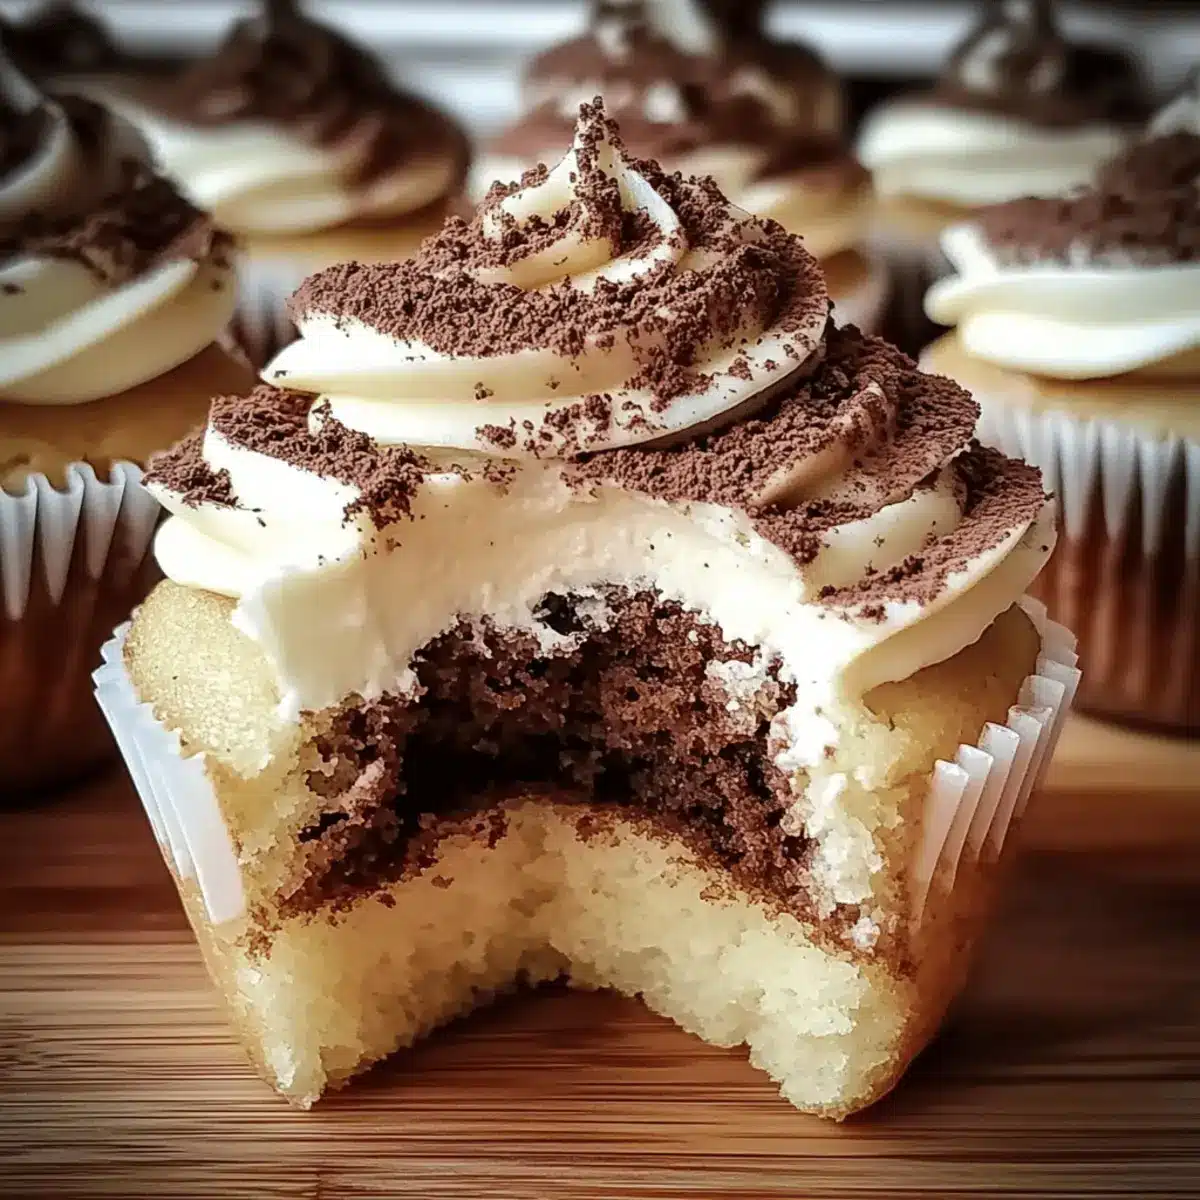
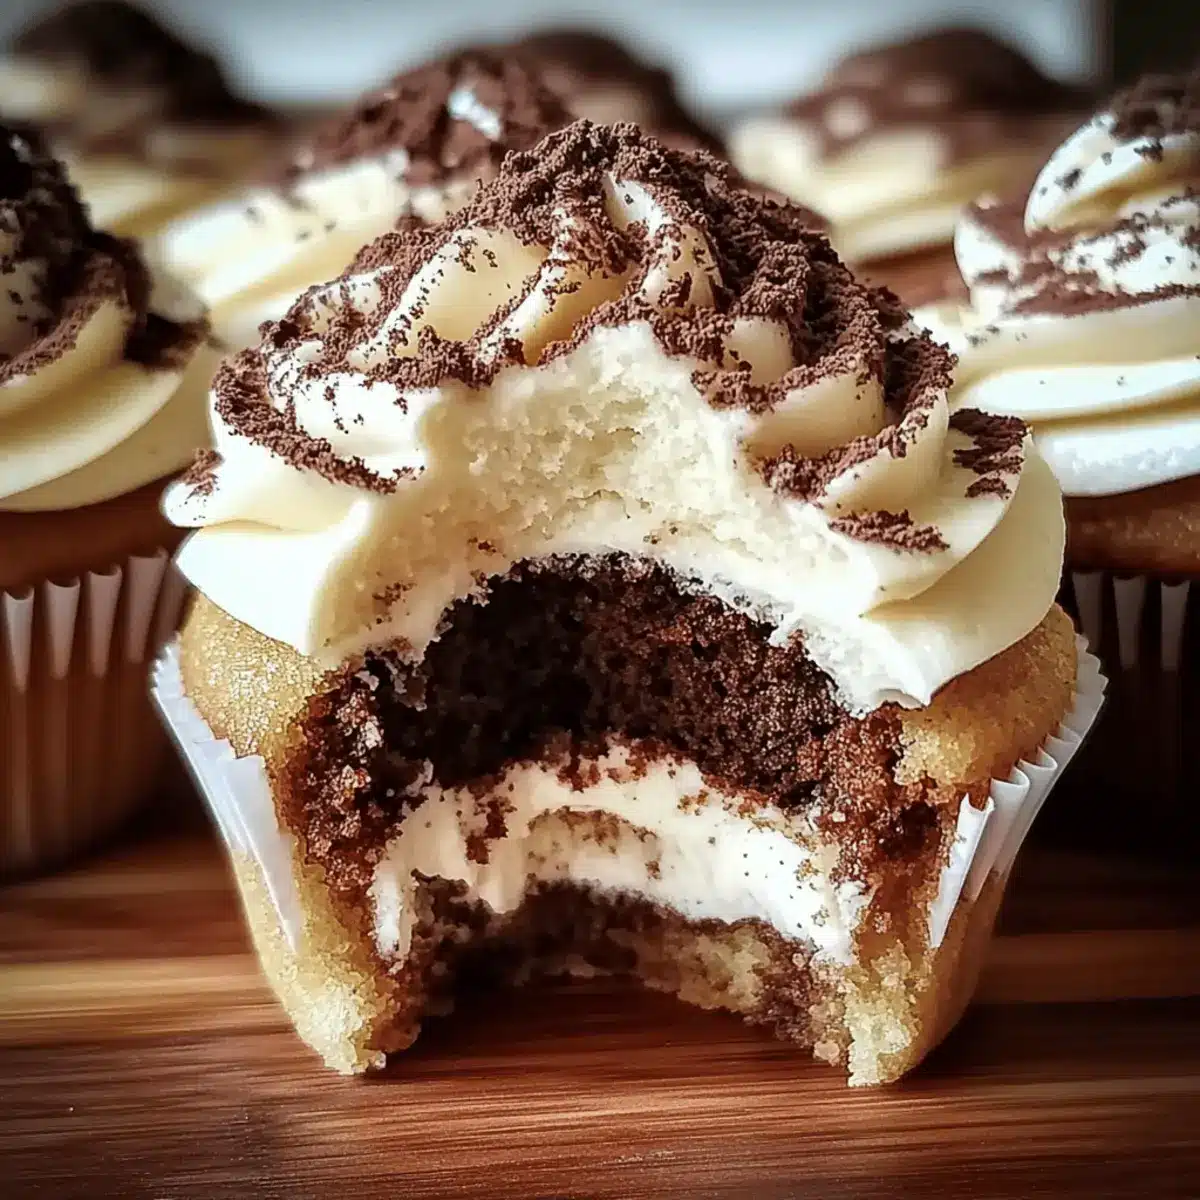
There’s something enchanting about transforming an Italian classic into a handheld delight. My Tiramisu Cupcakes capture the beloved essence of traditional tiramisu, featuring moist coffee-soaked cake topped with a creamy mascarpone frosting and a sprinkle of cocoa that excites both the eyes and the taste buds. These cupcakes are not just elegant—they’re also incredibly easy to whip up, making them perfect for any occasion, from delightful dinner parties to a sweet weekend treat at home. Plus, with gluten-free options and tantalizing non-coffee variations, there’s adaptability that makes this recipe a crowd-pleaser for everyone. Ready to impress your friends with a dessert that pairs sophistication with simplicity? Let’s dive into the world of Tiramisu Cupcakes!
Why Are Tiramisu Cupcakes a Must-Try?
Heavenly Layers: Each bite of these Tiramisu Cupcakes offers a delightful blend of moist coffee-soaked cake and rich mascarpone frosting, creating a blissful experience.
Quick and Easy: With straightforward steps, you can impress your guests without spending hours in the kitchen.
Gluten-Free Friendly: The recipe accommodates gluten-free options, ensuring everyone can join in the fun.
Versatile Variations: Don’t like coffee? No problem! Discover chocolate milk or fruity options for a unique twist, much like my Patriotic Cupcakes Festive for a different flavor profile.
Crowd-Pleasing Appeal: Perfect for parties or casual gatherings, these cupcakes are sure to put smiles on faces and spark delightful conversations.
Perfect for Any Occasion: Whether it’s a holiday celebration or a cozy weekend treat, these cupcakes are a delightful way to indulge in the flavors of Italy!
Tiramisu Cupcakes Ingredients
For the Cupcakes
• Strong brewed coffee – Provides deep flavor and moisture; opt for high-quality coffee to elevate taste.
• Coffee liqueur – Enhances the coffee flavor with a touch of warmth; substitute with chocolate milk for a non-coffee version.
• All-purpose flour – Gives structure to the cupcakes; use a gluten-free flour blend for gluten-free Tiramisu Cupcakes.
• Baking powder – Helps the cupcakes rise; ensure it’s fresh for the best results.
• Salt – Balances the sweetness and enhances flavor.
• Unsalted butter – Adds richness and moisture; soften in the microwave for quicker use.
• Granulated sugar – Sweetens the batter; adjust to your taste preference.
• Large eggs – Essential for moisture and structure; use room temperature eggs for better incorporation.
• Vanilla extract – Brings warm flavor notes; use pure extract for the best taste.
• Whole milk – Adds moisture to the batter; substitute with dairy-free milk for a lactose-free option.
For the Frosting
• Mascarpone cheese – Serves as the creamy base for the frosting; crucial for an authentic tiramisu flavor.
• Heavy cream – Whipped to achieve a light, airy texture in the frosting.
• Powdered sugar – Sweetens and stabilizes the frosting; adjust the quantity based on your sweetness preference.
• Cocoa powder – Used for dusting the cupcakes and adding that essential tiramisu flavor.
Step‑by‑Step Instructions for Tiramisu Cupcakes
Step 1: Preheat Oven
Begin by preheating your oven to 350°F (175°C) and lining a cupcake pan with liners. This ensures your Tiramisu Cupcakes will bake evenly and come out easily. While the oven warms up, gather your ingredients so you’re ready for the next steps.
Step 2: Mix Coffee
In a bowl, combine 1 cup of brewed coffee with 2 tablespoons of coffee liqueur, then let the mixture cool. This flavorful concoction will give the cupcakes their signature taste, infusing each bite with deep coffee richness. Set this aside as you prep the batter.
Step 3: Prep Dry Ingredients
In a separate bowl, whisk together the all-purpose flour, baking powder, and salt until well combined. This dry mix lays the foundation for the texture of your Tiramisu Cupcakes, ensuring they rise beautifully. After mixing, set it aside to focus on the wet ingredients.
Step 4: Cream Butter and Sugar
In a large mixing bowl, beat the unsalted butter and granulated sugar together until the mixture is fluffy and light, usually about 3-5 minutes. The creamy texture is essential for achieving the moistness in your cupcakes, setting the stage for the sweet treat ahead.
Step 5: Mix in Eggs
Add the large eggs to the butter-sugar mixture one at a time, mixing thoroughly between each addition. This step allows for optimal incorporation, giving your Tiramisu Cupcakes the structure they need to rise as they bake.
Step 6: Add Vanilla
Pour in the vanilla extract and mix until fully combined. The vanilla adds warm, aromatic notes that perfectly complement the coffee flavor. This element creates a harmonious balance in your batter, enhancing the layered taste of your Tiramisu Cupcakes.
Step 7: Combine Mixtures
Gradually add the dry ingredient mixture to the wet mixture, alternating with the whole milk. Mix just until combined to maintain the light and airy texture of the batter. Avoid overmixing, as this could lead to dense cupcakes instead of the desired fluffiness.
Step 8: Fill Cupcake Liners
Using an ice cream scoop or a ladle, fill the cupcake liners about two-thirds full with batter. This allows room for the Tiramisu Cupcakes to rise without overflowing. Place the pan in the oven once you’ve filled all the liners.
Step 9: Bake
Bake the cupcakes in the preheated oven for 18-20 minutes, or until a toothpick inserted into the center comes out clean. The tops should look lightly golden and spring back when touched, indicating they are perfectly baked.
Step 10: Cool Cupcakes
After baking, let the cupcakes cool in the pan for about 5 minutes. Then transfer them to a wire rack to cool completely. This step is crucial as it prevents the cupcakes from becoming soggy, allowing them to maintain their delightful texture.
Step 11: Make Frosting
In a mixing bowl, beat the mascarpone cheese and heavy cream until soft peaks form. Gradually add the powdered sugar and any remaining coffee liqueur, mixing until you achieve stiff peaks. This luscious frosting is key to topping your Tiramisu Cupcakes.
Step 12: Soak Cupcakes
Once the cupcakes are completely cool, dip the tops briefly in the reserved coffee mixture for a rich flavor boost. This step mimics the traditional tiramisu experience, giving your cupcakes that signature coffee-soaked essence.
Step 13: Frost
Generously pipe the mascarpone frosting onto each cupcake, creating a beautiful swirl on top. Finally, dust each frosted cupcake with cocoa powder for that classic Tiramisu touch. These delightful Tiramisu Cupcakes are now ready to impress your family and friends!
Make Ahead Options
These Tiramisu Cupcakes are a fantastic choice for meal prep, allowing you to enjoy their lusciousness without the last-minute rush! You can prepare and bake the cupcakes up to 24 hours in advance; just be sure to let them cool completely before storing them in an airtight container at room temperature to maintain their moist texture. The frosting can also be made ahead and stored in the refrigerator for up to 3 days; just give it a quick rewhip before using. When you’re ready to serve, simply dip the cooled cupcake tops in the coffee mixture and pipe on the frosting, dusting with cocoa powder for a stunning finish. Enjoy restaurant-quality Tiramisu Cupcakes without the stress!
Expert Tips for Tiramisu Cupcakes
- Room Temperature Ingredients: Ensure all your ingredients are at room temperature to achieve a smooth batter and a light texture in your Tiramisu Cupcakes.
- Avoid Overmixing: Gently mix the batter to prevent dense cupcakes; overmixing can result in a heavy texture that’s not ideal.
- Testing for Doneness: Use a toothpick to check if the cupcakes are baked through; they should be lightly golden and spring back when pressed.
- Prepare Frosting Ahead: Make the mascarpone frosting a day in advance and keep it refrigerated. This saves time and allows flavors to meld beautifully.
- Storage Secrets: Store leftover Tiramisu Cupcakes in an airtight container in the fridge for up to five days; they can also be frozen individually for up to three months.
What to Serve with Tiramisu Cupcakes?
Indulge in an exquisite spread that complements the delightful flavors of these cupcakes, transforming your dessert experience into an unforgettable celebration.
-
Rich Espresso: The bold, aromatic notes of a classic espresso accentuate the coffee flavors in the cupcakes. It’s the perfect pick-me-up!
-
Decadent Chocolate Mousse: A silky chocolate mousse adds a luxurious touch, creating a heavenly pairing that balances sweetness with a touch of bitterness.
-
Fresh Berries: Juicy strawberries or raspberries offer a burst of freshness that brightens each bite, enhancing the flavors while providing a lovely tart contrast.
-
Whipped Cream: A dollop of lightly sweetened whipped cream adds a cloud-like texture that beautifully complements the creamy mascarpone frosting.
-
Vanilla Ice Cream: Creamy and cool, vanilla ice cream is a classic companion to desserts, softening the richness of the cupcakes while enhancing indulgence.
-
Fruit-Infused Sparkling Water: A refreshing drink infused with lemon or berry flavors cleanses the palate between bites while adding a light, fruity note to the meal.
-
Dessert Wine: A sweet dessert wine, like a Moscato, elevates the occasion, melding with the coffee-soaked flavors for a sophisticated finish.
-
Dark Chocolate Truffles: Handcrafted dark chocolate truffles bring depth and richness, making every bite of the pairing a delightful experience, perfect for any chocolate lover.
-
Italian Almond Cookies: These crisp, nutty cookies add a delightful crunch and enhance the Italian theme, making for a charming and harmonious combination.
Tiramisu Cupcakes Variations & Substitutions
Feel free to get creative and put your own spin on these delightful Tiramisu Cupcakes, ensuring every bite is just as special as your personal touch!
-
Gluten-Free: Substitute all-purpose flour with a gluten-free flour blend for a cake that everyone can enjoy. They’ll be just as light and fluffy!
-
Non-Coffee Option: Swap out the coffee for chocolate milk or cold brew tea to create a unique flavor profile that tantalizes taste buds. Experiment with how these flavors mingle—it’s like discovering a hidden gem!
-
Berry Delight: Mix in fresh raspberries or strawberries into the batter for a fruity twist, or use them as a gorgeous topping. The sweetness from the berries complements the rich frosting beautifully!
-
Choco-Licious: Stir in cocoa powder or use finely grated chocolate in your frosting for an extra chocolatey punch. A chocolate lover’s dream, this variation adds a decadent depth!
-
Nutty Flavor: Incorporate a spoonful of hazelnut spread into the frosting or batter for an exciting, nutty undertone. Hazelnut adds a lovely richness, mimicking the traditional flavor of tiramisu.
-
Spiced Up: Add a pinch of cinnamon or nutmeg to the batter for a warm, spiced flavor you won’t forget. These spices not only enhance flavor but also bring warmth to your dessert experience.
-
Dairy-Free: Substitute mascarpone cheese with coconut cream for a dairy-free version that still satisfies the creamy crave. It’s a fantastic alternative that surprises the palate!
-
Tantalizing Toppings: Try topping your cupcakes with crushed cookies instead of cocoa powder for a delightful crunch. This gives the traditional finish a fun and textured twist!
With so many options, these Tiramisu Cupcakes can be tailored to fit any occasion or palate. Just like my Patriotic Cupcakes Festive, these variations will charm your friends and family, ensuring that your baking truly stands out!
Storage Tips for Tiramisu Cupcakes
Fridge: Store Tiramisu Cupcakes in an airtight container in the fridge for up to 5 days to maintain freshness and flavor.
Freezer: For long-term storage, wrap each cupcake individually in plastic wrap and freeze for up to 3 months. Thaw in the fridge before serving.
Reheating: Allow frozen cupcakes to thaw overnight in the fridge, then enjoy them cold or let them sit at room temperature for about 30 minutes before serving.
Frosting Storage: If you’ve made extra mascarpone frosting, it can be stored separately in the fridge for up to 3 days. Rewhip before using.
Tiramisu Cupcakes Recipe FAQs
How do I choose ripe or high-quality ingredients for Tiramisu Cupcakes?
Absolutely! For the best flavor, select high-quality strong brewed coffee, ideally freshly brewed for the deepest taste. Use room temperature large eggs and make sure your unsalted butter is softened (but not melted) for easy mixing. Fresh baking powder is essential for proper rising, so check the expiration date!
How should I store Tiramisu Cupcakes after baking?
After baking, store your Tiramisu Cupcakes in an airtight container in the fridge for up to 5 days. This keeps them moist and delicious. If you plan to enjoy them later, consider freezing them wrapped individually for up to 3 months. Just make sure they are tightly sealed to prevent freezer burn!
Can I freeze Tiramisu Cupcakes? How do I do it?
Yes, you can! To freeze Tiramisu Cupcakes, allow them to cool completely, then wrap each cupcake individually in plastic wrap, ensuring no air escapes. Place the wrapped cupcakes in a freezer-safe bag or container. Just thaw overnight in the fridge when you’re ready to enjoy them again, and they will taste as fresh as the day they were baked!
What should I do if my Tiramisu Cupcakes come out too dense?
Very! If your Tiramisu Cupcakes end up dense, double-check that you didn’t overmix the batter, as this can lead to heavy cupcakes. Ensure all ingredients are at room temperature for better incorporation, and always check your baking powder for freshness. For your next batch, you might even consider folding the dry ingredients into the wet ingredients gently rather than mixing vigorously.
Are Tiramisu Cupcakes suitable for people with allergies?
The more the merrier! While this recipe incorporates dairy and gluten, adaptations are available. You can use gluten-free flour blends to make them gluten-free, and substituting with coconut cream instead of mascarpone makes for a delicious dairy-free frosting. Always double-check cross-contamination if you’re serving individuals with allergies!
Can I make Tiramisu Cupcakes without coffee?
Absolutely! If coffee isn’t your thing, simply replace it with chocolate milk or cold brew tea in the batter. You can enhance the frosting by adding cocoa powder or even trying fruit flavors like fresh berries for a refreshing twist. This versatility ensures everyone finds a version to love!
Delicious Tiramisu Cupcakes That Will Make You Smile
Ingredients
Equipment
Method
- Preheat your oven to 350°F (175°C) and line a cupcake pan with liners.
- In a bowl, combine 1 cup of brewed coffee with 2 tablespoons of coffee liqueur and let it cool.
- In a separate bowl, whisk together the flour, baking powder, and salt.
- In a large mixing bowl, beat the butter and sugar together until fluffy, around 3-5 minutes.
- Add the eggs one at a time, mixing thoroughly between each addition.
- Pour in the vanilla extract and mix until combined.
- Gradually add the dry ingredient mixture to the wet mixture, alternating with the milk.
- Fill cupcake liners about two-thirds full with batter.
- Bake for 18-20 minutes until a toothpick comes out clean.
- Cool the cupcakes in the pan for 5 minutes before transferring to a wire rack.
- In a bowl, beat the mascarpone cheese and heavy cream until soft peaks form.
- Gradually add powdered sugar and remaining coffee liqueur, mixing until stiff peaks form.
- Dip cupcake tops in reserved coffee mixture for flavor.
- Pipe the mascarpone frosting onto each cupcake and dust with cocoa powder.