
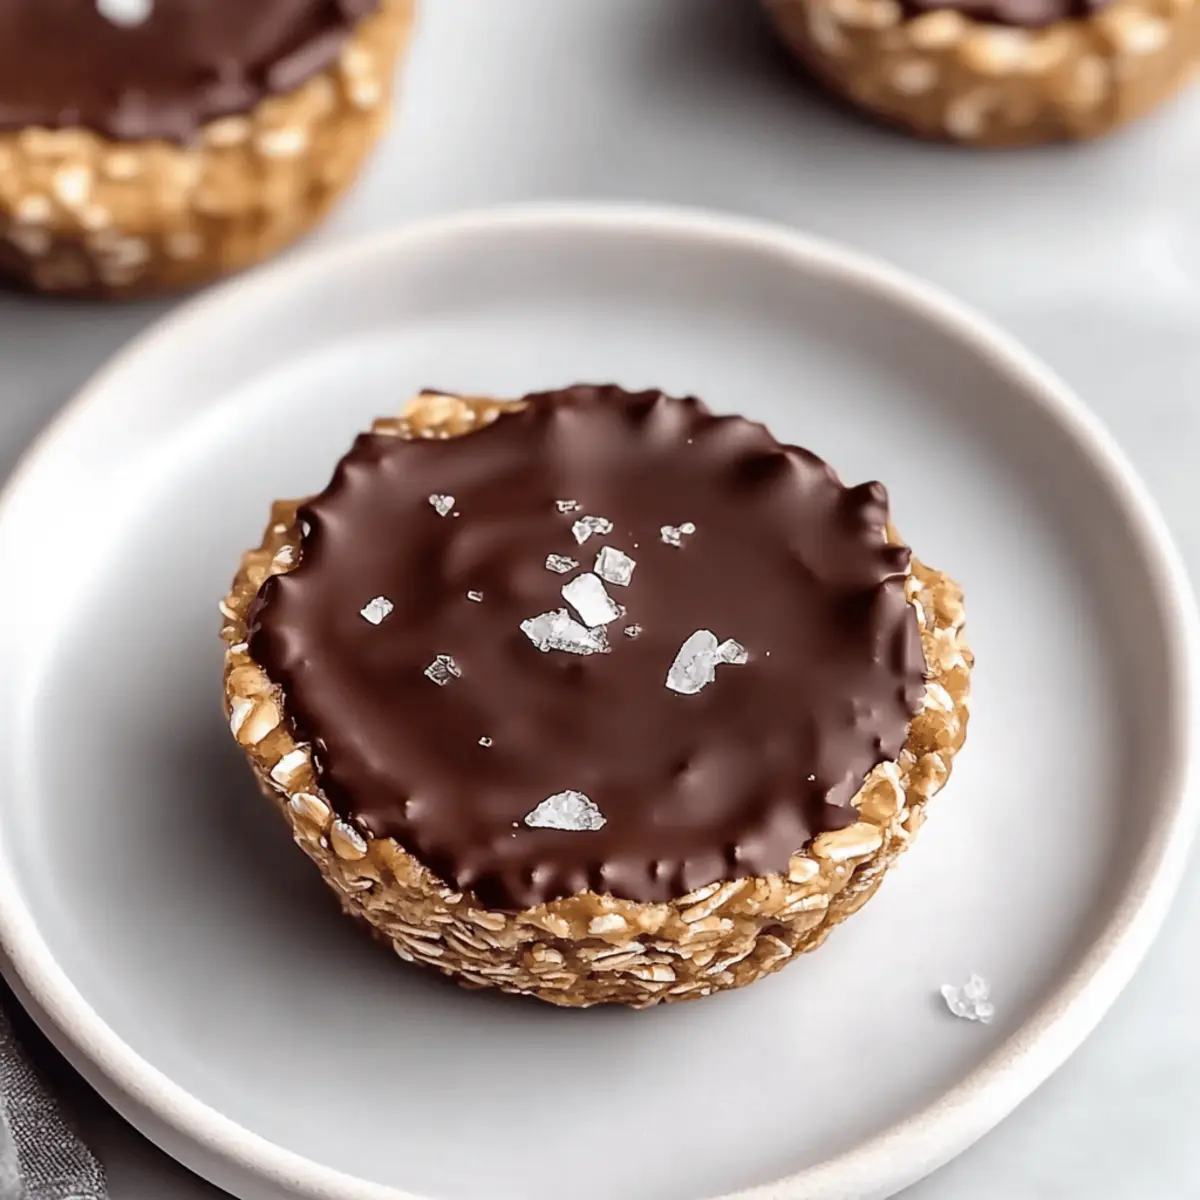
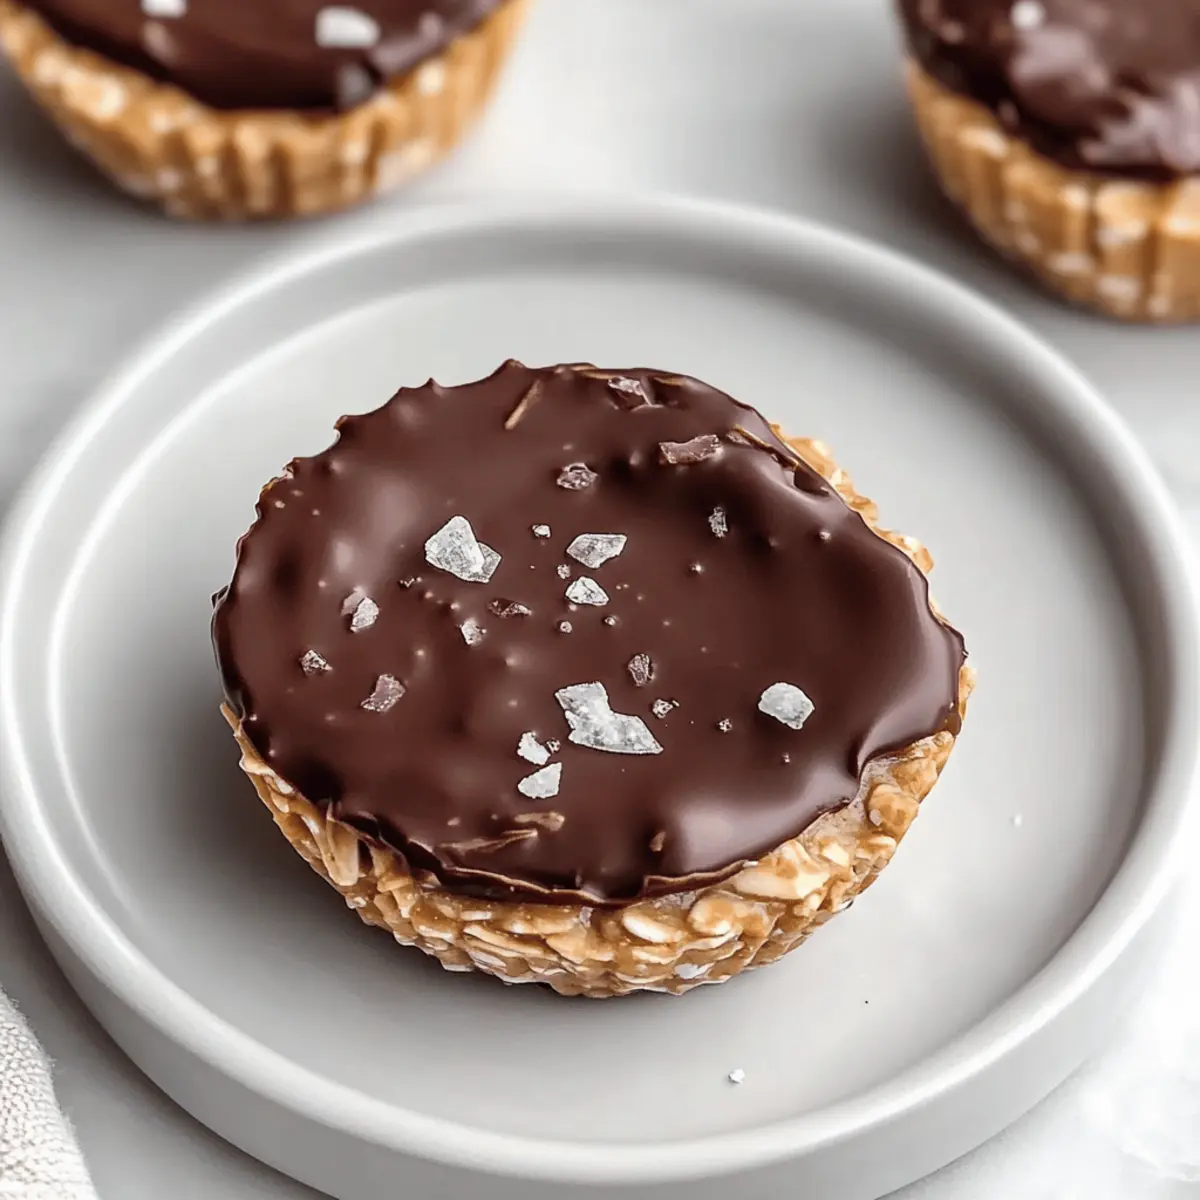
As I pulled the last batch from the freezer, I couldn’t help but smile at the sight of these Easy No Bake Peanut Butter Oat Cups. Packed with the rich, nutty flavor of peanut butter and the wholesome goodness of rolled oats, they are the ultimate quick snack that satisfies both cravings and busy schedules. No baking means you can whip these up in no time, making them perfect for those moments when you’re short on time but still want something deliciously homemade. Plus, they’re customizable—add a sprinkle of your favorite mix-ins or swap the toppings to suit your taste! What’s your favorite way to enjoy a healthy treat?
Why You’ll Love These No Bake Cups?
Quick Preparation: You’ll have these oat cups ready in just a few minutes, making them perfect for busy days.
Healthy Indulgence: Enjoy the rich taste of peanut butter without the guilt; they’re a wholesome snack option!
Customizable Treats: Feel free to experiment with different mix-ins and toppings, like dried fruit or dark chocolate.
Family-Friendly Fun: Kids will love these tasty cups; involve them in the preparation for a delightful bonding experience.
No Baking Required: Skip the oven and still achieve a delicious treat that’s ready to enjoy. If you love easy recipes, check out our Baked Lemon Butter or Honey Butter Chicken for more inspiration!
No Bake Peanut Butter Oat Cups Ingredients
• Discover the simple components that make these no-bake peanut butter oat cups a deliciously easy treat!
For the Base
- Rolled Oats – Provides structure and a chewy texture; quick oats may lead to mushiness.
- Natural Peanut Butter – The star flavor of these cups; smooth works best for binding, but chunky can add crunch.
- Honey – Acts as a natural sweetener and binding agent; adjust to your preferred sweetness level.
- Vanilla Extract – Infuses a warm aroma; optional, but it enhances overall flavor profile.
For the Topping
- Chocolate Chips – Add a luscious layer of sweetness; feel free to swap with dark or white chocolate.
- Coconut Oil – Helps melt the chocolate smoothly; optional, but adds richness to the topping.
These no bake peanut butter oat cups are a quick and satisfying solution for any snack craving!
Step‑by‑Step Instructions for No Bake Peanut Butter Oat Cups
Step 1: Prepare Mixture
In a medium mixing bowl, combine 2 cups of rolled oats, 1 cup of natural peanut butter, 1/2 cup of honey, and 1 teaspoon of vanilla extract. Stir vigorously until all ingredients are well mixed and a sticky, cohesive mixture forms. This should take about 2-3 minutes. You want to ensure that the oats are evenly coated for a deliciously chewy texture in your no bake peanut butter oat cups.
Step 2: Muffin Tin Prep
Next, grab a standard muffin tin and lightly spray each cup with nonstick cooking spray to prevent sticking. Make sure to cover each section evenly to ensure easy removal later. This quick task only takes about a minute and sets the stage for your oat cups to slide right out once they’ve set, making serving a breeze.
Step 3: Assemble Cups
Take the oat mixture and divide it evenly among the prepared muffin cups, filling each one up to the top. Using the back of a spoon, firmly press the mixture down into each cup to create a compact base. This pressing action should take about 5 minutes. This step is crucial to ensure your no bake peanut butter oat cups hold their shape once set.
Step 4: Melt Chocolate
In a small microwave-safe bowl, combine 1 cup of chocolate chips with 1 tablespoon of coconut oil. Microwave in 30-second increments, stirring between each, until the mixture is completely melted and smooth—this should take approximately 1-2 minutes. Be careful not to overheat the chocolate, as it can become grainy. You want a silky consistency for topping your cups.
Step 5: Top Cups
Once the chocolate mixture is ready, carefully spoon a generous amount over each oat cup, using the back of the spoon to spread it evenly across the top. The warmth of the chocolate will melt slightly into the oats for a delightful combination. This step should take another 5 minutes. The no bake peanut butter oat cups are shaping up beautifully!
Step 6: Add Sea Salt
If you enjoy a sweet and salty flavor combination, sprinkle a pinch of sea salt over the chocolate tops before it sets. This enhances the flavor profile and provides a lovely crunch. This quick addition only takes about 1 minute and will elevate your no bake peanut butter oat cups to new delicious heights.
Step 7: Chill
Place the muffin tin in the freezer and let the oat cups chill for about 1 hour, allowing the chocolate to harden fully. This is key for creating a satisfying bite that won’t crumble apart. While you wait, you can clean up your workspace or prepare to enjoy your treat once they’re ready!
Step 8: Serve/Store
After an hour, remove the muffin tin from the freezer, and gently pop out each no bake peanut butter oat cup. They should come out easily if you’ve sprayed the tin well. Serve immediately for the best experience, or store them in an airtight container in the fridge for up to 2 weeks, or freeze for longer storage. Enjoy your deliciously healthy snack!

No Bake Peanut Butter Oat Cups Variations
Explore endless possibilities to make these no bake peanut butter oat cups uniquely yours! Let your creativity shine as you mix and match flavors, textures, and nutrition with these delightful variations.
-
Nut Butter Swap: Replace peanut butter with almond or sunflower seed butter for a change in taste and a nut allergy-friendly treat. Each option brings its own unique flavor and character to your oat cups.
-
Dried Fruit Add-ins: Incorporate a handful of dried fruits like cranberries, raisins, or apricots into the oat mixture for a burst of sweetness and extra chewiness. This twist will take your cups to a whole new level of deliciousness.
-
Seeds Galore: Add chia seeds or flaxseeds to the mixture for a nutritional boost and a delightful crunch. These tiny seeds are packed with omega-3 fatty acids, and they make your cups even more wholesome.
-
Chocolate Variety: Experiment with dark, white, or even butterscotch chips as a topping. Each chocolate type lends a different flavor profile, ensuring there’s always something new to delight your taste buds.
-
Coconut Twist: Mix in shredded coconut into the base for a tropical flair. It adds a sweet and chewy texture, reminiscent of your favorite coconut desserts.
-
Spice It Up: Sprinkle in a dash of cinnamon or nutmeg for an aromatic surprise in every bite. These spices bring warmth and earthy flavors that enhance the overall taste of your oat cups.
-
Heat Element: If you’re a fan of spice, consider adding a pinch of cayenne pepper or some chopped jalapeño, which will give your cups an unexpected kick! This delightful surprise adds complexity to the classic flavor.
Don’t forget to serve your creations with a refreshing glass of milk or alongside fresh fruit, like bananas or strawberries. And if you love unique flavor combinations, check out our Garlic Butter Honey or Broccoli Alfredo Bake for more delicious ideas!
What to Serve with Easy No Bake Peanut Butter Oat Cups?
These delightful treats are perfect for creating a balanced, satisfying snack time experience for everyone in the family.
- Fresh Fruit: Serve with sliced bananas or strawberries for a juicy, refreshing bite that complements the richness of the oat cups.
- Yogurt Parfait: Layer with Greek yogurt and berries for a creamy, protein-packed snack that balances textures and flavors beautifully.
- Glass of Milk: A classic pairing! Whether it’s dairy or a plant-based alternative, the creamy liquid enhances the nuttiness of the peanut butter.
- Nut Butter Dip: Create a fun experience by enjoying with a side of almond or cashew butter for extra richness and flavor.
- Dark Chocolate Squares: Elevate your treat with a piece of dark chocolate on the side; it deepens the chocolate experience while being a healthier option.
- Homemade Granola: Add a crunchy contrast by serving with a handful of homemade granola; its nutty and sweet notes complement the cups perfectly.
- Trail Mix: For a quick and portable option, serve with a homemade trail mix; the healthy fats and sweet elements make for a cheerful combination.
- Pumpkin Spice Latte: Wrap up your snack session with a cozy drink by pairing it with a warm pumpkin spice latte for a comforting, seasonal touch.
- Ice Cream: For an indulgent twist, top with a scoop of vanilla ice cream; this decadent pairing is sure to satisfy any sweet tooth!
- Hot Herbal Tea: Unwind with a soothing cup of herbal tea, such as chamomile or peppermint, which balances the sweetness of your snack.
Make Ahead Options
These Easy No Bake Peanut Butter Oat Cups are perfect for meal prep! You can prepare the oat mixture and fill the muffin tin up to 24 hours in advance. Simply follow the recipe up until Step 5, then cover the muffin tin and refrigerate. This helps maintain the freshness and flavor of the ingredients while saving you time during busy days. When you’re ready to enjoy them, melt the chocolate and top the cups before chilling them in the freezer for about 1 hour to set. This way, you’ll have homemade snacks with minimal effort, just as delicious and ready for any craving that arises!
Storage Tips for No Bake Peanut Butter Oat Cups
Room Temperature: Keep the oat cups at room temperature for up to 2 hours if serving at a party or gathering—perfect for sharing!
Fridge: Store in an airtight container in the fridge for up to 2 weeks. Use parchment paper between layers to prevent sticking and ensure freshness.
Freezer: For longer storage, freeze the no bake peanut butter oat cups for up to 3 months. Just make sure they are well-wrapped to maintain their flavor.
Thawing: Thaw in the fridge for about 30 minutes before enjoying, or simply grab one directly from the freezer for a refreshing snack!
Expert Tips for No Bake Peanut Butter Oat Cups
-
Room Temperature Peanut Butter: Ensure your peanut butter is at room temperature for easier mixing, helping to create a cohesive mixture for your no bake peanut butter oat cups.
-
Firm Pressing: Press the oat mixture firmly into the muffin cups; this step is crucial to prevent your cups from falling apart when served.
-
Careful Melting: Use short bursts when melting chocolate to avoid overheating, which can lead to a grainy texture instead of a smooth topping.
-
Chill Time: Allow sufficient cooling time by letting the cups set in the freezer for at least 1 hour to ensure they hold their shape.
-
Add Your Twist: Don’t hesitate to customize your no bake peanut butter oat cups with your favorite toppings or mix-ins, such as dried fruits or nuts for extra flavor and texture.
No Bake Peanut Butter Oat Cups Recipe FAQs
What type of oats should I use?
I recommend using rolled oats for the best chewy texture in your no bake peanut butter oat cups. Quick oats can lead to a mushy consistency, which might not hold together well. Rolled oats provide the perfect structure!
How should I store leftover oat cups?
Store your no bake peanut butter oat cups in an airtight container in the fridge for up to 2 weeks. If you’re feeling generous, these also make great gifts! Use parchment paper between layers to prevent sticking.
Can I freeze these oat cups?
Absolutely! You can freeze the no bake peanut butter oat cups for up to 3 months. To freeze, place them in a single layer on a baking sheet until solid, then transfer to an airtight container or freezer bag. Just be sure to keep layers separated with parchment paper for easy access.
What should I do if my mixture is crumbly?
If your oat mixture feels crumbly, this might be due to not enough honey or peanut butter. Try adding an extra tablespoon of honey or peanut butter to help bind everything together. Mix well to ensure all ingredients are coated.
Are these peanut butter oat cups safe for those with nut allergies?
Unfortunately, these no bake peanut butter oat cups aren’t suitable for those with nut allergies. However, you can easily substitute peanut butter with sunflower seed butter or tahini for a nut-free option. Just keep in mind that you’ll also want to check that all other ingredients are allergy-friendly.
How long should I let the cups set?
After you’ve assembled your no bake peanut butter oat cups, be sure to chill them in the freezer for at least 1 hour until the chocolate topping has firmly set. This step is crucial to ensure they hold their shape when served. If you have time, letting them set in the fridge for a couple of hours (or overnight) will enhance the flavors even more!

Irresistible No Bake Peanut Butter Oat Cups for Quick Snacking
Ingredients
Equipment
Method
- In a medium mixing bowl, combine rolled oats, natural peanut butter, honey, and vanilla extract. Stir until well mixed.
- Lightly spray a muffin tin with nonstick cooking spray.
- Divide the oat mixture evenly among the muffin cups, pressing it down firmly.
- In a microwave-safe bowl, combine chocolate chips and coconut oil. Microwave in 30-second increments until melted and smooth.
- Spoon the melted chocolate over each oat cup and spread it evenly.
- Sprinkle a pinch of sea salt on top before the chocolate sets.
- Place the muffin tin in the freezer for about 1 hour to allow the cups to chill and set.
- Remove from freezer and gently pop out the oat cups. Serve immediately or store as desired.