
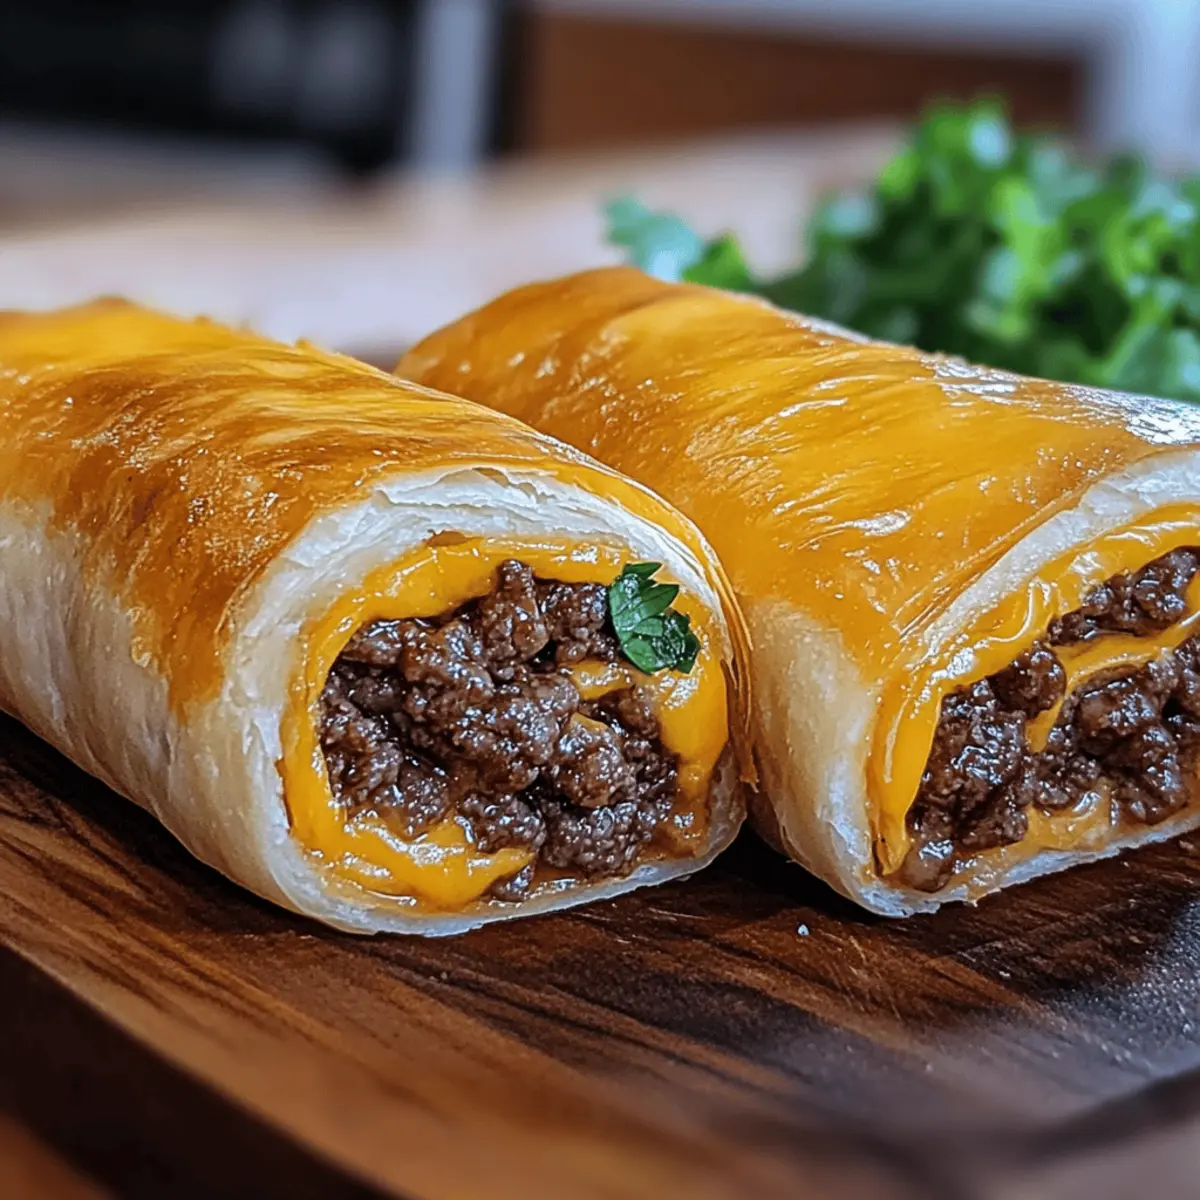
“Can you smell that incredible garlic aroma wafting through the kitchen?” As I stood by the stove, preparing to whip up some delightful Garlic Butter Beef Cheeseburger Rollups, childhood memories of family cookouts flooded my mind. This recipe transforms the classic cheeseburger into a portable, easy-to-make treat, perfect for hearty dinners or game-day snacks. With the irresistible combination of tender ground beef, gooey melted cheese, and a rich, buttery garlic glaze wrapped in warm tortillas, these rollups are comfort food at its finest. Not only are they customizable to suit your taste, but they also promise to be a crowd-pleaser and a great way to entice everyone away from fast food. Curious about how to elevate this nostalgic favorite and make it your own? Let’s dive into this delicious recipe together!
Why are these rollups so irresistible?
Customizable: Tailor these rollups to your taste, whether adding your favorite spices or experimenting with unique fillings like jalapeños or roasted veggies.
Easy to Make: No culinary degree needed! These rollups are straightforward, making them perfect for a quick weeknight dinner or an exciting appetizer.
Decadent Flavor: The rich garlic butter and melted cheese create a luscious experience that transforms ordinary ingredients into a spectacular dish.
Crowd-Pleasing: Perfect for sharing at parties or family gatherings, these rollups will delight your guests and leave them craving more.
Looking for more ideas to jazz up your meals? Try these Garlic Butter Steak or Ground Beef Stroganoff recipes for even more comfort food goodness!
Ingredients for Garlic Butter Beef Cheeseburger Rollups
For the Beef Mixture
• Ground Beef – Choose ground chuck for a balanced flavor and fat content, ensuring each bite is juicy and fulfilling.
• Worcestershire Sauce – This ingredient enhances the umami flavor in the beef, giving it that classic cheeseburger taste.
• Onion Powder – Adds a hint of sweetness and depth to the beef mixture.
• Garlic Powder – Complements the fresh garlic while boosting the savory notes.
• Smoked Paprika – Introduces a subtle smokiness, enhancing the overall flavor profile.
• Salt & Black Pepper – Essential for seasoning, adjusting to your personal taste preference.
For the Cheese
• Shredded Cheddar Cheese – Offers a sharp flavor and beautiful melt. Substitute with Gruyère for a unique taste!
• Shredded Mozzarella Cheese – Adds that gooey texture that makes every bite satisfying. Avoid cheeses that can be too bland.
For the Tortillas
• Flour Tortillas – The perfect base for rollups; they hold everything together and can be swapped for gluten-free options, if desired.
For the Garlic Butter Glaze
• Unsalted Butter – Essential for the garlic butter glaze, lending richness without overwhelming saltiness.
• Garlic – Fresh garlic is key to that irresistible aroma and flavor; avoid processed versions for optimal taste.
For the Garnish (Optional)
• Sliced Pickles – Adds a tangy crunch that elevates the flavor of these Garlic Butter Beef Cheeseburger Rollups even more!
Ready to make these scrumptious rollups? Let’s get cooking and create a comforting dish that’s sure to impress!
Step‑by‑Step Instructions for Garlic Butter Beef Cheeseburger Rollups
Step 1: Preheat and Prepare
Preheat your oven to 375°F (190°C). Meanwhile, line a baking sheet with parchment paper or lightly grease it to prevent sticking. This setup ensures that your Garlic Butter Beef Cheeseburger Rollups bake evenly and develop a lovely golden crust.
Step 2: Cook the Beef
In a large skillet over medium-high heat, warm a splash of olive oil. Once hot, add in the ground beef, cooking for about 7-8 minutes, or until browned. Use a spatula to break it apart as it cooks, ensuring all the meat is evenly browned and there are no pink spots.
Step 3: Season and Cool
Once the beef is browned, stir in Worcestershire sauce, onion powder, garlic powder, smoked paprika, salt, and black pepper. Mix well to incorporate the flavors, then remove the skillet from heat. Let the beef mixture cool slightly before proceeding, which will make it easier to assemble the rollups.
Step 4: Make the Garlic Butter
In a small bowl, combine the melted unsalted butter with minced garlic, stirring well to create a flavorful garlic butter glaze. This buttery mixture not only enhances the flavor of the rollups but also provides a delicious golden finish as they bake.
Step 5: Assemble the Rollups
Lay each flour tortilla flat on a clean surface. Distribute the beef mixture evenly across the center of each tortilla, followed by a generous sprinkle of shredded cheddar and mozzarella cheeses. Make sure to leave enough space on the edges for rolling.
Step 6: Roll and Brush
Carefully roll each tortilla tightly, ensuring the filling stays inside. Place the rollups seam-side down on the prepared baking sheet. Using a brush, generously coat the tops with the garlic butter mixture, allowing the rich flavor to soak in during baking.
Step 7: Bake to Perfection
Place the baking sheet in the preheated oven and bake the Garlic Butter Beef Cheeseburger Rollups for 12-15 minutes, or until they’re golden brown and the cheese is bubbly. Keep an eye on them to achieve that perfect crispy exterior while the inside stays gooey and delicious.
Step 8: Serve Warm
Once baked, remove the rollups from the oven and let them cool slightly before slicing them into pinwheels if desired. Serve warm, optionally garnished with sliced pickles for a delightful crunch that complements the savory flavors beautifully.
Make Ahead Options
These Garlic Butter Beef Cheeseburger Rollups are perfect for meal prep enthusiasts! You can assemble the entire rollup (without baking) up to 24 hours in advance. Simply prepare the beef mixture and fill the tortillas as directed, then wrap them tightly in plastic wrap and refrigerate. This helps seal in the flavors and maintain freshness. When you’re ready to enjoy, just brush the tops with garlic butter and bake directly from the fridge, adding a few extra minutes to the baking time if needed. This way, you’ll have delicious, golden rollups that are just as satisfying and comforting as when made fresh, saving you valuable time on busy weeknights!
Storage Tips for Garlic Butter Beef Cheeseburger Rollups
Fridge: Store leftover rollups in an airtight container in the fridge for up to 3 days. They’ll still taste delicious but may lose some crispiness.
Freezer: For longer storage, freeze the rollups before baking. Wrap them tightly in plastic wrap and then foil; they can last up to 3 months.
Reheating: To reheat, bake frozen rollups at 375°F (190°C) for 15-20 minutes directly from the freezer, or until heated through and crispy. Enjoy these Garlic Butter Beef Cheeseburger Rollups with your favorite dipping sauces!
Make-Ahead: Prepare the rollups ahead of time and store them in the fridge. Bake just before serving for a warm, comforting treat.
Garlic Butter Beef Cheeseburger Rollups Variations
Feel free to unleash your creativity and make these rollups uniquely yours with these simple twists!
-
Dairy-Free: Use a dairy-free cheese alternative to create a comforting yet lactose-free version. There are many great options available that melt beautifully!
-
Spicy Kick: Add finely chopped jalapeños or crushed red pepper flakes to the beef mixture for a delightful heat that elevates the savory flavors. Trust me, this spicy twist can turn up the fun factor in every bite!
-
Vegetarian Option: Replace the beef with a mixture of sautéed mushrooms, bell peppers, and lentils for a hearty plant-based alternative. This version is just as satisfying while taking a detour from meat.
-
Cheese Lovers Delight: Blend ricotta and feta for a creamy filling addition that enhances the cheesiness! These flavors can meld beautifully together, creating a melt-in-your-mouth experience.
-
Herb Infusion: Mix fresh herbs like parsley or cilantro into the garlic butter for a fresh, herby flavor that dances on your palate. It adds a burst of vibrancy to the rollups.
-
Buffalo-Style: Swap the garlic butter for a buffalo sauce glaze if you’re looking to satisfy your hot sauce cravings! Paired with an optional cooling ranch dip, it’s a winning game day snack.
-
Loaded Rollups: To amp up your rollups, add crumbled bacon bits or cooked ground sausage right into the filling for an extra savory punch that breakfast lovers won’t want to miss!
-
Asian Twist: Replace the Worcestershire sauce with soy sauce and add a sprinkle of sesame seeds and green onions for an Asian-inspired flavor twist. Serve with sweet chili sauce for dipping!
Whether you’re in the mood for something classic or adventurous, these variations will ensure your Garlic Butter Beef Cheeseburger Rollups are a hit every single time! And if you’re feeling inspired, check out our other comforting recipes like Garlic Butter Honey or Ground Beef Potato for more delicious ideas!
Expert Tips for Garlic Butter Beef Cheeseburger Rollups
• Choose the Right Beef: Opt for ground chuck with a fat content of 15-25% to ensure juicy and flavorful rollups without excess grease.
• Don’t Over-Season: Let the garlic butter and cheese shine through. A gentle hand with seasonings will elevate the flavors without overpowering them.
• Seal Them Tight: After rolling, make sure to seal the tortilla edges well to avoid any tasty filling leaks during baking.
• Experiment Freely: Feel free to switch up the cheeses or add your favorite veggies to customize your Garlic Butter Beef Cheeseburger Rollups to suit your taste!
• Keep an Eye on Bake Time: Ovens can vary—check your rollups around the 10-minute mark to prevent over-browning and ensure that perfect gooey center.
What to Serve with Garlic Butter Beef Cheeseburger Rollups
Indulging in delectable rollups creates the perfect opportunity to build a complete meal bursting with flavor and comfort.
-
Crispy French Fries: A classic pairing that brings that nostalgic fast-food vibe, perfectly complementing the flavors of the cheeseburger rollups while adding a satisfying crunch.
-
Garden Salad: A light, refreshing salad with mixed greens, tomatoes, and a zesty vinaigrette cuts through the richness of the rollups, balancing each bite beautifully.
-
Creamy Coleslaw: This creamy, tangy side adds texture and a hint of sweetness that pairs delightfully with the savory rollups, making every mouthful a delightful experience.
-
Loaded Nachos: Dive into a cheesy nacho plate topped with jalapeños, avocado, and sour cream for a fun and interactive side that echoes your rollups’ flavors, adding a festive touch to your meal.
-
Garlic Breadsticks: Enhance the garlic flavor with warm, buttery breadsticks; their fluffy texture and buttery taste are a fantastic companion to the savory rollups.
-
Sweet Potato Wedges: Their natural sweetness and crispy exterior are a delicious contrast, providing an extra layer of flavor alongside the beefy rollups.
-
Crisp Pickles: Serve sliced pickles on the side for a tangy crunch that not only brightens the plate but also enhances the cheeseburger experience.
-
Classic Milkshake: For a touch of nostalgia, pair your meal with a creamy milkshake to satisfy your sweet tooth and create a fun ‘diner’ experience.
-
Beer or Iced Tea: A cold beer or refreshing iced tea complements the hearty flavors of the rollups, creating a satisfying beverage option perfect for casual dinners or gatherings.
Garlic Butter Beef Cheeseburger Rollups Recipe FAQs
How do I choose ripe ingredients for this recipe?
Absolutely! When selecting ground beef, opt for ground chuck with a fat content of 15-25%. This balance between flavor and fat ensures juicy rollups without being greasy. For the freshest flavor, use firm garlic cloves, and make sure to check the tortillas for any dark spots or tears. Fresh ingredients make all the difference!
How should I store leftover Garlic Butter Beef Cheeseburger Rollups?
Very! Leftover rollups can be stored in an airtight container in the fridge for up to 3 days. While they’ll still be tasty, they may lose some crispiness due to refrigeration. If you want to retain that delightful crunch, try reheating them in the oven to restore that golden texture.
Can I freeze Garlic Butter Beef Cheeseburger Rollups?
Absolutely! For longer storage, assemble the rollups and freeze them before baking. Wrap each rollup tightly in plastic wrap, then in aluminum foil to prevent freezer burn. They can be stored in the freezer for up to 3 months. When ready to enjoy, bake from frozen at 375°F (190°C) for about 15-20 minutes until heated through and crispy!
What if I over-season the beef mixture?
No worries! If you find that your beef mixture is over-seasoned, balance the flavors by adding a little more unsalted butter or cheese into the mix, which can help mellow out the strong flavors. Additionally, serving your rollups with a cooling condiment like sour cream or ranch can also offset the seasoning.
Are there any dietary considerations I should be aware of?
The more the merrier! These rollups can be easily customized for dietary needs. For gluten-free options, swap out regular tortillas for gluten-free ones. If anyone in your family has cheese allergies, try using lactose-free cheese alternatives. And remember, if you’re considering sharing with pets, keep in mind that ingredients like garlic and certain spices can be harmful to them. Always check before sharing!
How can I make these rollups healthier?
I often make these rollups lighter by substituting ground beef with ground turkey or chicken, which reduces the fat content but still gives that satisfying flavor. Additionally, consider incorporating sautéed vegetables like bell peppers or spinach into the beef mixture for added nutrition without sacrificing taste!
Garlic Butter Beef Cheeseburger Rollups: Comfort in Every Bite
Ingredients
Equipment
Method
- Preheat your oven to 375°F (190°C) and prepare a baking sheet.
- Warm olive oil in a skillet, add ground beef and cook for 7-8 minutes or until browned.
- Stir in Worcestershire sauce, onion powder, garlic powder, smoked paprika, salt, and black pepper. Remove from heat and let cool.
- Combine melted butter with minced garlic in a bowl to create garlic butter glaze.
- Lay tortillas flat and distribute beef mixture and cheeses in the center.
- Roll tortillas tightly and place seam-side down on the baking sheet. Brush with garlic butter.
- Bake for 12-15 minutes until golden brown and cheese is bubbly.
- Let cool slightly, slice into pinwheels and serve warm with pickles if desired.