
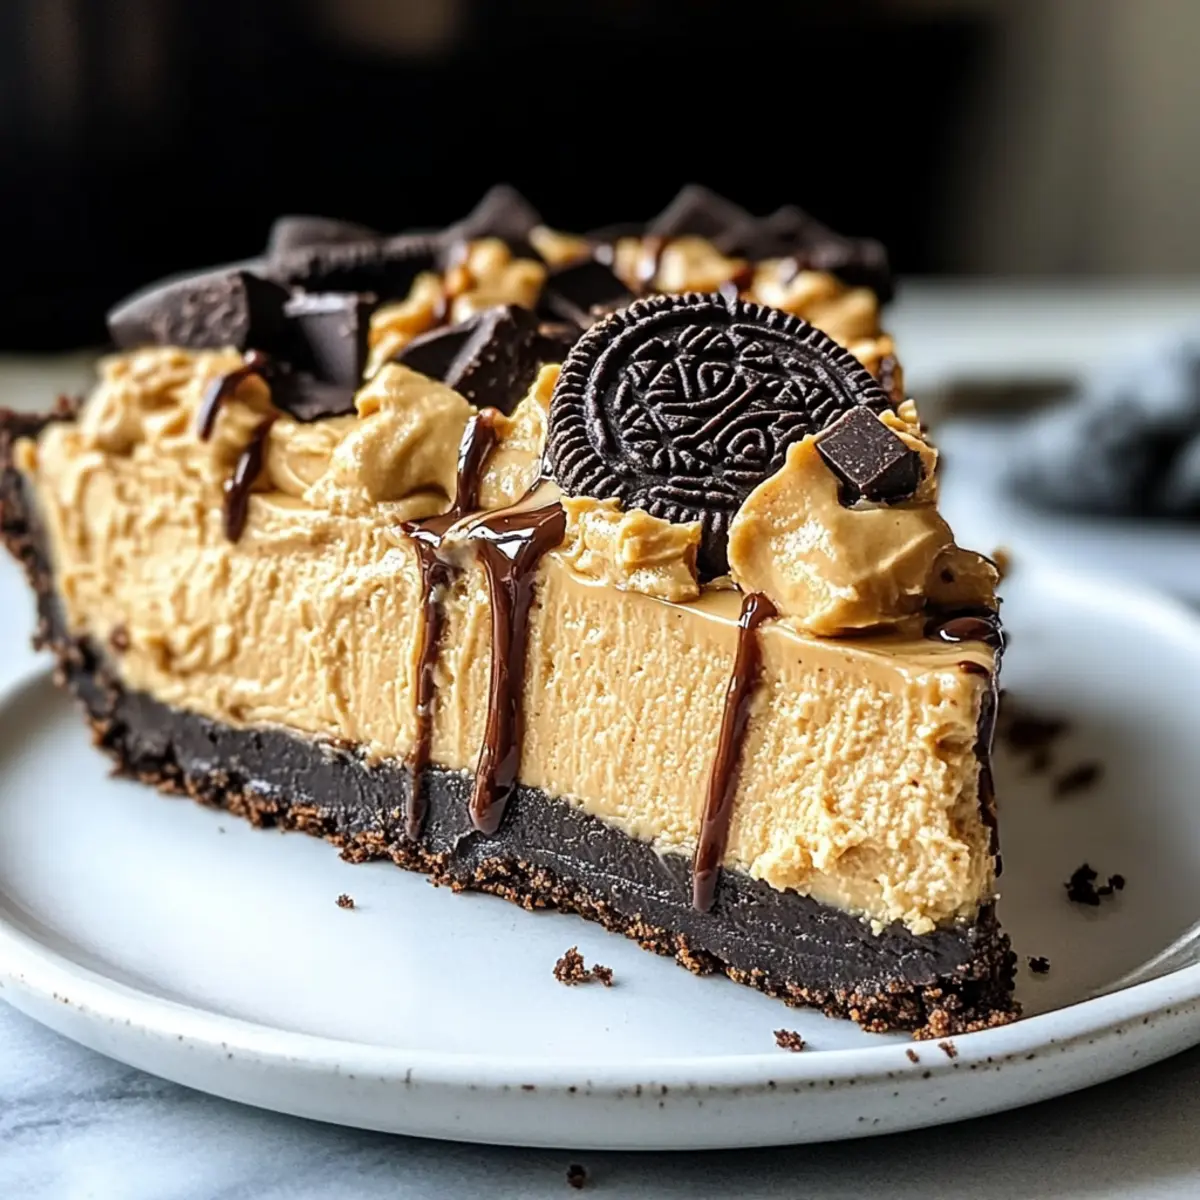
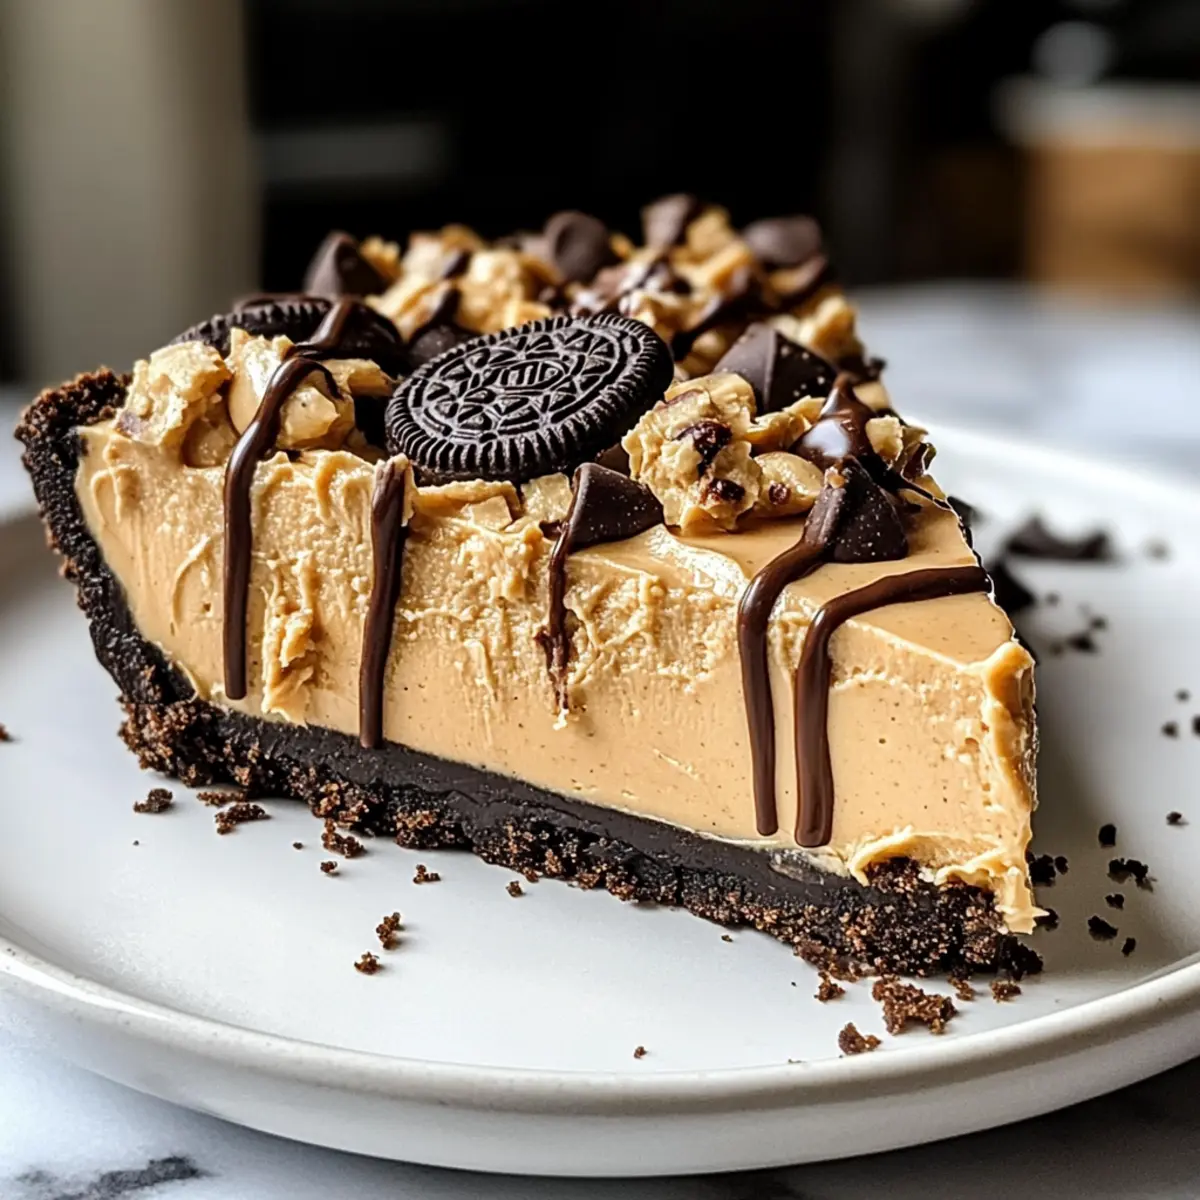
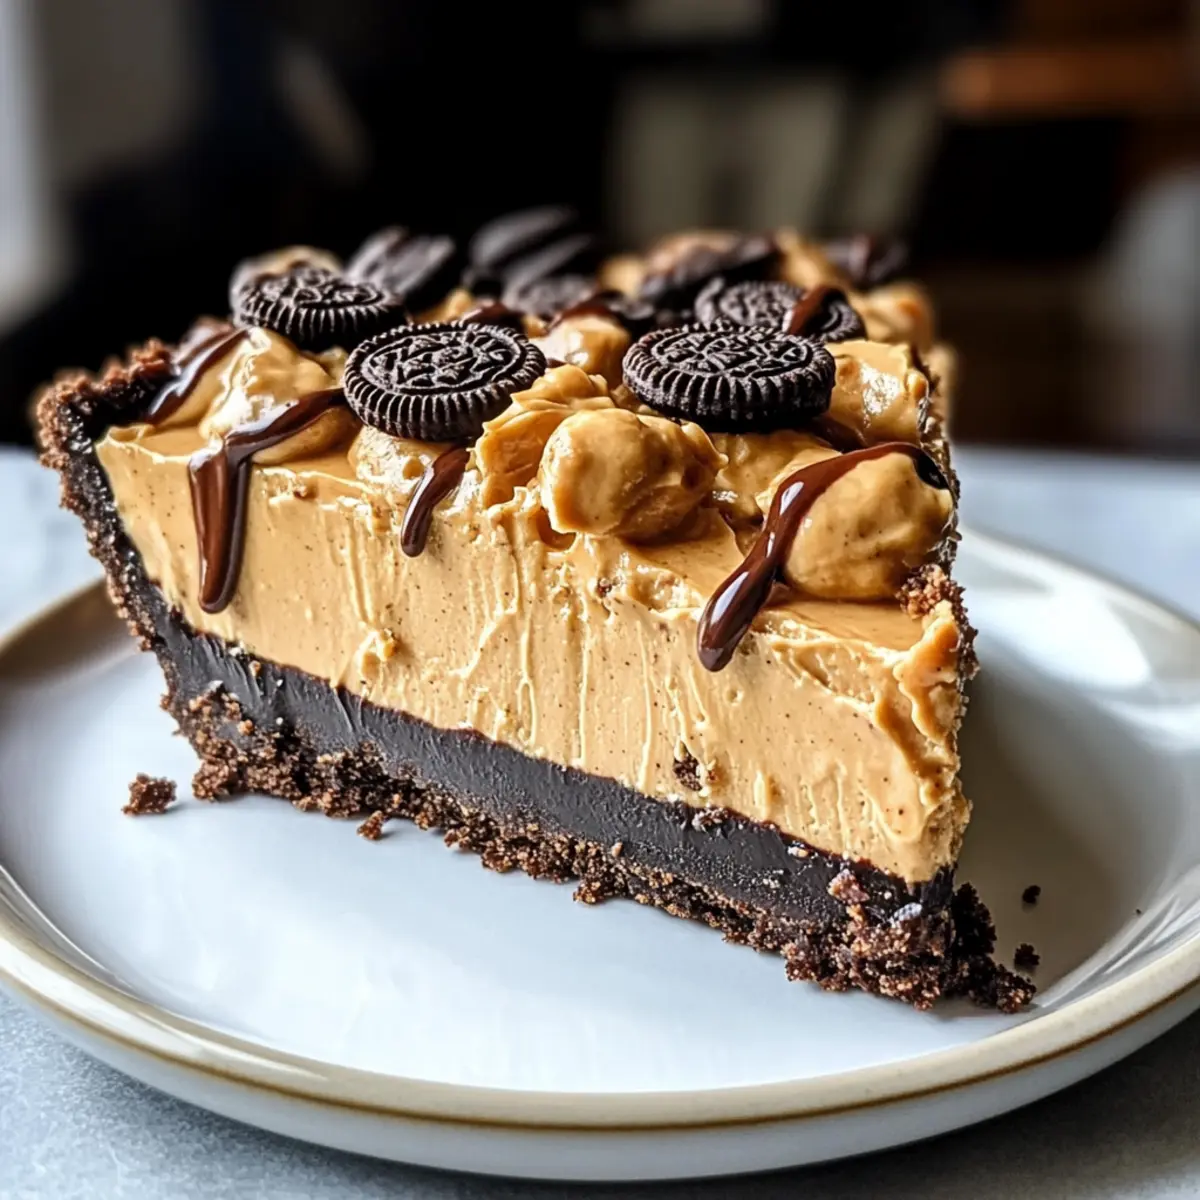
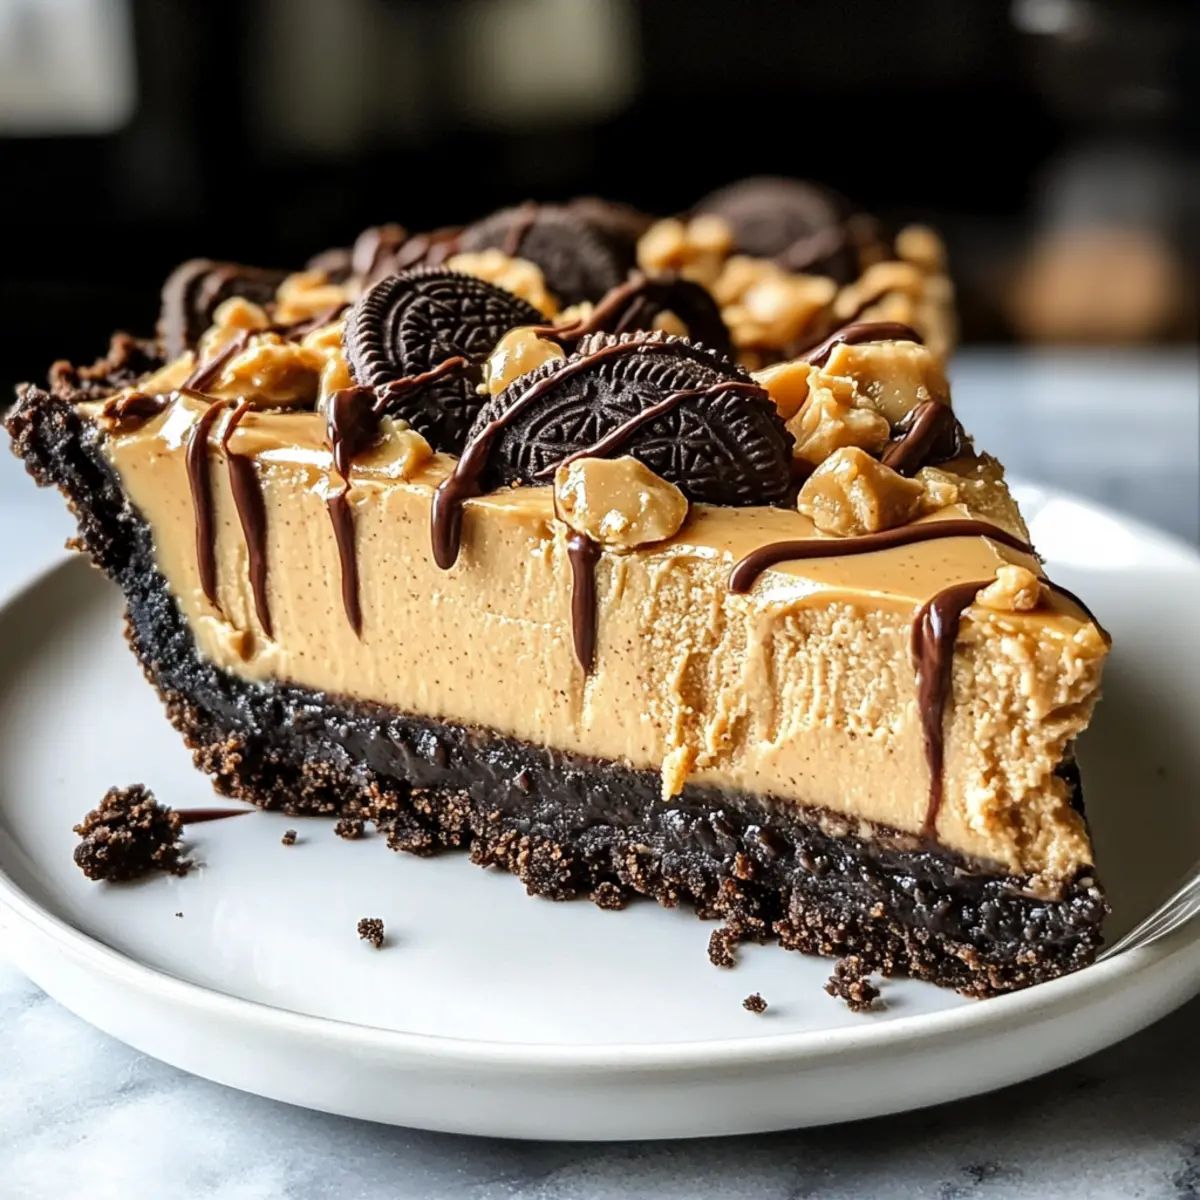
As I stood in my kitchen, the rich aroma of creamy peanut butter filled the air, invoking memories of childhood treats and happy gatherings. If you’re craving something truly special yet simple to whip up, my Easy No-Bake Peanut Butter Pie is just what you need. With a delightful chocolate Oreo crust and a luscious filling that takes merely 20 minutes to prepare, this dessert is perfect for busy home chefs or anyone looking to impress without the fuss. Beyond its quick prep time, this kid-friendly treat is a crowd-pleaser, making it the ideal centerpiece for family dinners or festive occasions alike. Are you ready to discover how this creamy delight will elevate your dessert game?
Why Is This Peanut Butter Pie a Must-Try?
Simplicity: With only 20 minutes of prep time, anyone can master this delicious dessert!
Kid-Friendly: Kids love the creamy filling and chocolate crust, making it an instant hit at family gatherings.
Versatility: Top it with fresh fruits or drizzles of chocolate syrup for a unique twist every time.
Crowd-Pleaser: This pie is always a favorite, guaranteeing smiles with every slice, whether at a cozy dinner or a festive potluck.
No-Bake Convenience: Perfect for warm days when you want dessert without heating up the kitchen! For more decadent options, check out my Garlic Butter Steak or Homemade Butter Chicken.
Peanut Butter Pie Ingredients
• For the Crust
- Oreos – The base for the crust; any chocolate cookie can be substituted for a similar flavor.
- Unsalted Butter – Binds the crust together; melting it first makes mixing much easier.
• For the Filling
- Whipping Cream – Adds a light, airy texture to the filling; heavy cream works well if you need a substitute.
- Powdered Sugar – Sweetens the filling and stabilizes the whipped cream; adjust the amount to match your desired sweetness.
- Cream Cheese – Gives richness and creaminess; for a dairy-free option, try using vegan cream cheese.
- Creamy Peanut Butter – The star of this recipe; switch to crunchy peanut butter for a textured variation.
- Vanilla Extract – Deepens the flavor profile; no substitutes are necessary for this all-important ingredient.
• Toppings (Optional)
- Chopped Peanuts – Provides a delightful crunch on top; feel free to omit for a nut-free dessert.
- Chocolate Syrup – A delicious drizzle for presentation and flavor enhancement; caramel sauce is a great alternative.
This delightful Peanut Butter Pie is sure to become a family favorite!
Step‑by‑Step Instructions for Easy No-Bake Peanut Butter Pie
Step 1: Prepare the Crust
Start by crushing approximately 24 Oreos into fine crumbs using a food processor or a resealable bag and rolling pin. In a medium bowl, combine the crumbs with 4 tablespoons of melted unsalted butter until well mixed. Press this mixture firmly into the bottom and up the sides of a greased 9-inch pie plate. Refrigerate for at least 30 minutes to allow the crust to set and harden.
Step 2: Whip the Cream
In a large mixing bowl, using an electric mixer, whip 1 cup of heavy whipping cream and 1/4 cup of powdered sugar on medium-high speed until stiff peaks form, about 3-5 minutes. You’ll know it’s ready when the cream holds its shape and doesn’t droop. Once done, set the whipped cream aside, making sure to cover it to keep it fluffy.
Step 3: Make the Filling
In another bowl, beat 8 oz of softened cream cheese with an electric mixer until smooth and creamy, about 2 minutes. Gradually add in 1 cup of creamy peanut butter, along with 1/4 cup of powdered sugar and 1 teaspoon of vanilla extract. Mix until all ingredients are well combined and smooth, creating a luscious filling for your Peanut Butter Pie.
Step 4: Combine and Assemble
Gently fold the whipped cream into the peanut butter mixture using a spatula, being careful to maintain the volume and airiness. Once thoroughly combined, spoon the fluffy filling evenly into the chilled Oreo crust. Use a spatula to smooth the top, making it look inviting and ready for toppings.
Step 5: Chill Before Serving
Place the assembled pie back in the refrigerator and chill for at least 2 hours, allowing the flavors to meld and the filling to set to a perfect, creamy consistency. The pie is ready to serve when the filling is firm but still soft enough to slice easily. Before serving, consider topping with chopped peanuts and a drizzle of chocolate syrup for added flavor.
Peanut Butter Pie Variations & Substitutions
Feel free to get creative with your Easy No-Bake Peanut Butter Pie! There are so many ways to tailor it to your taste that each version will be a delightful surprise.
- Crunchy Peanut Butter: Swap smooth peanut butter for crunchy for an added texture that gives each bite a delightful crunch.
- Fresh Fruit Topping: Top the pie with fresh strawberries, bananas, or raspberries for a burst of natural sweetness and added freshness. It’s like a sweet symphony on your palate!
- Dairy-Free Delight: Use vegan cream cheese and coconut whipped cream to turn this pie into a creamy, dairy-free treat the whole family can enjoy.
- Caramel Swirl: Drizzle caramel sauce alongside the chocolate syrup for a decadent twist that enhances the overall flavor beautifully. It’s an unexpected caramel kick!
- Chocolate or Peanut Butter Drizzle: Use melted chocolate or peanut butter to drizzle over the top, adding a luxurious touch that will make your dessert irresistible.
- Nut-Free Option: Omit the chopped peanuts from the topping to create a nut-free version, perfect for those with allergies or sensitivities.
- Add a Layer: Create a chocolate ganache layer on top of the filling before chilling for a rich, indulgent experience. This adds a luscious layer of flavor that complements the pie.
- Spice it Up: Sprinkle cinnamon or a pinch of sea salt over the filling before chilling to enhance the flavor profile even more. It’s a little twist that makes a big impact!
Get inspired by these variations, and don’t hesitate to explore your own delicious combinations. For more ideas, check out my Baked Lemon Butter Chicken for a tasty meal to pair with your sweet treat!
Make Ahead Options
This Easy Peanut Butter Pie is perfect for busy cooks looking to save time! You can prepare the crust and filling up to 24 hours in advance. Simply follow the steps to make the pie, then store the unassembled pie in the refrigerator, covering it tightly to maintain freshness. The filled crust will stay looking and tasting delightful, just as delicious, when you pour it into the crust right before serving. To finish, you can add the toppings, like chopped peanuts and chocolate syrup, right before you serve it, ensuring that everything is fresh and inviting. Prepare ahead, and enjoy delicious homemade dessert with minimal last-minute effort!
Expert Tips for Peanut Butter Pie
- Use Softened Cream Cheese: Ensure cream cheese is at room temperature; this prevents lumps in your filling for a smooth and creamy Peanut Butter Pie.
- Gentle Incorporation: When folding in whipped cream, do it delicately to retain the airy texture, creating that cloud-like filling we all crave.
- Refrigerate Longer: For the best flavor and texture, let the pie chill for at least 4 hours instead of the minimum 2; this allows flavors to deepen.
- Adjust Sweetness: Taste your filling before assembling; you can easily tweak the powdered sugar to better match your sweetness preference.
- Be Creative with Toppings: Feel free to swap out chopped peanuts or chocolate syrup for other favorites like fruits or flavored sauces to customize your pie.
- Avoid Overmixing: When mixing the peanut butter filling, stop as soon as everything is well combined to preserve that light, creamy consistency.
What to Serve with Easy No-Bake Peanut Butter Pie
Indulging in a rich, creamy dessert isn’t complete without the perfect accompaniments to complement each delightful bite.
-
Fresh Berries: Strawberries and raspberries add a burst of sweetness and freshness to balance the richness of the pie.
-
Whipped Cream: A light dollop of whipped cream enhances the creamy texture while adding an airy contrast to each slice.
-
Chocolate Ice Cream: The rich flavors of chocolate ice cream provide a great contrast, intensifying the dessert experience with each bite.
-
Coffee: A warm cup of coffee or espresso pairs beautifully with the sweetness, enhancing all the nutty goodness of the peanut butter pie.
-
Caramel Drizzle: A gentle drizzle of caramel sauce adds a sweet, buttery depth that harmonizes perfectly with the flavors of the pie.
-
Banana Slices: Fresh banana slices create a creamy texture and add a fruity element that elevates the peanut butter flavor profile.
-
Nutty Granola: A sprinkle of nutty granola provides a delightful crunch that contrasts well with the smooth filling while nodding to the pie’s peanut flavor.
-
Milkshakes: For a fun twist, serve with a chocolate or vanilla milkshake to create an indulgent dessert experience.
-
Dark Chocolate Tart: If you’re looking for something extra sweet, a slice of dark chocolate tart creates a lovely rich flavor pairing with the pie.
-
Mint Tea: For an herbal touch, sip peppermint tea alongside your slice to cleanse your palate and refresh your senses.
How to Store and Freeze Peanut Butter Pie
-
Fridge: Store leftover Peanut Butter Pie in an airtight container in the refrigerator for up to 4 days to keep it fresh and creamy.
-
Freezer: You can freeze the pie for 1-2 months; wrap it tightly in plastic wrap or foil to prevent freezer burn and maintain flavor.
-
Thawing: When you’re ready to enjoy the frozen pie, let it thaw in the refrigerator overnight for the best texture before serving.
-
Reheating: This pie is best served cold, so there’s no need for reheating; simply slice and enjoy as-is!
Easy No-Bake Peanut Butter Pie Recipe FAQs
How do I select the right ripeness of ingredients?
Absolutely! For this Peanut Butter Pie, ensure your cream cheese is softened to room temperature. This will help avoid any lumps in your filling. If you choose to add fresh toppings like bananas or strawberries, opt for fruits that are ripe but not overly soft—look for a slight give when gently pressed.
What is the best way to store leftover Peanut Butter Pie?
To keep your delicious Peanut Butter Pie fresh, store it in an airtight container in the refrigerator for up to 4 days. This will maintain its creamy texture and rich flavor. Be sure to cover it well to prevent any odors from affecting the pie!
Can I freeze the Peanut Butter Pie?
Definitely! You can freeze the pie for up to 1-2 months. Just wrap the pie tightly in plastic wrap or aluminum foil to avoid freezer burn. When you’re ready to enjoy it, move it to the refrigerator the night before to thaw slowly for the best texture.
What are some common troubleshooting tips for this recipe?
If your whipped cream isn’t forming stiff peaks, ensure your mixing bowl and beaters are completely clean and dry. Any residue can affect whipping. If you find the filling is too sweet, try balancing it with a pinch of salt or adjusting the powdered sugar to your taste preference. Lastly, avoid overmixing when combining the whipped cream with the peanut butter mixture to keep it light and fluffy.
Are there any dietary considerations for this Peanut Butter Pie?
Very! If you have nut allergies, simply omit the chopped peanuts as a topping and make sure your peanut butter is from a trusted source. For those following a dairy-free diet, substituting cream cheese with vegan cream cheese and using coconut cream in place of whipped cream works wonderfully!
What should I do if my pie falls apart when slicing?
If your Peanut Butter Pie isn’t slicing cleanly, it may not have chilled long enough. I recommend chilling it for at least 4 hours or even overnight to ensure the filling sets properly. Additionally, using a hot knife (dipped in warm water and wiped dry) can help make cleaner cuts.
Creamy Peanut Butter Pie That Will Wow Your Taste Buds
Ingredients
Equipment
Method
- Crush approximately 24 Oreos into fine crumbs and combine with 4 tablespoons of melted unsalted butter. Press into a greased 9-inch pie plate and refrigerate for at least 30 minutes.
- Whip 1 cup of heavy whipping cream with 1/4 cup of powdered sugar until stiff peaks form, about 3-5 minutes. Set aside covered.
- Beat 8 oz of softened cream cheese until smooth, then mix in 1 cup of creamy peanut butter, 1/4 cup of powdered sugar, and 1 teaspoon of vanilla until combined.
- Gently fold the whipped cream into the peanut butter mixture, then spoon the filling into the chilled crust and smooth the top.
- Chill in the refrigerator for at least 2 hours before serving. Optional: top with chopped peanuts and chocolate syrup.